Assembly of the Commentary Headset Adapter
Before proceeding, ensure that the power cord of the DSP-1216HL is unplugged.
Removing the XLR inserts out of the DSP-1216HL
-
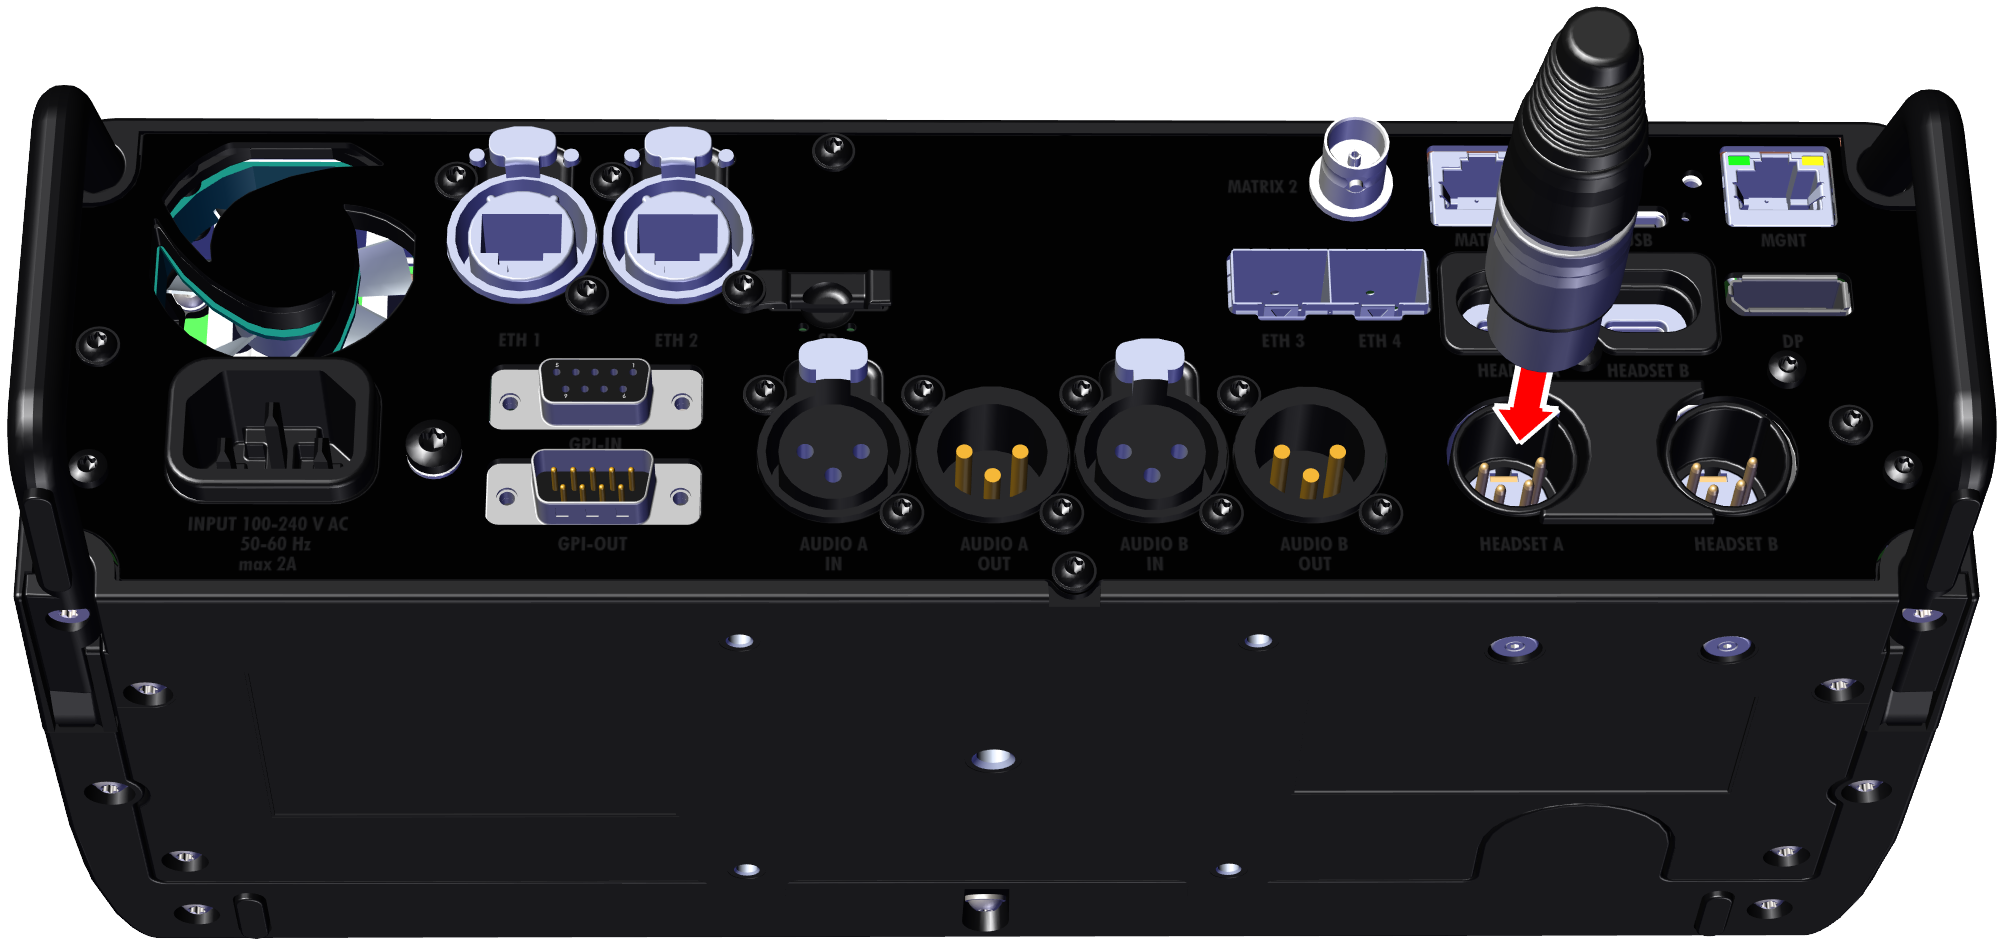
Insert a compatible XLR connector into the XLR insert.
-
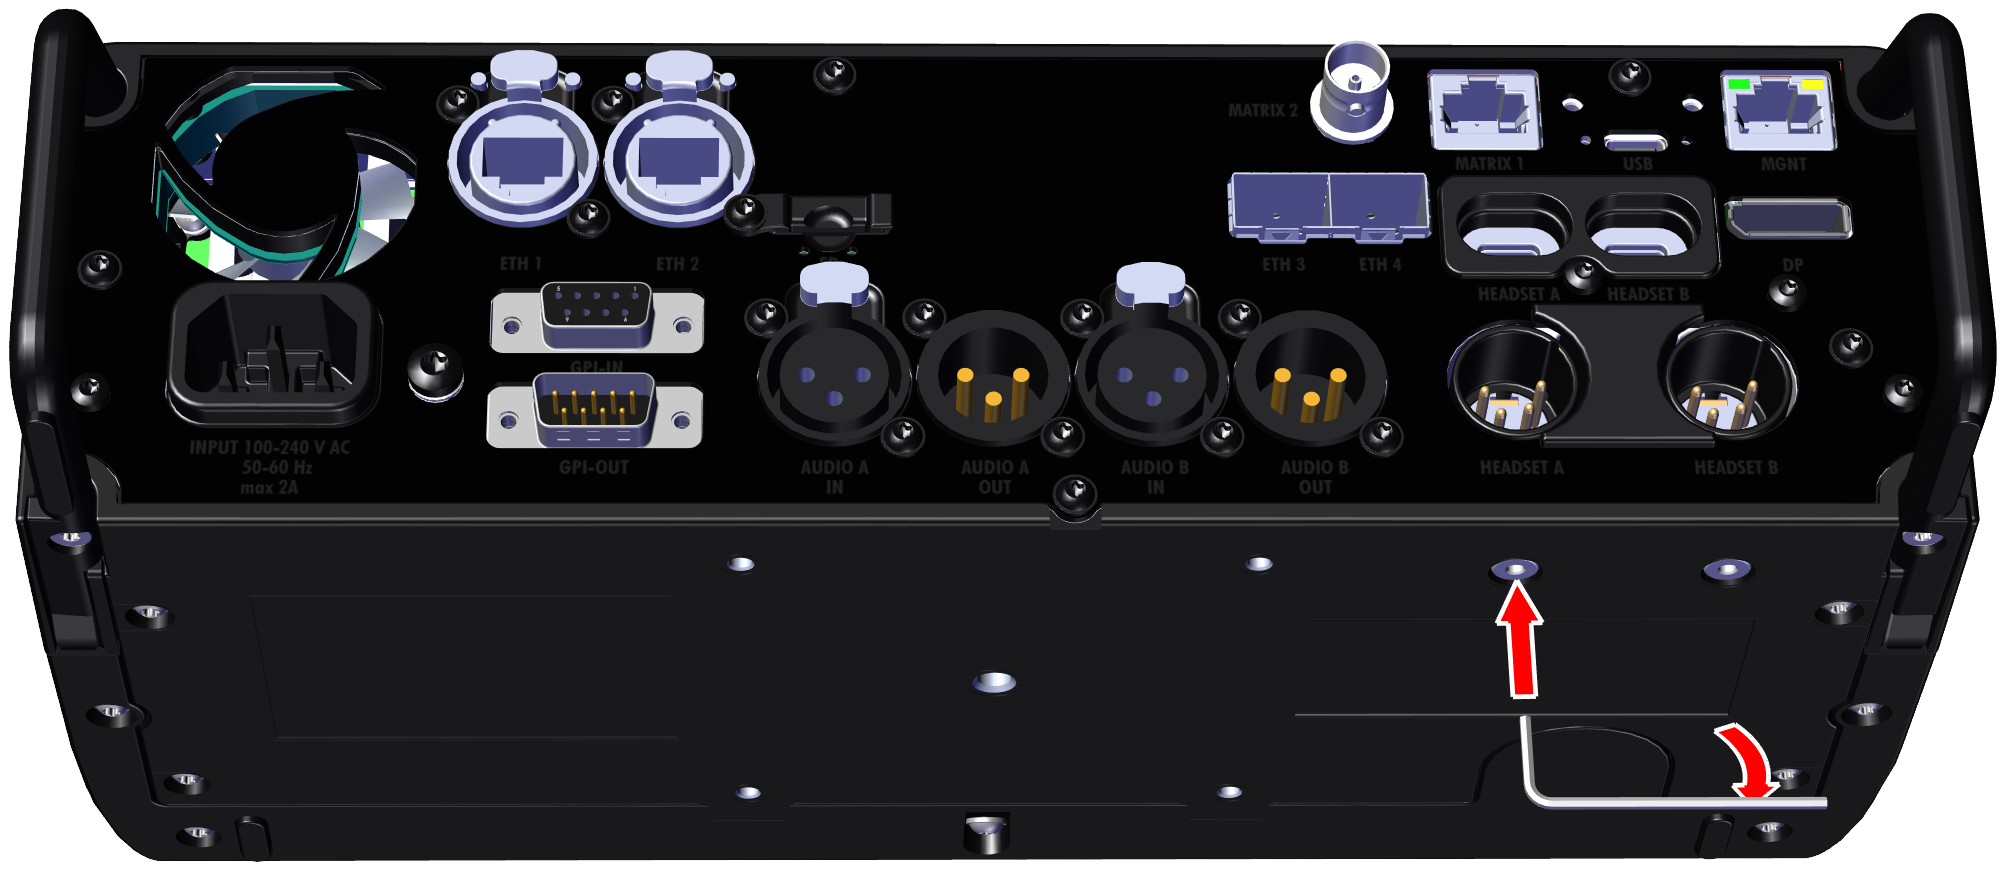
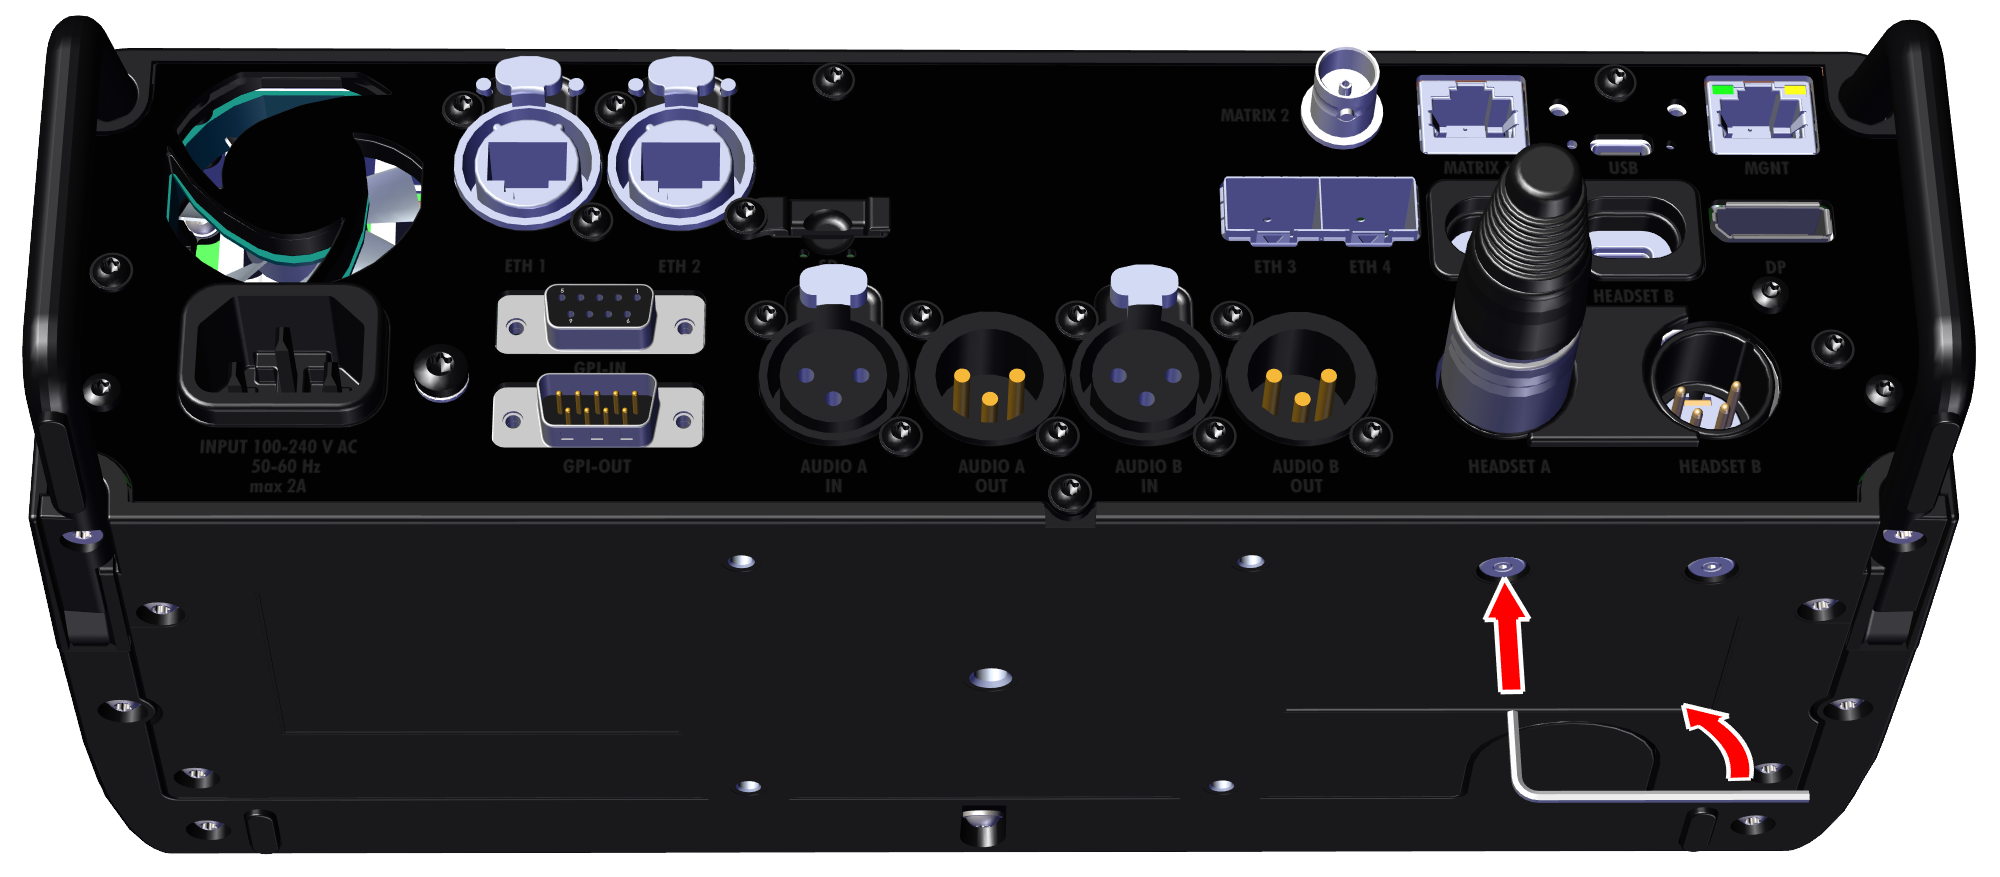
Using a 1.5 mm Allen wrench, remove the grub screw on the bottom of the SmartPanel below the XLR insert.
-
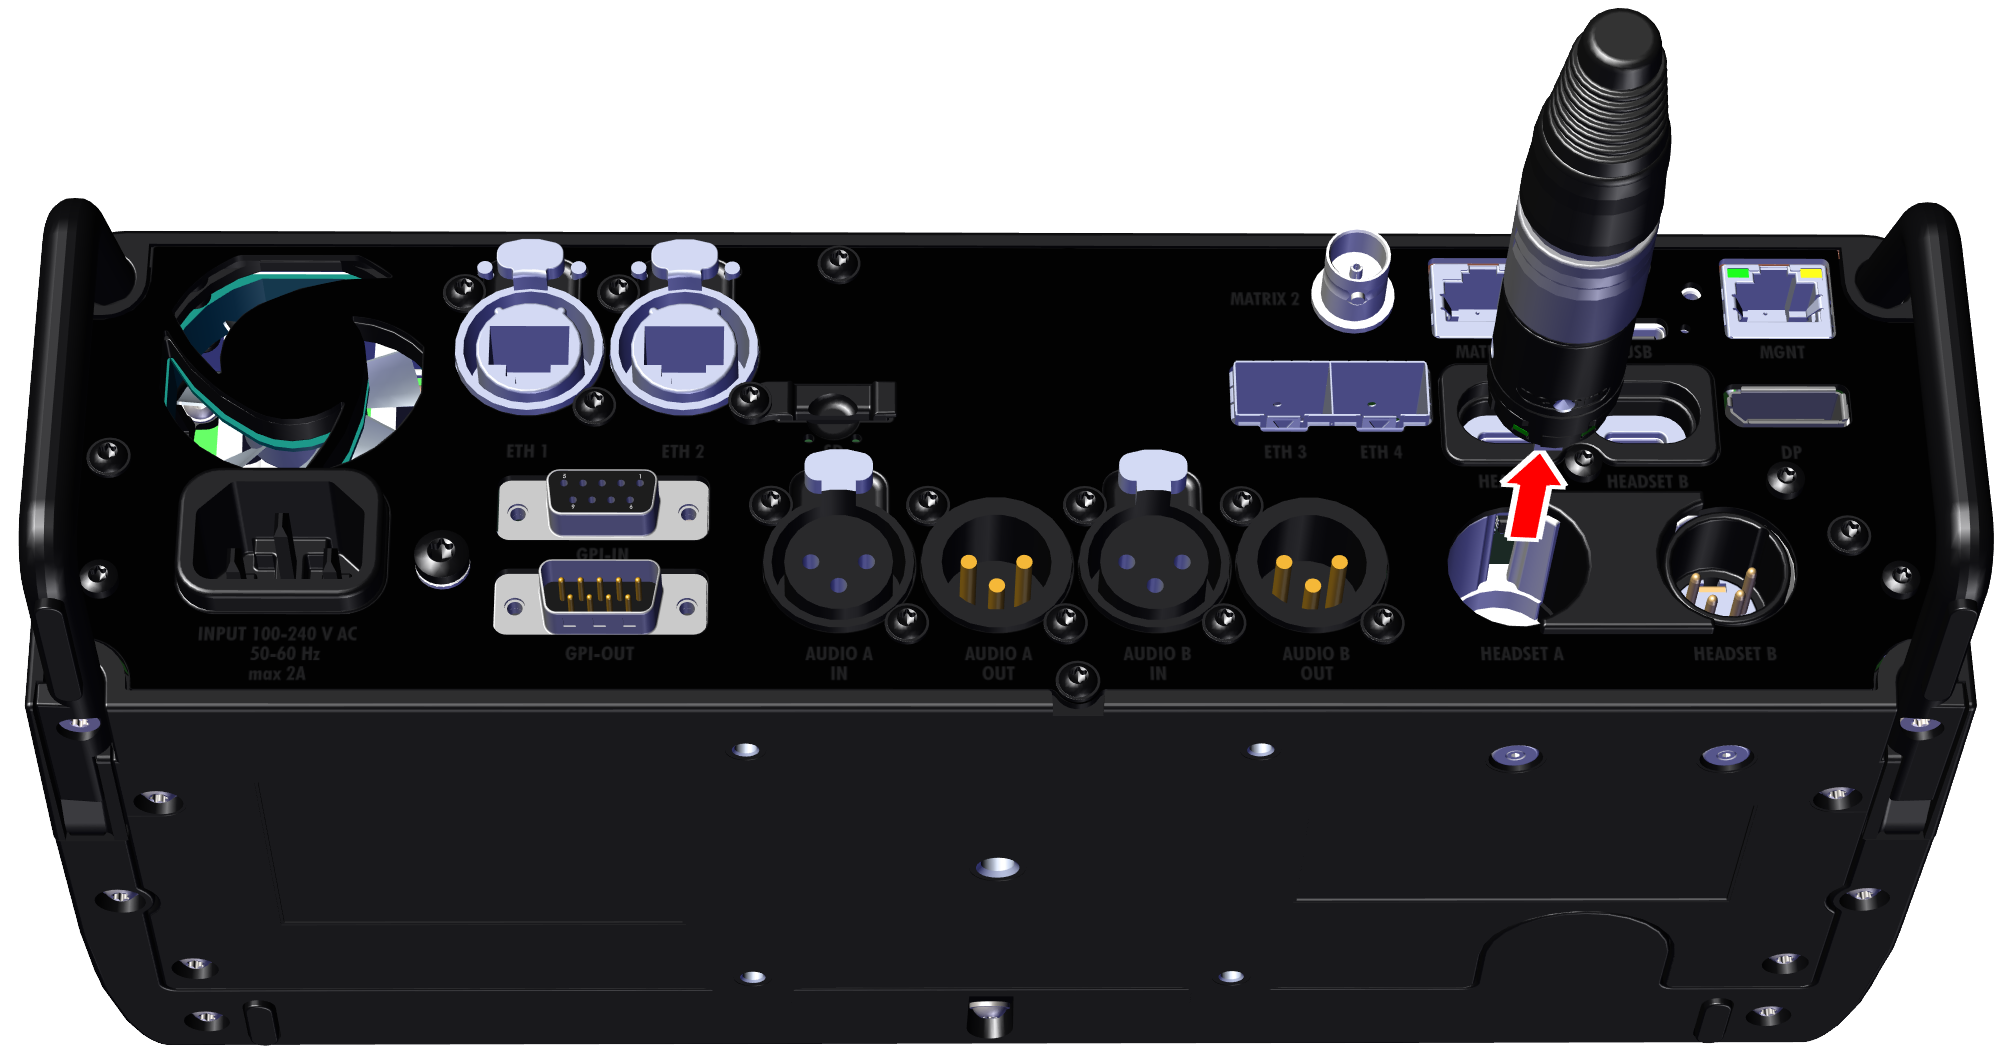
Remove the XLR insert from the SmartPanel by pulling the attached XLR connector.
-
Remove the second XLR insert in the same way.
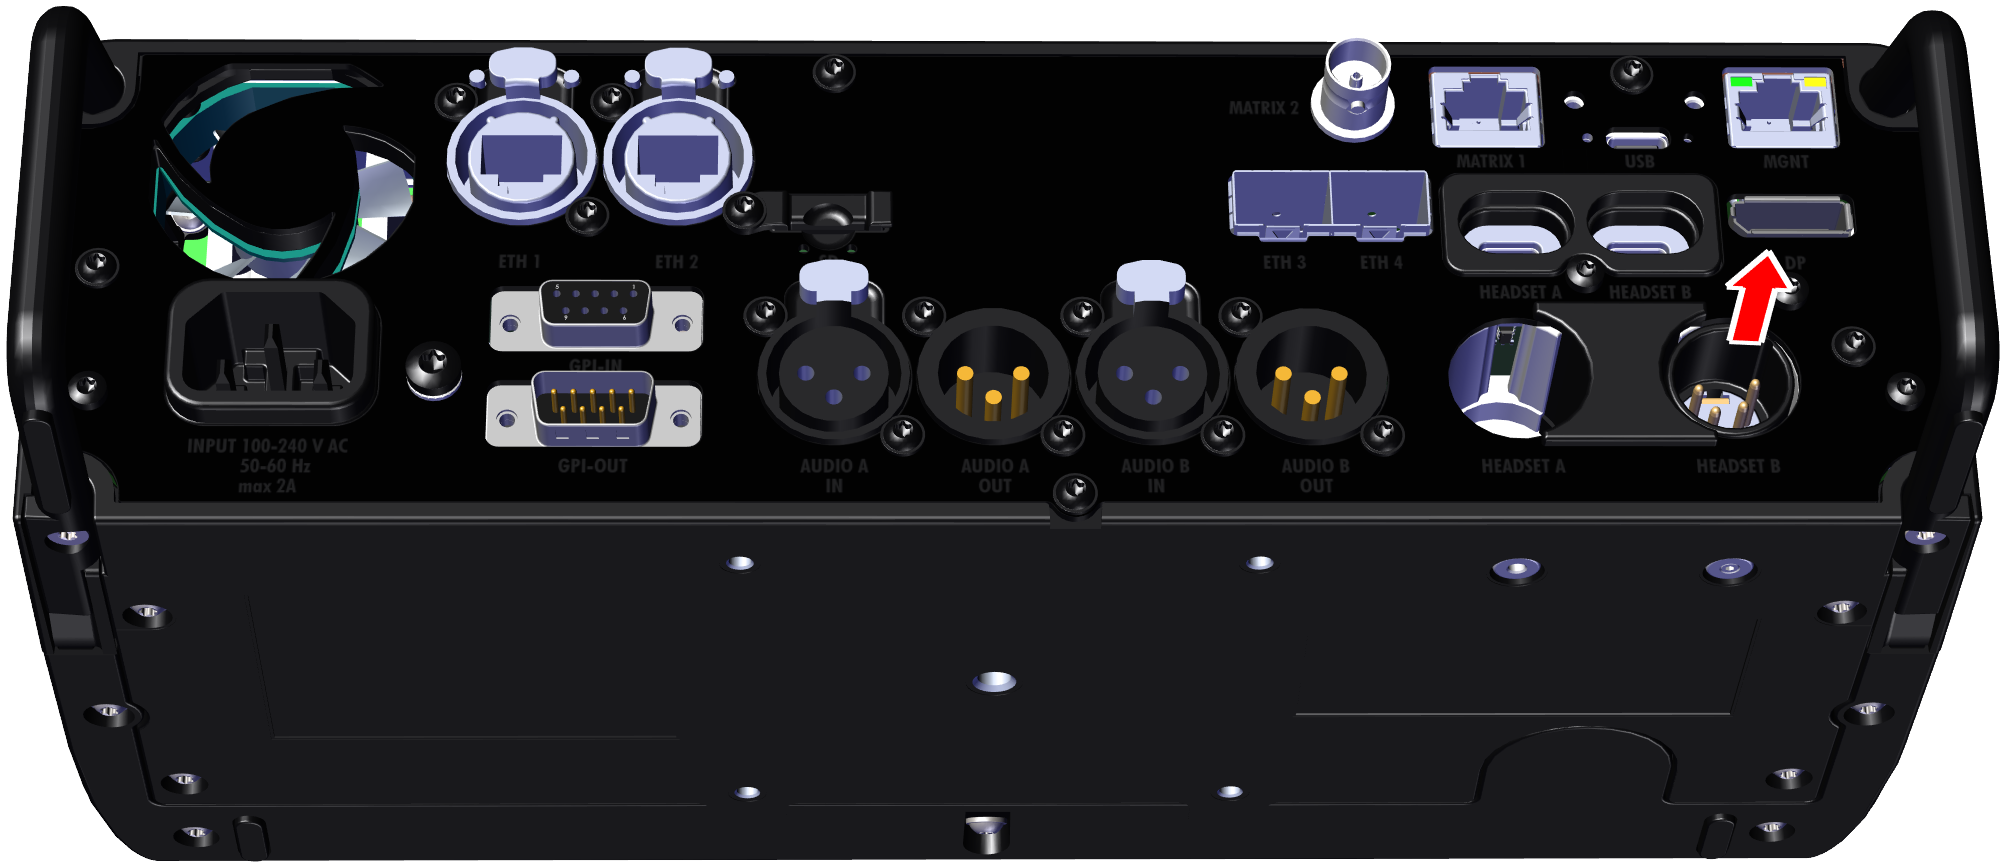
-
Remove the plastic insert between the two XLR slots.
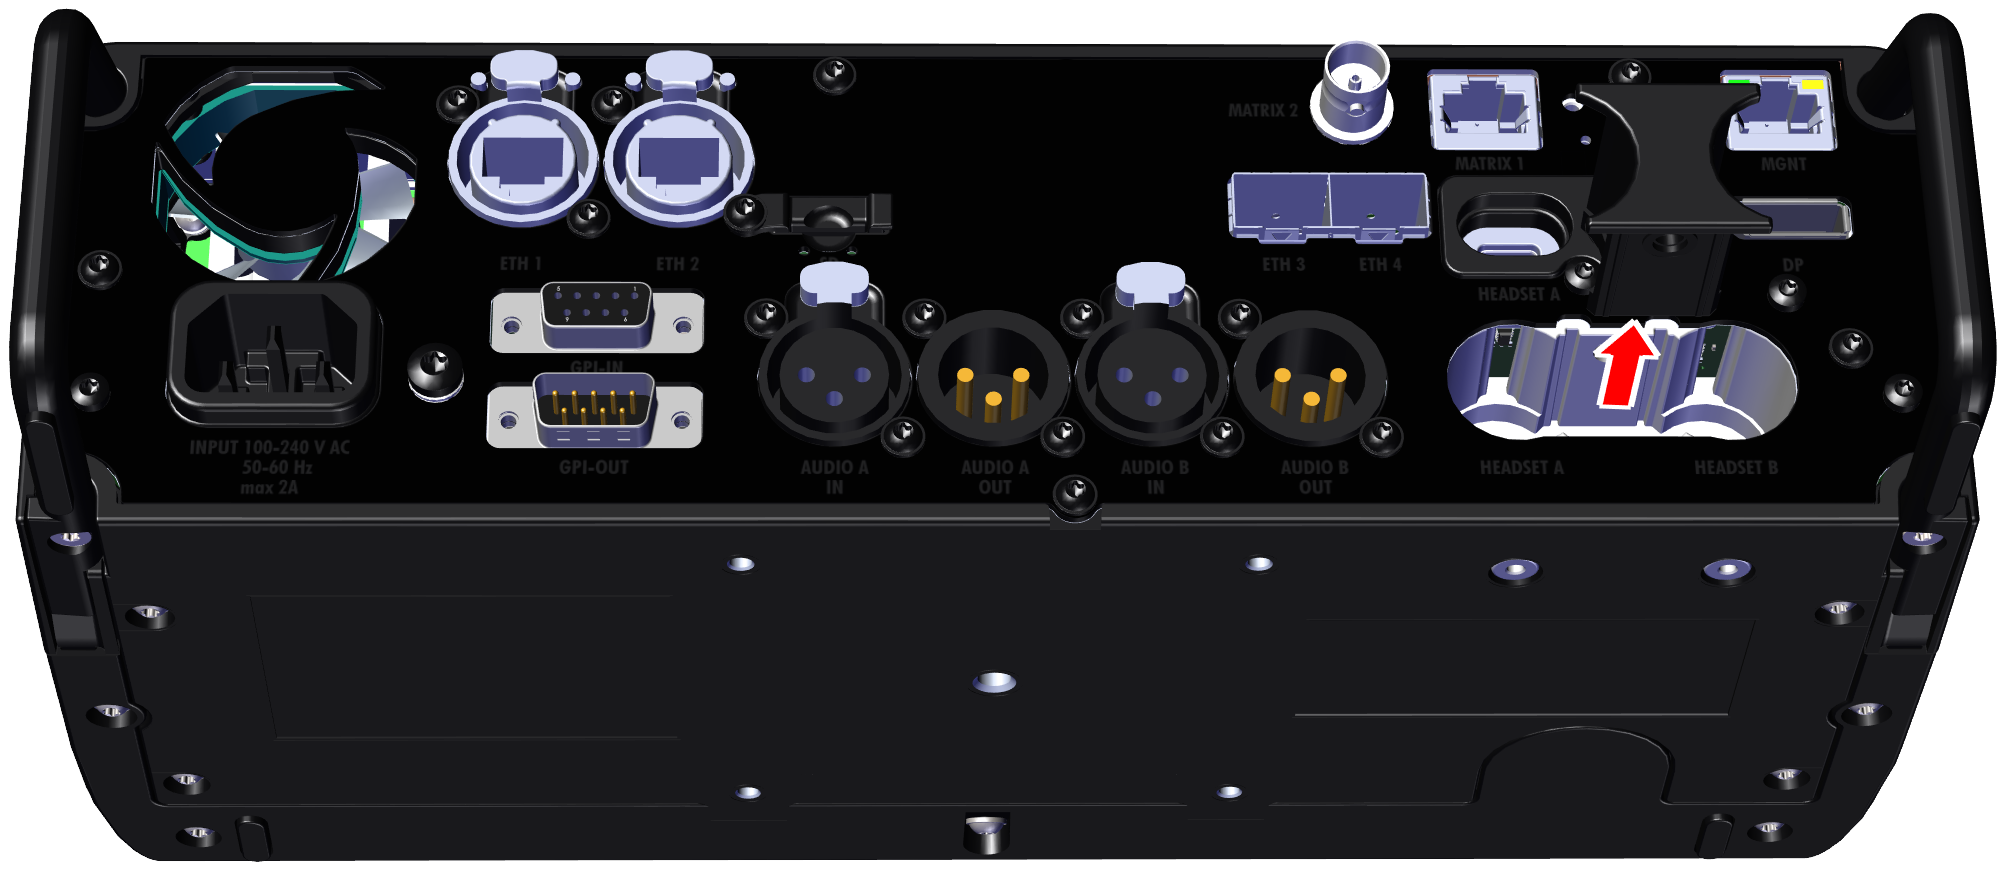
Attaching the Commentary Headset Adapter to the DSP-1216HL
-
Place the rear end of the DSP-1216HL on the front part of the adapter's base plate.
-
Push the DSP-1216HL toward the interface connectors until you hear a click.
Keep the DSP parallel to the adapter's base plate, otherwise the connectors may get damaged.
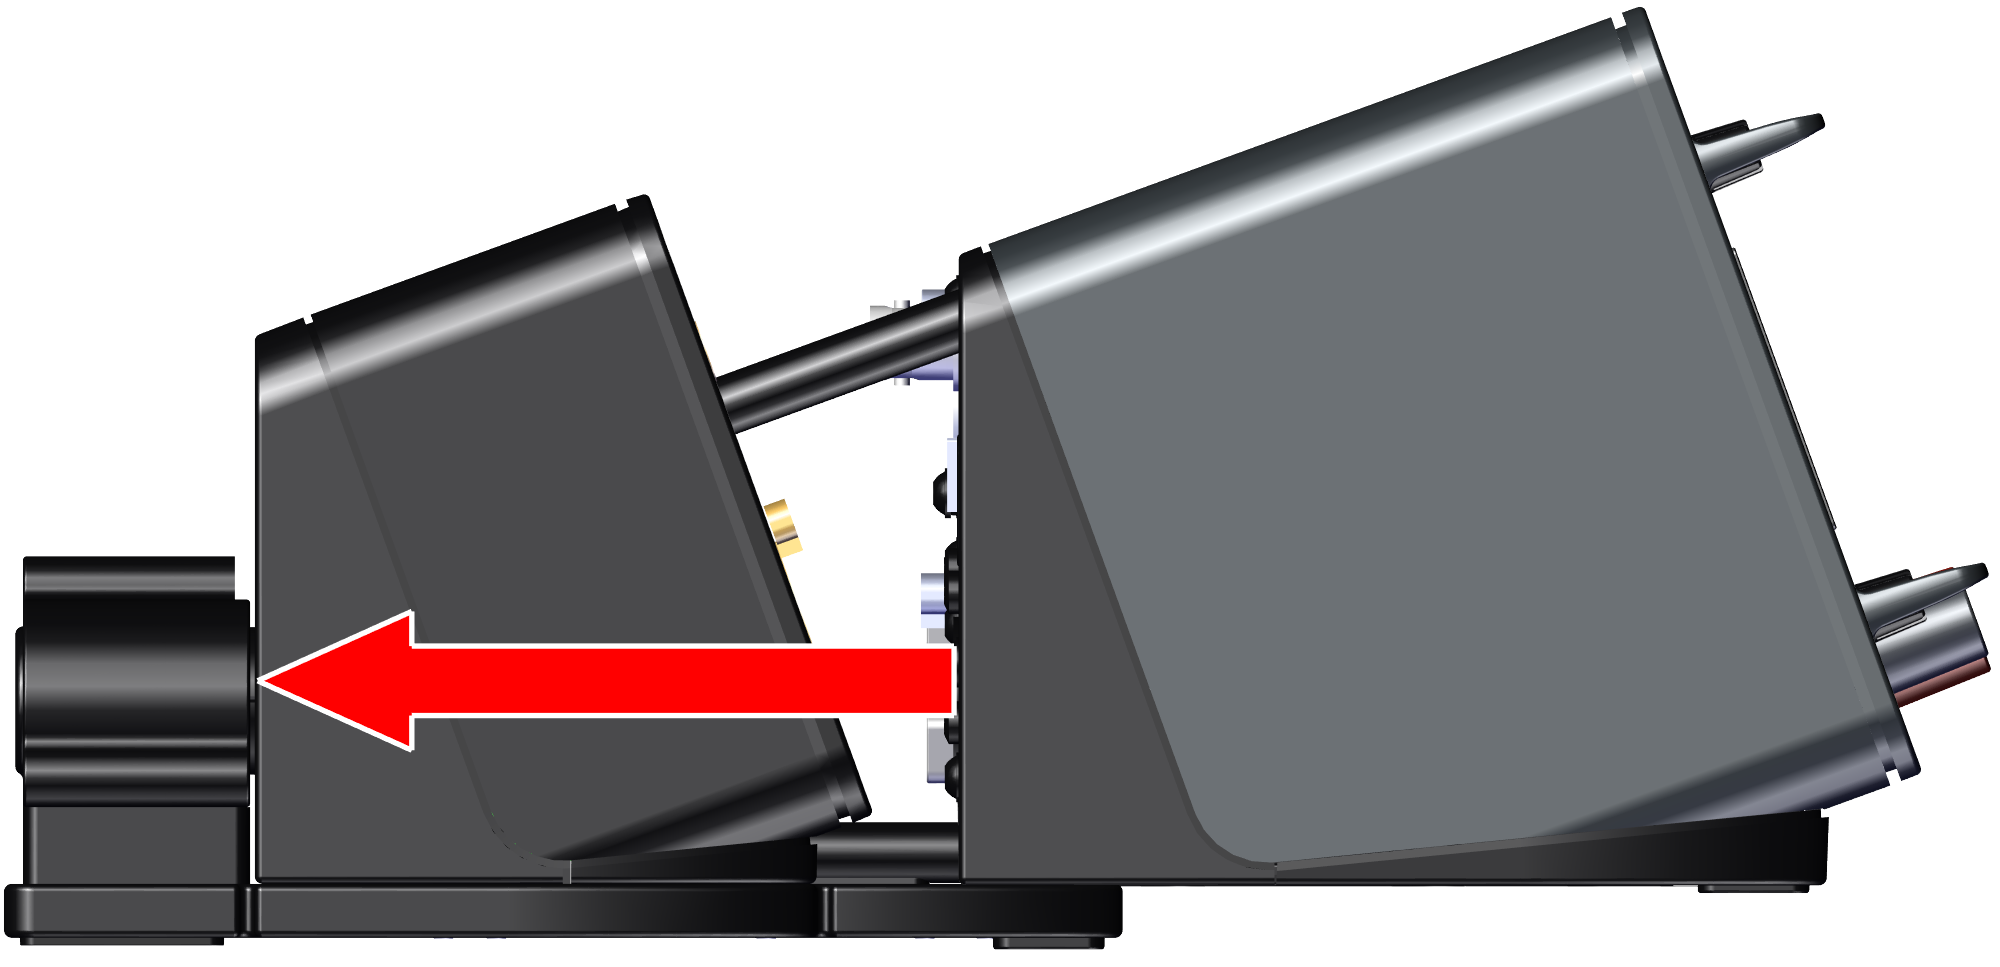
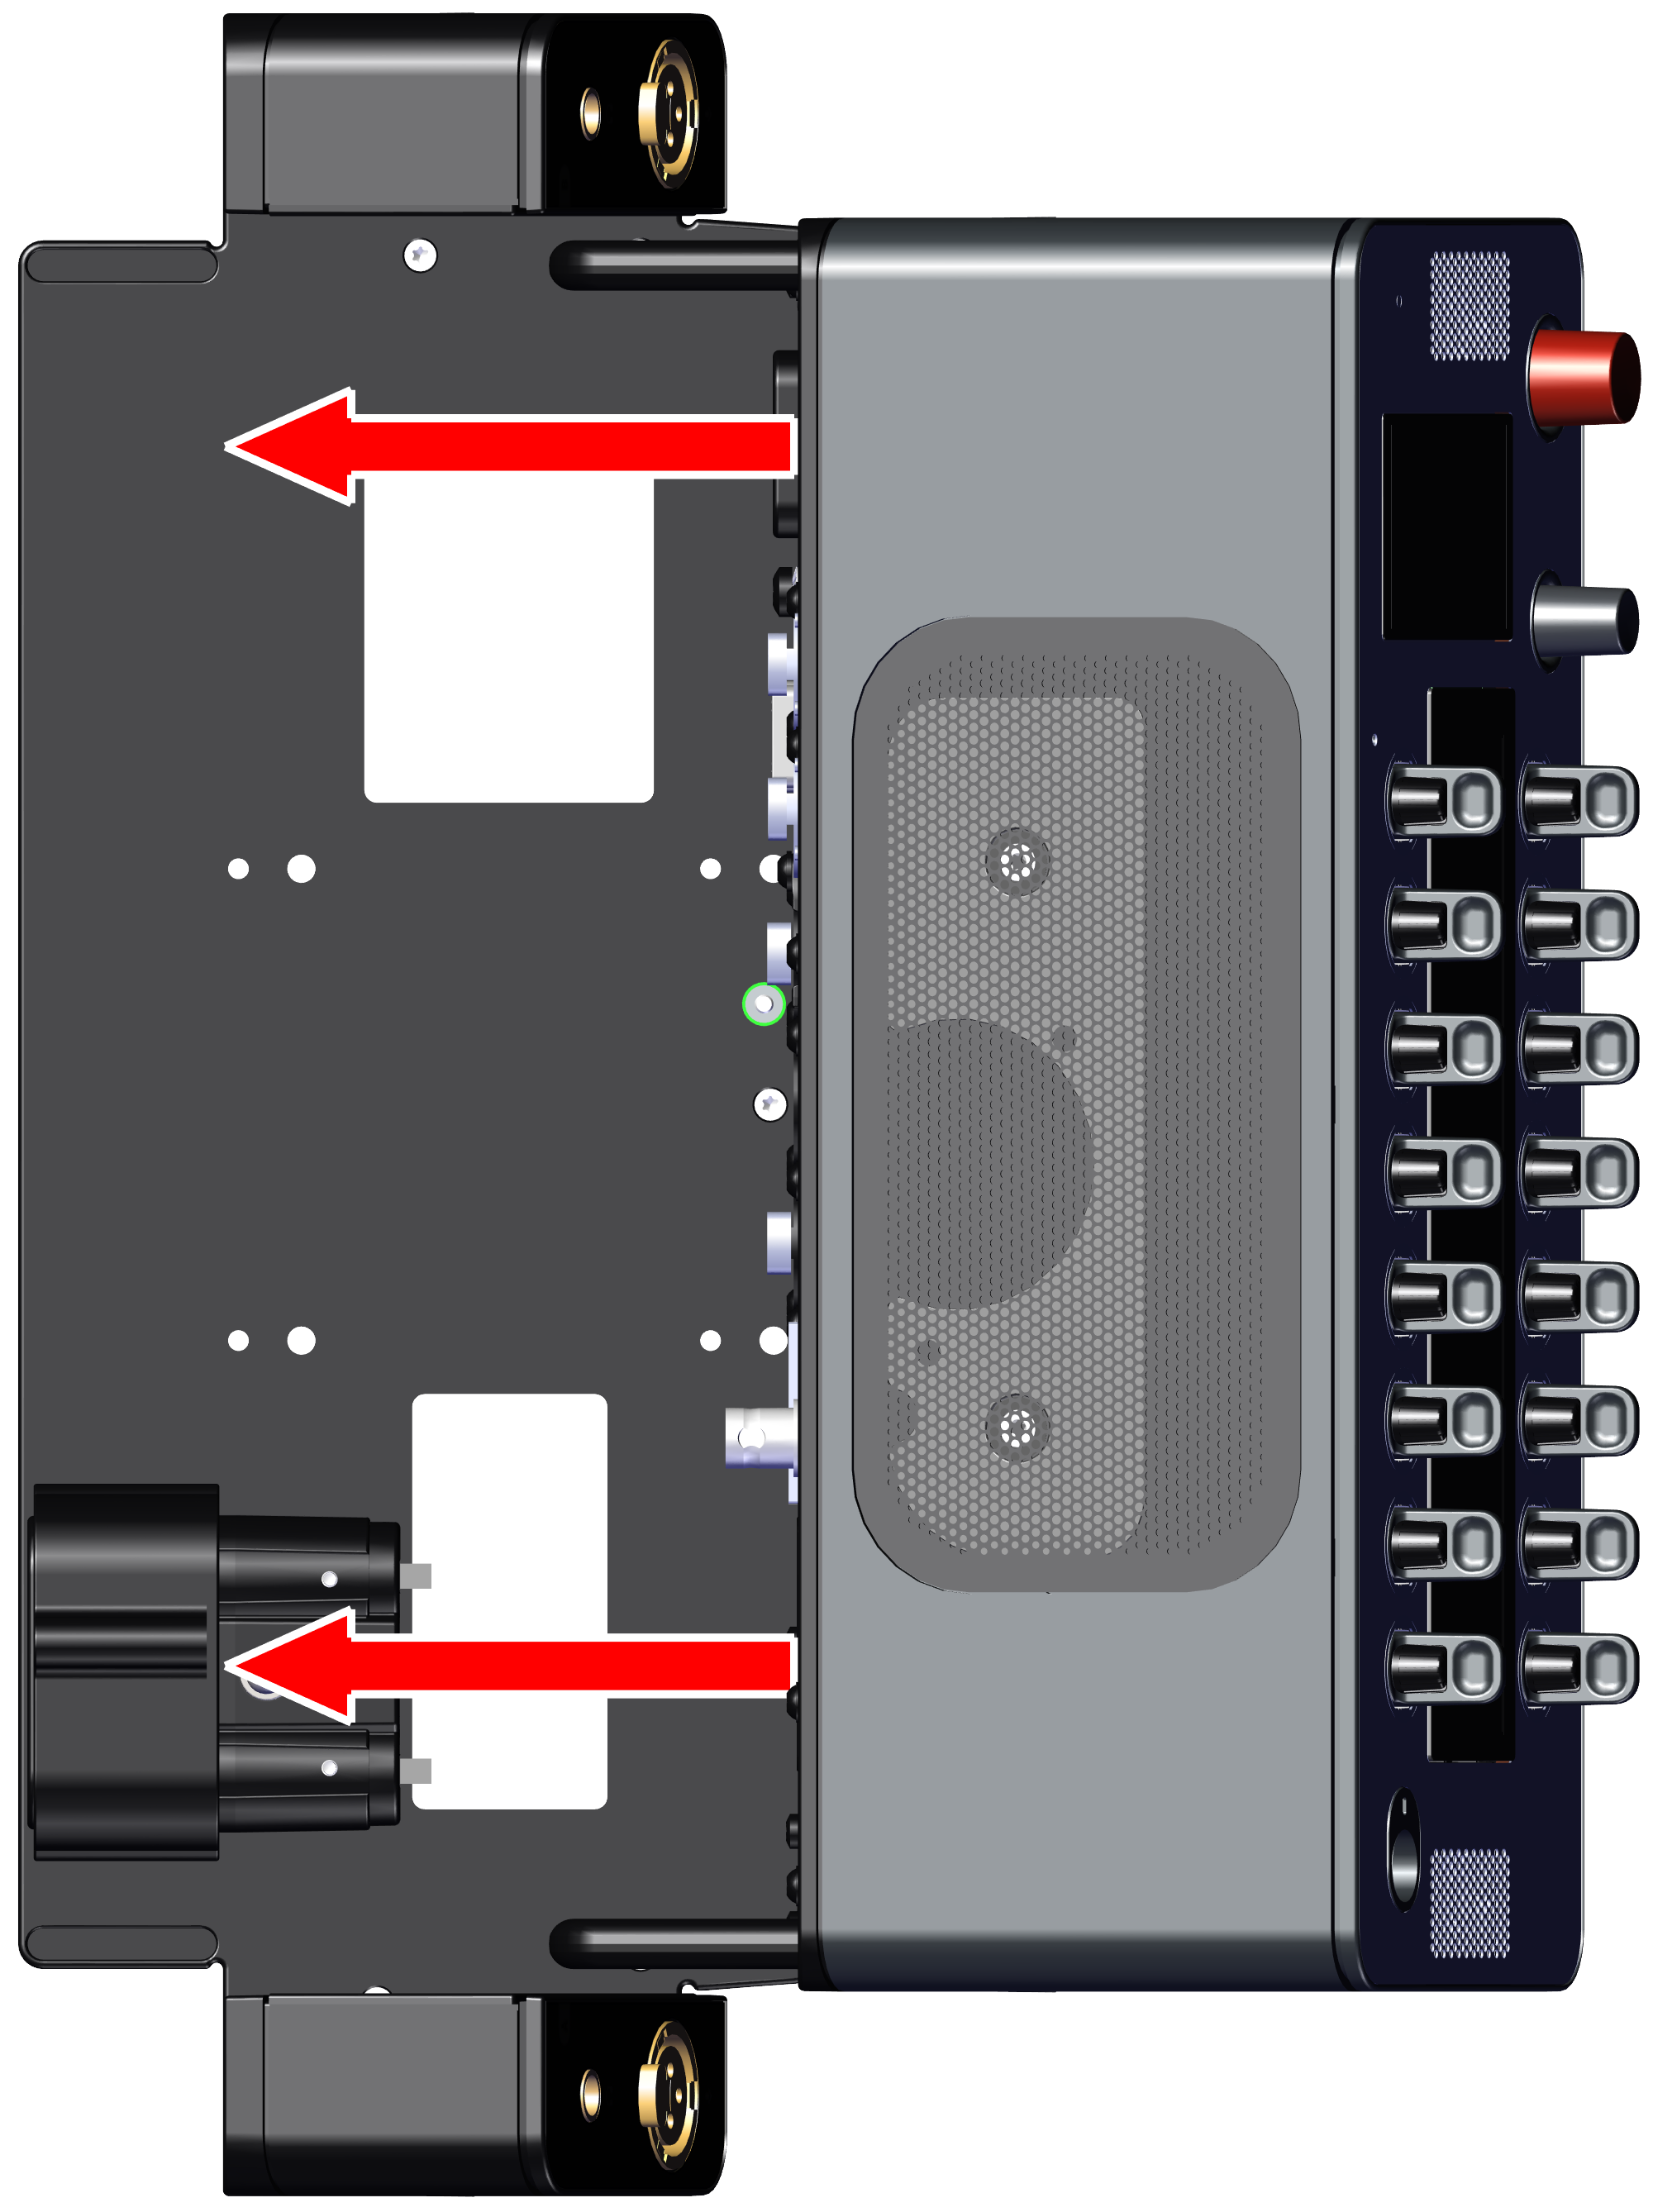
-
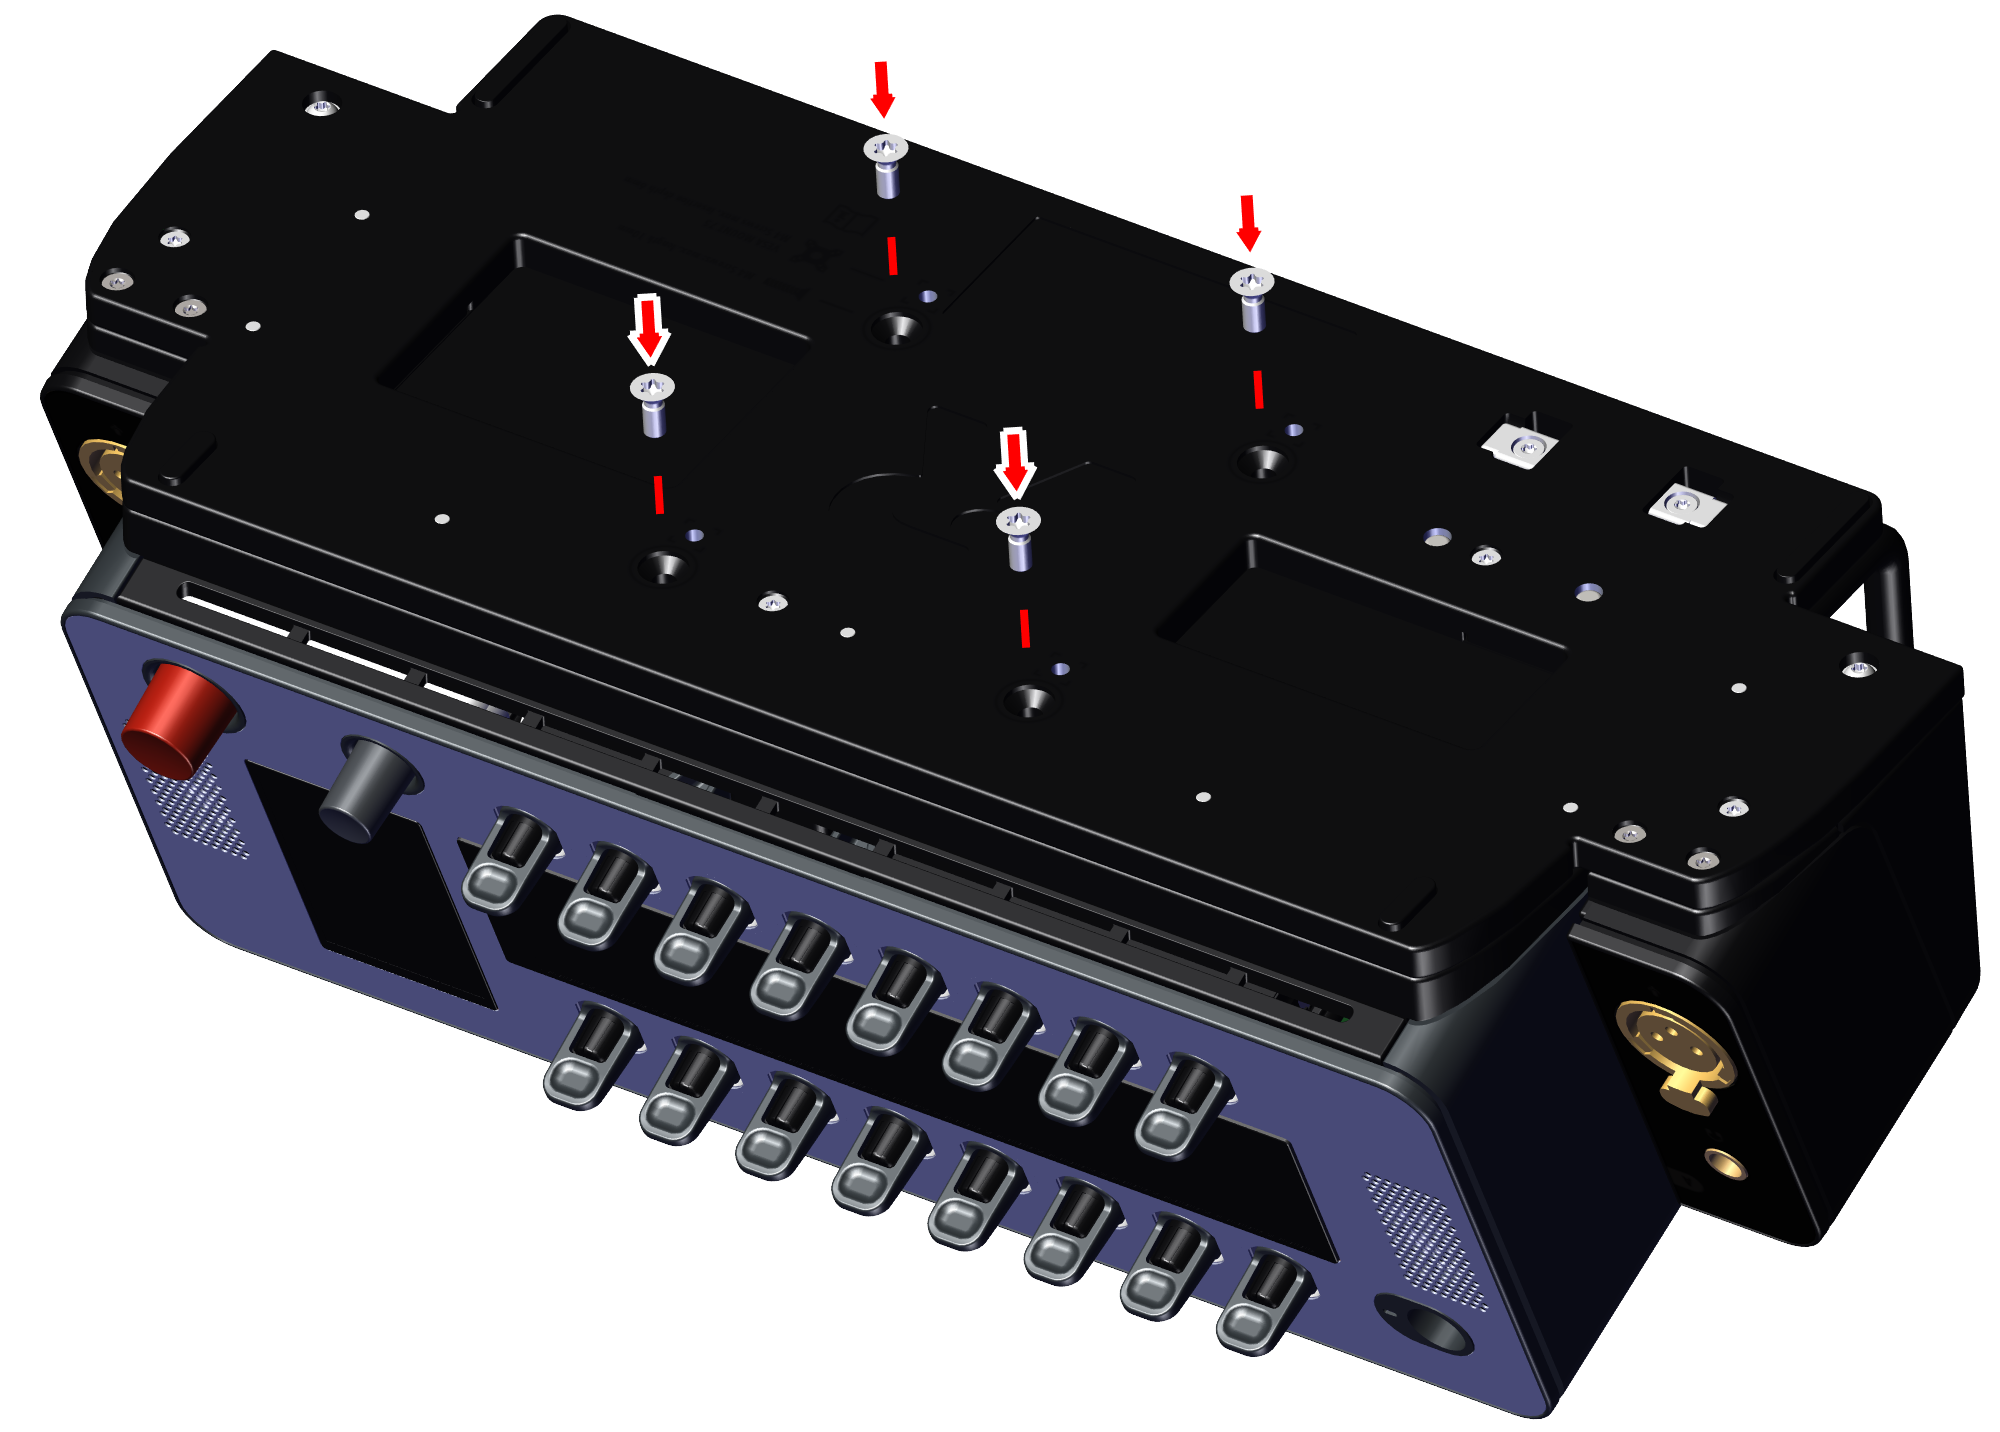
Fix both parts to the VESA mount using four M4×10 countersunk screws and a TX20 screwdriver.
Tighten the screws to a maximum torque of 2 Nm.
Disassembly of the Commentary Headset Adapter
Before proceeding, ensure that the power cord of the DSP-1216HL is unplugged.
Removing the Commentary Headset Adapter from DSP-1216HL
-
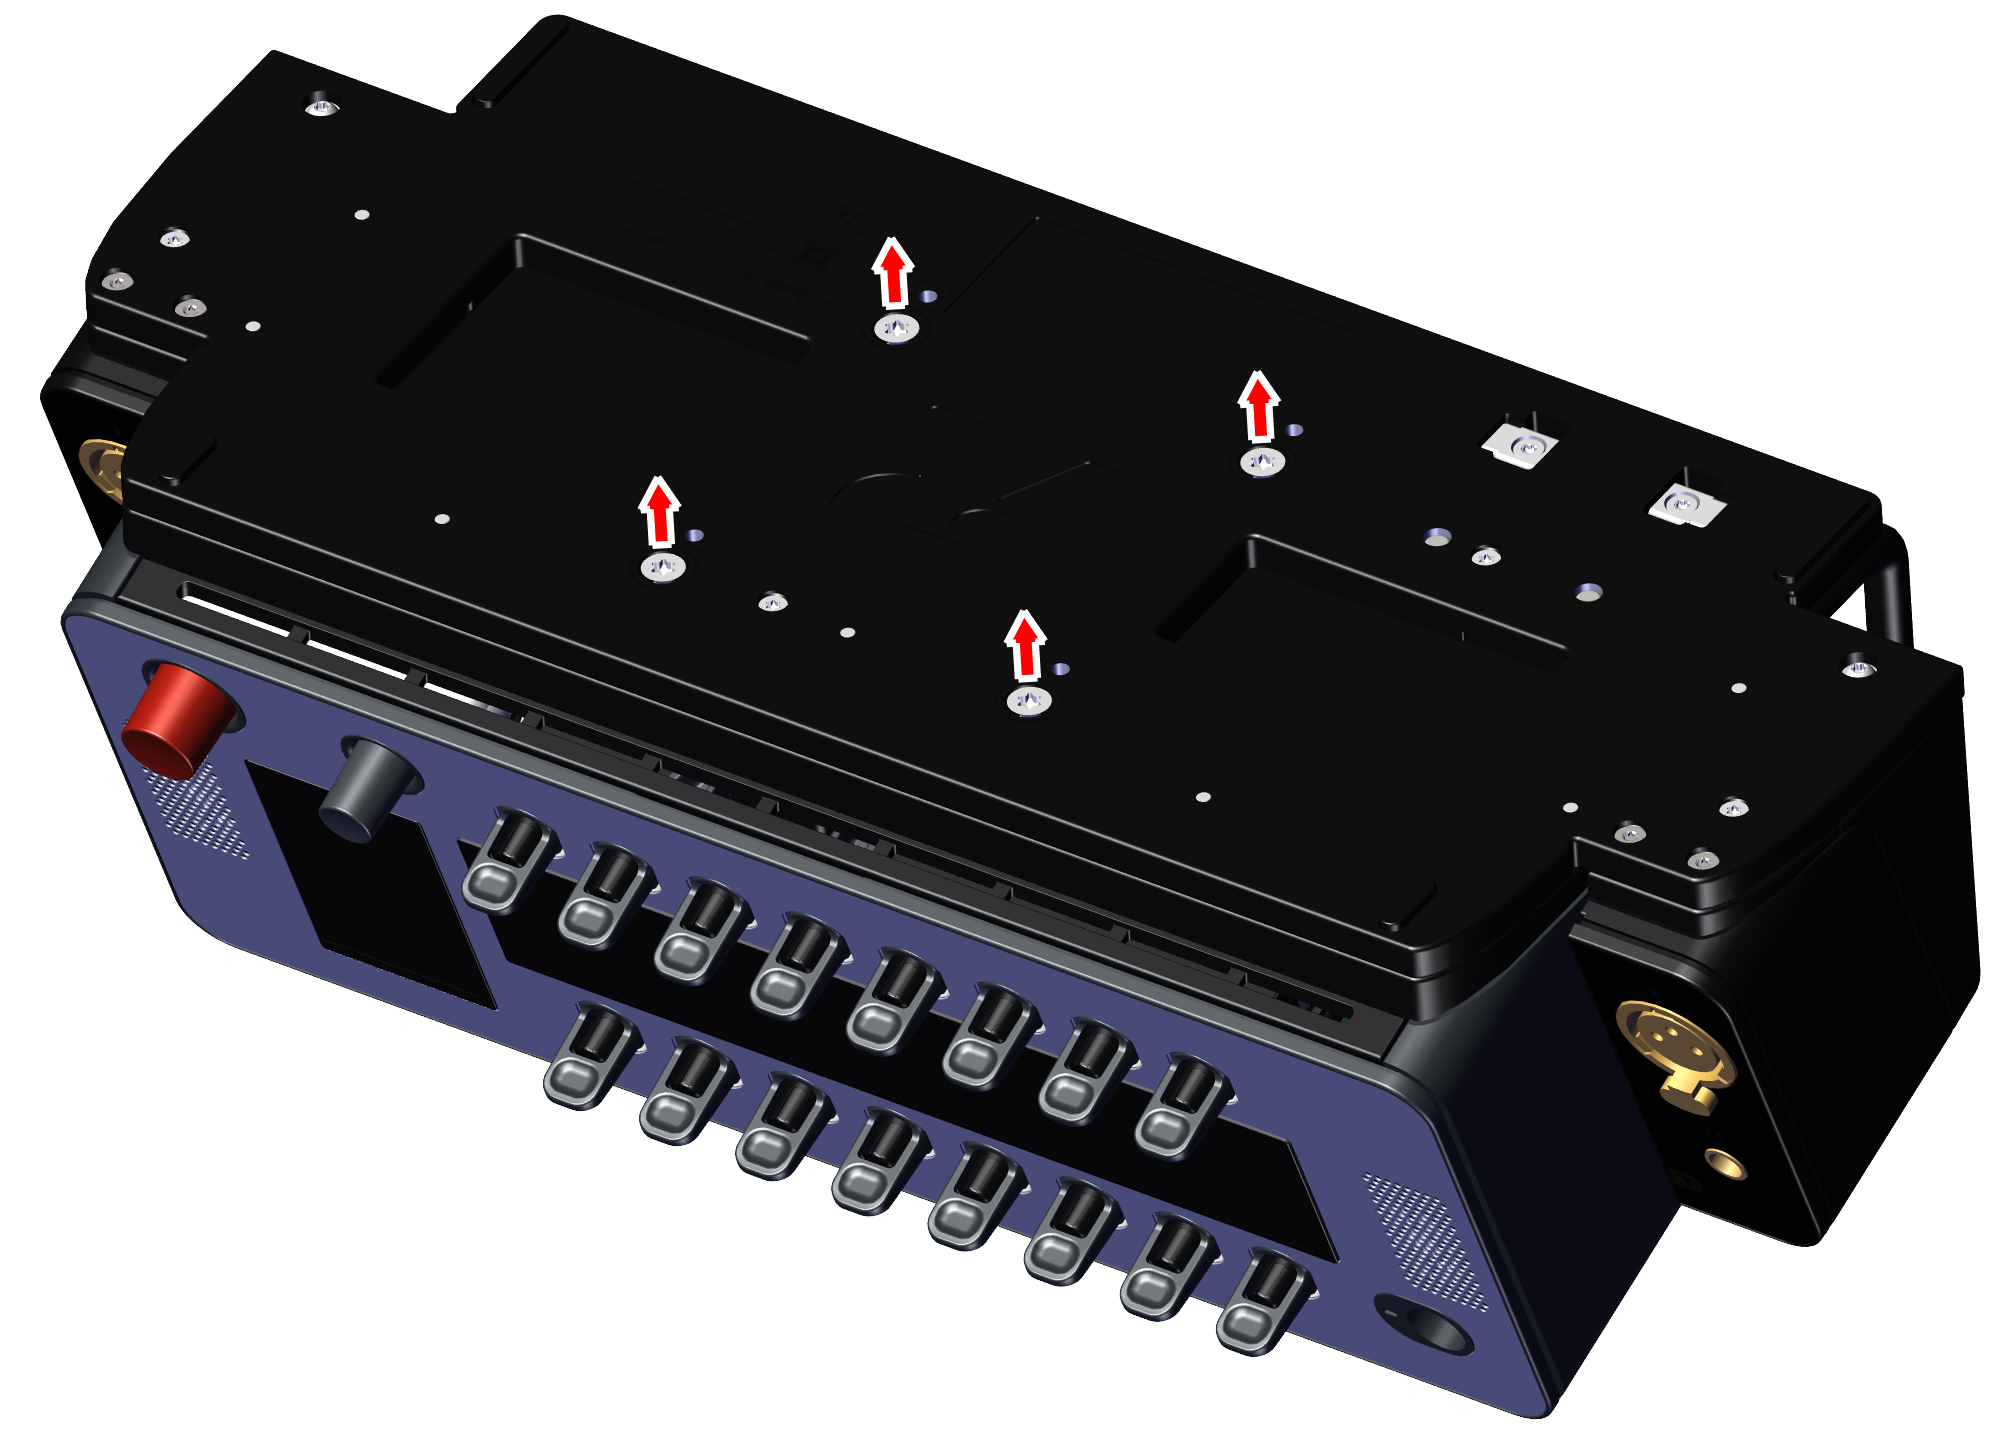
Remove the four screws on the bottom of the VESA mount using a TX20 screwdriver.
-
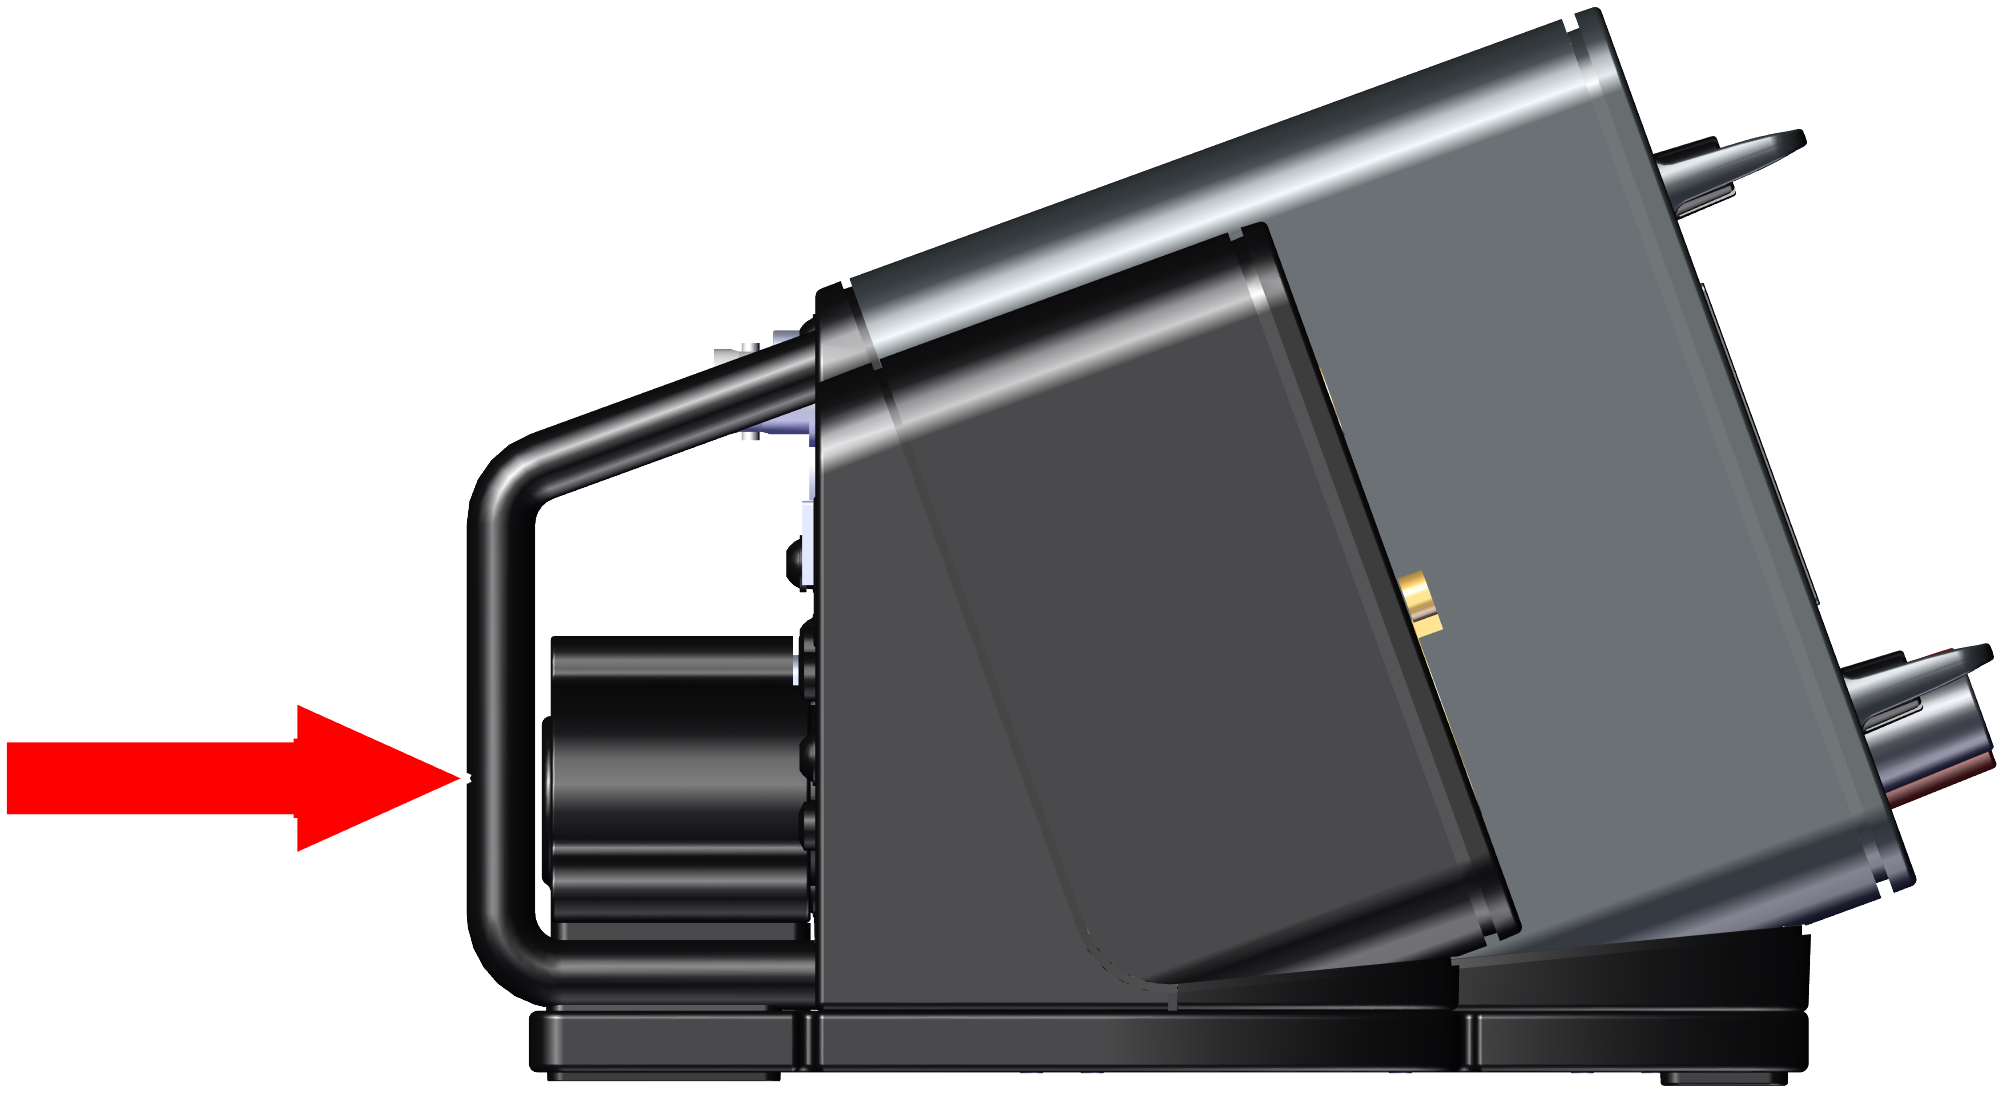
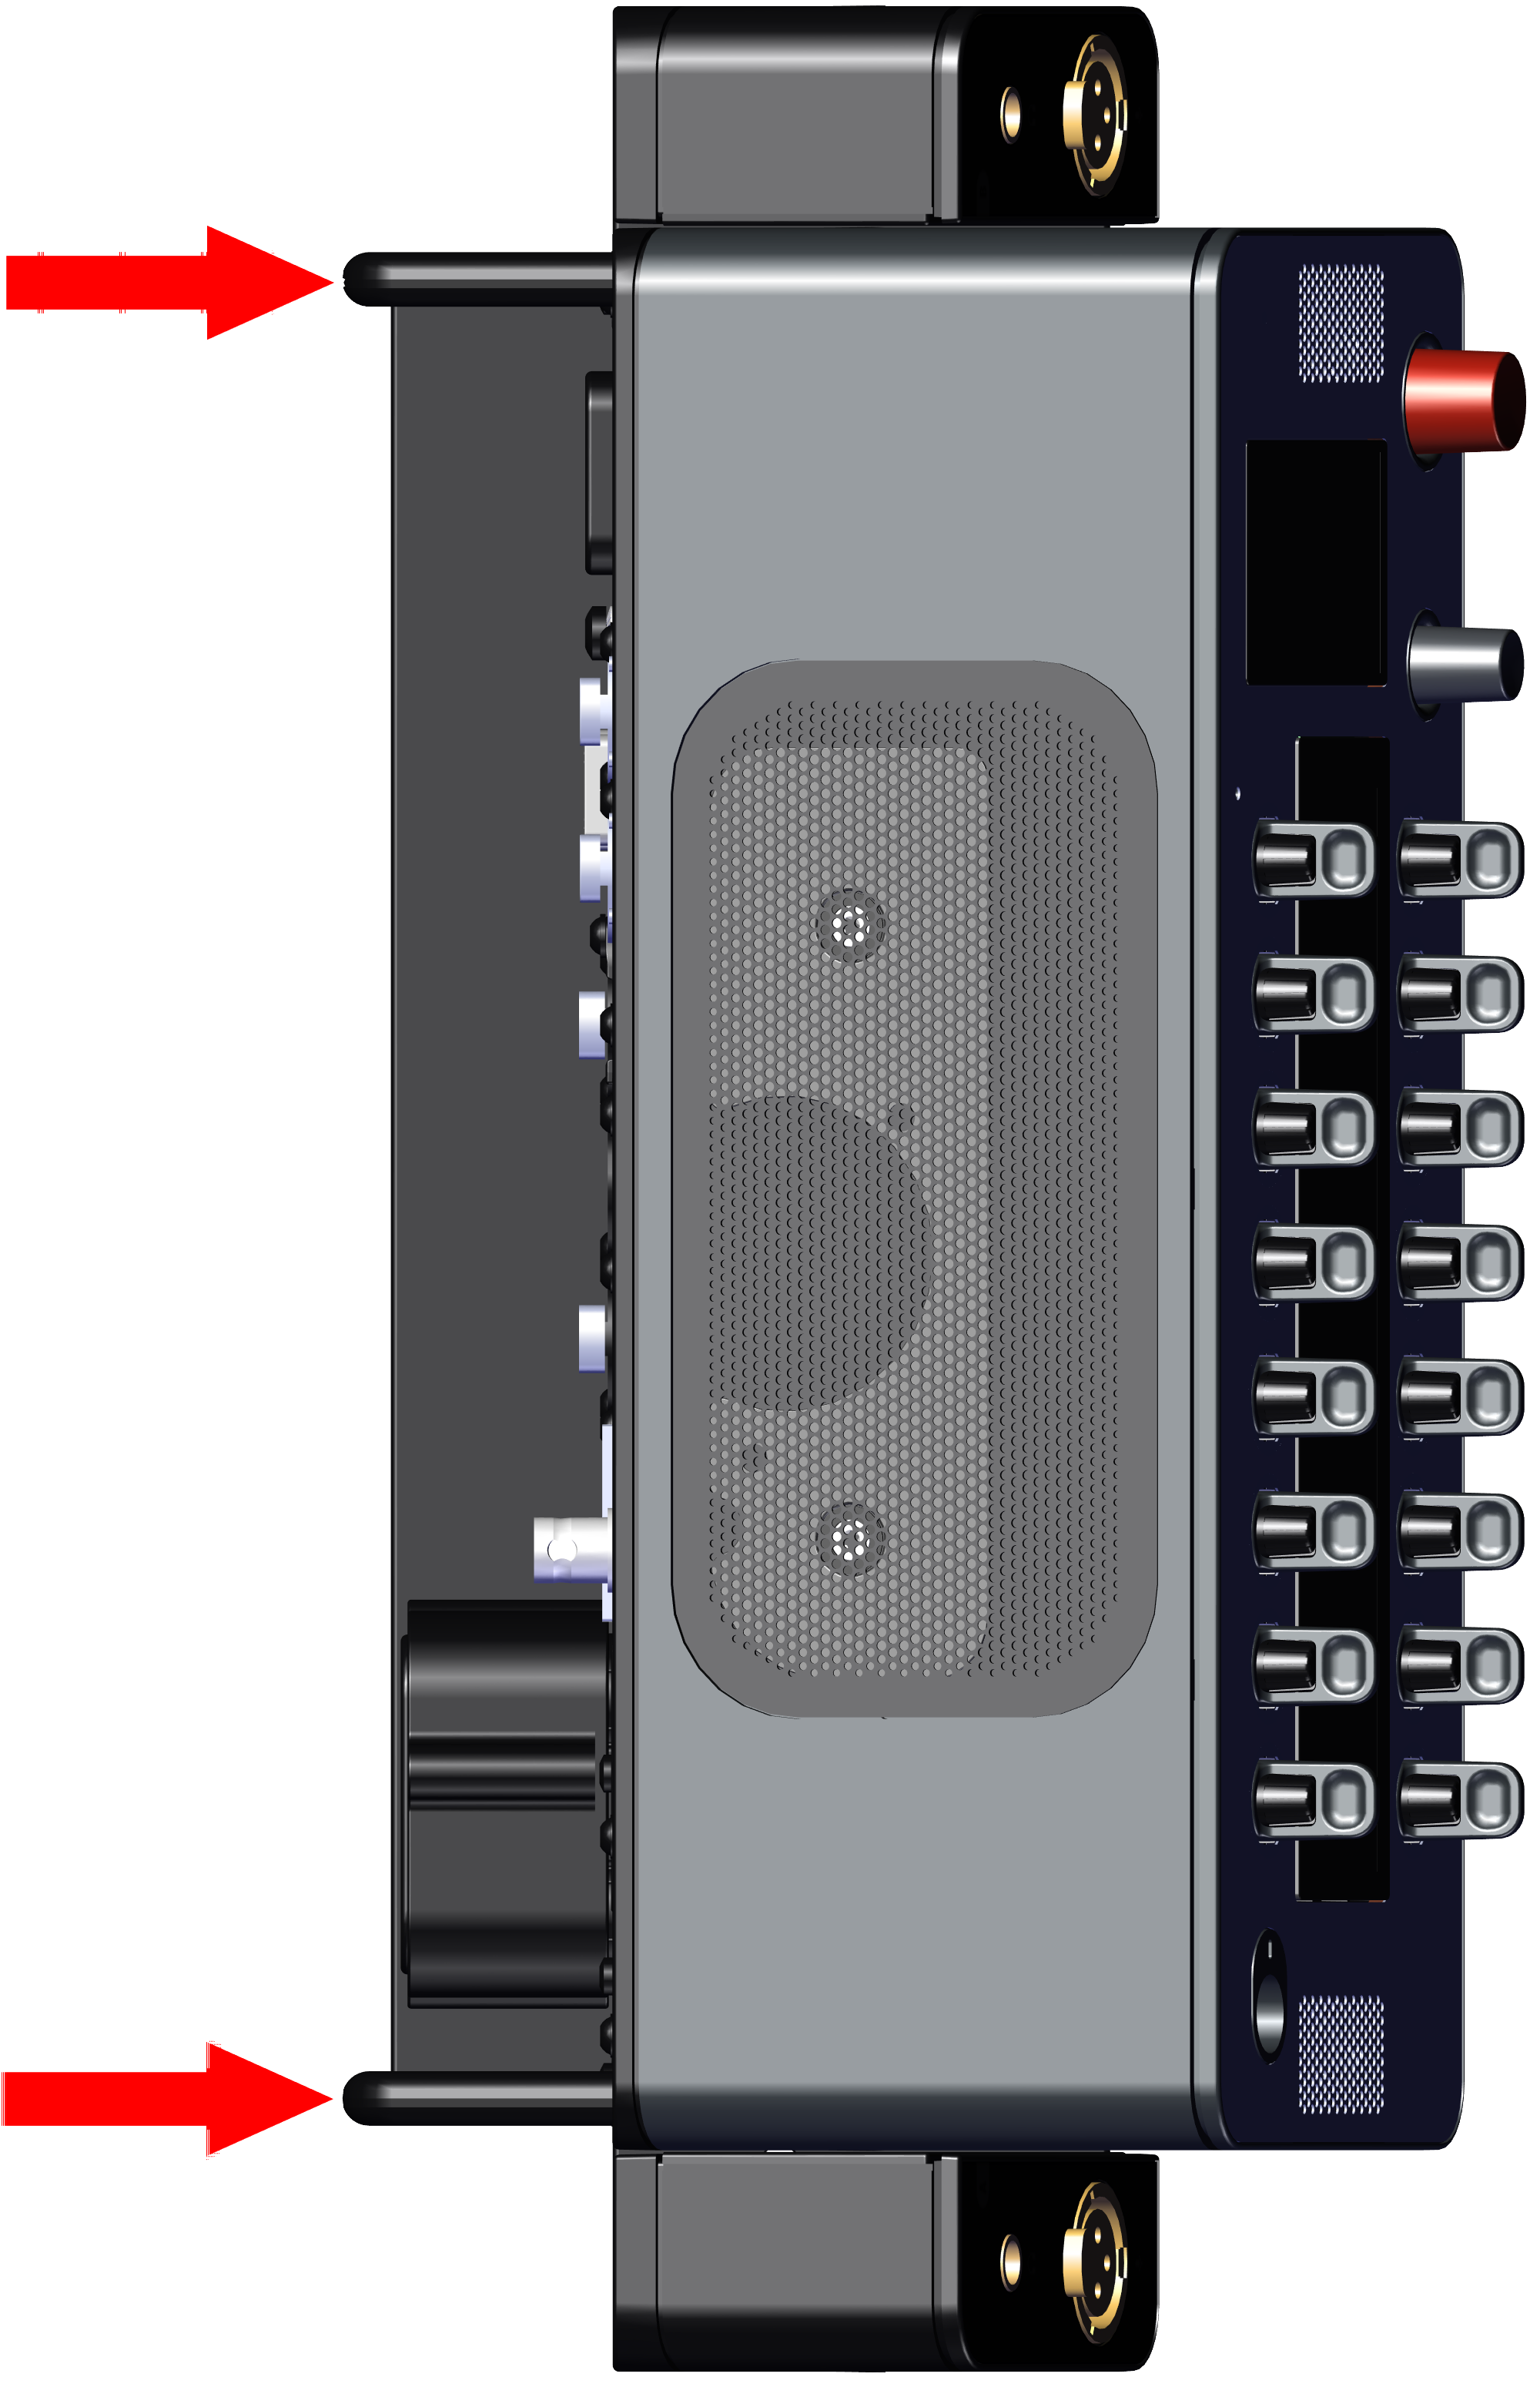
Push the DSP-1216HL out of the adapter using the handles.
Keep the DSP parallel to the adapter's base plate, otherwise the connectors may get damaged.
Replacing the XLR inserts into the DSP-1216HL
-
Replace the plastic insert between the two XLR slots.
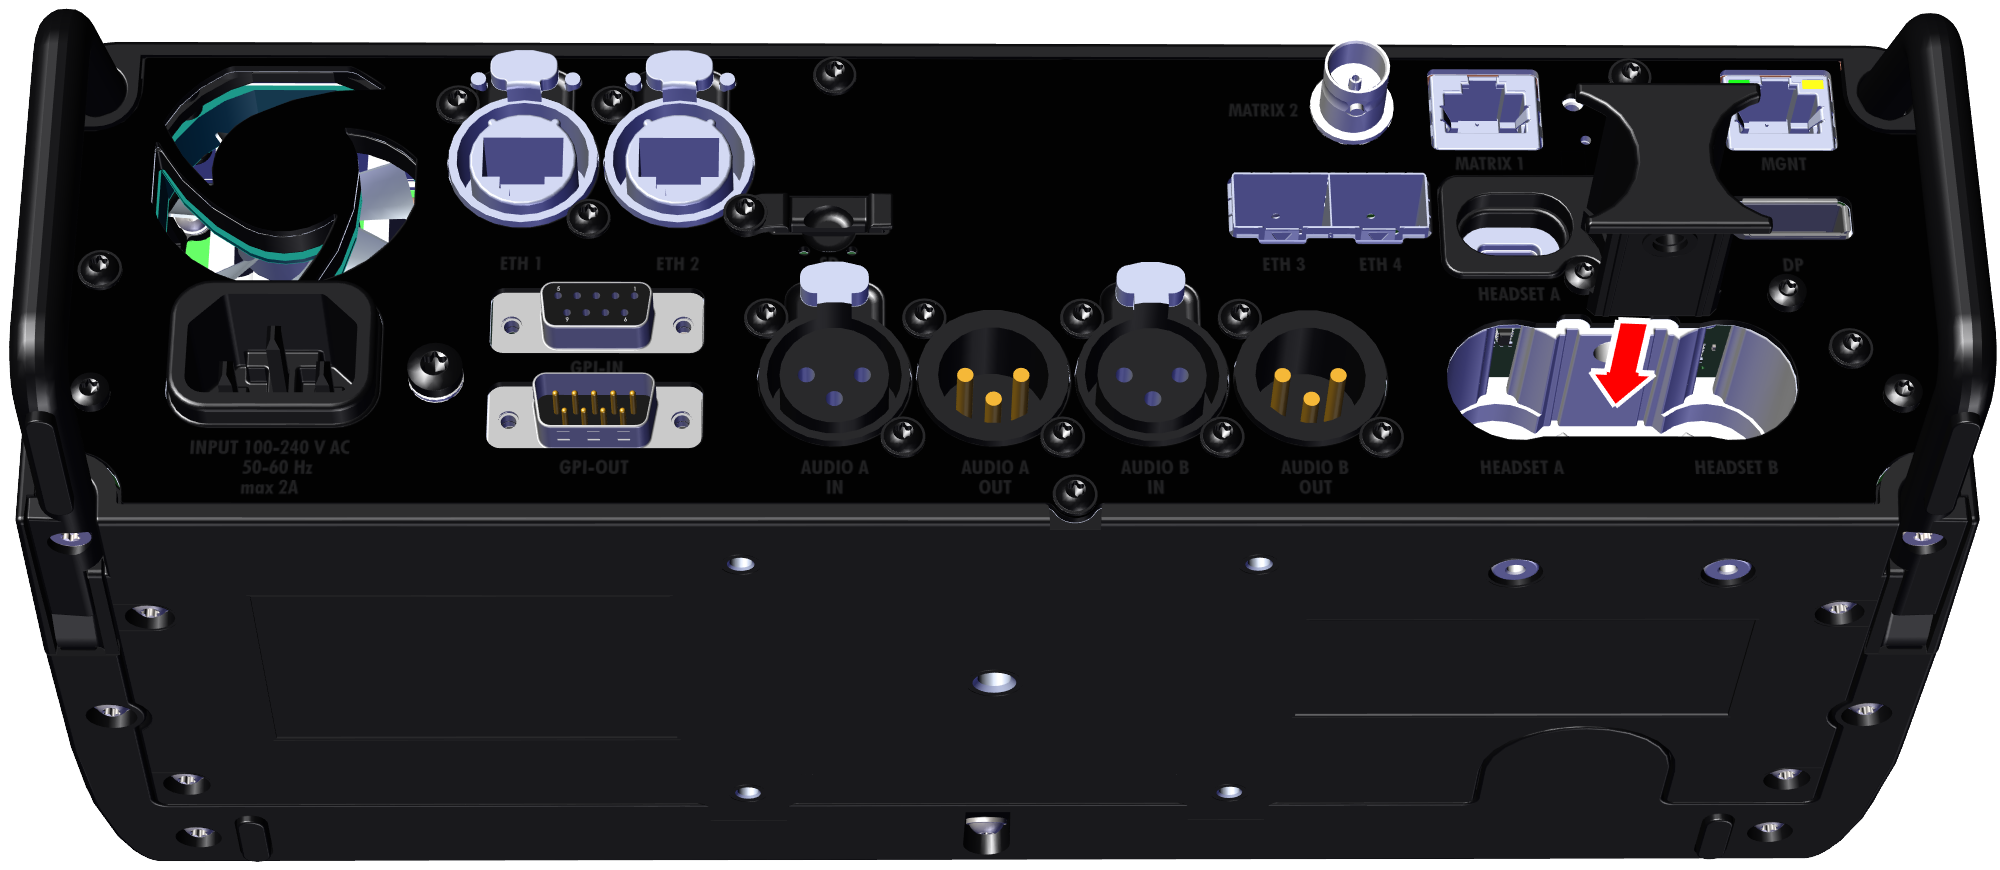
-
Replace both XLR inserts into the SmartPanel.
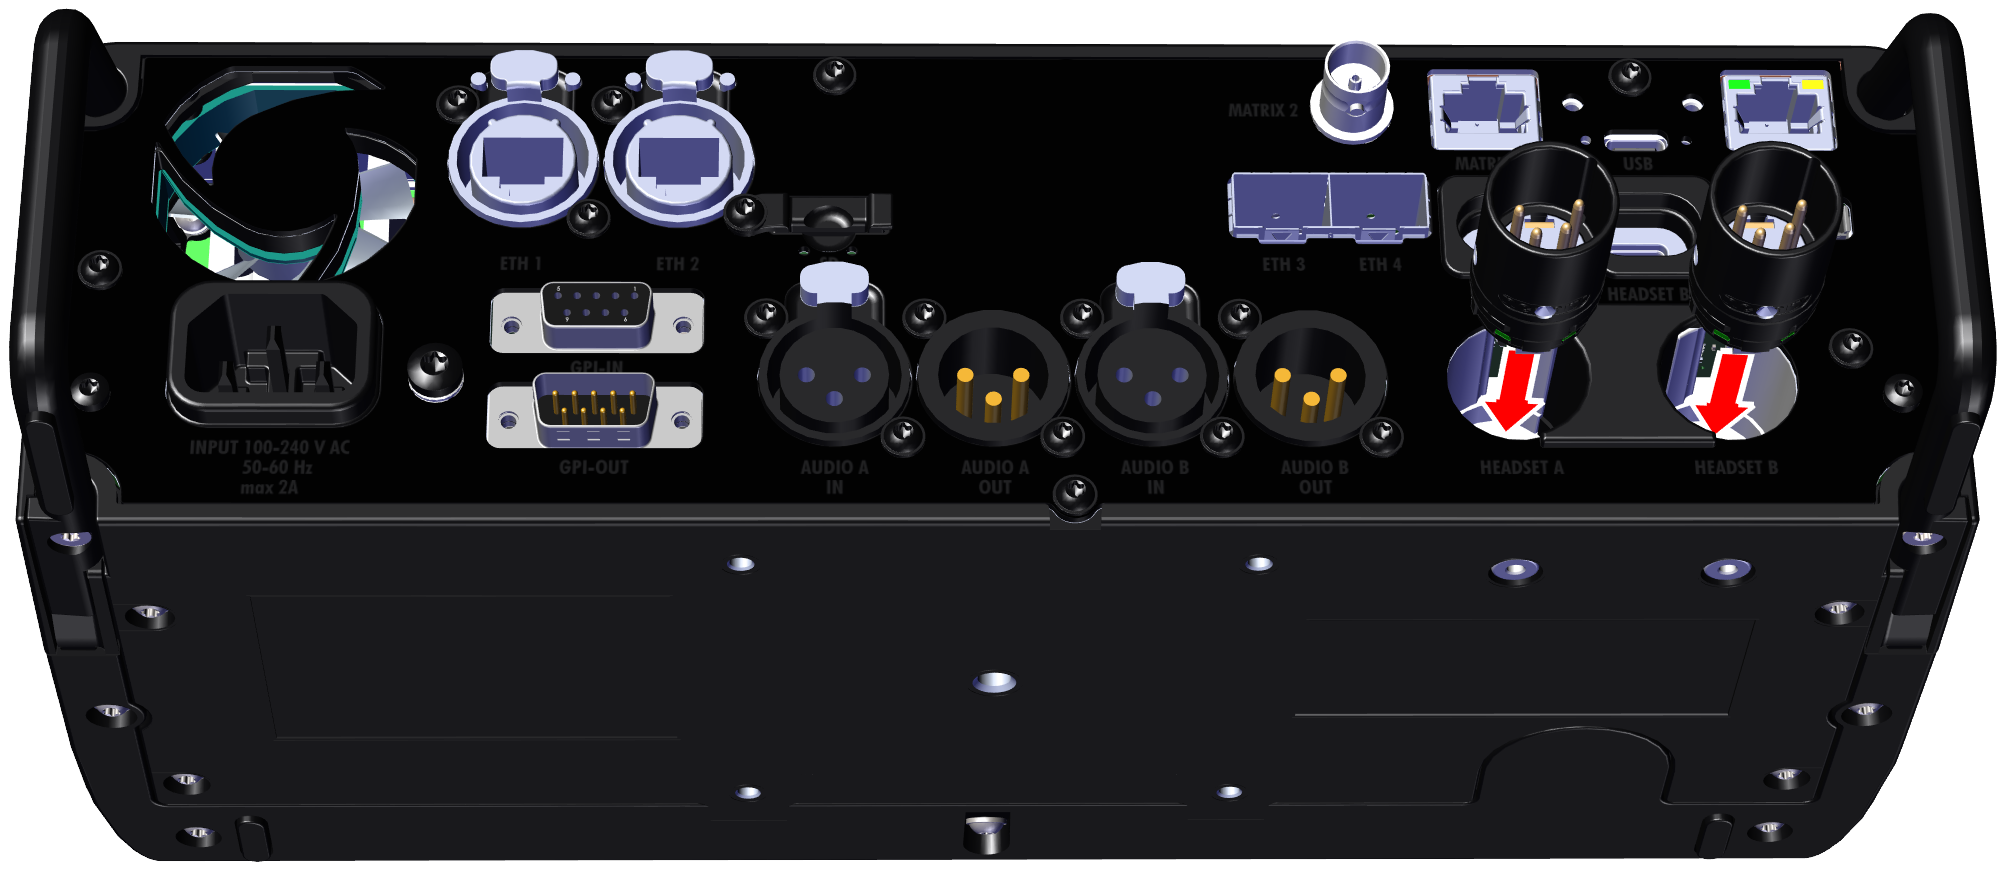
-
Tighten the grub screw with a torque of 0.15 Nm.