This chapter describes the installation of WebRTC using the Riedel Software Manager.
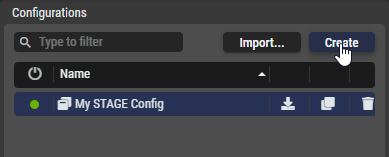
RSM - Configurations View
-
In the Configurations section, click Create.
-
Enter a name for the Server Configuration, for example,
My webRTC Config.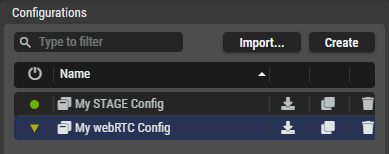
-
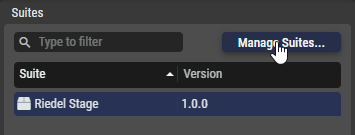
In the Suites section, click on Manage Suites… .
-
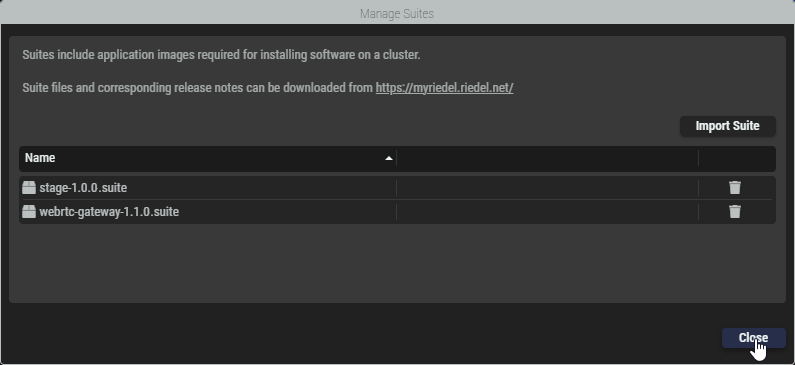
In the Manage Suites dialog, click Import Suite, then find the
*.suitefile on your local computer and upload it to the Riedel Software Manager, e.g. 'webrtc-gateway-1.1.0.suite'.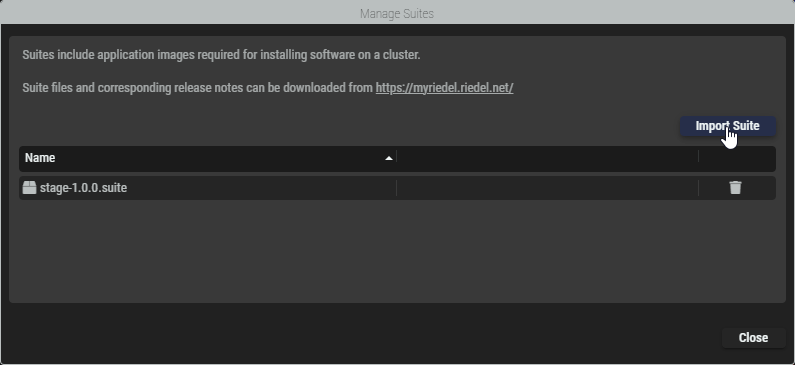
-
When the upload is completed, click Close to return to the Suite Configuration.
-
Click the new Suite to select it and to see available packages that will appear on the right side. Packages with a


-
Enter required package settings.
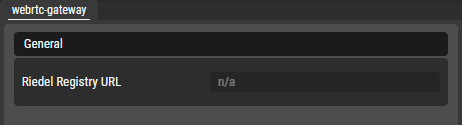
Set the registry UR pointing to your STAGE installation:
https://<IP Address of STAGE>:<WebUI Port of STAGE>/service/riedel-registry/ -
Click Save and Enable.
RSM - Clusters View
-
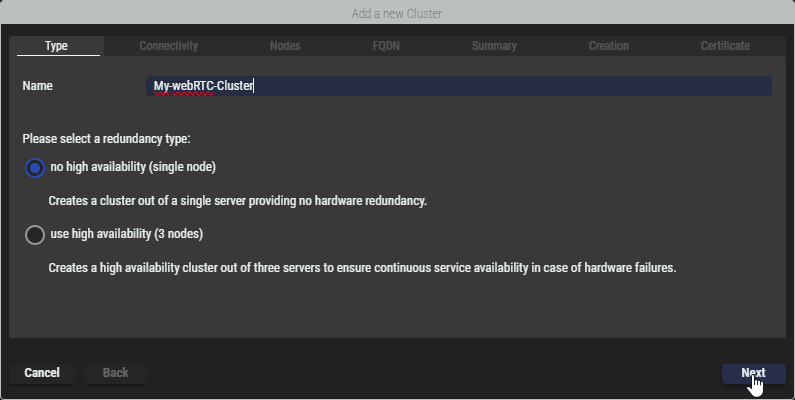
In the Clusters section, click Create….

A wizard will appear which guides through the creation:
Type tab
-
Enter a name (without spaces) for the Cluster Setup, for example,
My-webRTC-Cluster. -
Choose whether you want to use
-
no high availability (single node)
-
high availability (3 nodes)
-
-
Click Next.
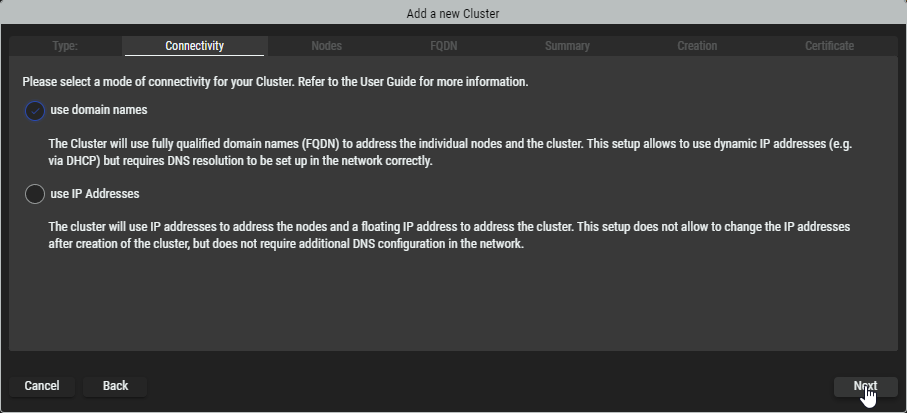
Connectivity tab
-
Select whether you want to address your nodes via domain names (resolved by DNS) or via IP addresses.
-
Click Next.
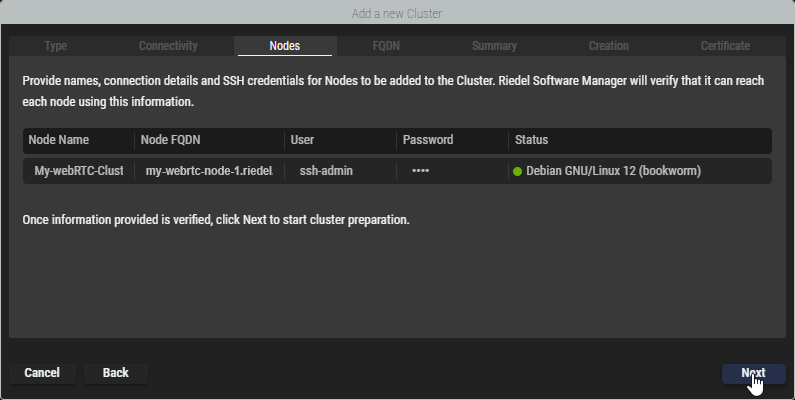
Nodes tab
-
Depending on the selection in the previous Connectivity tab, enter the name(s) or IP address(es) of the node(s).
-
Enter the SSH credentials of the node(s).
After entering the information, the connection is verified and RSM will check if the corresponding node file has been provides before. Information about that is displayed in the status column. -
If


*.nodefile from your computer that corresponds to the operating system on your server, e.g.ues-node-1.0.0-debian-12-bookworm_amd64.node. -
If all SSH connections are established and the corresponding node files are

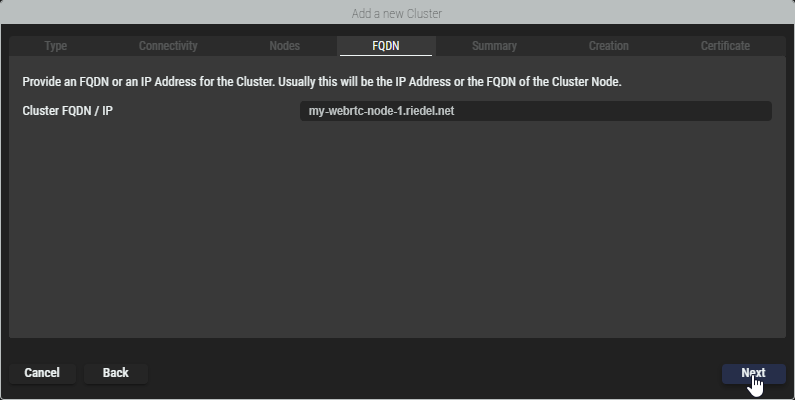
FQDN tab
-
If necessary, edit the domain / IP address of the cluster.
-
Click Next.
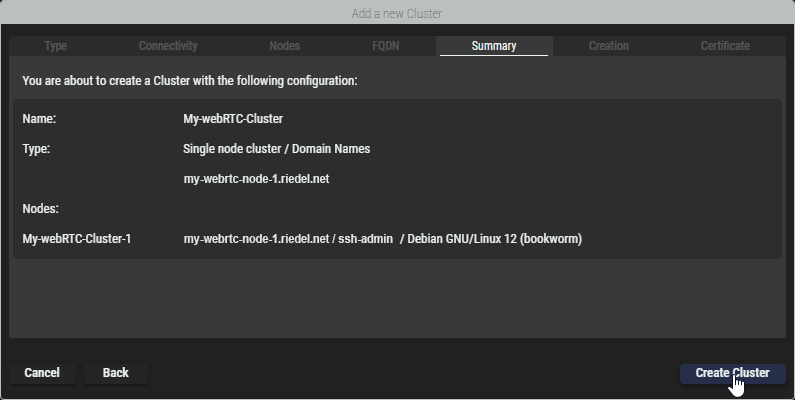
Summary tab
-
Review the provided information. Click on Back to switch to the corresponding tab to correct it.
-
Click Create Cluster to start preparing the servers or virtual machines according the Cluster setup.
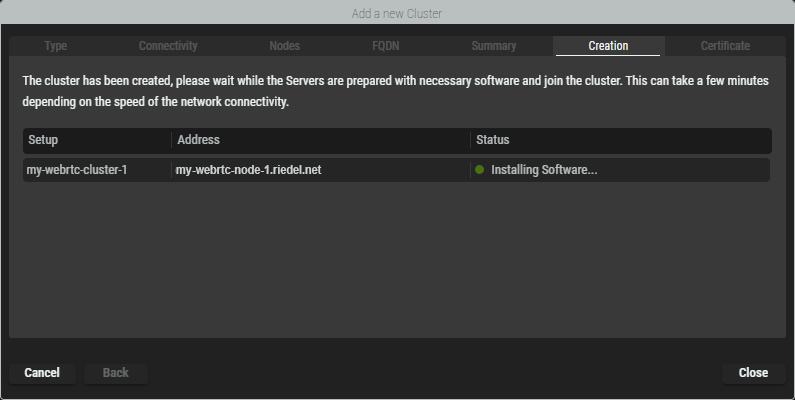
Creation tab
-
Riedel Software Manager is now creating the Cluster Setup and adding the specified servers or virtual machines to it. During this process it will install the required packages on the servers to form the Cluster Setup.
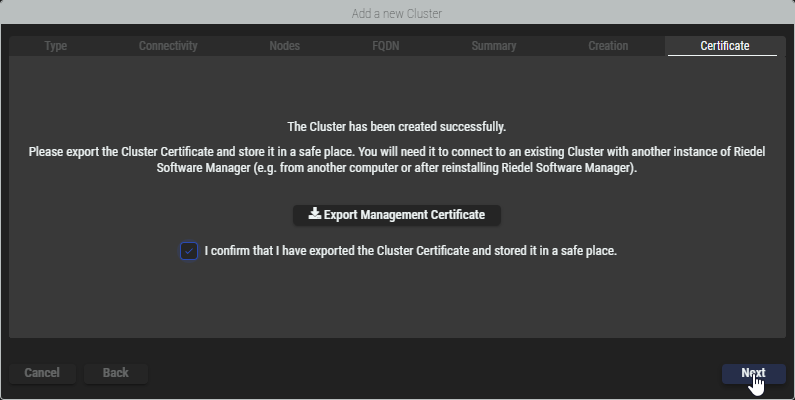
Certificate tab
-
Once the Cluster has been created, click Export Management Certificate to download it. This certificate is the “key” to connect to this Cluster with Riedel Software Manager at a later time or from another computer.
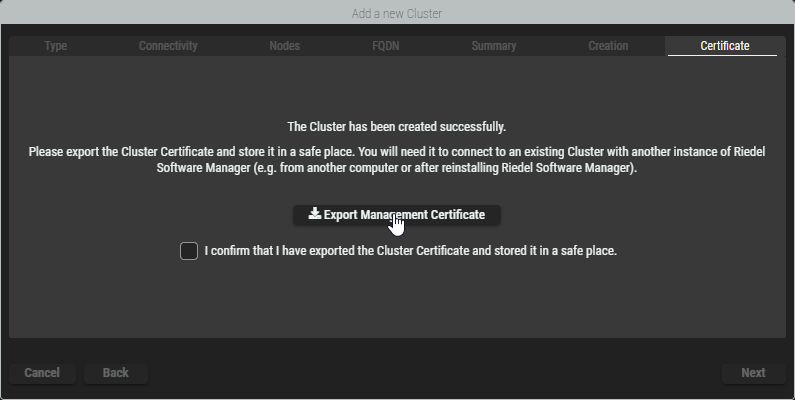
-
After confirming the download of the certificate by ticking the checkbox, click Next.
-
During the installation, a self-signed certificate was generated. This certificate may trigger security warnings in browsers or other applications when connecting to the cluster. To avoid these warnings, you can export the certificate and add it to your browser's trusted certificates, or you can import a certificate provided by your organization for the cluster to use.
Click Close to exit the wizard.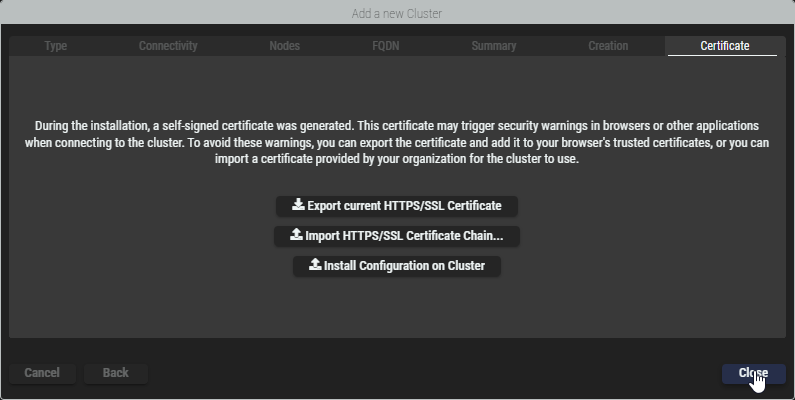
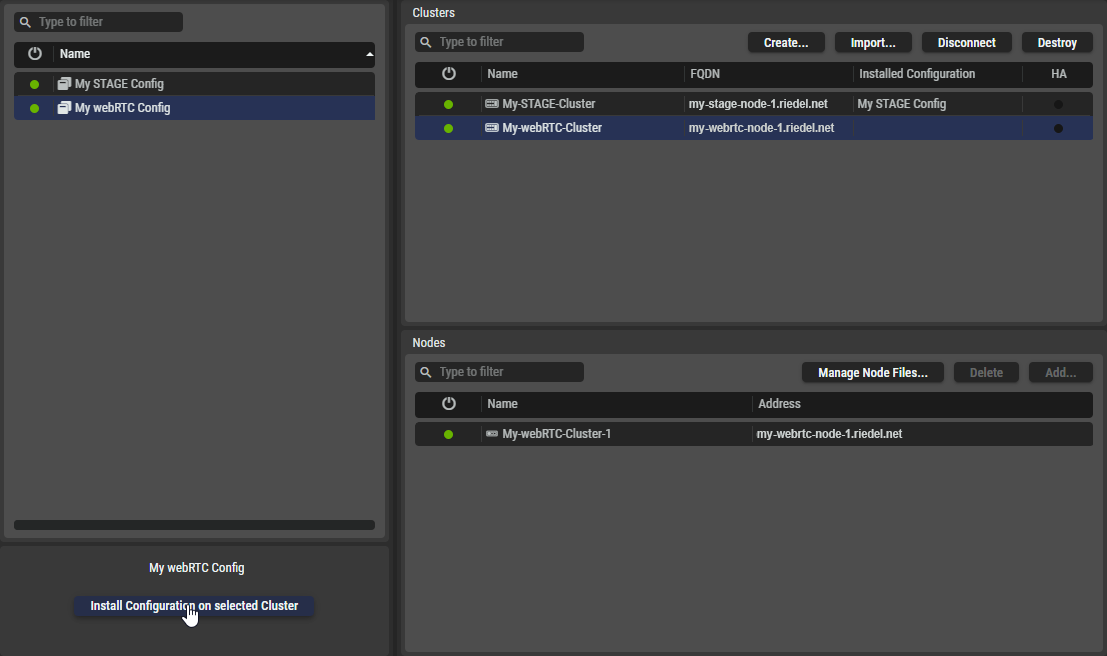
Installing a Server Configuration on a Cluster Setup
-
Select a Server Configuration on the left and a Cluster in the middle and click Install Configuration on selected Cluster at the bottom left.
-
The license agreement of the Application you are installing is shown.
Accept the terms by ticking the checkbox. Click Install to start the installation.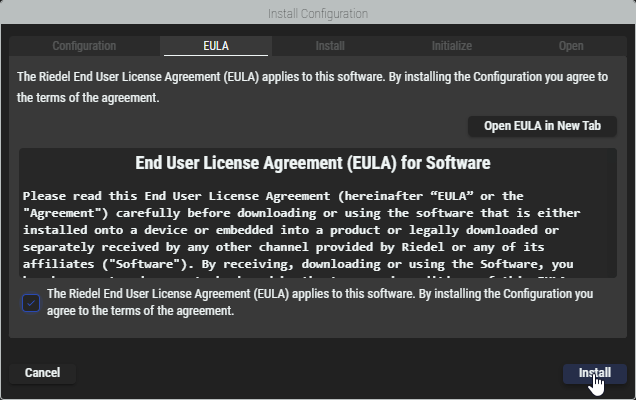
-
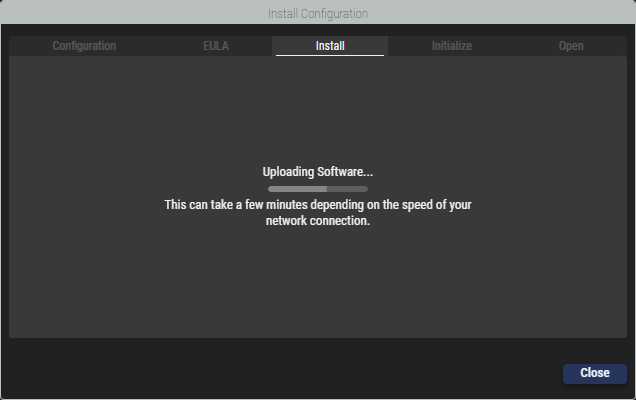
Riedel Software Manager is now installing the selected Configuration on the selected Cluster. This process can take a few minutes depending on the speed of your network connection.
-
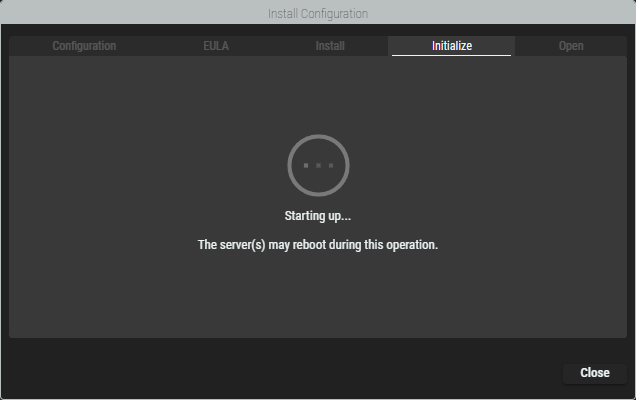
Once the installation has been finished, the servers are started.
-
After all services are started, click Close to exit the wizard.
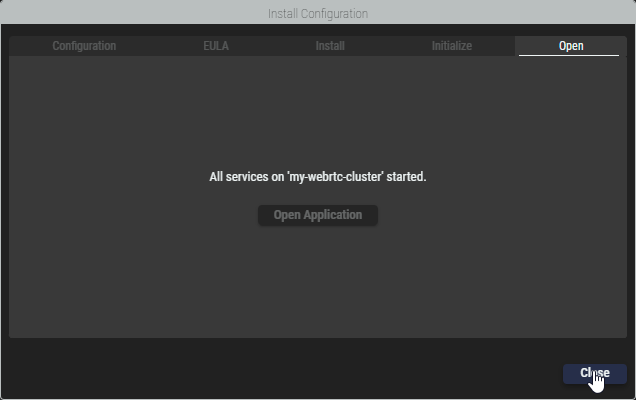
This completes the installation of WebRTC.