AWS will release updates to their user interfaces periodically, and therefore the screenshots used in this guide may look different, but the functionality should be the same.
Setting up the Instances
-
In the AWS console navigate to: EC2 → Instances → Launch an Instance
This will launch the new instance wizard -
Give the instance a suitable name
-
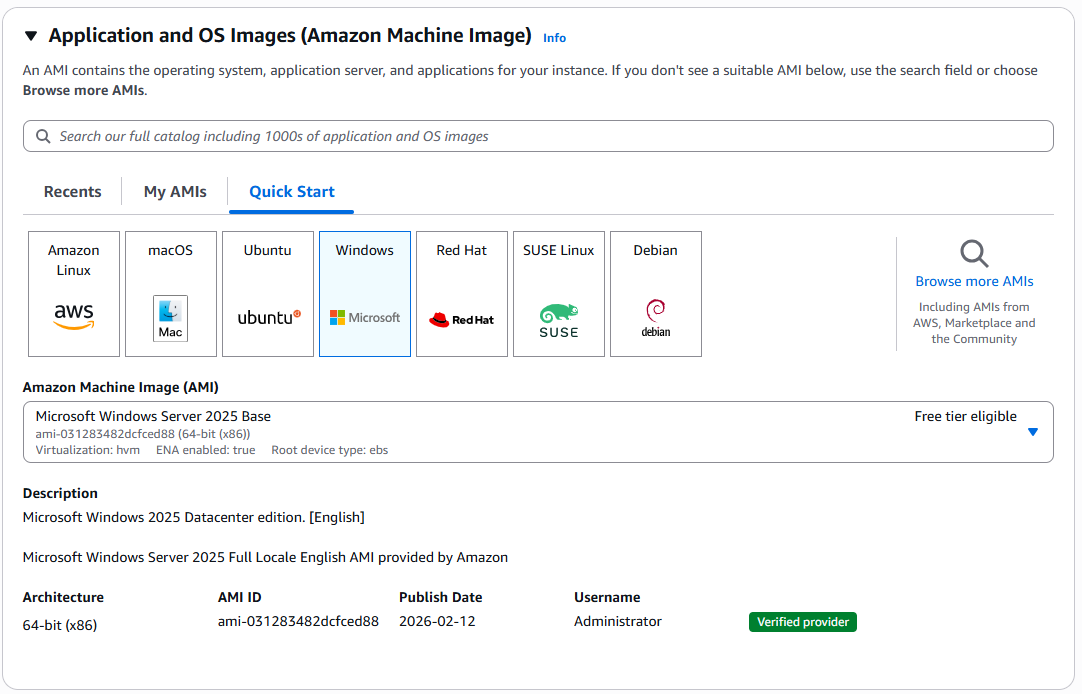
Select the operating system - at the time of writing we recommend Windows 2025 Server Base
-
Select the appropriate instance type based on your requirements.
-
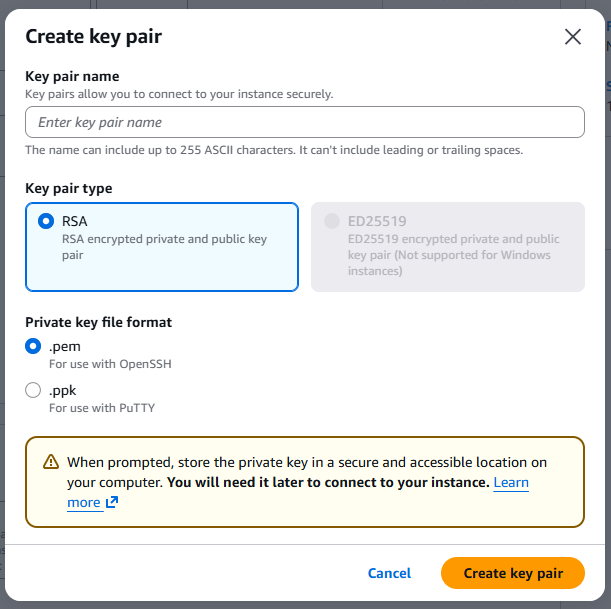
Select or Create a new Key pair for the Windows login, this key pair will be specifically used to decrypt the Windows Administrator account password.
-
You can create a new Key Pair via a pop-up window in the Launch an Instance wizard
-
Give the Key pair a suitable name
-
Use RSA encryption
-
Select the private key file format depending on how you prefer to connect to remote machines, typically within Riedel we use .pem
-
Clicking on Create key Pair will generate a new key pair and download the key file via your browser, store this somewhere safe and do not share with anyone.
-
-
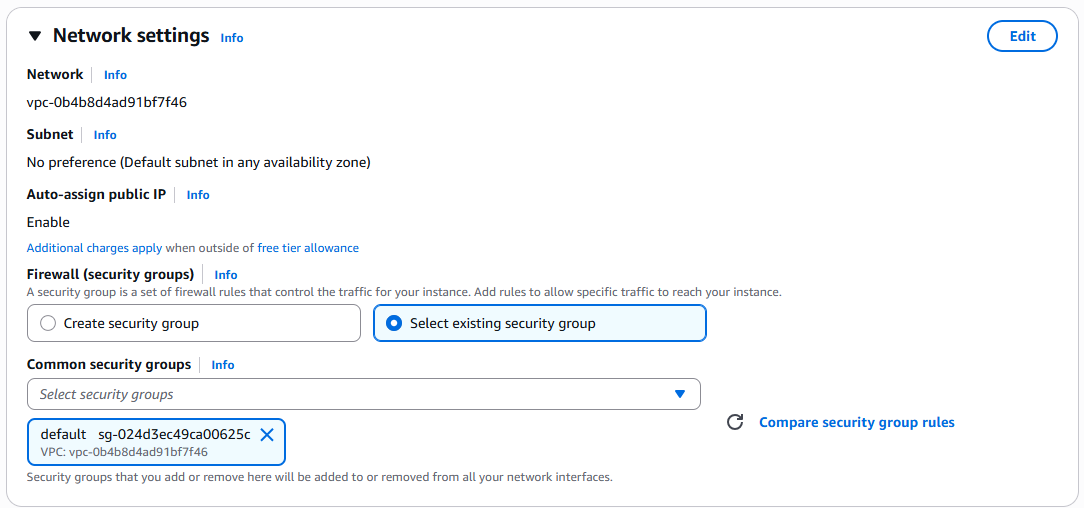
Network settings can either use a suitable Security Group, or at this stage select the default security group and then edit this after the instance has been created.
-
Configure Storage depending on the workflow requirements
Keep in mind that this disk will not only be used for the Operating System, and applications, but this disk will also be used for any files that need to be imported into the SimplyLive system. Therefore, if a high number of large sized files will be imported (clips, graphics, RTDs etc) we recommend a large enough disk to support those workflows. For standard installations we recommend 250GiB of gp3 storage-
gp3 | max 16,000 iops = suitable for small low load systems
-
io2 | max 256,000 iops = suitable for typical deployments requiring a high load
-
-
To finish this step you can create the Instance, which will immediately start the instance.
Security Groups
Riedel recommends adopting the Least-Privilege approach to AWS deployments, as per the AWS well architected framework. This means only necessary permissions and network traffic is allowed and all other traffic is blocked.
As explained in the Networking section of this guide, we typically expect SimplyLive servers and clients to be the same VPC, however access to machines in that VPC should be limited, with the following ports needing to be open for administrative and operational purposes.
|
IP version |
Protocol |
Port range |
Use |
|---|---|---|---|
|
IPv4 |
UDP |
8443 |
NiceDCV |
|
IPv4 |
TCP |
3389 |
RDP |
|
IPv4 |
TCP |
8443 |
NiceDCV |
Here is how to set-up a new security group for the first time.
-
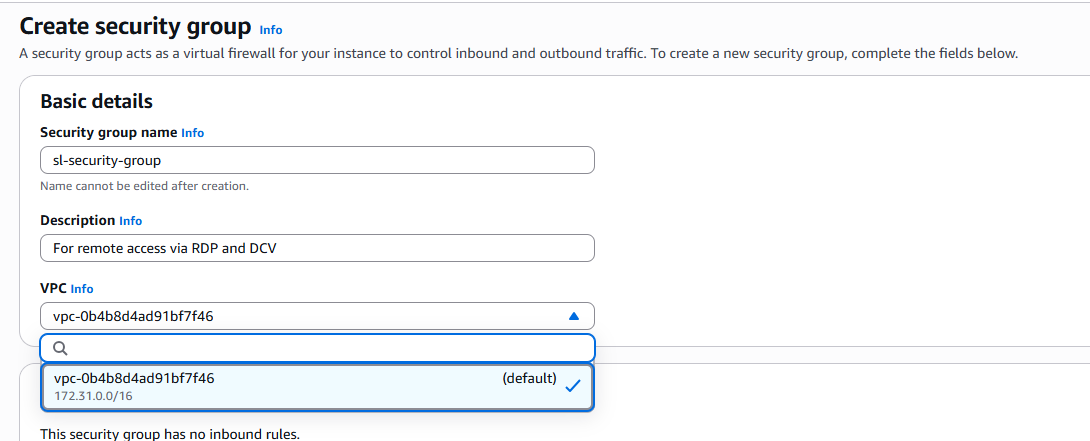
In the AWS Console navigate to EC2 → Security Groups and fine the “Create Security Group” button
-
Give the Security group a name and Description
-
Select the correct VPC from the drop downlist in the wizard:
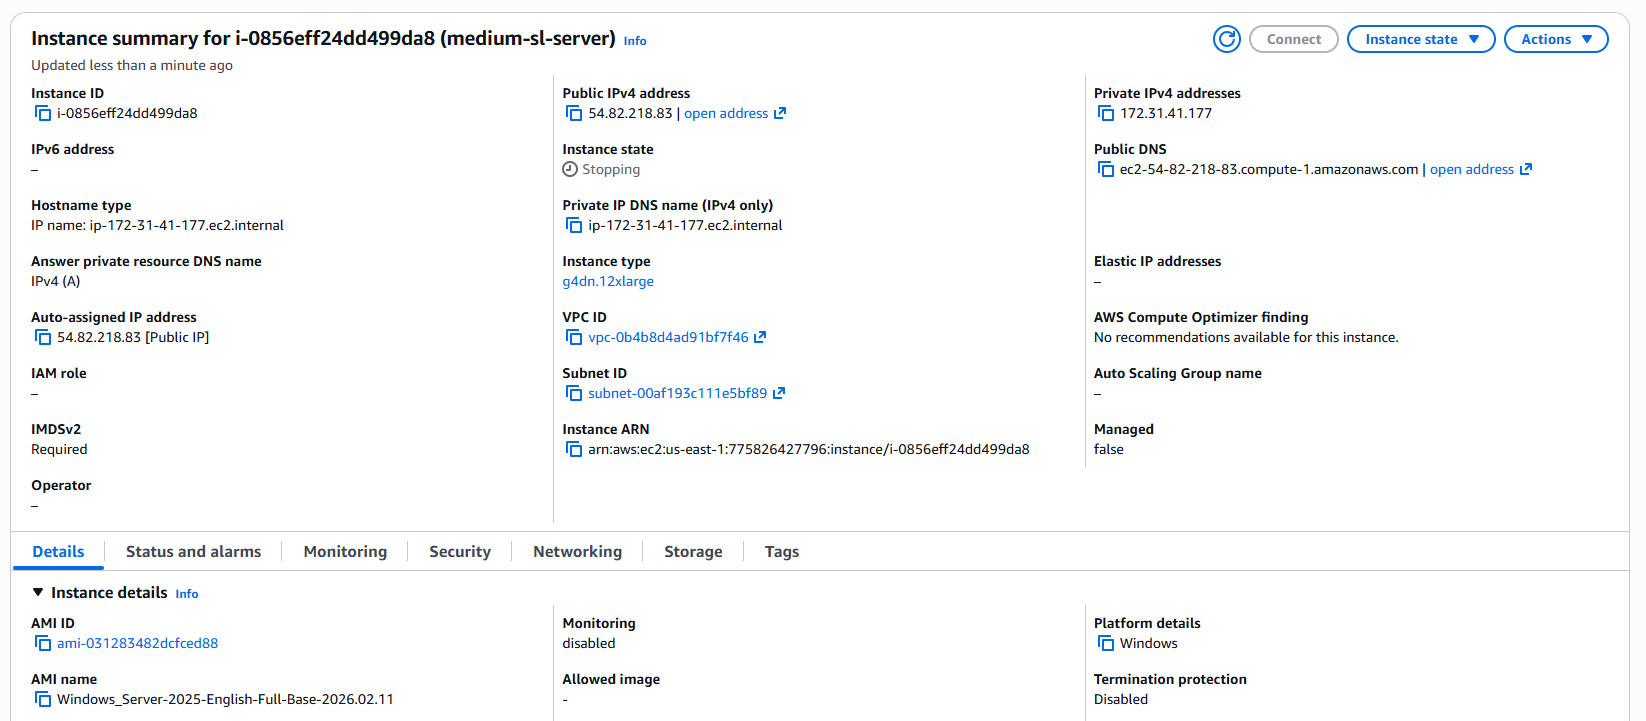
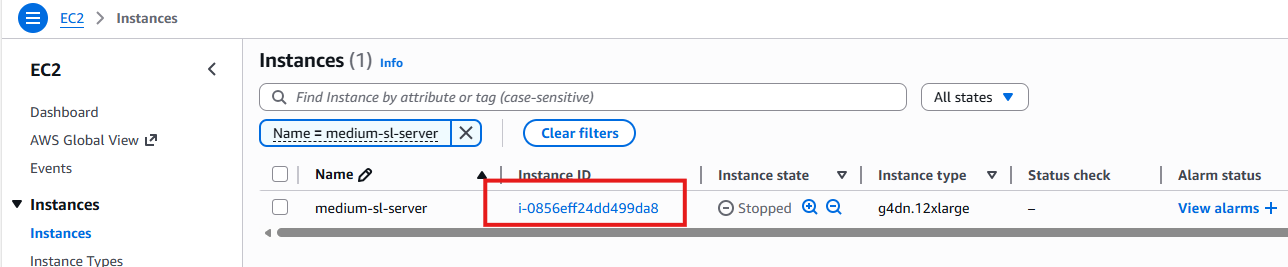
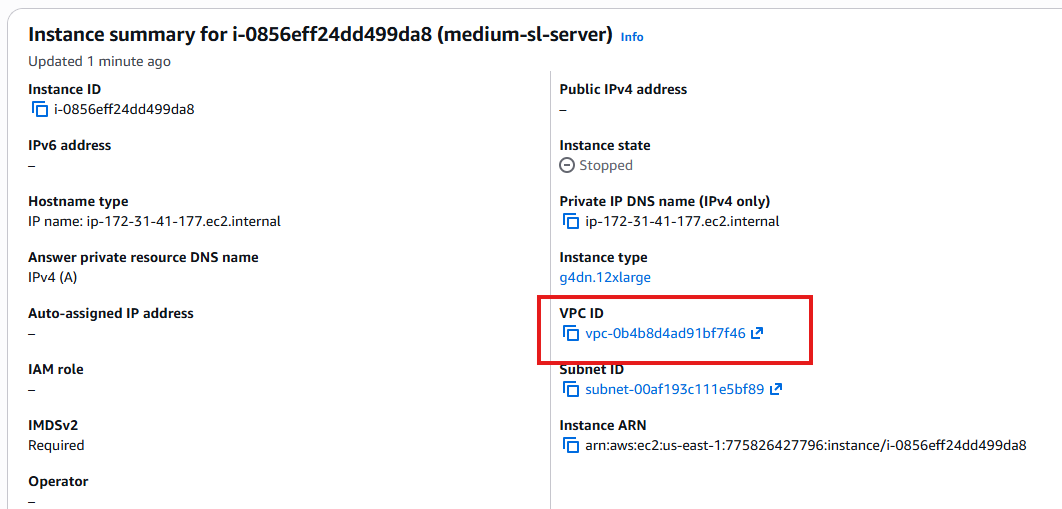
If more than one VPC is in the list, then you can find out which VPC your EC2 servers belong to by looking at the Instance Summary page, found in EC2 → Instances → Select your Instance ID
-
Add the Inbound Rules allowing the required ports, remembering that at minimum SimplyLive will require the ports to be configured for NiceDCV and RDP explained the beginning of this section.

This will restrict access to the instances to any source IP address or range of addresses that you configure.
-
For outbound rules, during initial commissioning we open all IPv4 traffic.

Please consult with your IT team and ask how this should be configured. You may wish to restrict this to RDP, NiceDCV, SRT Ports, NDI Ports and more.
-
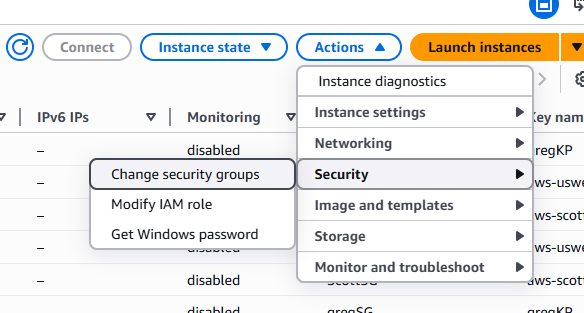
Once you’re happy with the security groups, then can then be applied to the instances, navigate to EC2 → Instances and select the instances you wish to apply the security group to and go to Actions → Security → Change security groups
Static IP with Elastic IP
In AWS, the allocation of IP addresses is dynamic, and while it is possible to connect to an instance using the Public IPv4 which is dynamically allocated from a pool each time the instance is started.
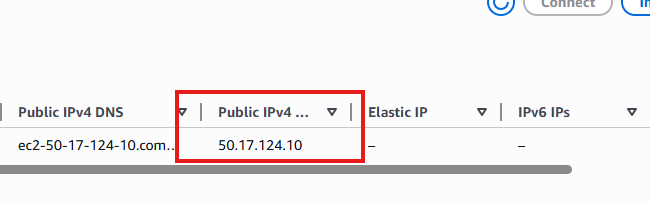
To apply a static IP address, the Elastic IP service must be used.
-
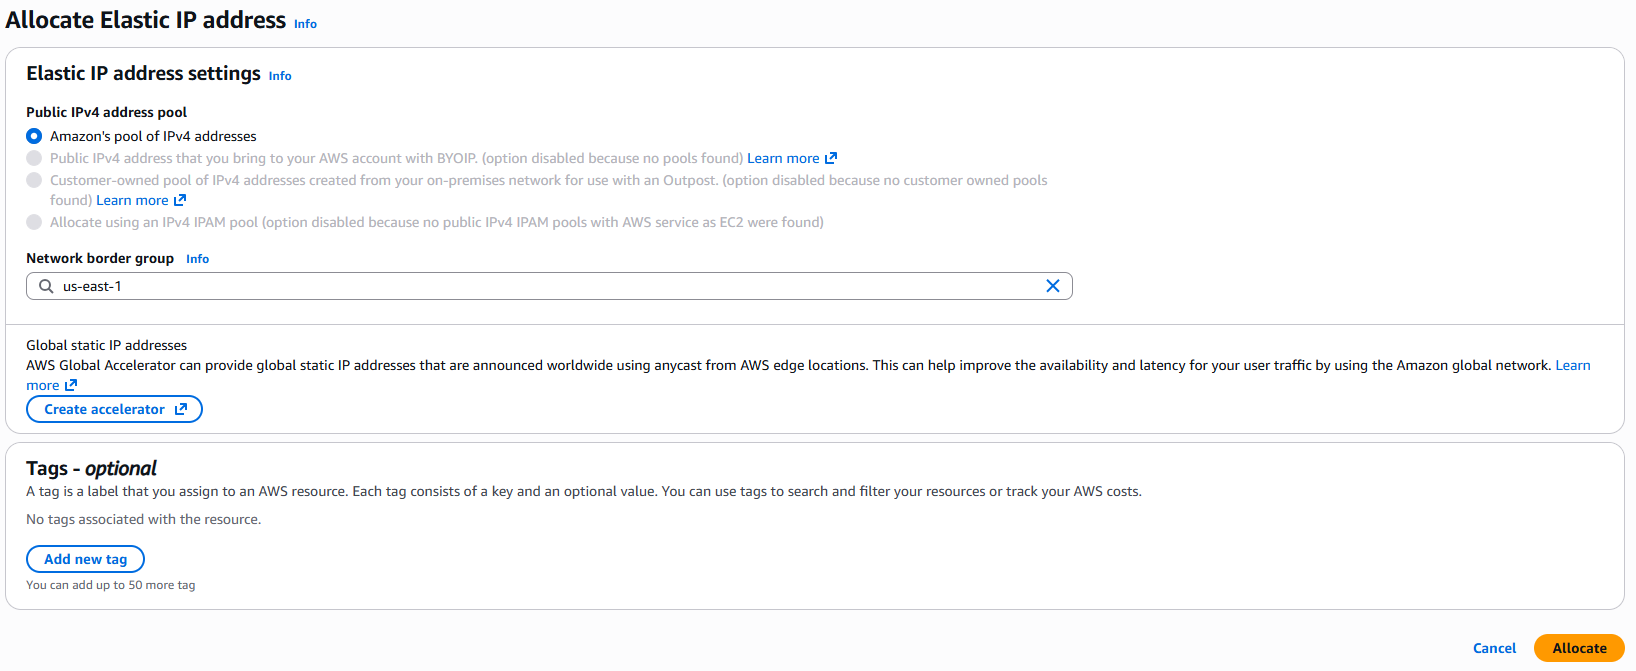
In the AWS console navigate to EC2 → Elastic IP addresses
-
Here you can manage existing Elastic IP addresses or generate a new one using “Allocate Elastic IP address”
-
You may be provided instructions to select from a specific pool, such as a range of addresses provided by your organisation, if those are not available then one will be allocated from Amazons pool of Static IPv4 addresses.
-
Make sure to select the region that your new instance belongs to, this is under the Network border group
-
Add tags depending on your organisations IT policy and press Allocate
-
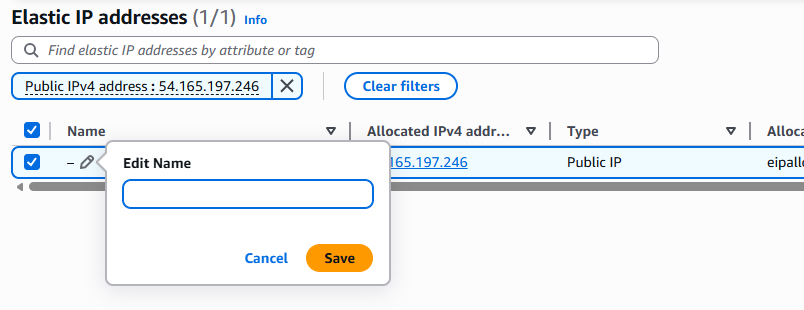
Back in the Elastic IP address page, you’ll be able to give the new address a name.
-
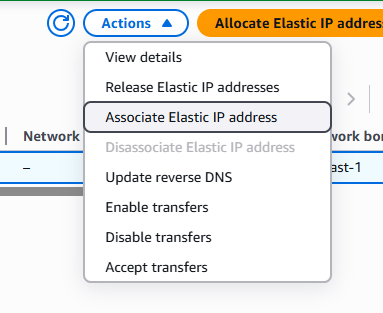
With the address selected you can navigate to Actions → Associate Elastic IP address
-
It is the possible to choose how to associate the IP address, to a specific NIC in the server or to the Instance itself.
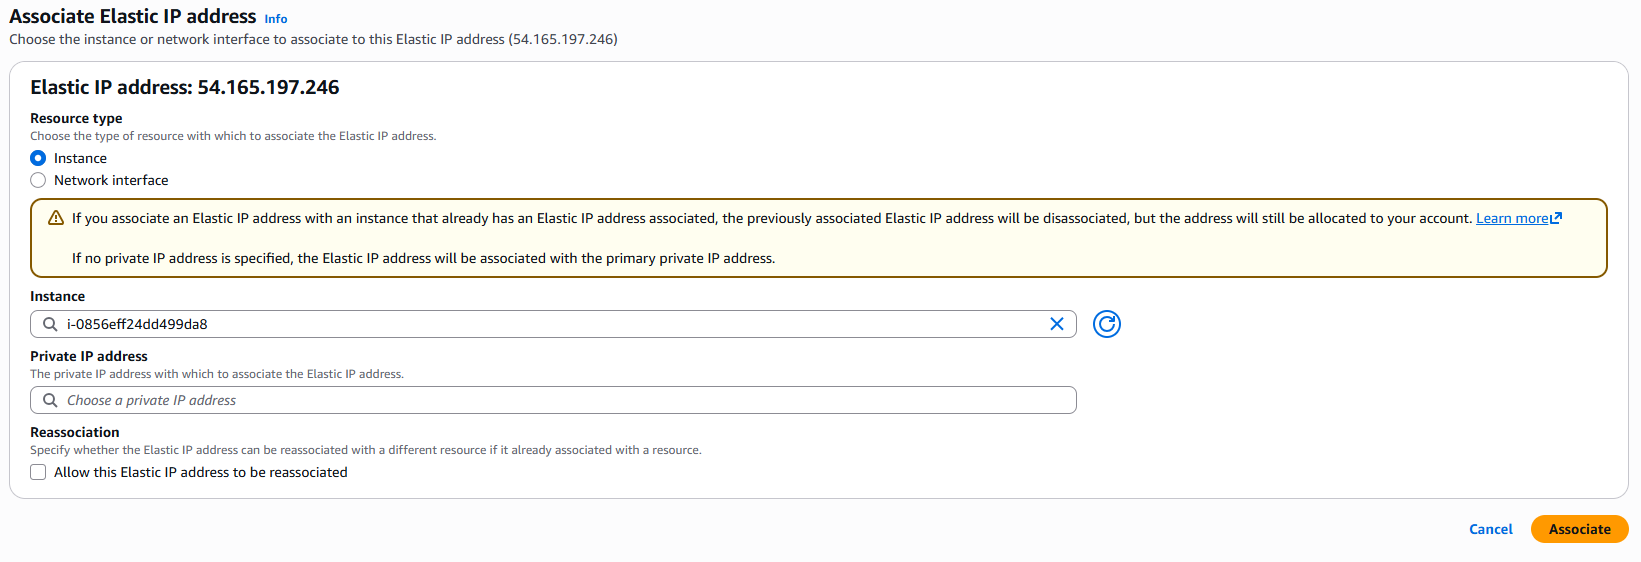
-
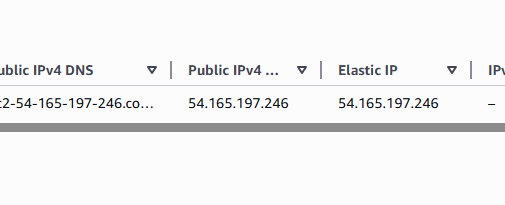
Once allocated, the Elasic IP address can now be used in connection configurations on client devices.
Elastic IP address limits
By default, you will only have 5 Elastic IP addresses available to your account; to increase this quota you’ll need to raise a request to AWS.
Connecting to the Instance via RDP
These steps require the use of the security key and will set-up the connection via RDP to the server, this is a necessary step when connecting to the server for the first time to install the required SimplyLive (and supporting) software.
-
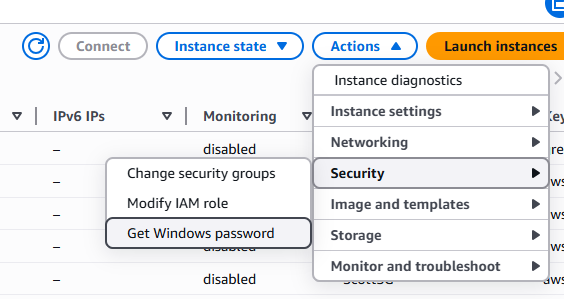
In the AWS console navigate to EC2 → Instances
-
Select your new instance navigate to Actions → Security → Get Windows Password
-
A new page should open where you will need to upload the previously generated Key Pair, meaning either the .pem or .psk file.
-
This will upload your private RSA key and allow you to Decrypt the Administrator password for Windows OS on the new instance.
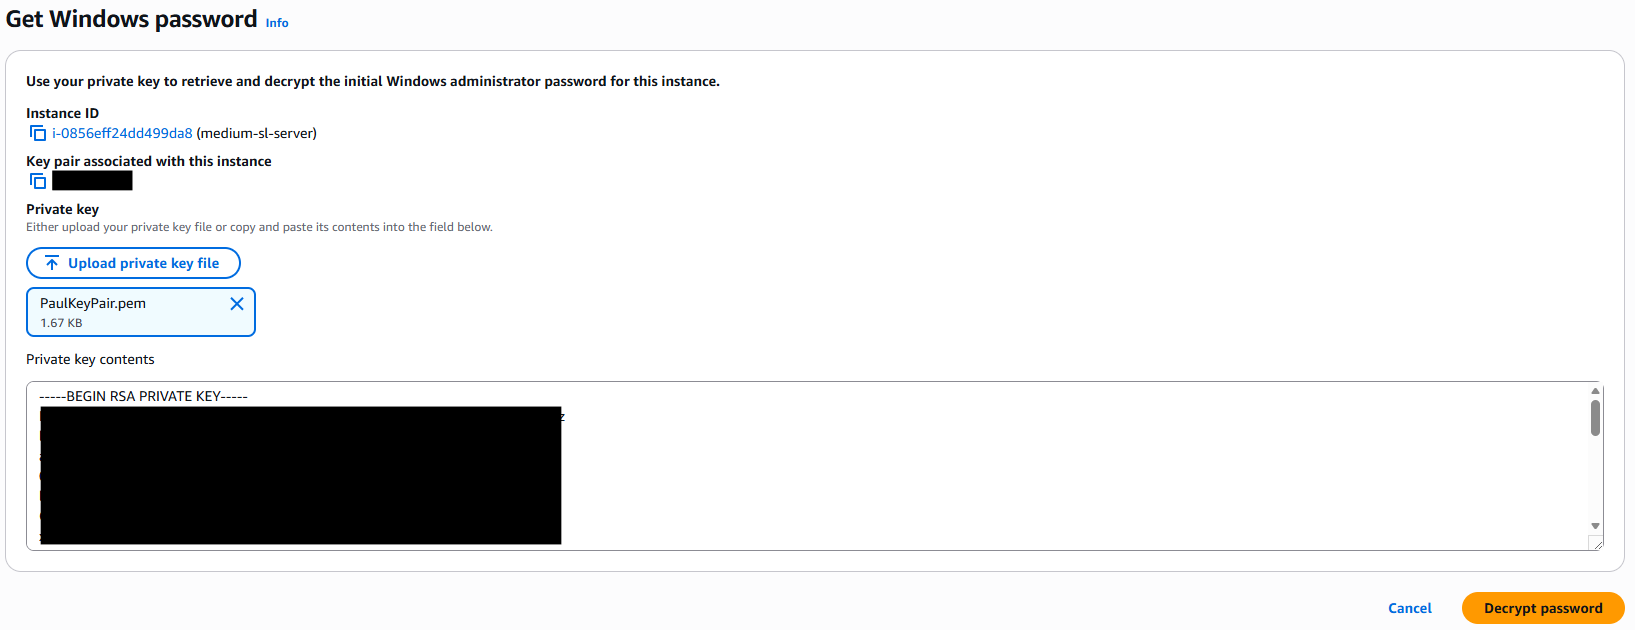
-
The Administrator password will be decrypted, and you can now use this to connect via Remote Desktop.
Change the Password
As will be mentioned in the AWS console, it is highly recommended that you change this password after logging in for the first time.
Attaching Storage volumes
With the instance configured and access to the OS via RDP now possible, the final step of the basic set-up is to attach storage that will be used as Media Storage for the SimplyLive record trains. Carefully consider the maximum duration you will need to store depending on your requirements, consider how far back in time you want to be able to search and how many input channels you will configure, disk performance and of course cost.
The type of storage is detailed in the Storage section above and a more comprehensive list of indicative recording capacity based on format and input channel density is available in General Information.
-
In the AWS console navigate to EC2 → Elastic Block Storage → Volumes
-
Here you can manage existing volumes, or click Create volume
-
This opens a new page where the EBS storage is configured
-
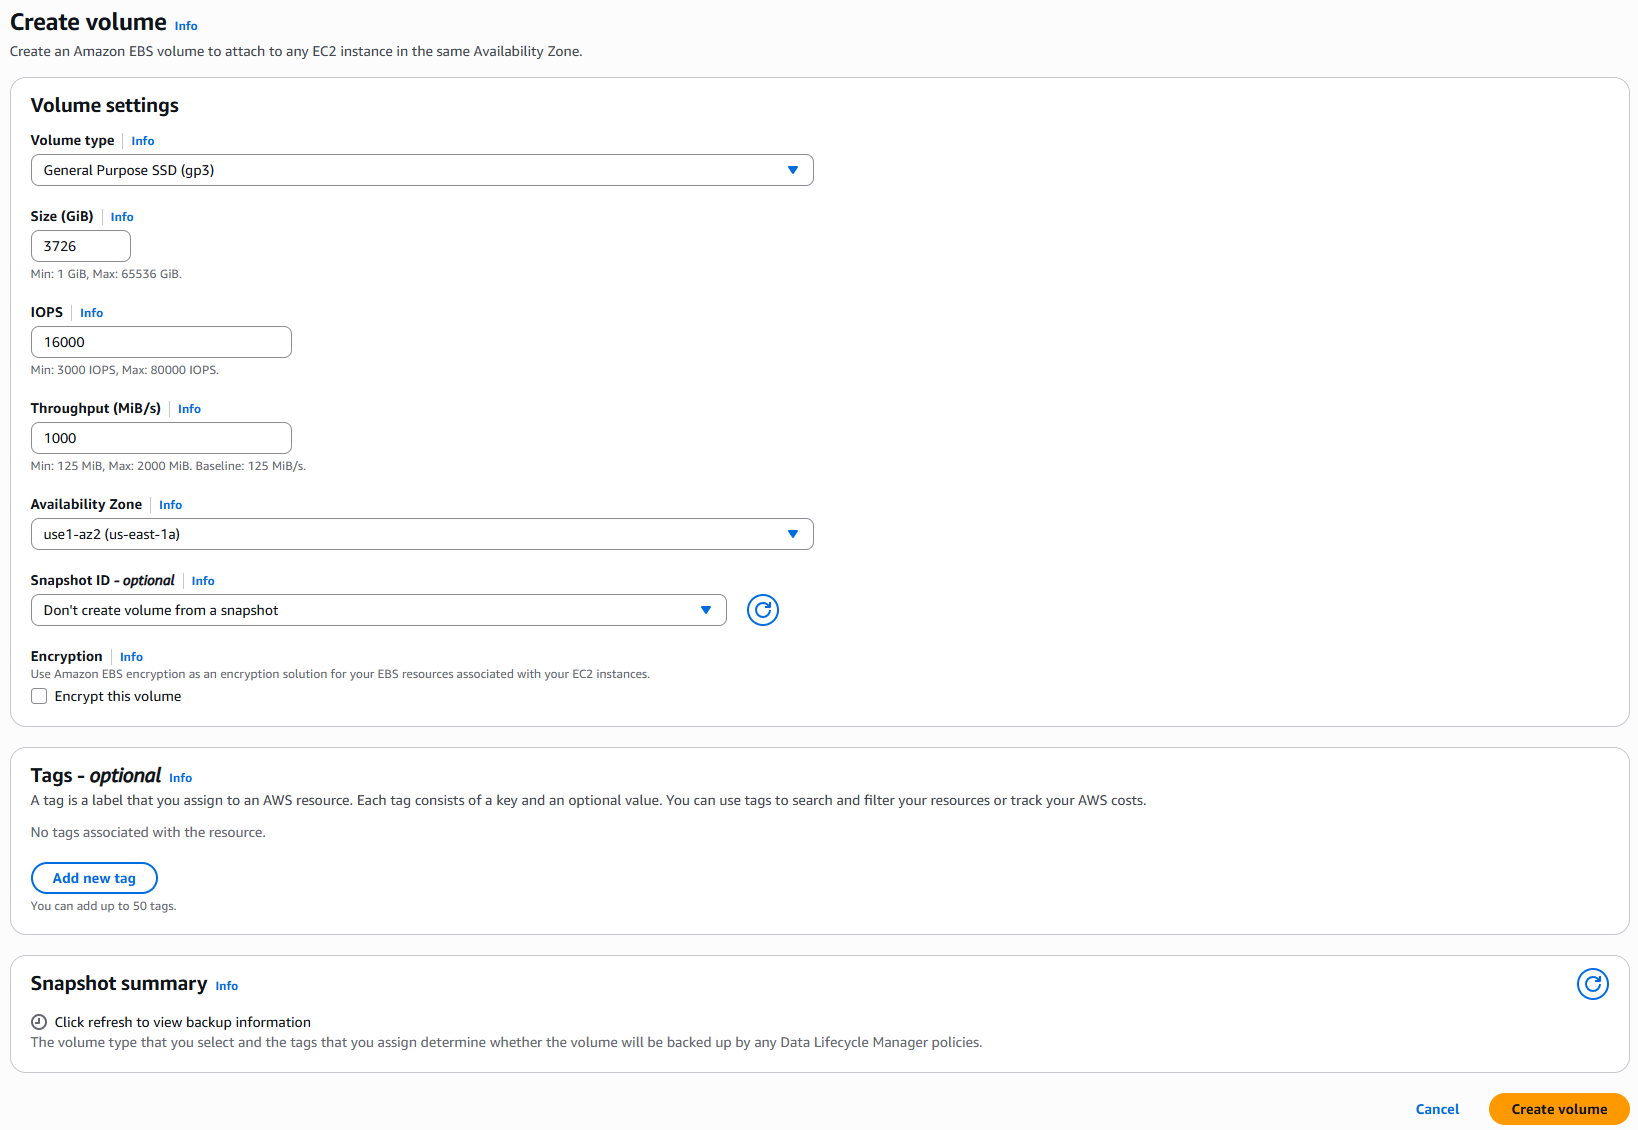
Volume type, as explained in the storage section, we suggest at minimum using General Purpose SSD (gp3)
-
Size is configured in Gigabytes; consider that in the smallest Riedel COTS hardware we offer a single 4TB drive. Therefore, we would recommend configuring at least one 4TB volume.
4TiB = 3725.29 GiB - with AWS only allowing integers, therefore 3726 GiB -
IOPS should be set to at least 16000
-
Throughput should be at least 1000 MiB/s
-
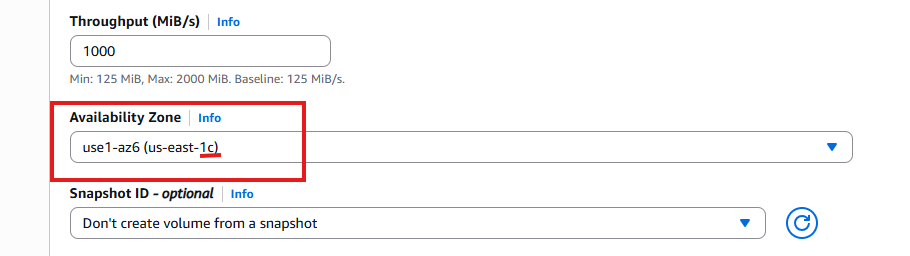
Make sure to match the Availability Zone precisely with the Instance.
Example: an instance located in us-east-1b cannot be associated with a volume in us-east-1c
-
As this will be attached to a new instance, do not create from a Snapshot ID
-
Do not select Encryption
The SimplyLive Backend software will stripe these blocks using our own method, it’s not seen as a valid logical volume by the OS, only SimplyLive. -
The configured volume should look something like this
-
Once finished press Create volume
-
Repeat this step as many times as you need, to configure the virtual RAID volume.
-
It may take a few minutes to finalise creating the volume, once it’s ready it will state Available under the “Volume State” column in the portal.
-
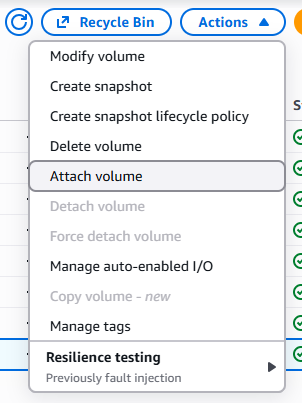
Using right click, or by pressing Actions you can now select Attach volume
-
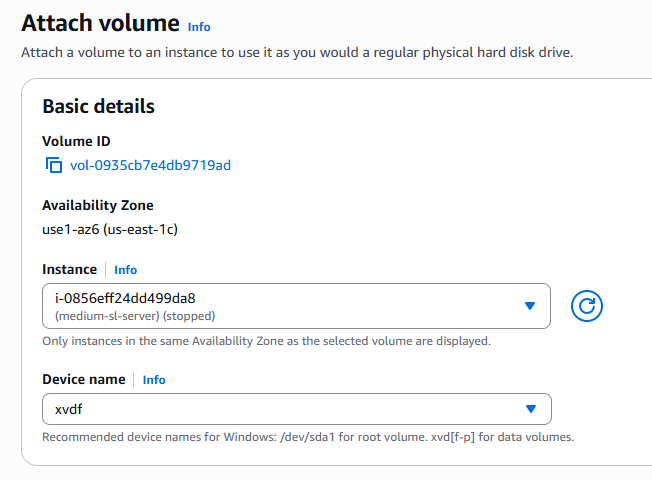
This will open a new page where you can select your instance, and give the Device a name, which will be the device mount in the Windows OS
-
Logging into the Instance now via RDP you will be able to see the Disk in Disk Manager
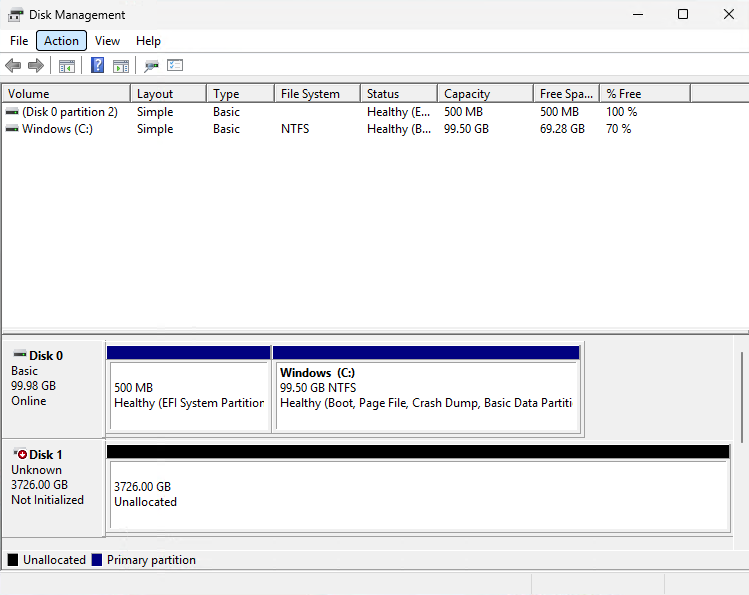
Do not initialise or format the disk
The SimplyLive backend will manage formatting this disk, it should be left in the state shown above
-
Depending on the storage requirements this process can be repeated until enough volumes are associated with the Instance.
Installing drivers and supporting software for SimplyLive servers
As with the COTS hardware servers sold be Riedel, for EC2 instances additional software and drivers need to be installed for 3rd party components and services.
GPU Drivers
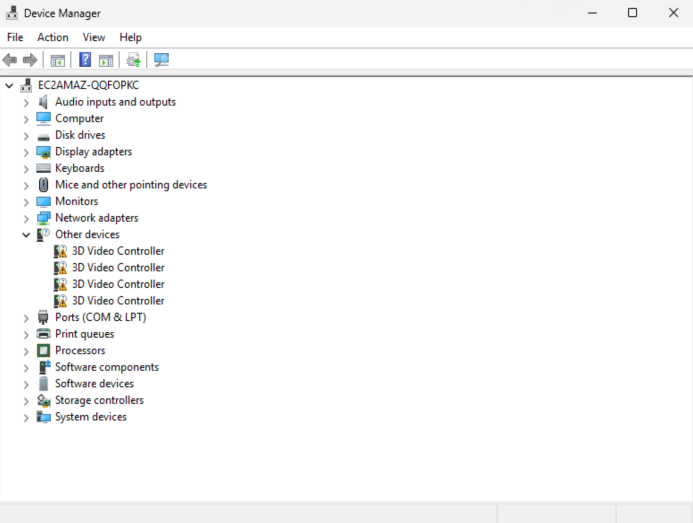
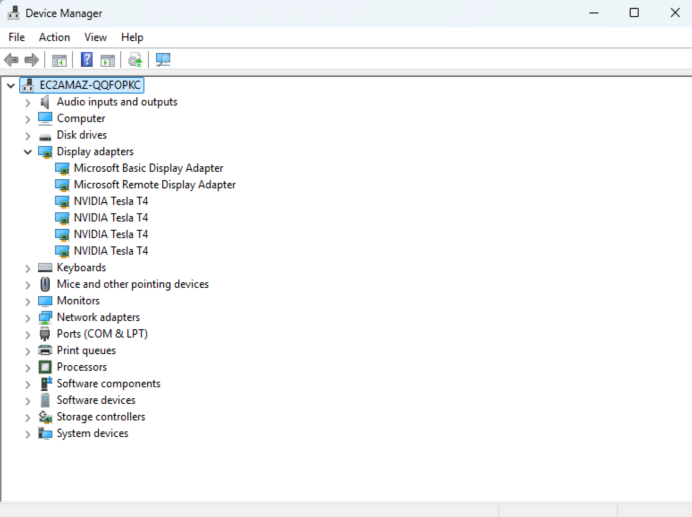
When the instance first starts, you’ll notice that the GPU is not yet identified by the OS. In Device Manager the GPU will be listed under Other Devices as an unknown 3D Video Controller.
To install drivers for the GPU on AWS, do not install the drivers from Nvidia, instead follow the steps below to install the correct drivers for your EC2 instance.
-
Connect to the EC2 instance via RDP
-
Open the web browser and navigate to the correct driver page depending on your instance type:
NVIDIA drivers for your Amazon EC2 instance - Amazon Elastic Compute Cloud -
You’ll need to follow the instructions in the page, for Windows this means using Powershell
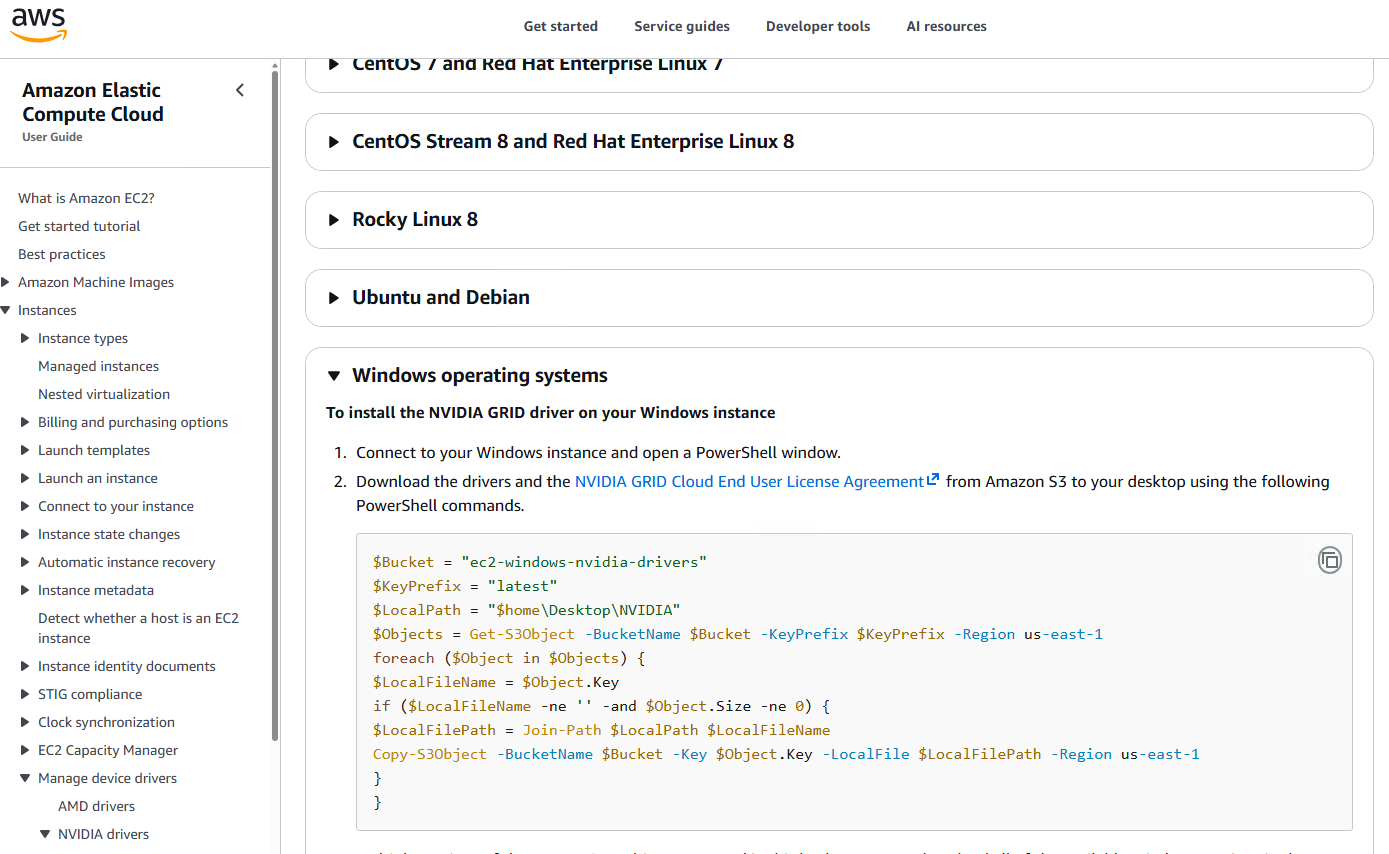
-
Open Windows Powershell or ISE Windows Powershell
-
Paste the code from the AWS download page
-
If you see an error indicating, you cannot reach the S3 bucket containing the drivers this will be because your IAM Role has not been granted permission to this S3 bucket
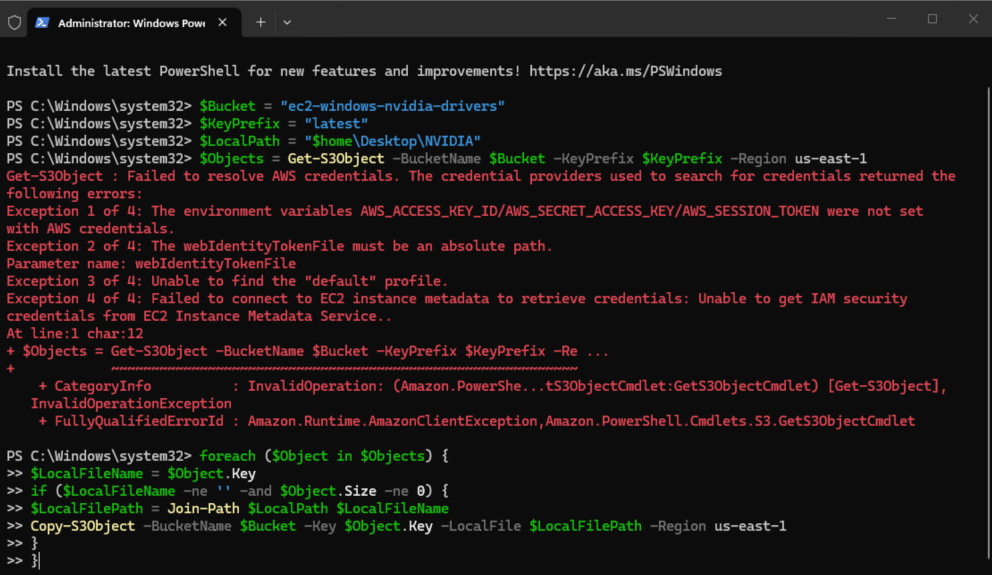
-
If you have access, you’ll need to navigate to IAM → Roles → Create role
-
Select a Trusted Entity for AWS Service and for the Use Case EC2
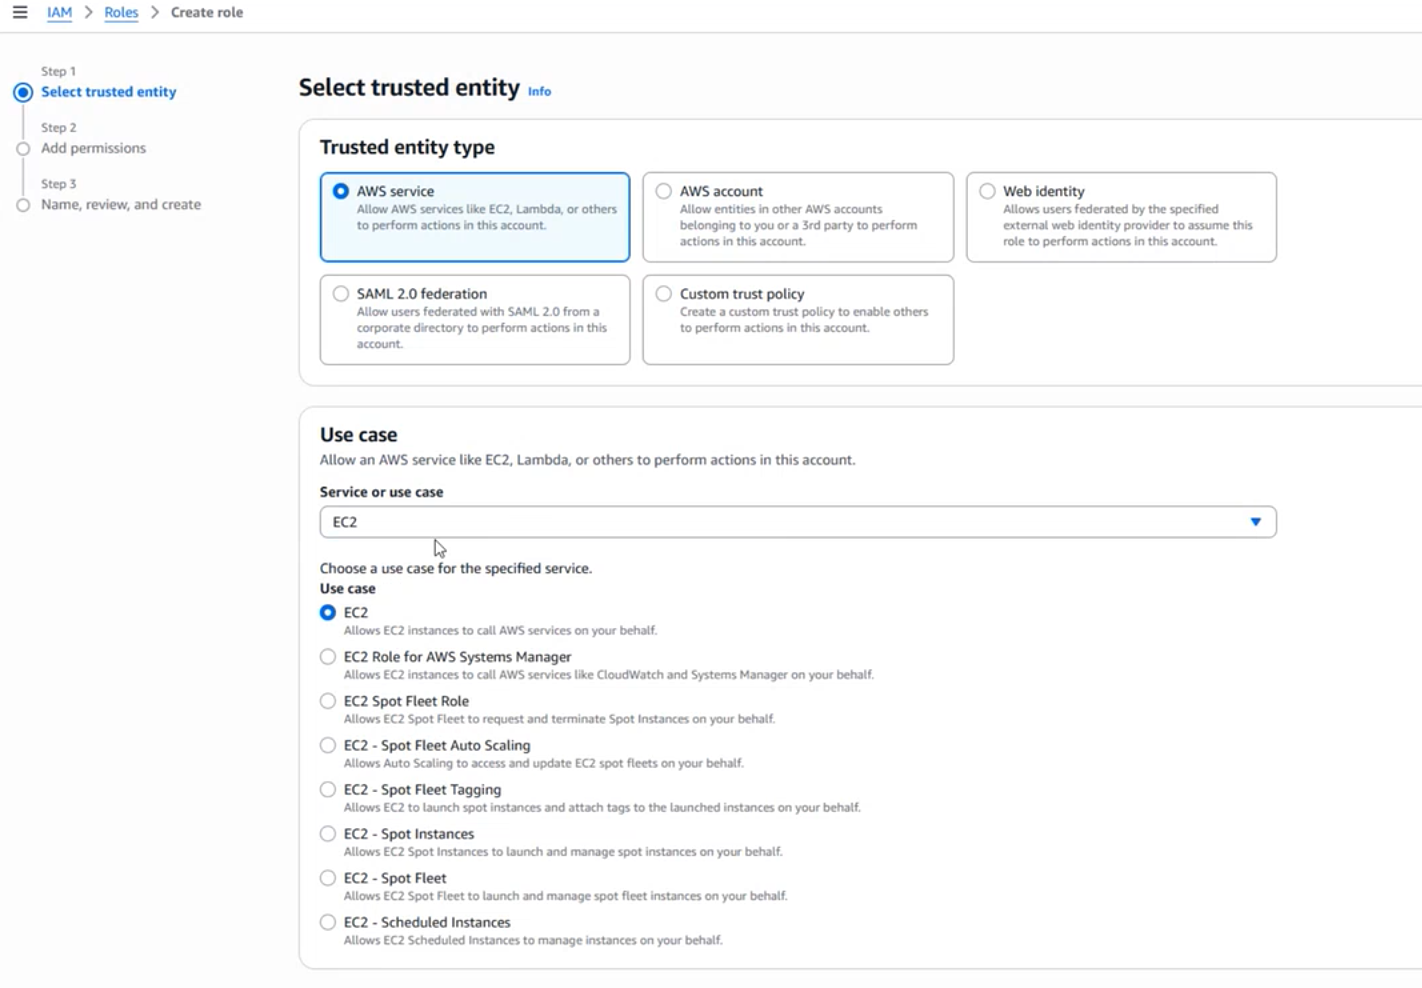
-
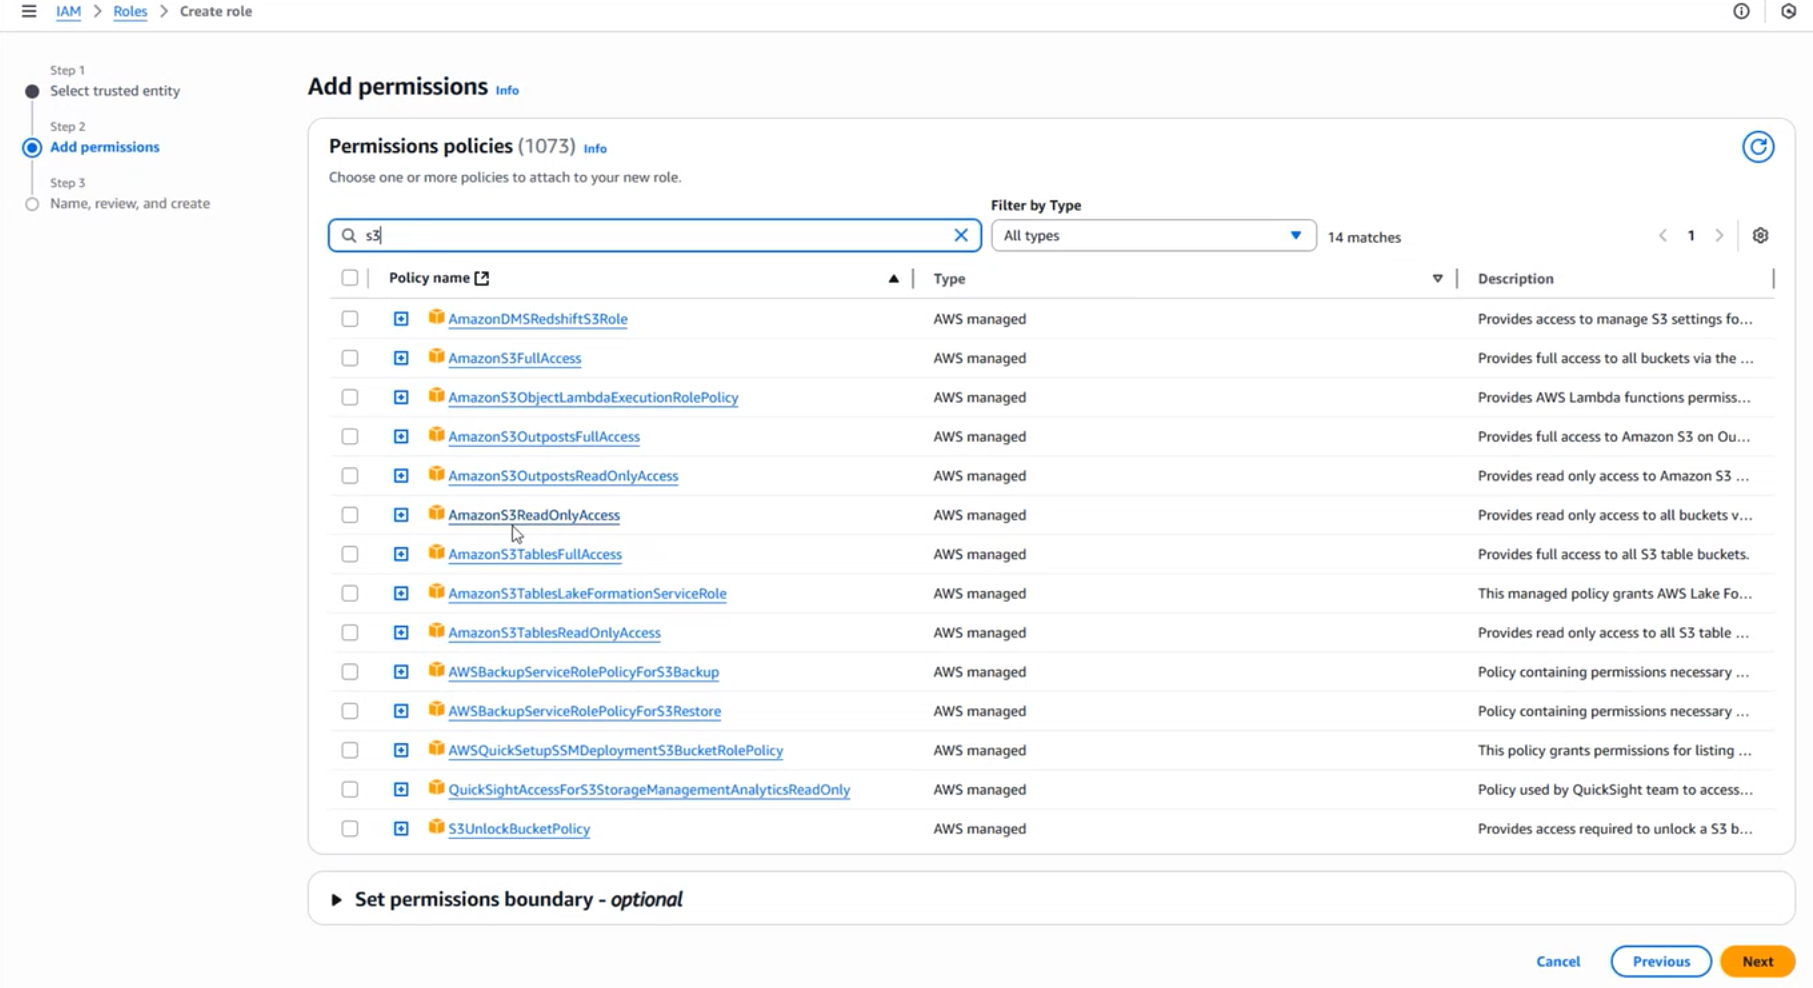
Add permissions, and add a permission policy that allows the EC2 instance to read from S3, so AmazonS3ReadOnlyAccess
-
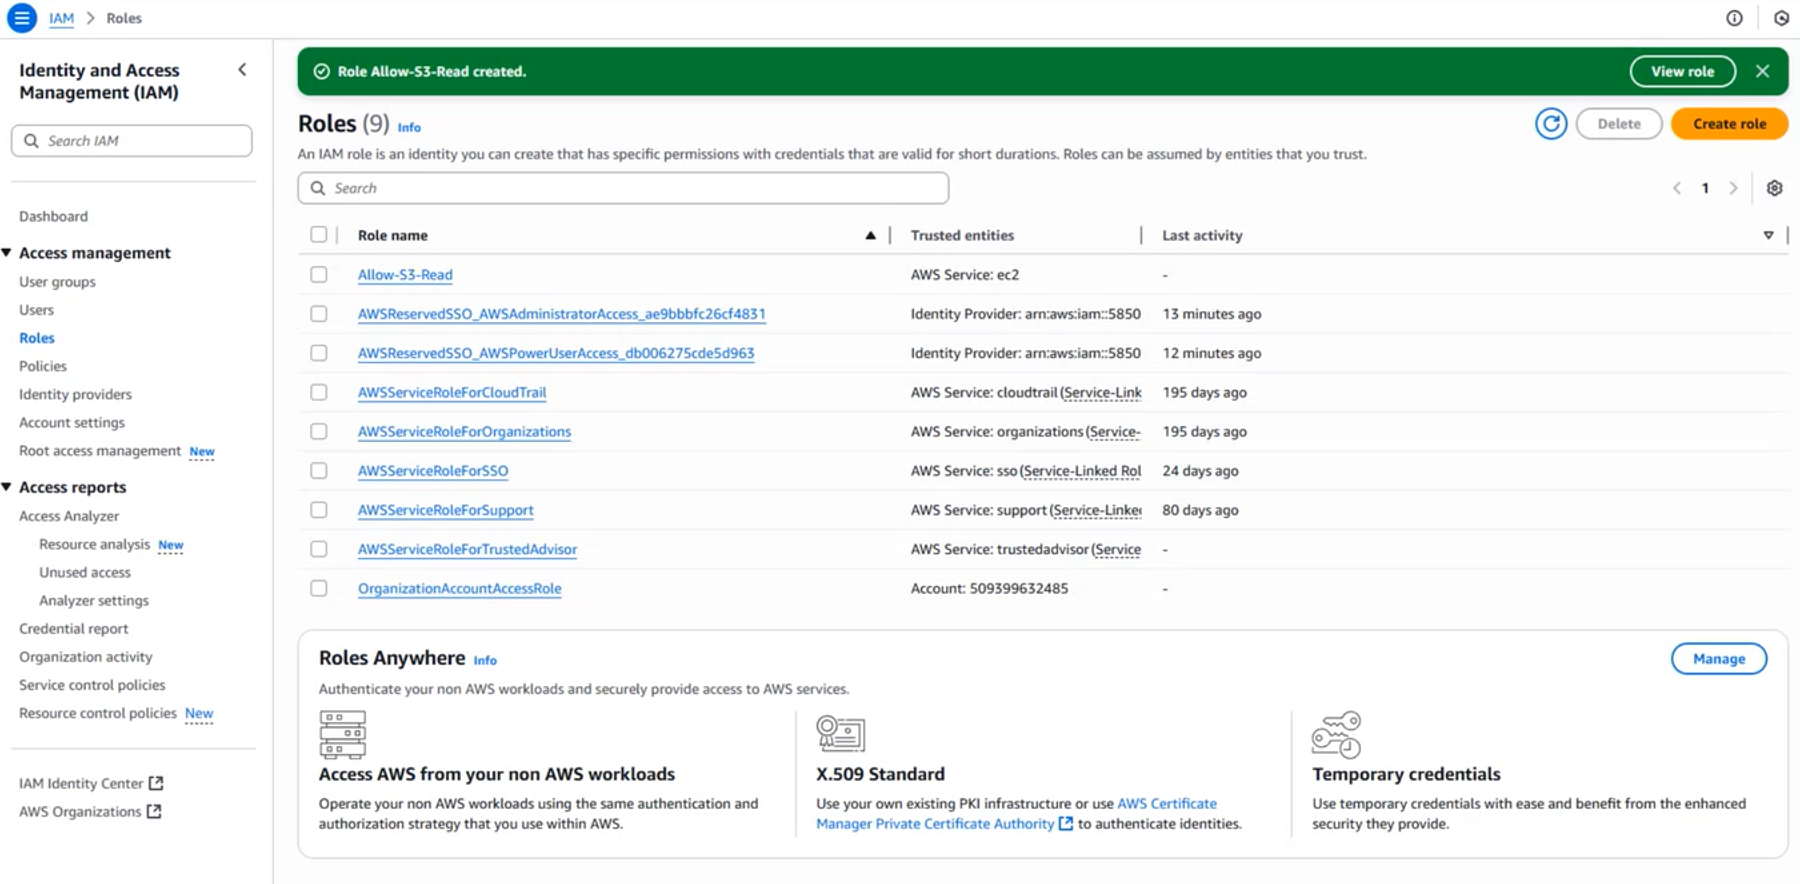
Give the Role a name, such as Allow-S3-Read and then create role
-
You should now see this role available in IAM
-
Navigate to EC2 → Instances; select your EC2 instance under Actions select Modify IAM role
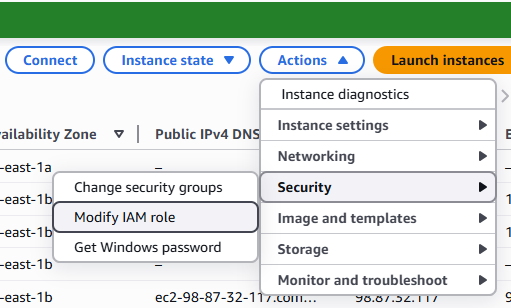
-
Now you can assign these roles to your EC2 instance

-
-
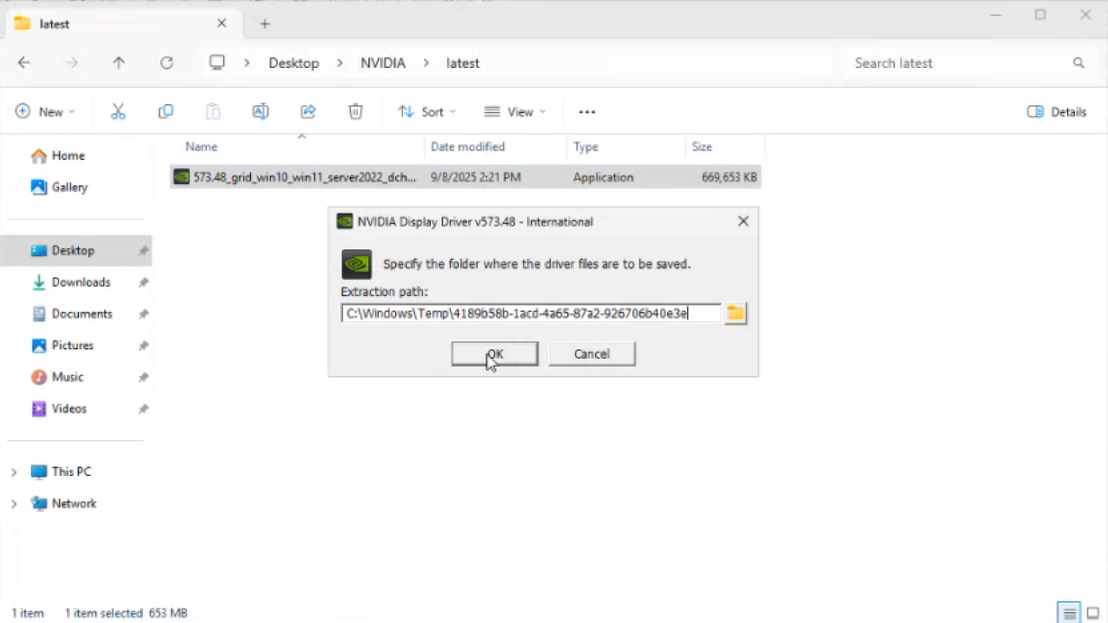
With the correct IAM Role applied, you can run the Powershell script again and you should be able to download the GPU drivers, will create a folder on the Desktop called NVIDIA, in the folder latest you’ll find the latest driver which can now be installed.
-
Once completed you will see the GPU is available in Device Manager
-
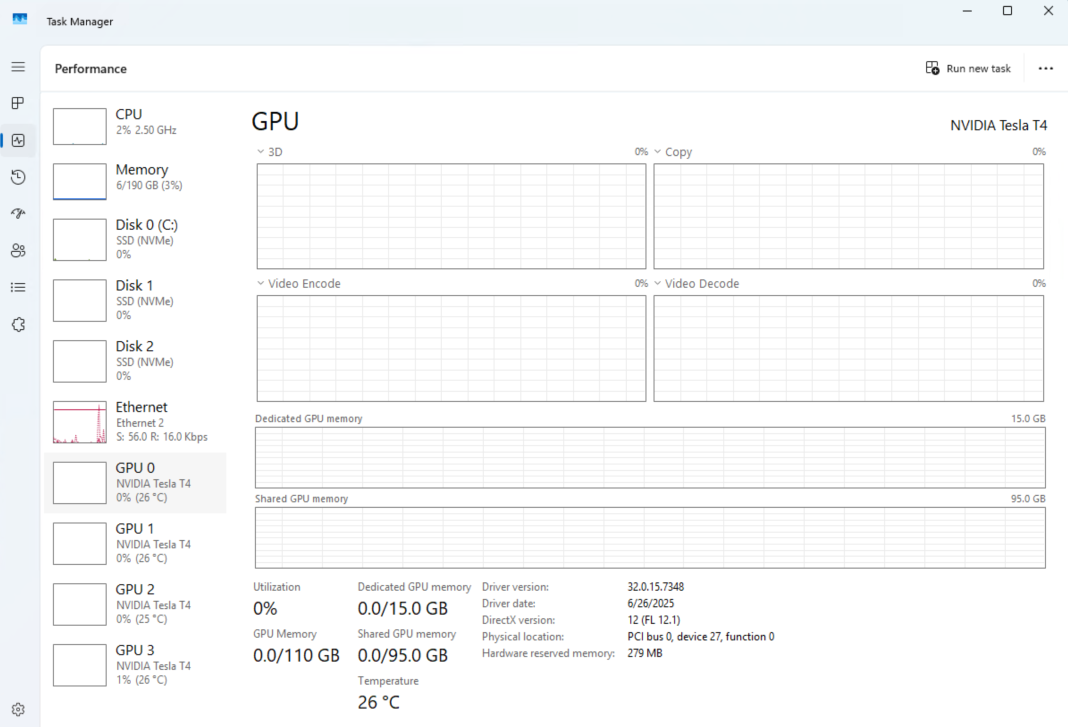
It will also be available in Task Manager → Performance
IAM Roles
Depending on your IT policy, you may not have the necessary permissions to create or list IAM Policies, in which case please send this instruction set to your IT team and request the role be created and granted to your instances.
3rd Party Supporting Software
In order to align the server with the systems we test with, we recommend using the following utility software.
-
Chrome is recommended for most applications using the SimplyLive WebSDK (e.g. WebPortal, SSE, VRD Panel) - Download Chrome
-
Notepad++ is recommended for viewing logs and configuration files - Download Notepad++
Client Instances
Repeat the steps above for the client instances, keep in mind that you will need smaller instance types and consider your workflow requirements when selecting the Instance Type and Storage Volumes.