Configuration
To help get users started, Riedel in collaboration with SKAARHOJ, have created a default configuration based on the functionality available in the ViBox gRPC-based Control API. This default configuration requires the use of Macro’s as explained below.
Customers familiar with SimplyLive and SKAARHOJ are of course free to modify the configurations but do so at their own risk.
While all switcher panel types are supported, we highly recommend using the MasterKey48 panel with SimplyLive.
Make sure the correct project file is running in the Reactor software and the correct Macros have been loaded in the ViBox software.
Files are available in a compressed folder on the page SL_ SimplyLive & SKAARHOJ Setup - Riedel Online Help Center - Confluence
Operation
PGM-PRV
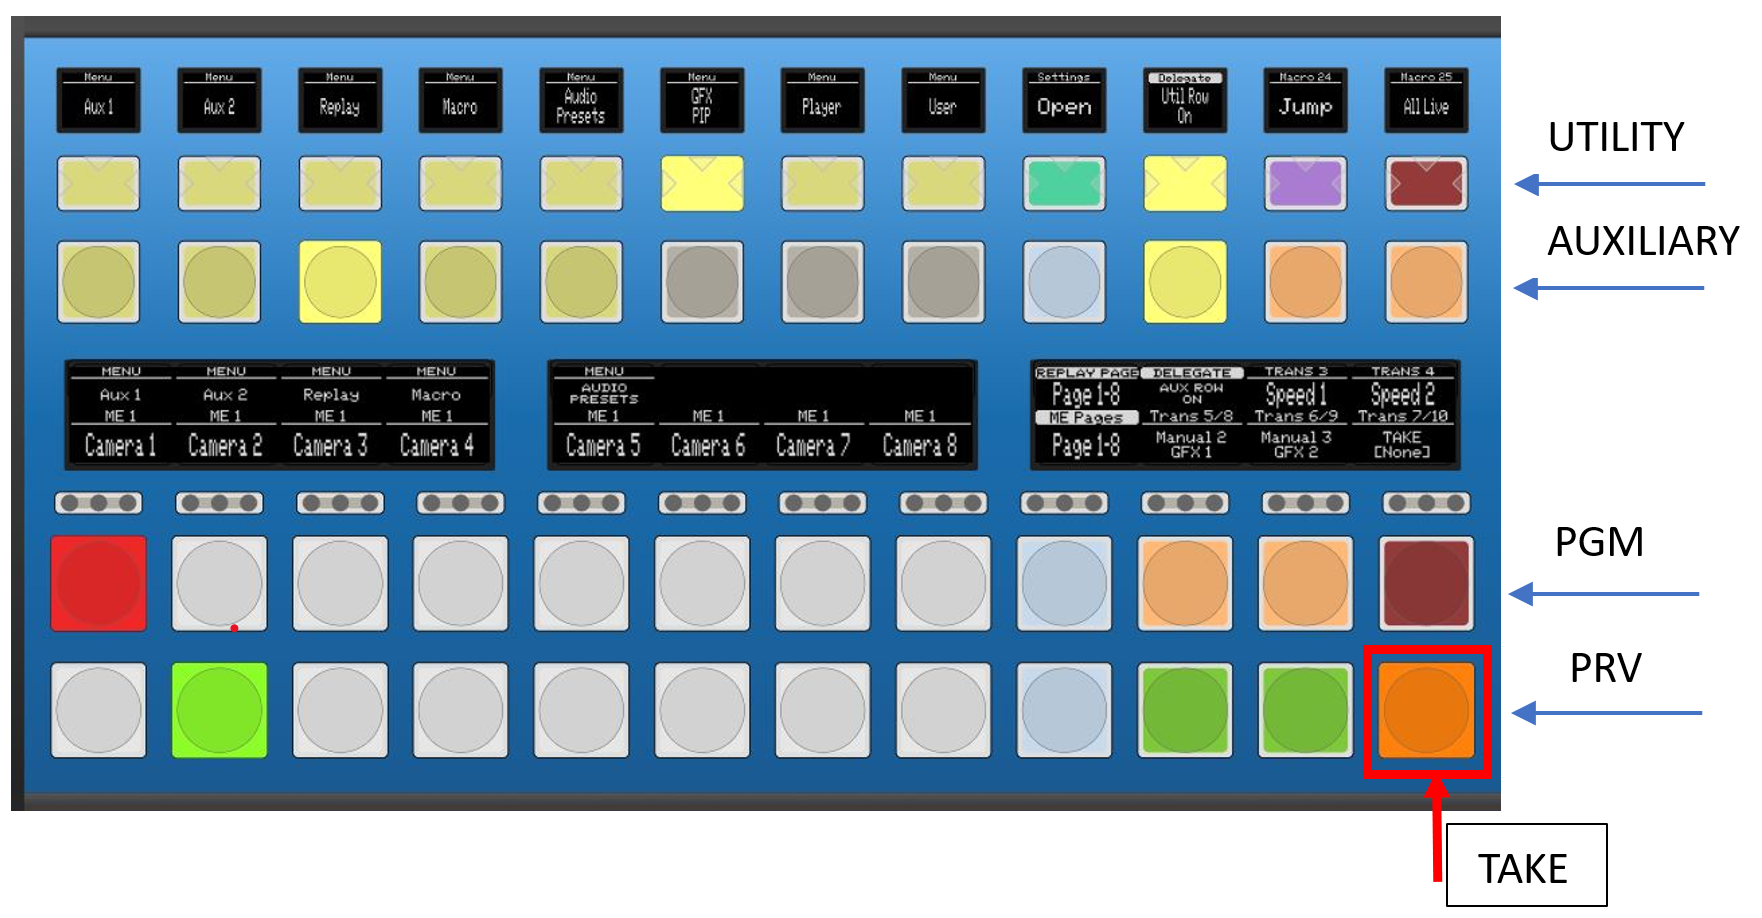
Master key 48 has 4 rows of button:
-
Utilities
-
Auxiliaries (AUX)
-
Program control (PGM)
-
Preview control (PRV)
PGM and PRV rows will be used only to select cameras between two pages, this provides the basic switcher functionality in combination with the take button.
-
Page 1: cameras from 1 to 7 which is the limit for production Layout on Simplylive
-
Page 2: cameras from 8 to 15 which is the maximum allowed number of cameras for LIVE layout on SimplyLive
-
TAKE button on the API is used to switch between PRV and PGM
Delegate Function
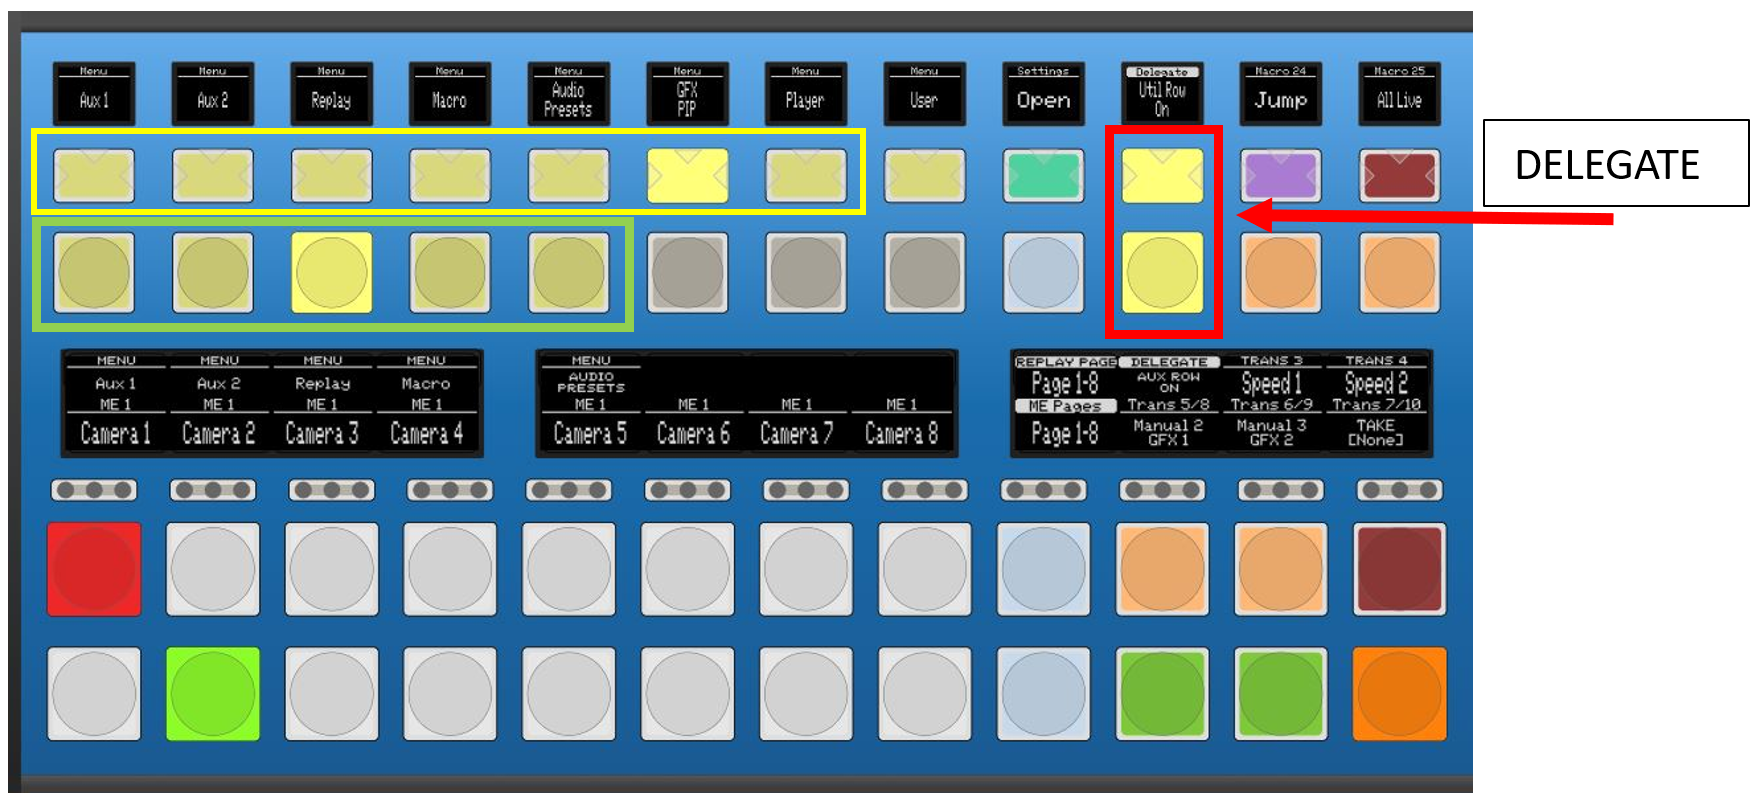
Auxiliary and Utility rows each have a delegate key to switch between different functions and open the delegate menu, both circled in the red box below. The top button opens the delegate functions available to be assigned to the Utility row (circled in the yellow box), and the bottom button opens the delegate functions available to be assigned to the Auxiliary row (circled in the green box).
-
Functions that can be delegated to the Utility row are:
-
AUX 1 - AUX 2 - REPLAY - MACRO - AUDIO PRESET - GFX/PiP - PLAYER - USER
-
-
Functions that can be delegated to the Auxiliary row are:
-
AUX1 - AUX 2 – REPLAY – MACRO - AUDIO preset
-
Panel Settings
It is also possible to open some basic Panel settings, such as Panel connection status, server connection, button brightness and IP address on the Utility row. To do this press the green “Open” button on the top row of buttons next to the delegate button.
Aux 1 & Aux 2
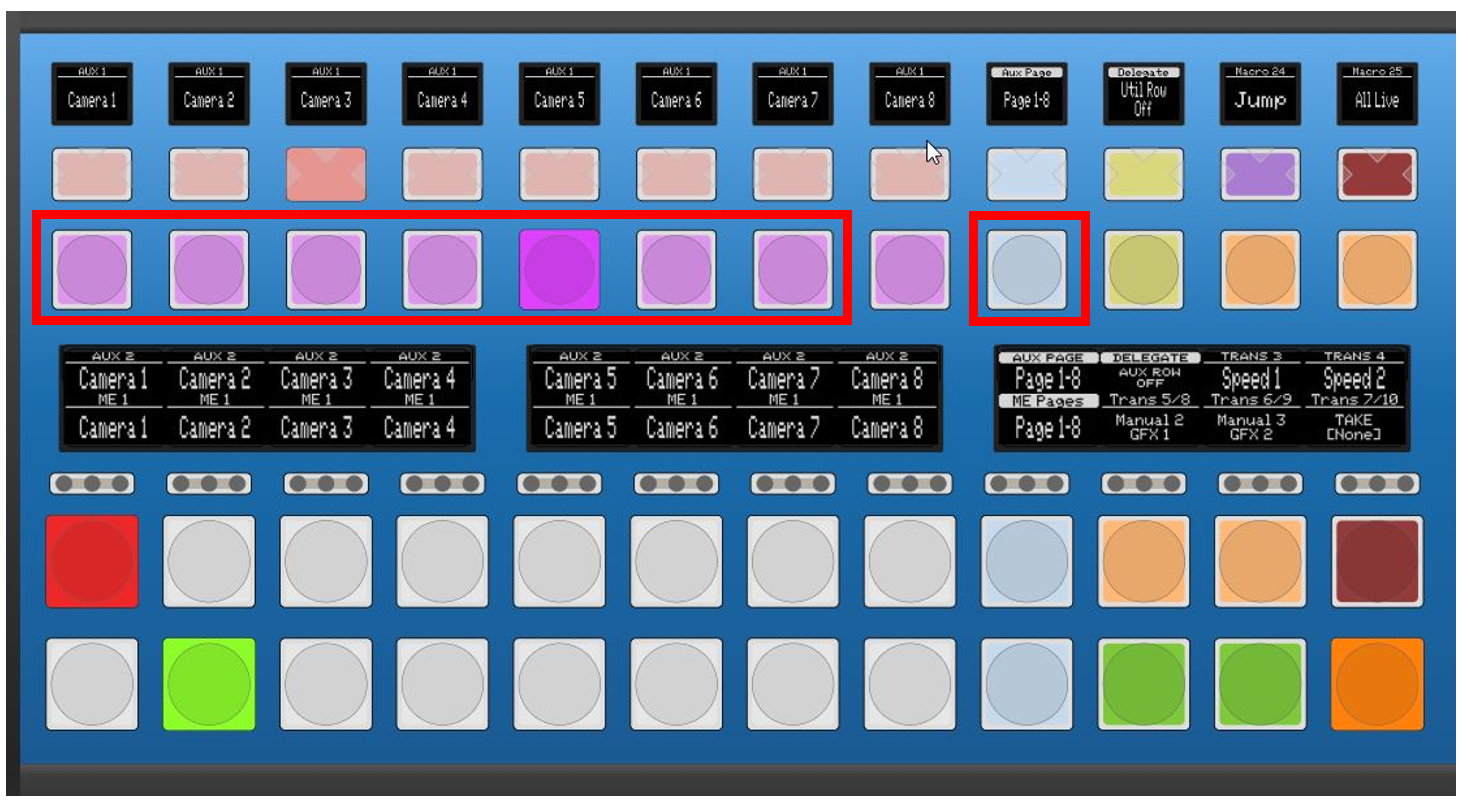
When Aux 1 and Aux 2 have been selected and delegated to a row, you can use the blue toggle button highlighted above to change pages. The first page contains cameras 1 to 7, the second page contains cameras 8 to 15, then replays 1 - 15 and rPGMs.
This setup allows the operator to cut any source in the aux outputs using a dedicated bank on the switcher panel.
REPLAY
When Replay has been selected and delegated to a row we have two pages.
-
Page one is for replays from camera 1 to 7 and would typically be used for production layouts (single or multi)
-
Page two contains rPGM1 and rPGM2 and would typically be used in live layout with multiple users where the second and/or third user are managing the replays
Take note that the replay will always be loaded on PRV channel, then sent to PGM with the TAKE button.
SimplyLive automation can automatically run replay transitions/wipes (RTDs) when switching the PGM output to replay from live camera, or will dissolve if we transition from replay to replay, according to auto transition setup on ViBox.
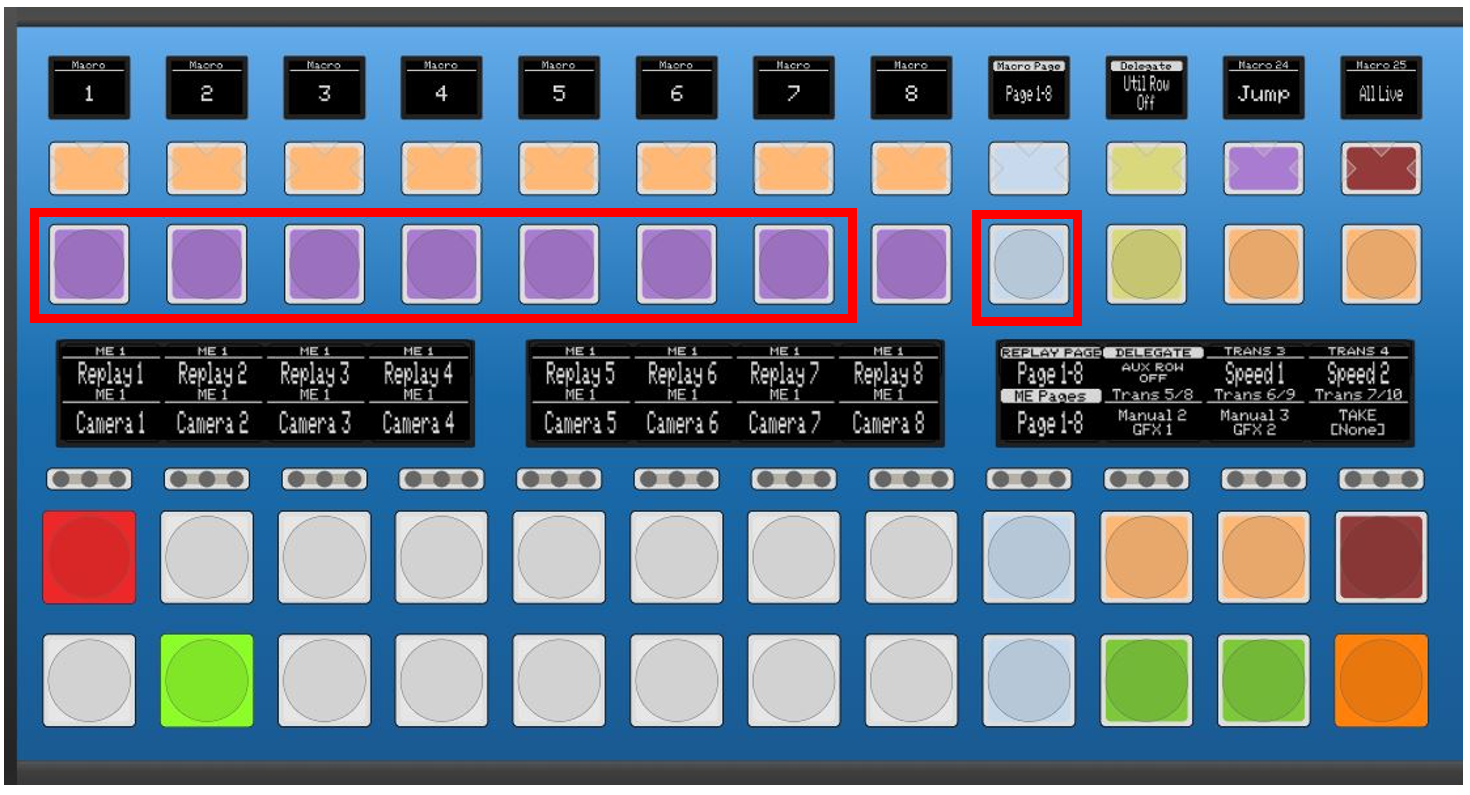
MACRO
The macro selection is very straight forward. On different pages I have all the MACROs available to run according to the macro setup on ViBox.
AUDIO PRESET
Audio preset is the method used to switch presets on an external audio mixer, typically connected to a SimplyLive server using Dante audio. All audio presets available on different pages, presets can be selected and then applied for the next TAKE action or applied immediately by pressing apply.
GFX\PIP
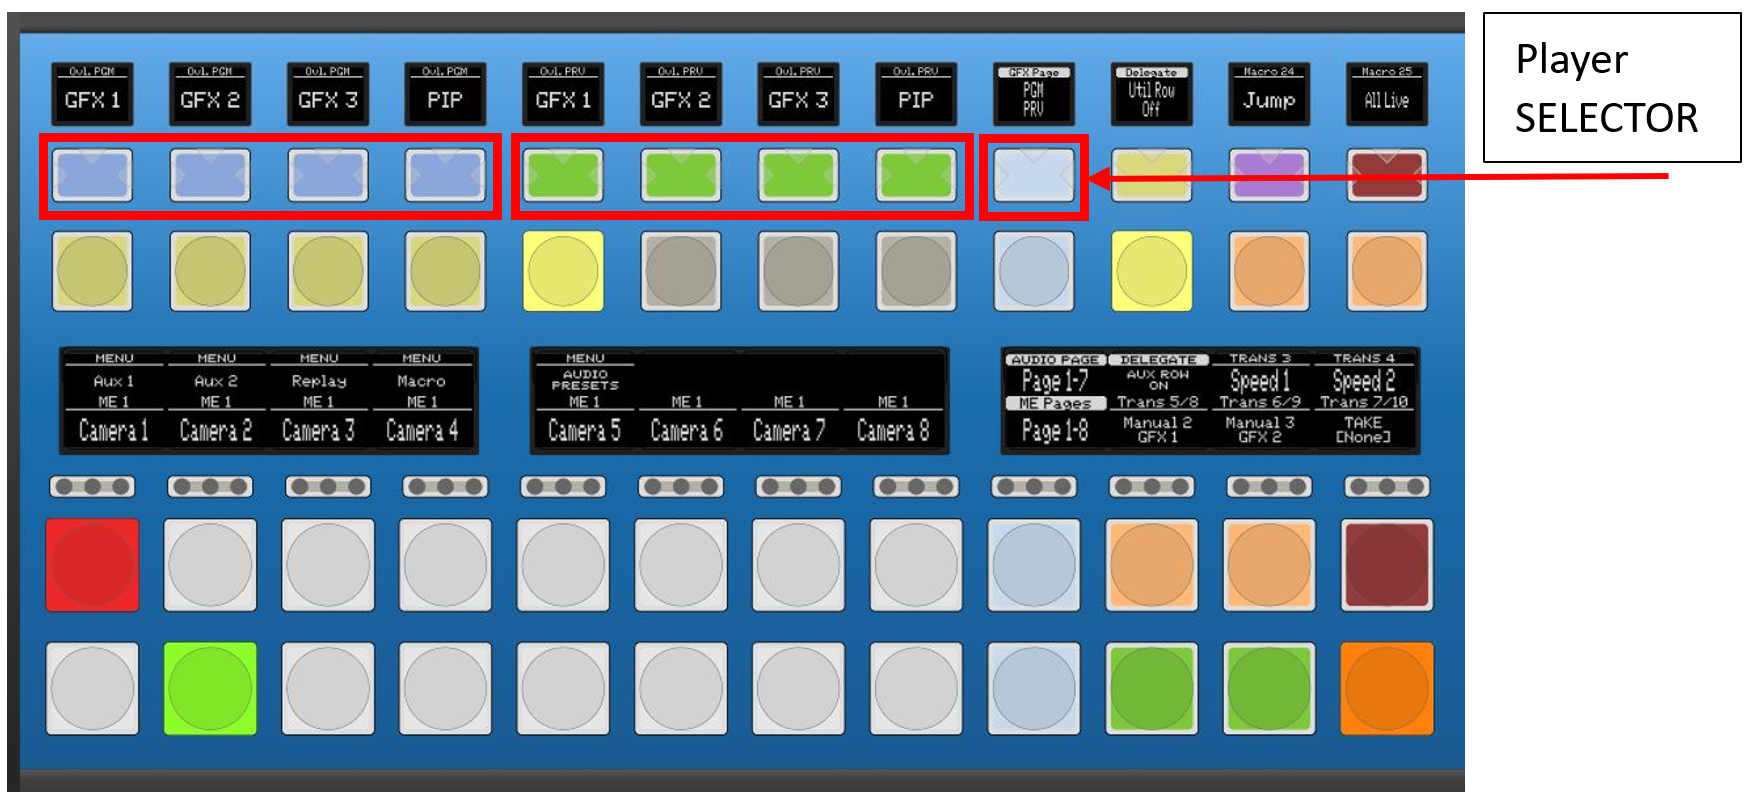
Once GFX\PIP option is selected a PLAYER SELETION button will appear. This allows to choose the output where we want to insert the graphic\pip: PGM\PRV or AUX1\AUX2.
The gfx button doesn’t work as a toggle. Pressing the lower part on the button we key the graphic on, pressing the upper part we key the graphic off.
This setup gives the operator extreme flexibility as he is able to manage the graphics on every output available.
PLAYER
By selecting the utility Player, we are able to control the playback transport controls for every output.
We have Play, stop and live options.
CONFIGURABLE MACROS
Using these pre-programed functions, we can really demonstrate the flexibility of this “default” setup.
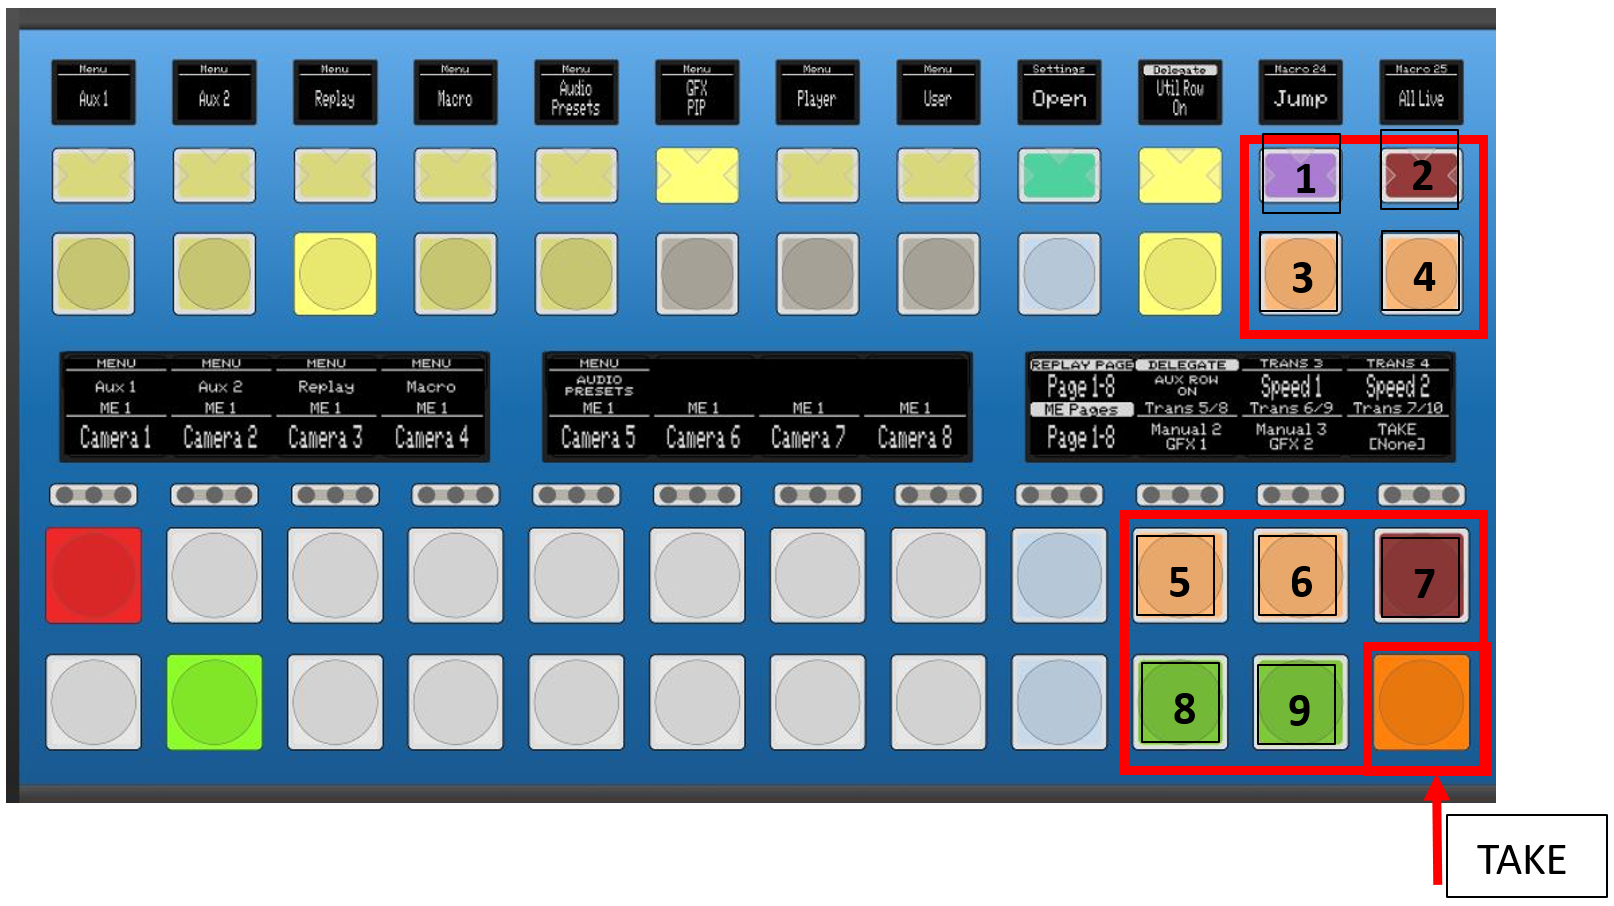
The setup is built for with a single operator running in Live mode and the panel layout with these marcos are designed for maximum flexibility. We decided to only have the TAKE button on the API and have 9 macros available either on Utility, Auxiliary, PGM and PRV rows.
The layout also provides key functionality such as JUMP and ALL LIVE if needed, GFX toggle buttons in different position, manual transition, slomo speed, audio preset … everything, everywhere.
From reactor is also possible to change the color and the label of every button.
I propose introducing a limited-access user mode that allows operators to adjust only a small, predefined set of parameters, preventing unintended changes to the full system configuration.
The broader goal is to provide a setup that adapts to different experience levels and operational needs:
-
From a basic, streamlined workflow, simple and guided,
-
To a more advanced, modular workflow that enables real-time management of multiple sources and outputs.
This approach allows operators to choose which functions they need, how to arrange them, and how much control they want—ranging from an all-in-one, automated experience to a more detailed and dynamic management of the entire process.