Pre-Requisites
-
The SimplyLive Server must be running a compatible version of the Web SDK
-
Supported in the official Release Package - SimplyLive Version 2.1 or later.
-
-
The SKAARHOJ controller must be running a compatible version of the Simply Live Device Core and Reactor softwares
-
Default configurations for SimplyLive is added in the official Reactor release from v2.2.6 or later
-
The Simply Live Device Core is installed automatically by Reactor and is supported from v1.0.0 or later
-
SimplyLive
-
Install the security certificate on the NUC and Server
We must make sure that the certificate is installed on the NUC and Server running the ViBox UI - to do this follow these instructions.-
Open ViBox UI then press:
Setup -> Backend Server -> Distributable - Opens the SDK Control Panel.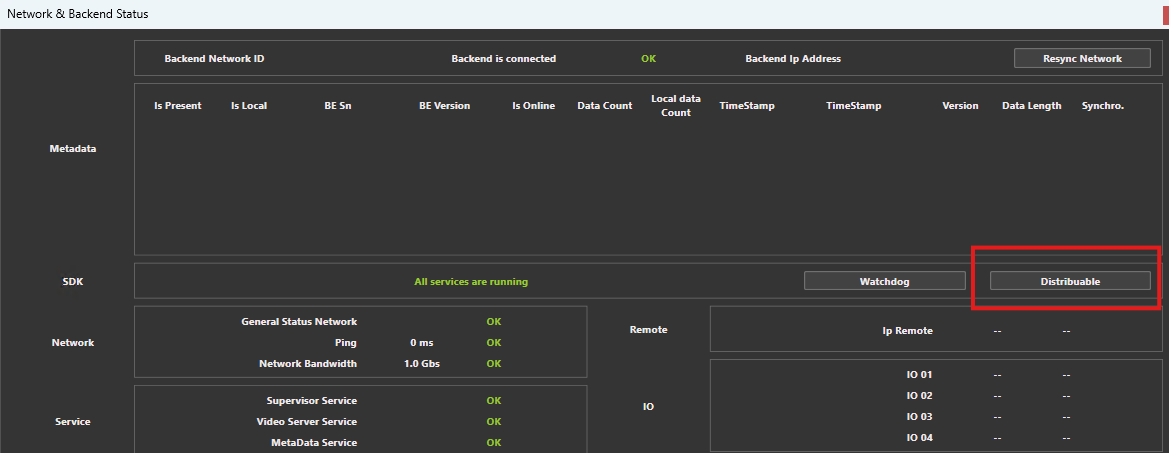
-
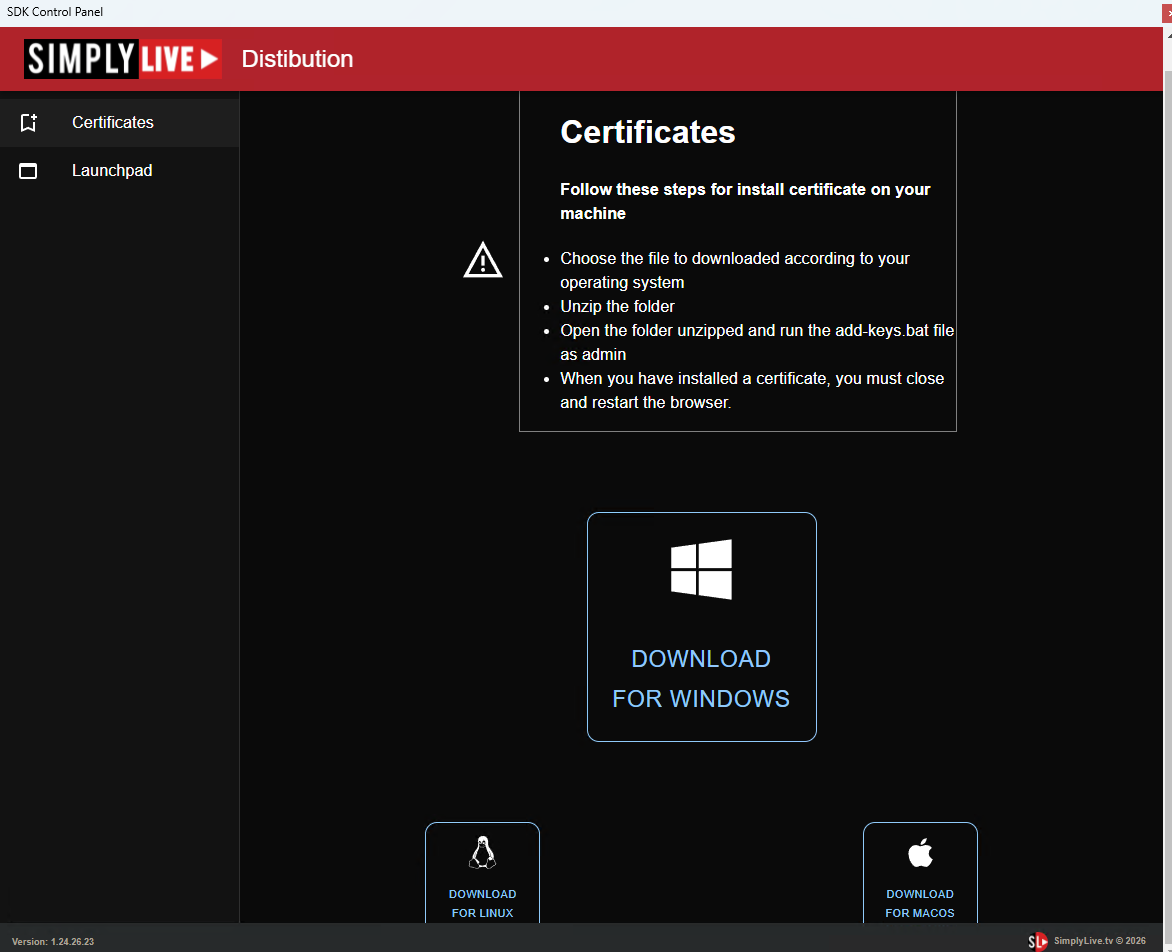
Then Download for Windows
-
Download the zip folder, and unzip and launch the application in this folder.
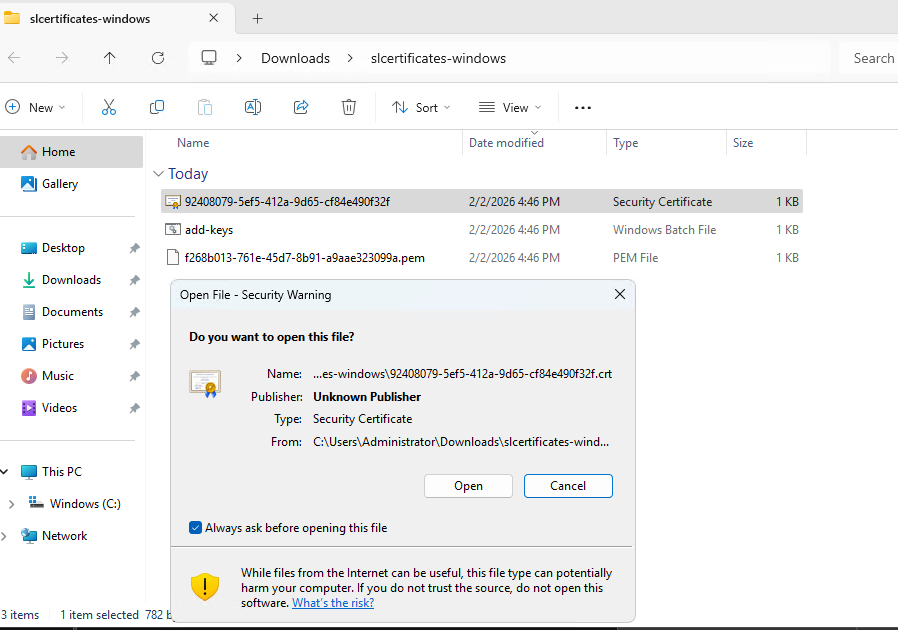
-
-
Map the role permissions to the controller manager service (the gRPC API).
To connect the panel to the backend we need to go to the WebPortal and then connect to the sl-external-controller-manager service - by navigating to https://localhost:20536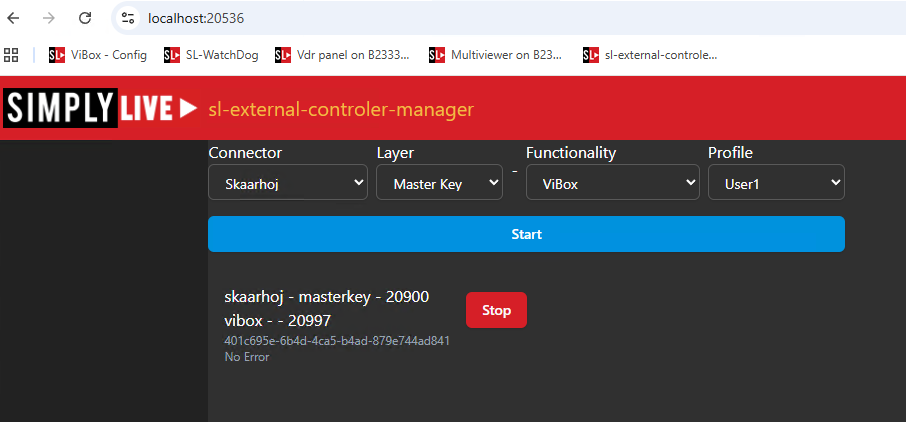
-
Enter the following:
-
Connector = Skaarhoj
-
Layer = Master Key
-
Functionality = ViBox
-
Profile = User 1
-
-
Macros
To work with the default configuration and use our Operation Guide you will need to install the following Marcos in ViBox.
-
Download the default Marcos
(Macros are available in attached folder “simplylive_skaarhoj_install_files_June2026.zip)
-
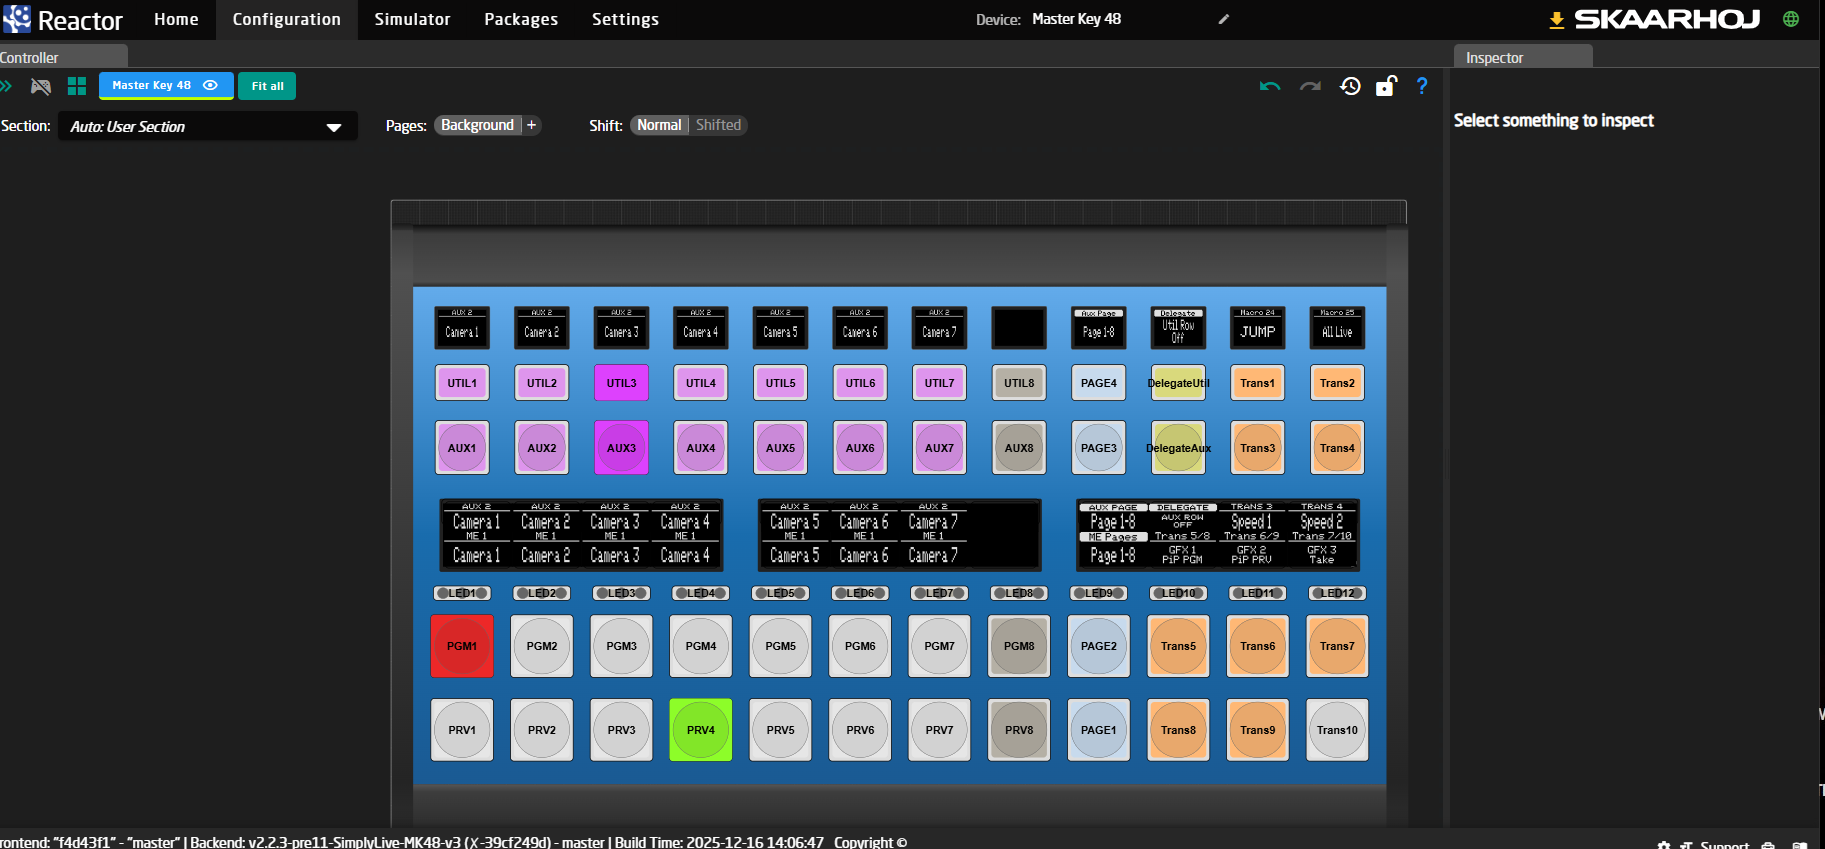
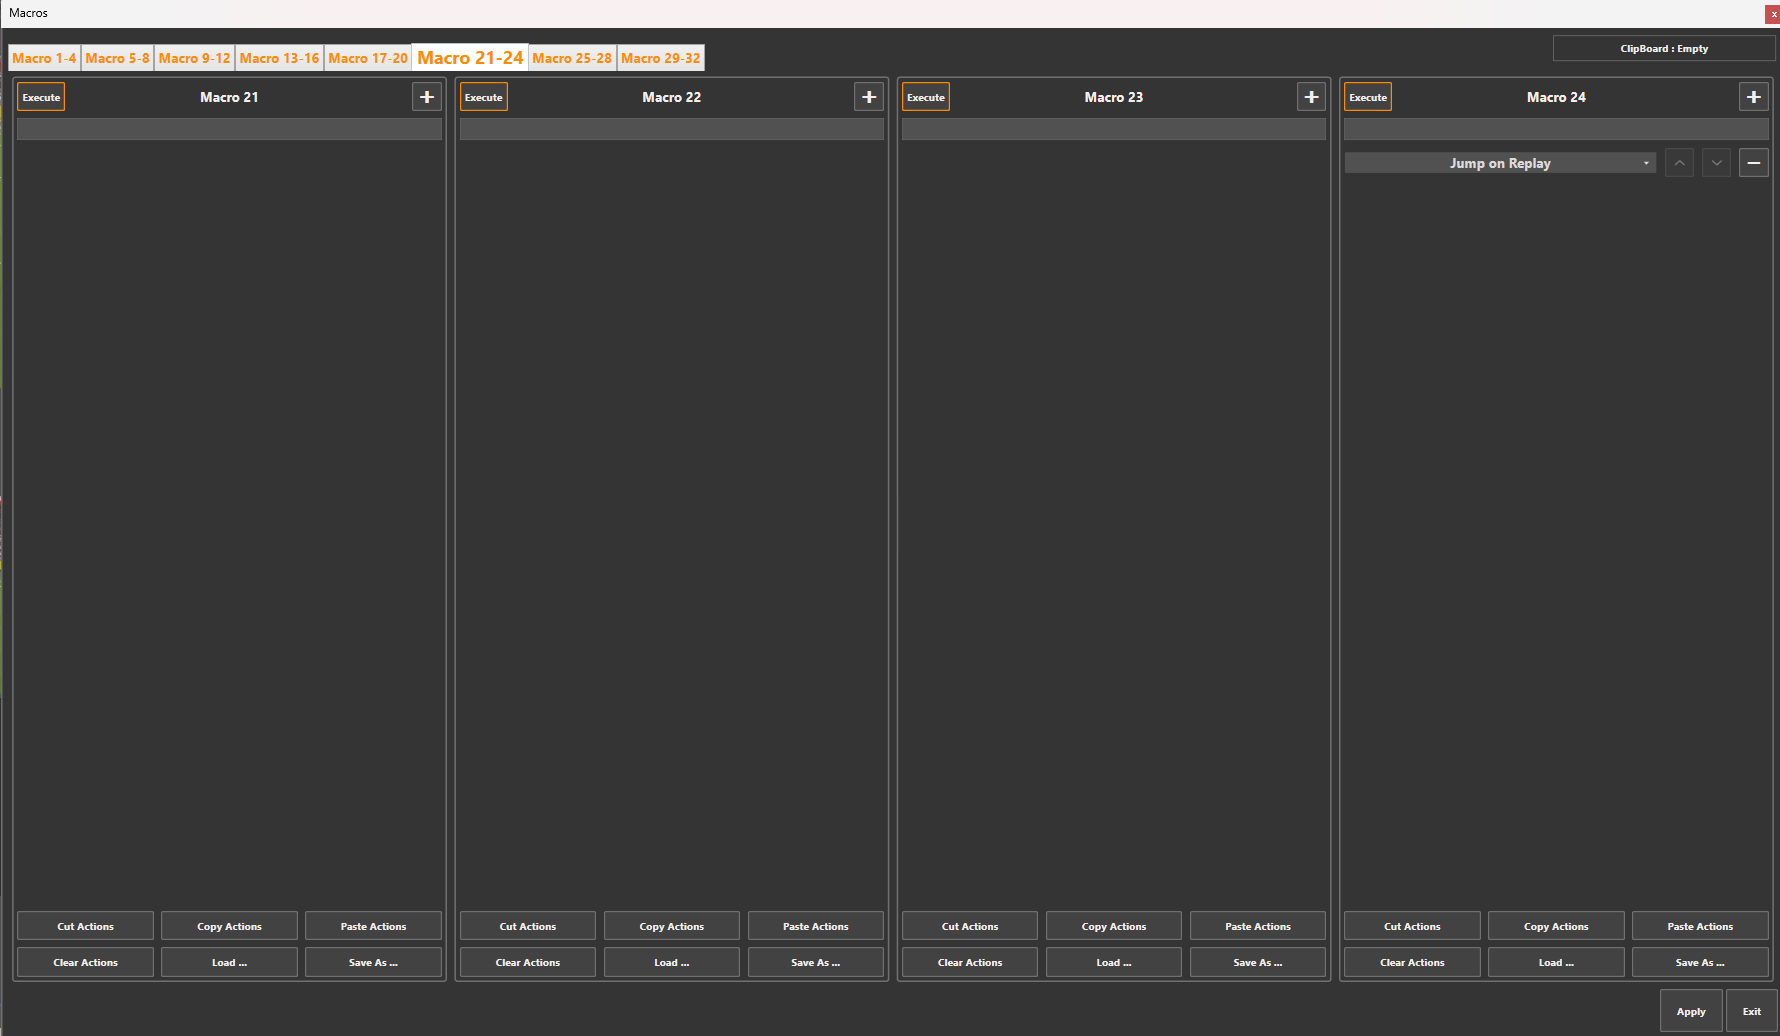
With SKAARHOJ we have created a button layout based on the Master 48 that uses Macros 24 to 32 for some simple switcher commands, seen in orange in the image below from the Reactor softwares configuration tool.
-
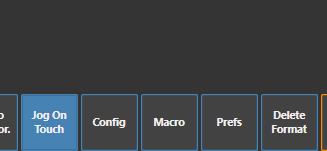
Open ViBox and open Settings → Macro
-
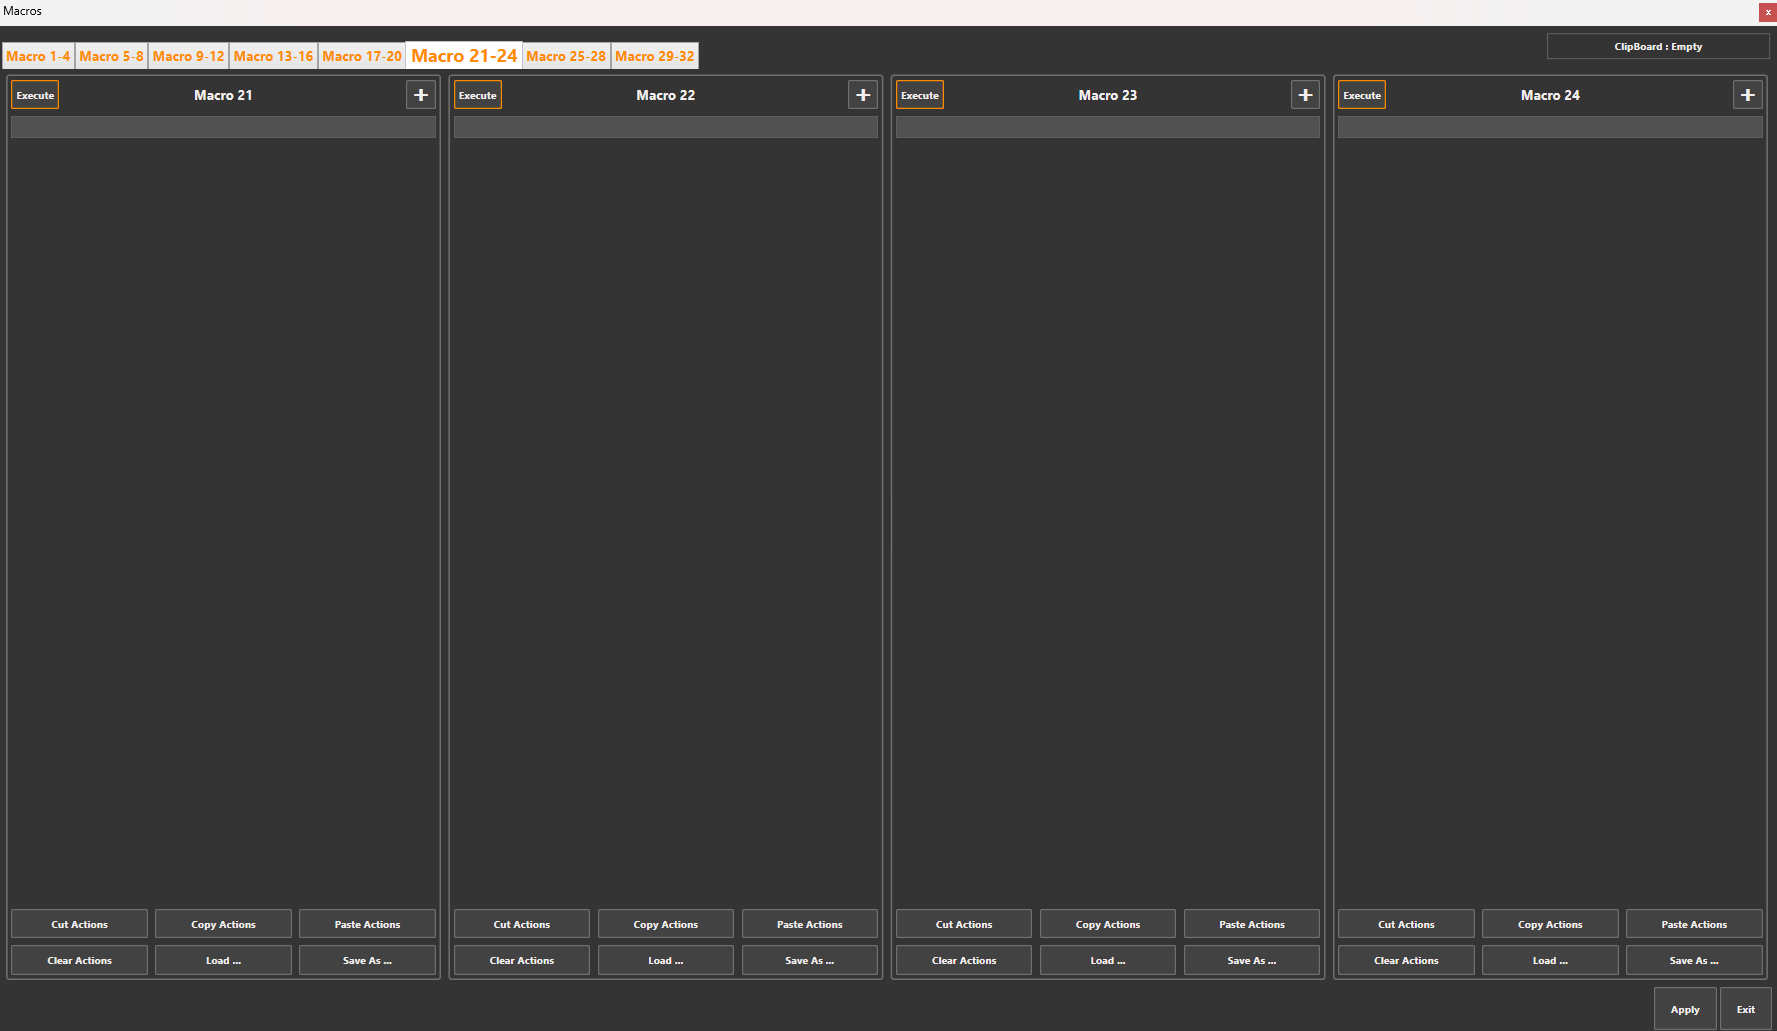
Go to the 6th tab “Macro 21-24” and then in Macro 24 which should be empty select Load
-
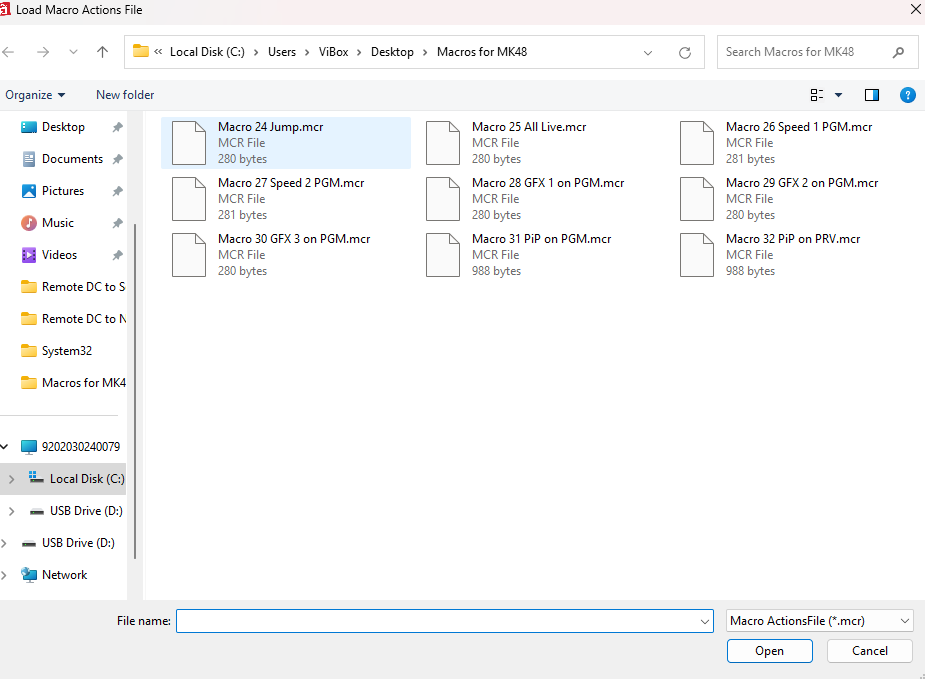
Select the corresponding Macro
-
This will then update the Macro with the command.
-
Repeat these steps for Macros 25 - 32.
-
SKAARHOJ
SKAARHOJ Support
If you do not see the correct version of reactor, the SimplyLive Device Core or need help modifying the IP address you can try the following:
Reactor and Device Cores can be installed directly from the controller, and can also be downloaded from devices.skaarhoj.com for offline users.
For support, contact support@skaarhoj.com
-
Connect the SKAARHOJ panel to the network:
-
Connect the panel to power and to the backend via Ethernet
-
Connect to the SKAARHOJ panel by navigating to the IP address of the panel in the browser to connect to the Reactor Blue Pill software.
-
To find the IP address on the panel click “Setup” (top right of panel)
-
The IP address should now be visible in the top left of the panel
-
If the IP address is not displayed or you’re unable to connect due to your local network settings then follow these instructions SimplyLive & SKAARHOJ Setup | Changing the Panel IP address
-
-
Providing you can connect you’ll need to enter the username and password -
contact SKAARHOJ support it you’re unsure what this is. -
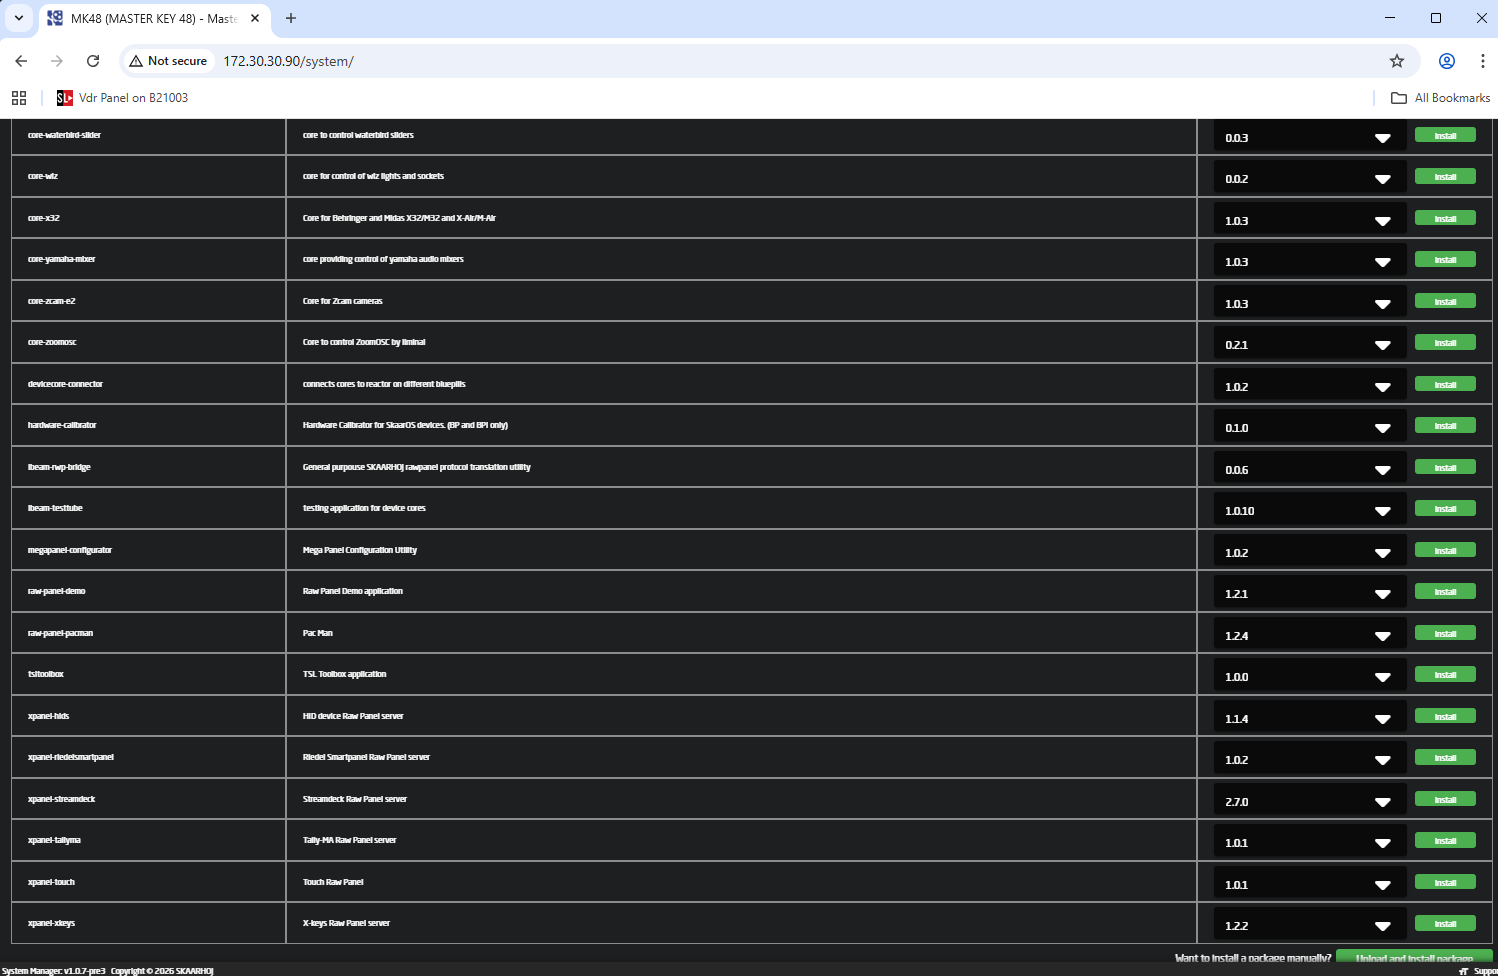
Once logged into the Reactor browser application navigate to system and check the correct packages are installed.
-
Reactor Software should be v2.2.6 or later
-
Search for the SimplyLive Device Core and make sure that is running v1.0.0 or later
-
If you do not see these packages installed, contact SKAARHOJ or your reseller for support, it is possible to update panels with newer versions of Reactor software and Device Cores manually.
-
-
Connect your SimplyLive server to the panel by adding it as a device
-
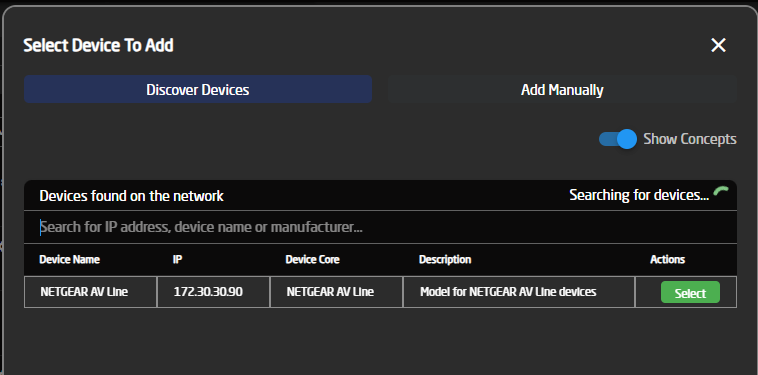
At the Home page, under Device press “Add Device”
-
The device might be searchable by entering the IP address of the SimplyLive servers Management IP, or IP on the same subnet as the panel.
-
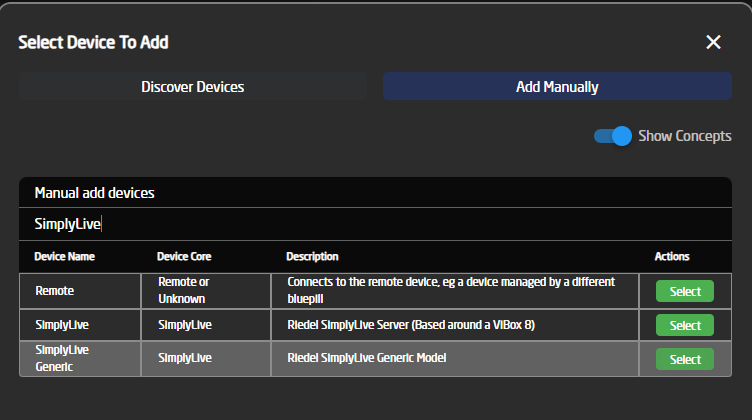
If the device can’t be found, then it can be added manually by using the “Add Manual” tab and then searching for “SimplyLive”, you might see more than one result, but you should select SimplyLive Generic Model.
-
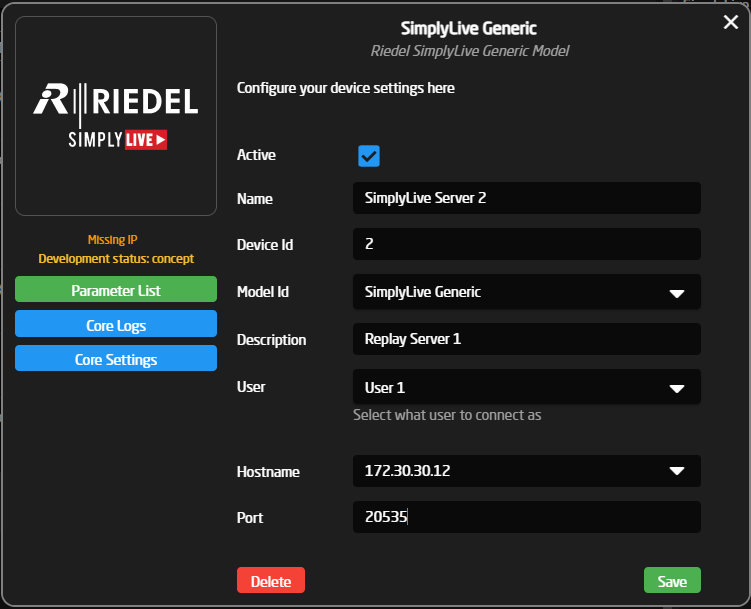
Once selected fill out the server information, by entering the correct UP address information and the Port and User settings.
-
Model ID = SimplyLive Generic
-
User = The same as the user selected in the sl-external-controller-manager, in the example in this guide it would be User 1
-
Hostname = The SimplyLive IP v4 address on the same network as the panel.
-
Port = 20535
-
-
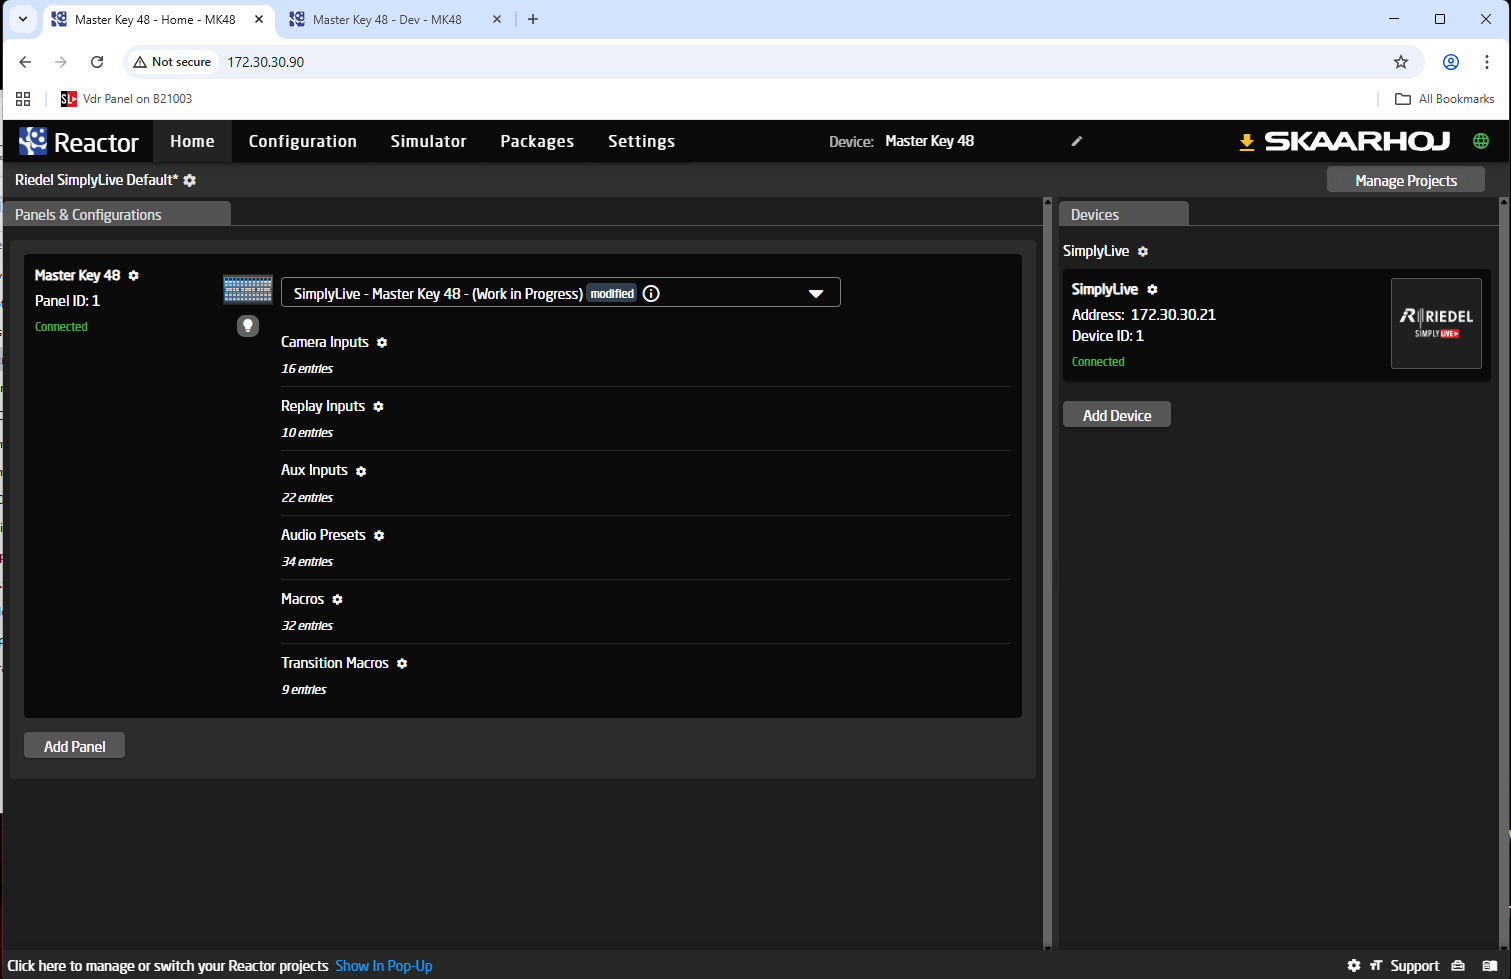
Once added it will appear in the Home page under Devices and should have the state “connected”.
-
-
To apply the default panel layout, make sure that the correct project is loaded or upload the default SimplyLive project.
-
On the home page under the Panels & Configurations tab select your model type (e.g. Master Key 48)
-
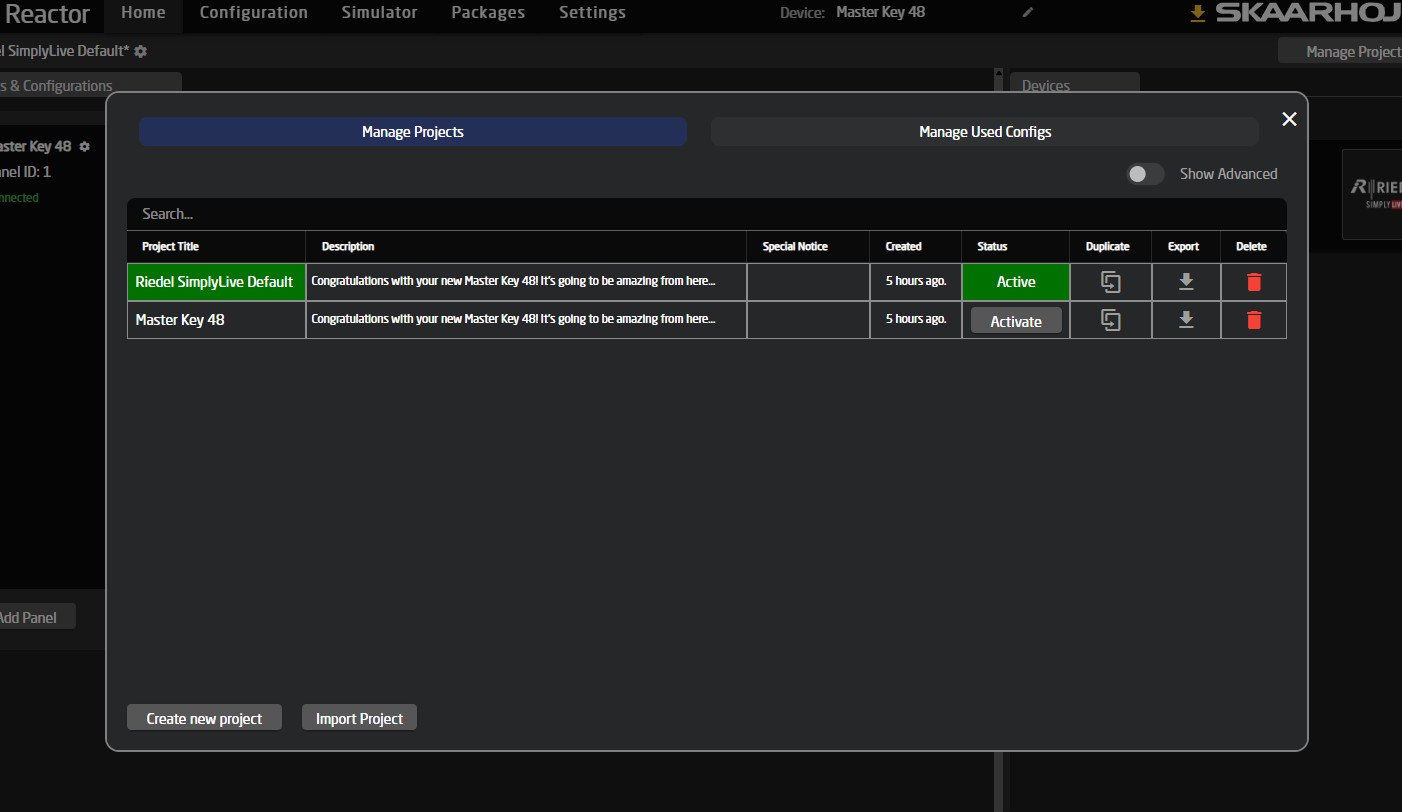
Select the Dropdown menu: Riedel SimplyLive Default
-
If this project is not loaded, you can select Manage Projects and then Import Project
(package available in attached folder “simplylive_skaarhoj_install_files_June2026.zip)
-
-
Packages: Check SimplyLive package is running
-
The panel interface should now appear on the Home or Configuration tab
Changing the Panel IP address
If you cannot access because the IP address is not in the correct range, follow these steps:
-
Before starting you will need to download the ”Skaarhoj Discover App” from their website: Software Download | SKAARHOJ
-
Using a PC where you have administrative rights, connect a USB cable to the Panel.
-
Install the downloaded ”Skaarhoj Discover App” and run it.
-
This will search for panels on the network and allow you to connect to the Reactor application via the browser.
-
Once connected you can navigate to Settings and from here you can modify the network details under “IP Configuration”
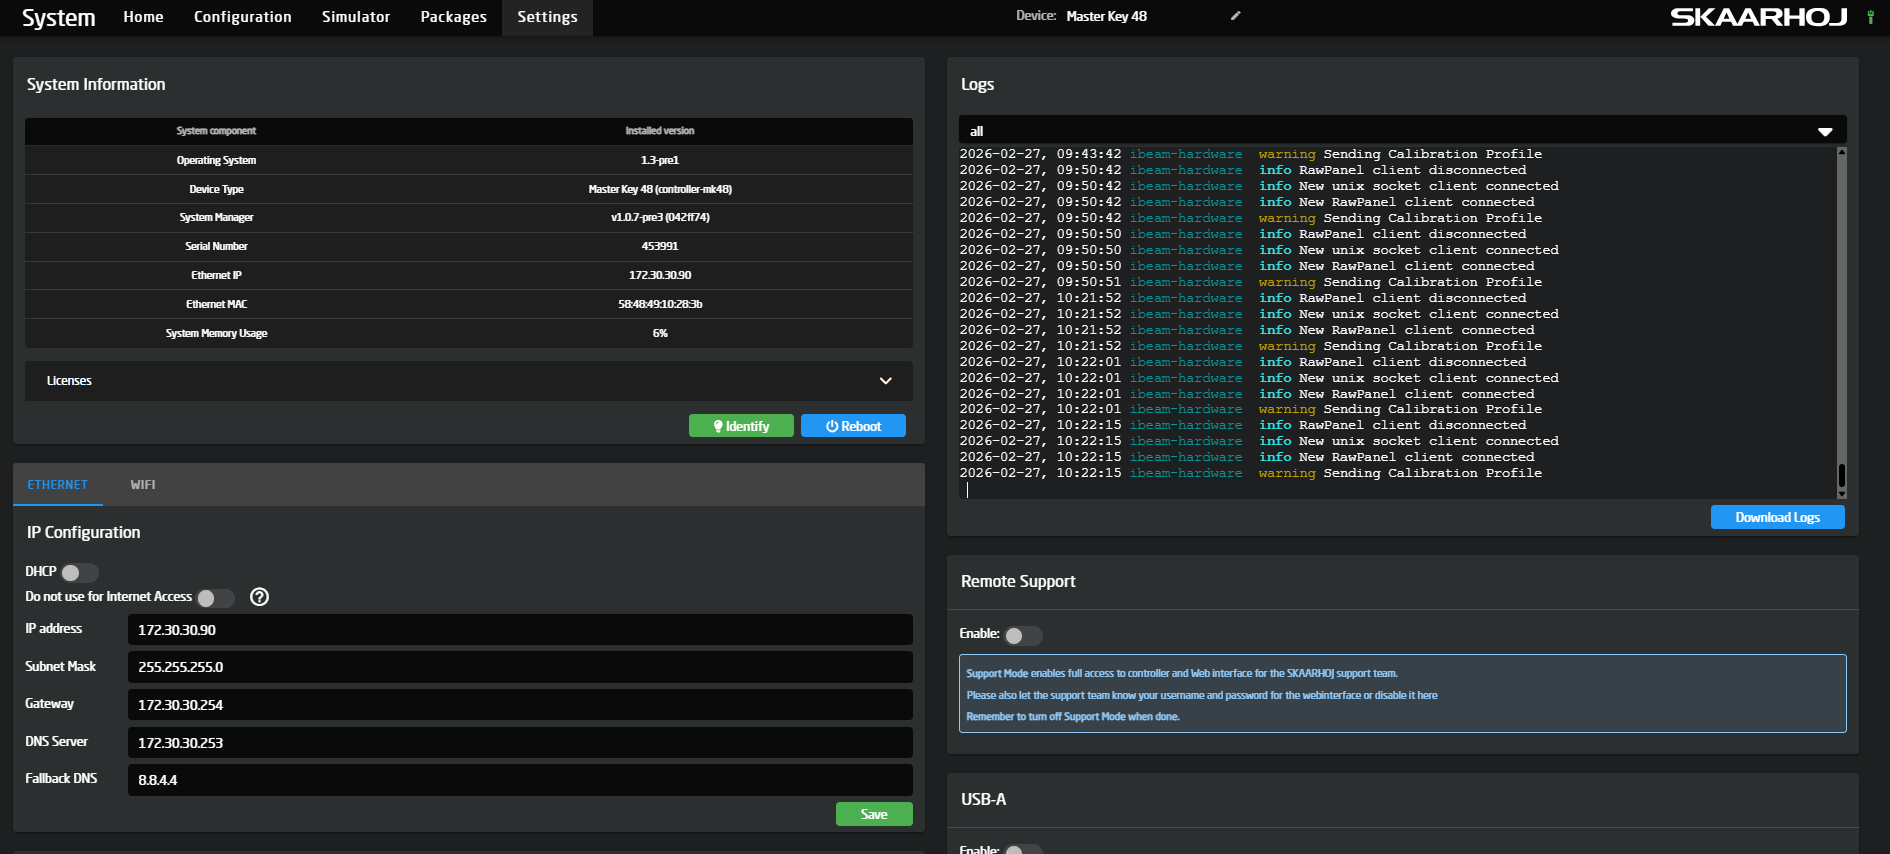
-
You should now be able to put this IP address into a web browser to access the panel from the SimplyLive server.
Downloading Project and Maco files
All files are available for download from My Riedel - https://my.riedel.net/s/downloads
Search under Live Video Production and download the compressed file: simplylive_skaarhoj_install_files_June2026.zip
simplylive_skaarhoj_install_files_June2026.zip