The RC-200 needs to be connected to the same network as the NUC in order connect.
You can either plug this directly into the NUC or into the network switch.
To update the RC-200’s IP Address, Subnet Mask and Gateway IP, you can do this either via:
-
RC-200 directly
-
More instructions below
-
-
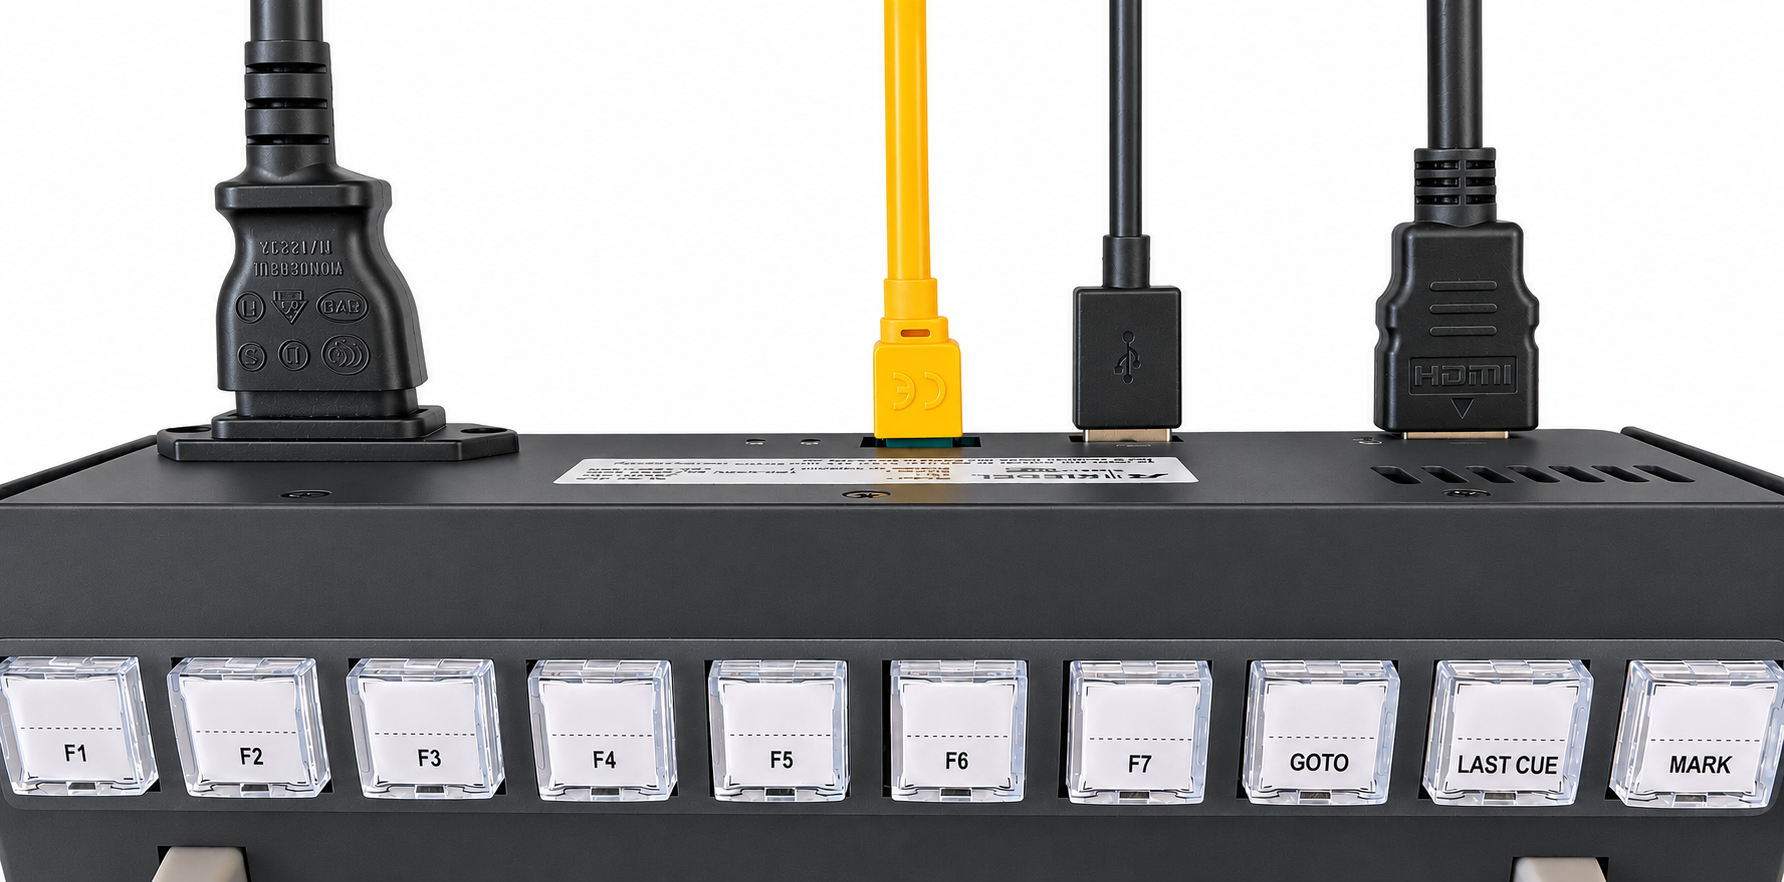
HDMI / Monitor connected to the back of the RC-200
-
IP Address: Port >
-
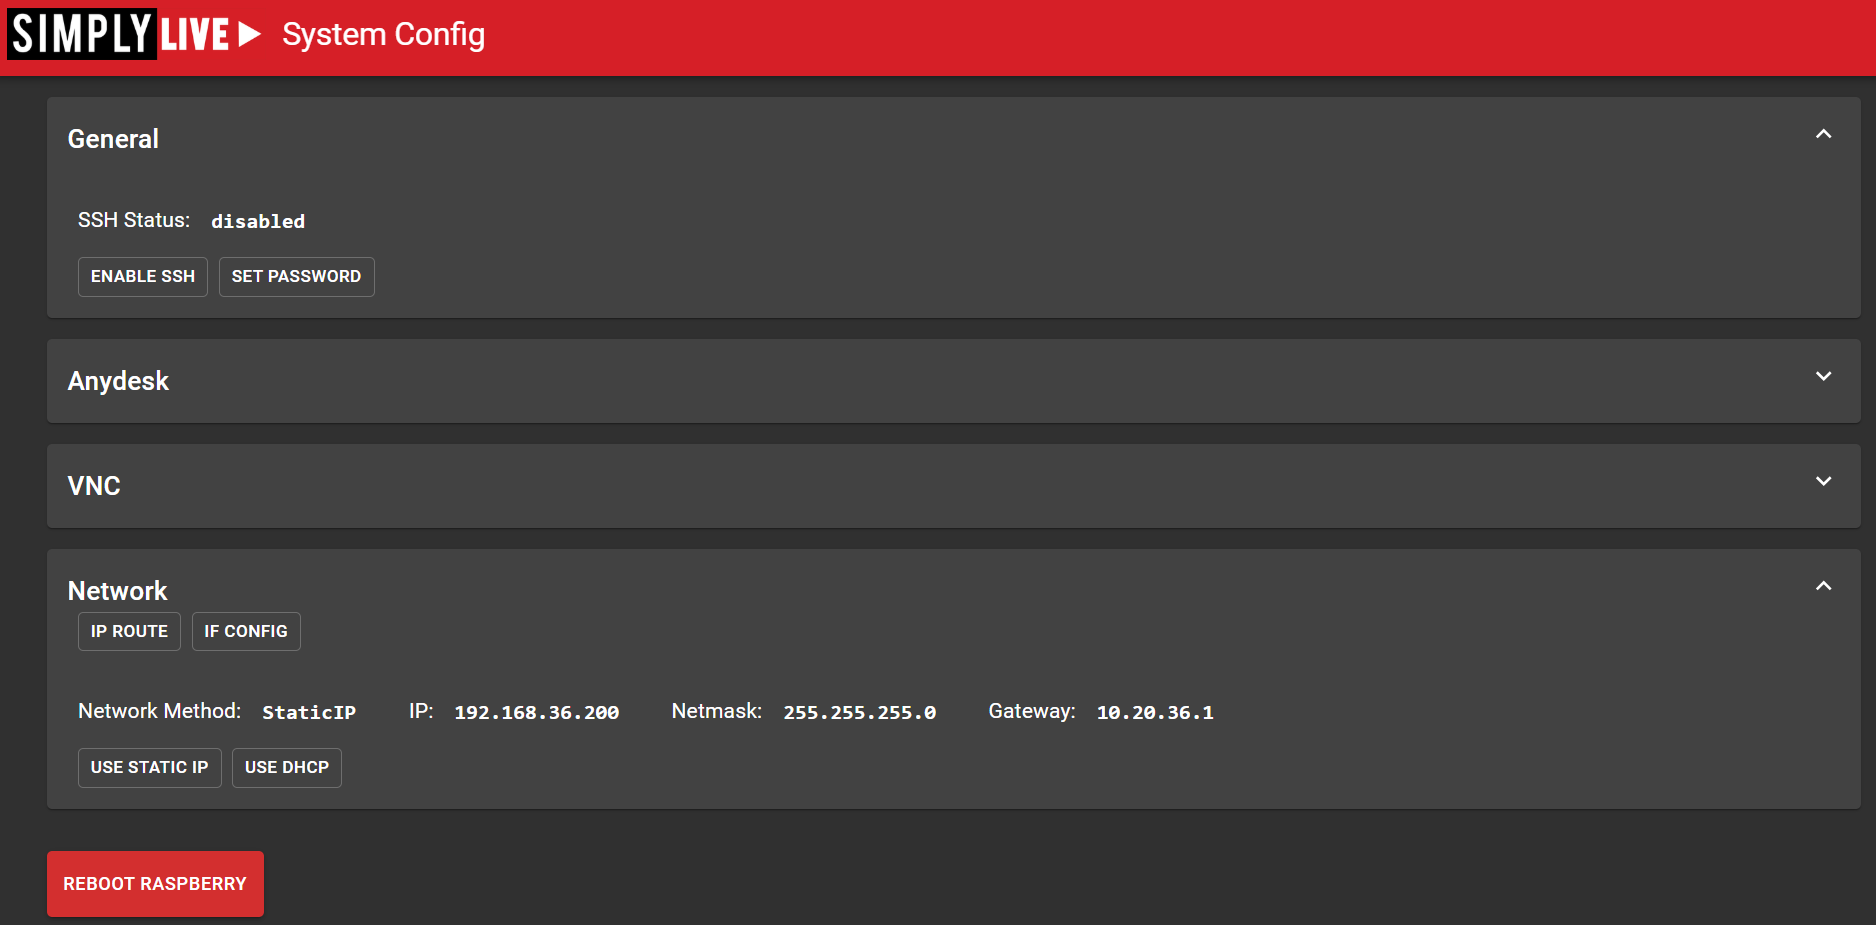
If on the correct range, you can access the RC-200 config page directly by visiting http://rc200ipaddress:20094
-
Default IP > http://192.168.1.200:20094
-
Network > Use Static IP
-
Update the IP address
-
Disconnect the power from the RC-200, wait 10 seconds and power on again to make sure the IP address is taken
-
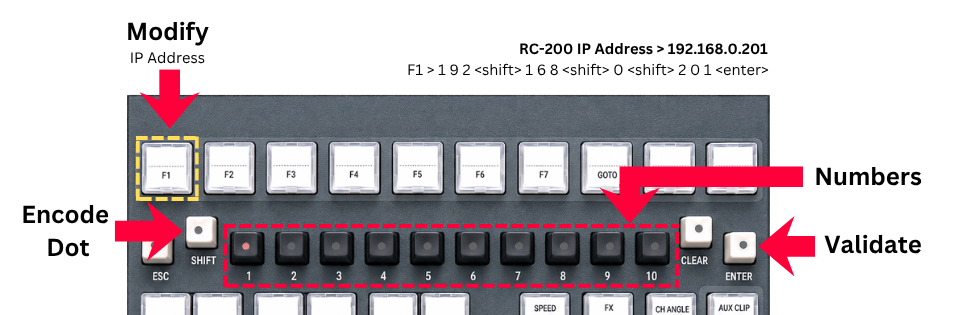
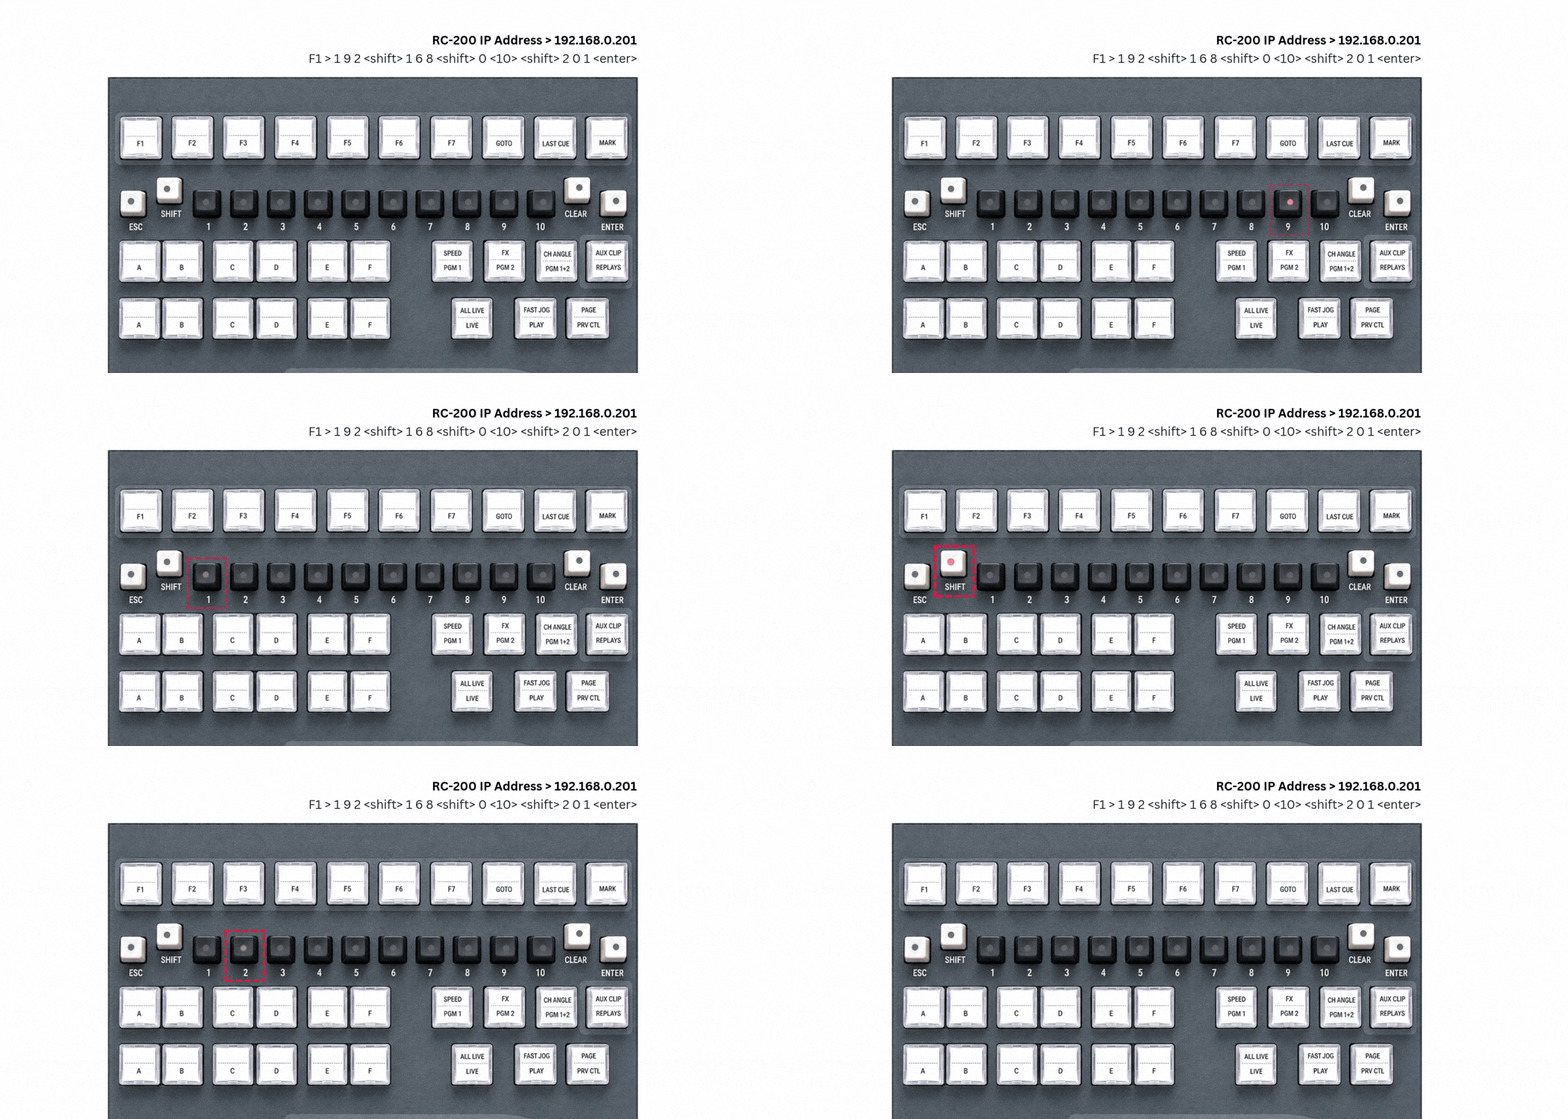
Change network via RC-200 keys
|
Key Combinations |
Action |
Default values |
|
press and hold for 5s: “ESC” + “ENTER” |
Reset the network to default value and reboot the RCU |
IP: 192.168.1.200
|
|
press and hold for 3s: “PGM1” + “PGM2” + “PGM1+2” + “REPLAY” |
Enter to Configuration Mode menu |
|
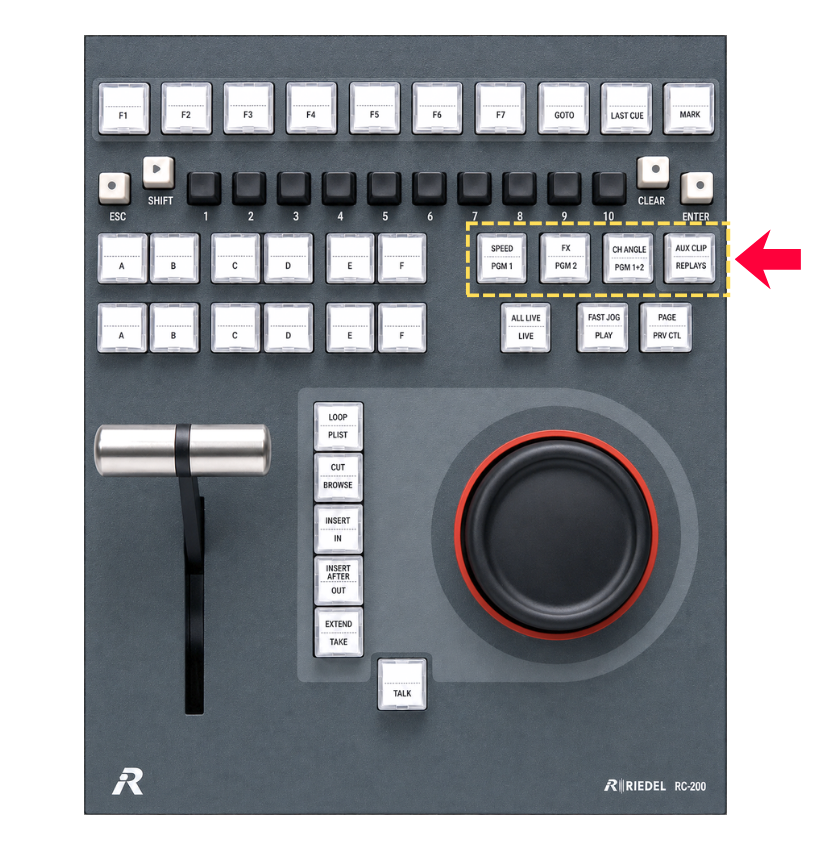
Configuration Mode
|
Key Combinations |
Action |
|
ESC |
Go back to previous menu |
|
ESC in Configuration Mode |
Go Out of Configuration Mode |
|
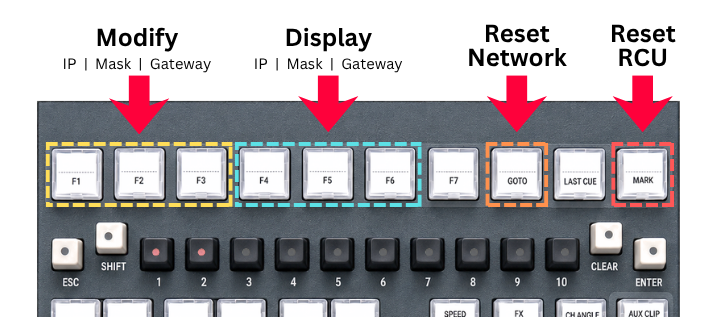
F1 |
Modify IP address |
|
F2 |
Modify Subnet Mask |
|
F3 |
Modify Gateway IP |
|
F4 |
Display IP |
|
F5 |
Display Subnet Mask |
|
F6 |
Display Gateway IP |
|
F8 |
Reset Network to default value (All light are lighted during action) |
|
F10 |
Reboot RCU (ENTER to validate, ESC to cancel) |
Modify values
|
Key Combinations |
Action |
|
ESC |
Cancel Action |
|
ENTER (available only if the encoded address is correct) |
Validate Action
|
|
1 - 10 (10 = 0) |
Encode corresponding number |
|
SHIFT |
Encode dot |