This view allows creating and managing Cluster Setups on which Server Configurations are then installed.
Depending on the level of risk-aversion to an outage, this will change the number of nodes required.
-
No high availability: One node is required to form the cluster.
-
High availability: Three identically-configured nodes are required to form the cluster.
See also chapter Network Setup in High-Availability Scenarios.
The Clusters View uses Server Configurations created in the Configurations view. The selected server configuration is used by the Riedel Software Manager to deploy the selected applications and their configuration on the Hosts. The Riedel Software Manager determines if it is a single host or a high availability cluster and will deploy the required applications accordingly.
Furthermore, you can upgrade a single node cluster to a high availability cluster during a maintenance down-time period.
Overview
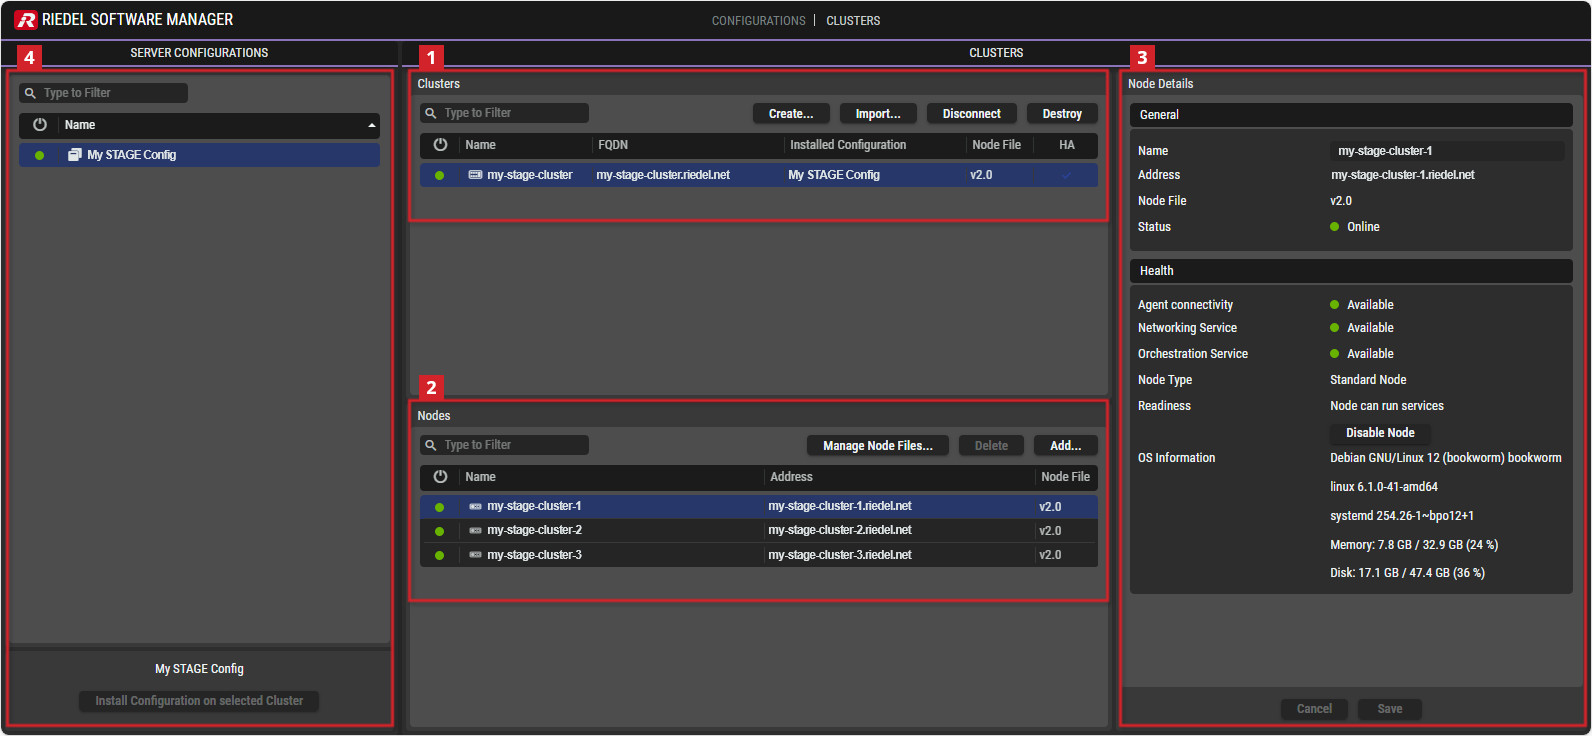
Riedel Software Manager - Clusters

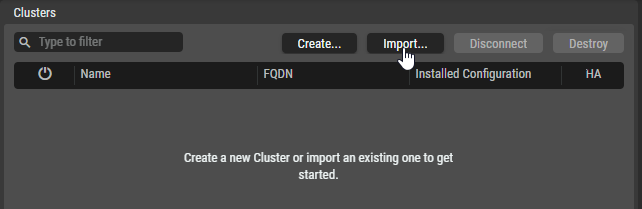
Clusters
This section shows all Cluster Setups created in this view. The Server Configuration selected in the Configurations section is used to form a Cluster Setup selected here. See chapter Configurations.
|
|
Set a filter to display only content whose search text is found in the name.
|
|---|---|
|
|
Click to create a new Cluster Setup.
|
|
|
Click to connect to an existing cluster and to provide a previously stored Management Certificate saved on your computer / on the server. By default this file is exported in the default download folder of the computer.
|
|
|
Click to disconnect the selected Cluster Setup. |
|
|
Click to delete the selected Cluster Setup.
|
|
|
Indicates whether the corresponding Cluster has a valid ( |
|
Name |
Shows the name of the Cluster Setup. |
|
FQDN |
Shows the Fully Qualified Domain Name or IP address of the Cluster via which the installed software can be opened in your browser. |
|
Installed Configuration |
Name of the Server Configuration that is deployed to the Cluster Setup. |
|
Node File |
Shows the version number of the corresponding Node file. |
|
HA |
The |
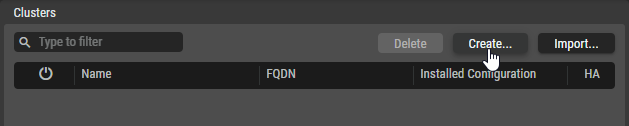
Creating a Cluster Setup
It is necessary that the correct date and time are set on the device on which the Riedel Software Manager is running.
During cluster creation, a certificate is created with the time and date of the computer on which the RSM is running. After the cluster has been created, the time is synchronized with NTP. If the time differs from the certificate created by RSM, time synchronization is not possible and errors occur.
-
In the Clusters section, click Create….
Ensure that:
-
The computer running Riedel Software Manager has network connectivity to the servers or virtual machines via the provided IP address or host name.
-
The servers or virtual machines have been prepared with the operating system required for the software to be installed.
-
The servers or virtual machines have password based SSH access enabled.
-
The user used in the SSH connection has root access.
A wizard will appear which guides through the creation:
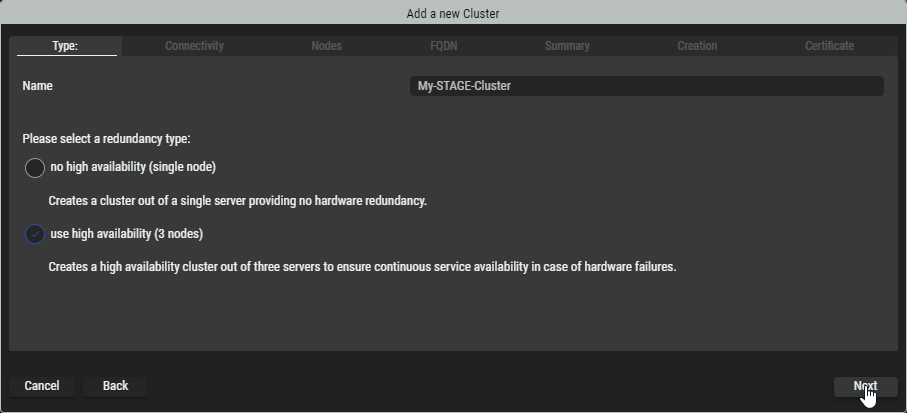
Type tab
-
Enter a name (without spaces) for the Cluster Setup, for example,
My-STAGE-Cluster. -
Choose whether you want to use
-
no high availability (single node)
-
high availability (3 nodes)
See chapter Network Considerations.
-
-
Click Next.
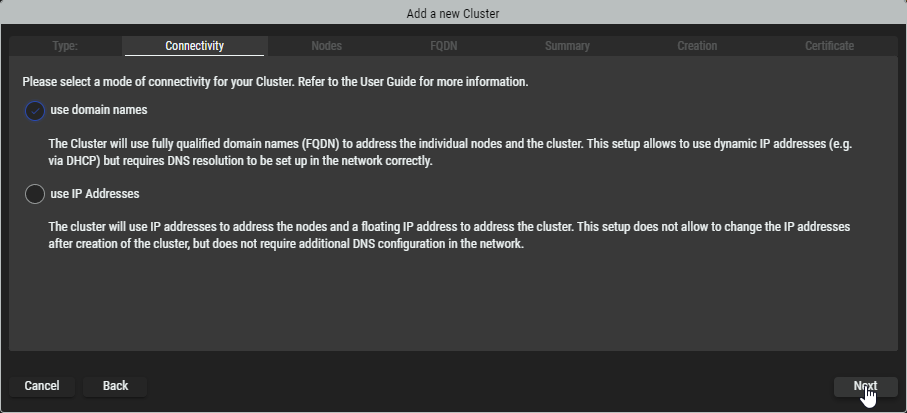
Connectivity tab
-
Select whether you want to address your nodes via domain names (resolved by DNS) or via IP addresses.
use domain names : The Cluster will use fully qualified domain names (FQDN) to address the individual nodes and the cluster. This setup allows to use dynamic IP addresses (e.g. via DHCP) but requires DNS resolution to be set up in the network correctly.
use IP address: The cluster will use IP addresses to address the nodes and a floating IP address to address the cluster. This setup does not allow to change the IP addresses after creation of the cluster, but does not require additional DNS configuration in the network.
-
The DNS Name will be the address used to access the web interface of the Application you will install. Please make sure that the DNS Name will be resolved to the IP address of your Cluster Setup. This can be achieved by configuring your DNS server in the network or providing static entries to the
hosts-file on your computers operating system. -
In case your network does not provide DNS resolution and static entries are not an option, the Cluster Setup can also be created based on IP Addresses. In this case, select the use of IP adresses.
-
Click Next.
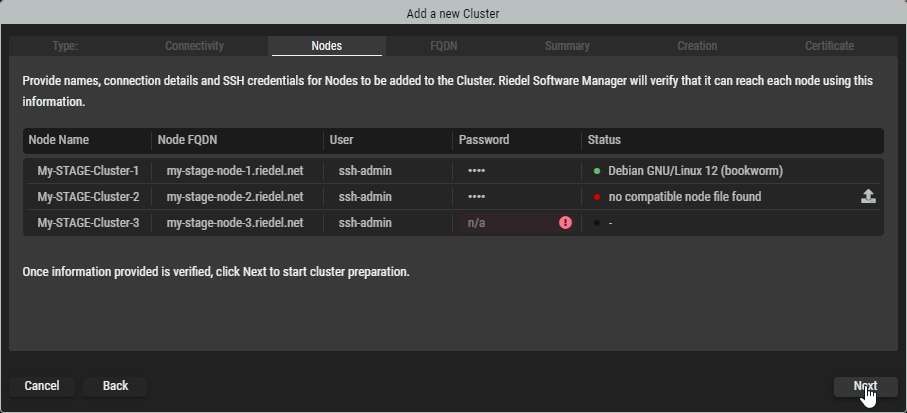
Nodes tab
-
If required, you can edit the Node Names by clicking on them.
-
Depending on the selection in the previous Connectivity tab, enter the name(s) or IP address(es) of the node(s).
For FQDN mode, either use static addresses in the background or ensure that the addresses are reserved in a DHCP server.
-
Enter the SSH credentials of the node(s).
After entering the information, the connection is verified and RSM will check if the corresponding node file has been provides before. Information about that is displayed in the status column. -
If


*.nodefile from your computer that corresponds to the operating system on your server, e.g.ues-node-1.0.0-debian-12-bookworm_amd64.node. -
If all SSH connections are established and the corresponding node files are

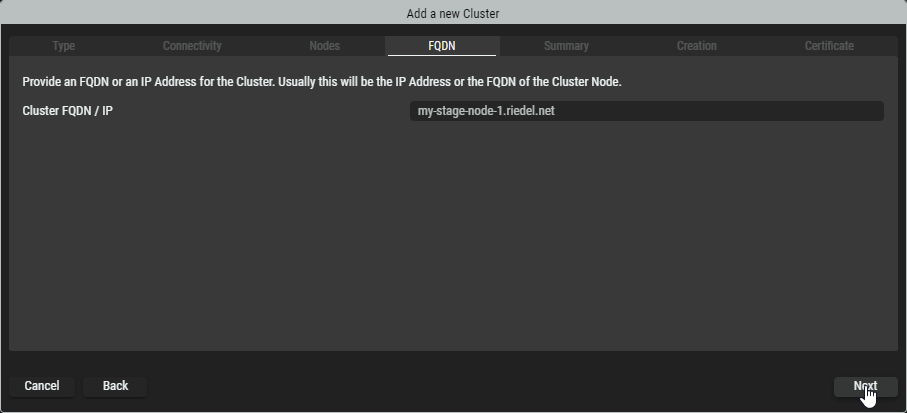
FQDN tab
-
If necessary, edit the domain / IP address of the cluster.
-
Click Next.
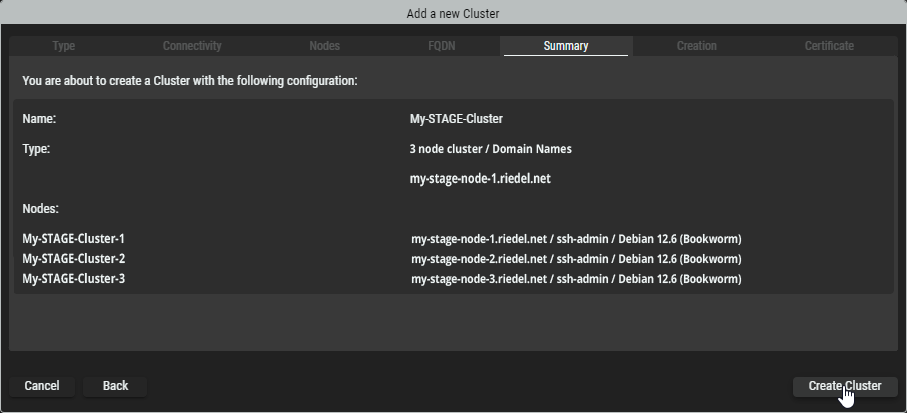
Summary tab
-
Review the provided information. Click on Back to switch to the corresponding tab to correct it.
-
Click Create Cluster to start preparing the servers or virtual machines according the Cluster setup.
Creation tab
-
Riedel Software Manager is now creating the Cluster Setup and adding the specified servers or virtual machines to it. During this process it will install the required packages on the servers to form the Cluster Setup.
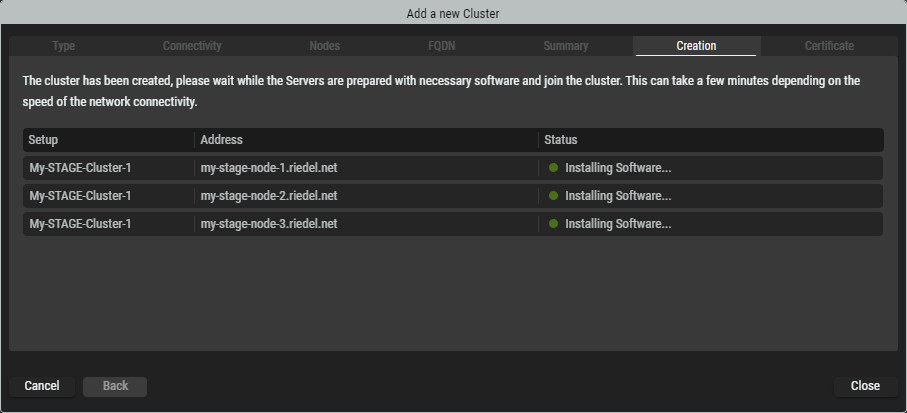
The duration of this process is dependent on the network connectivity speed between the computer running Riedel Software Manager and the individual servers or virtual machines that form the cluster.
In case one or multiple Nodes stay in “Offline” status for a long time, this indicates either a network connection issue or a login problem through the SSH connection. In this case, close the wizard, remove the pending node and add another node manually.
Certificate tab
-
Once the Cluster has been created, click Export Management Certificate to download it. This certificate is the “key” to connect to this Cluster Setup with Riedel Software Manager at a later time or from another computer.

Connecting to the Cluster with Riedel Software Manager for maintenance, updates, and so on requires the Management Certificate of the respective Cluster. This certificate must be downloaded and stored in a safe place.
Reconnecting a Cluster with Riedel Software Manager without this certificate is not possible.
-
After confirming the download of the certificate by ticking the checkbox, click Next.

-
During the installation, a self-signed certificate was generated. This certificate may trigger security warnings in browsers or other applications when connecting to the cluster. To avoid these warnings, you can export the certificate and add it to your browser's trusted certificates, or you can import a certificate provided by your organization for the cluster to use.
Click Close to exit the wizard.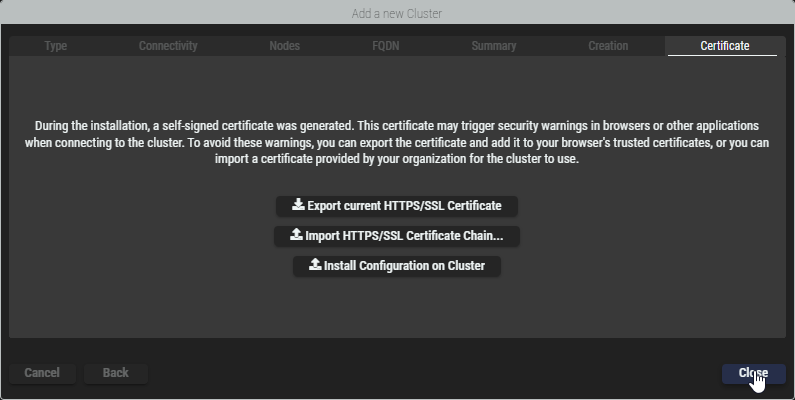
Connecting to an existing Server Setup
To connect to an existing Cluster Setup you will require the DNS Name of the Cluster Setup and the Management Certificate generated during creation of the Cluster Setup.
-
Click Import… in the center section of the Clusters View.
-
Provide the DNS Name and the Management Certificate and click Import.
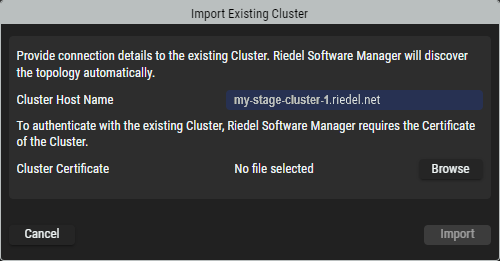
The connection process will take a few seconds to discover the Cluster Setup topology.
Destroy a Cluster Setup
-
To remove a Cluster Setup from Riedel Software Manager, select the desired Cluster Setup and click Destroy.
-
A warning dialog will appear informing you that this will remove the running Configuration, release all Nodes from the Cluster and remove all Server files from the Nodes.
Click Delete to confirm and destroy the Cluster setup.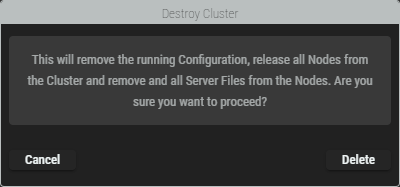

Nodes
This section shows all available Nodes created in the Cluster Setup.
The software of a Server Configuration that is deployed in a Cluster Setup is installed on a single node for normal availability and on three nodes for high availability. Ensure that you have enough nodes to form a cluster.
|
|
Click to manage (import and delete) Node files. |
|---|---|
|
|
Click to delete the selected Node. |
|
|
Click to add another node. |
|
|
Indicates whether the corresponding node is online ( |
|
Name |
Name of the corresponding Node. |
|
Address |
Fully qualified domain name or IP address of the corresponding Node. |
|
Node File |
Shows the version number of the corresponding Node file. |

Cluster / Node Details
Depending on the selection in the center section (Cluster or Node), the corresponding content is displayed in this Details section.
Cluster Details
Select a Cluster Setup in the list in the center section to inspect it. The right hand area will display the properties. The Cluster Details are displayed on several tabs:
Status tab
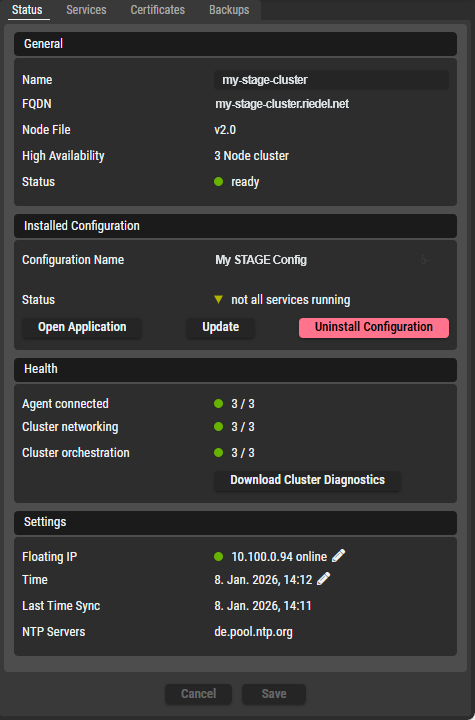
The Status tab displays information in various groups.
|
General |
Name |
Here you can change the name of the Cluster Setup. |
|---|---|---|
|
FQDN |
Here you can review the domain name. |
|
|
Node File |
Shows the version number of the corresponding Node file. |
|
|
High Availability |
Here you can see if the cluster in running on a single node of on a 3 Node Cluster. Click Upgrade to High Availability to turn your single node setup into a three node setup. See chapter Upgrading Cluster Setup to High Availability Wizard. |
|
|
Status |
Inidicates the status of the Cluster. |
|
|
Installed Configuration |
Configuration Name |
Here you can review the name of the installed Configuration. |
|
Status |
Here you can review the status. Click on Open Application to open the clusters domain name / IP address in your default browser. Click on Update to update the current Server Configuration of the selected Cluster Setup.
Click on Uninstall Configuration to remove the current Server Configuration from the selected Cluster Setup.
|
|
|
Health |
Agent connected |
The health section shows a sum up of the status of Server Setup components. A green indicator and Click on Download Cluster Diagnostics to download a zipped diagnostics file in .json format. |
|
Cluster networking |
||
|
Cluster orchestration |
||
|
Settings |
Floating IP |
Indicates if the system operates with floating IPs. |
|
Time |
Shows the current time of the cluster. Click the pencil icon to set the time. |
|
|
Last Time Sync |
Timestamp of the last time synchronization. |
|
|
NTP Servers |
Shows the time server. |
|
|
Buttons |
Cancel |
Click to discard any changes you have made. |
|
Save |
Click to apply any changes you have made. |
Service tab
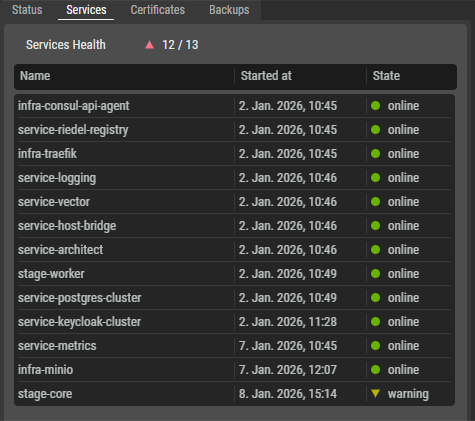
The Services tab shows all the individual services of the installed application and their status.
|
Name |
Shows the name of the corresponding service. |
|---|---|
|
Started at |
Shows the date and time when the service was started. |
|
State |
Indicates whether the corresponding service is running ( |
Certificates tab
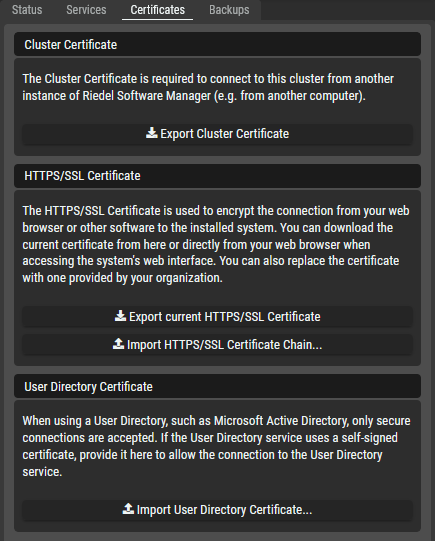
The Certificates tab allows to export and import certificates.
|
Cluster Certificate |
The Cluster Certificate is required to connect to this cluster from another instance of Riedel Software Manager (e.g. from another computer). |
|---|---|
|
HTTPS/SSL Certificate |
The HTTPS/SSL Certificate is used to encrypt the connection from your web browser or other software to the installed system. You can download the current certificate from here or directly from your web browser when accessing the system's web interface. You can also replace and import the certificate with one provided by your organization. |
|
User Directory Certificate |
When using a User Directory, such as Microsoft Active Directory, only secure connections are accepted. If the User Directory service uses a self-signed certificate, provide it here to allow the connection to the User Directory service. |
Backups tab

|
Export Backup |
A backup contains a snapshot of the database installed application. It can be used to transfer the application data to another Cluster or to restore data in case the Cluster gets damaged. |
|---|---|
|
Import Backup |
Importing a backup will overwrite the application database with data from the backup. During the restore process, the application will be stopped and restarted after the backup has been restored. |
See also chapter Managing Backup Restore.
Node Details
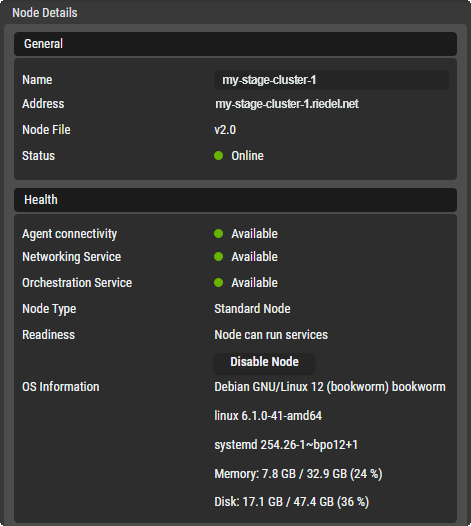
Select a Node in the list in the center section to inspect it. The right hand area will display the properties.
|
General |
Name |
Shows the name of the node. |
|---|---|---|
|
Address |
Shows the domain name or IP address of the node. |
|
|
Node File |
Shows the version number of the corresponding Node file. |
|
|
Status |
Indicates whether the node is currently online ( |
|
|
Health
|
Agent Connectivity |
Indicates if node-agent is installed on all nodes (for communication between RSM and the cluster). |
|
Networking Service |
Indicates if service used to manage network and node discovery is installed on all nodes. |
|
|
Orchestration Service |
Indicates if service used for orchestration of the services of a suite file is installed on all nodes. |
|
|
Node Type |
Shows the cluster’s node type.
|
|
|
Readiness |
Shows an overall health message for the node. |
|
|
OS Information |
Shows details about the node’s operating system and the utilization of hardware resources such as RAM and Hard Disk. |
|
|
Buttons |
Cancel |
Click to discard any changes you have made. |
|
Save |
Click to apply any changes you have made. |

Server Configurations
This section shows all Server Configurations created in the Configurations view. The Server Configuration selected here is used to form a Cluster that you create on the right.
|
|
Set a filter to display only content whose search text is found in the name. |
|---|---|
|
|
Indicates whether the corresponding Server Configuration is valid ( |
|
Name |
Name of the Server Configuration. |
|
Install Configuration on selected Cluster |
Click to install the selected Server Configuration on the selected Cluster Setup. |
Installing a Server Configuration on a Cluster Setup
-
After creating the Cluster Setup, verify that the Setup is healthy by checking the indicators next to the Clusters and Nodes Names.
-
When all indicators light up green, select a Server Configuration on the left and a Cluster in the middle and click Install Configuration on selected Cluster at the bottom left.

-
The license agreement of the Application you are installing is shown.
Accept the terms by ticking the checkbox. Click Install to start the installation.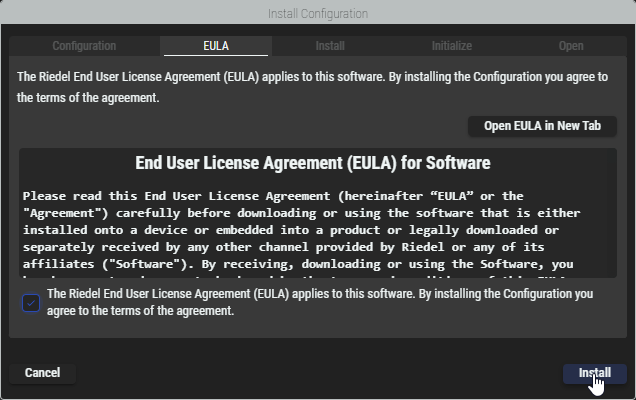
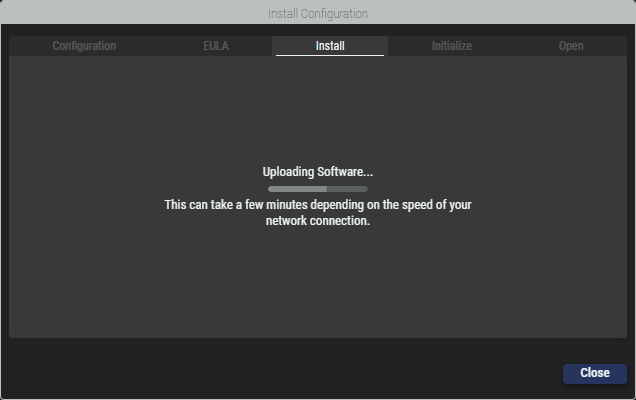
-
Riedel Software Manager is now installing the selected Configuration on the selected Cluster. This process can take a few minutes depending on the speed of your network connection.
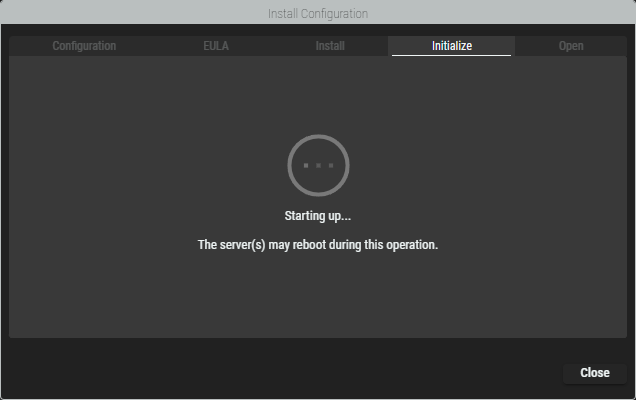
-
Once the installation has been finished, the servers are started.
-
After all services are started, click Close to exit the wizard.
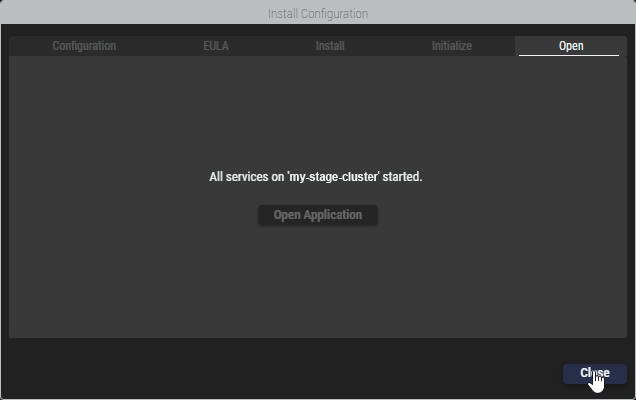
After the installation is finished you can proceed to open the web interface of the application or close the wizard.