
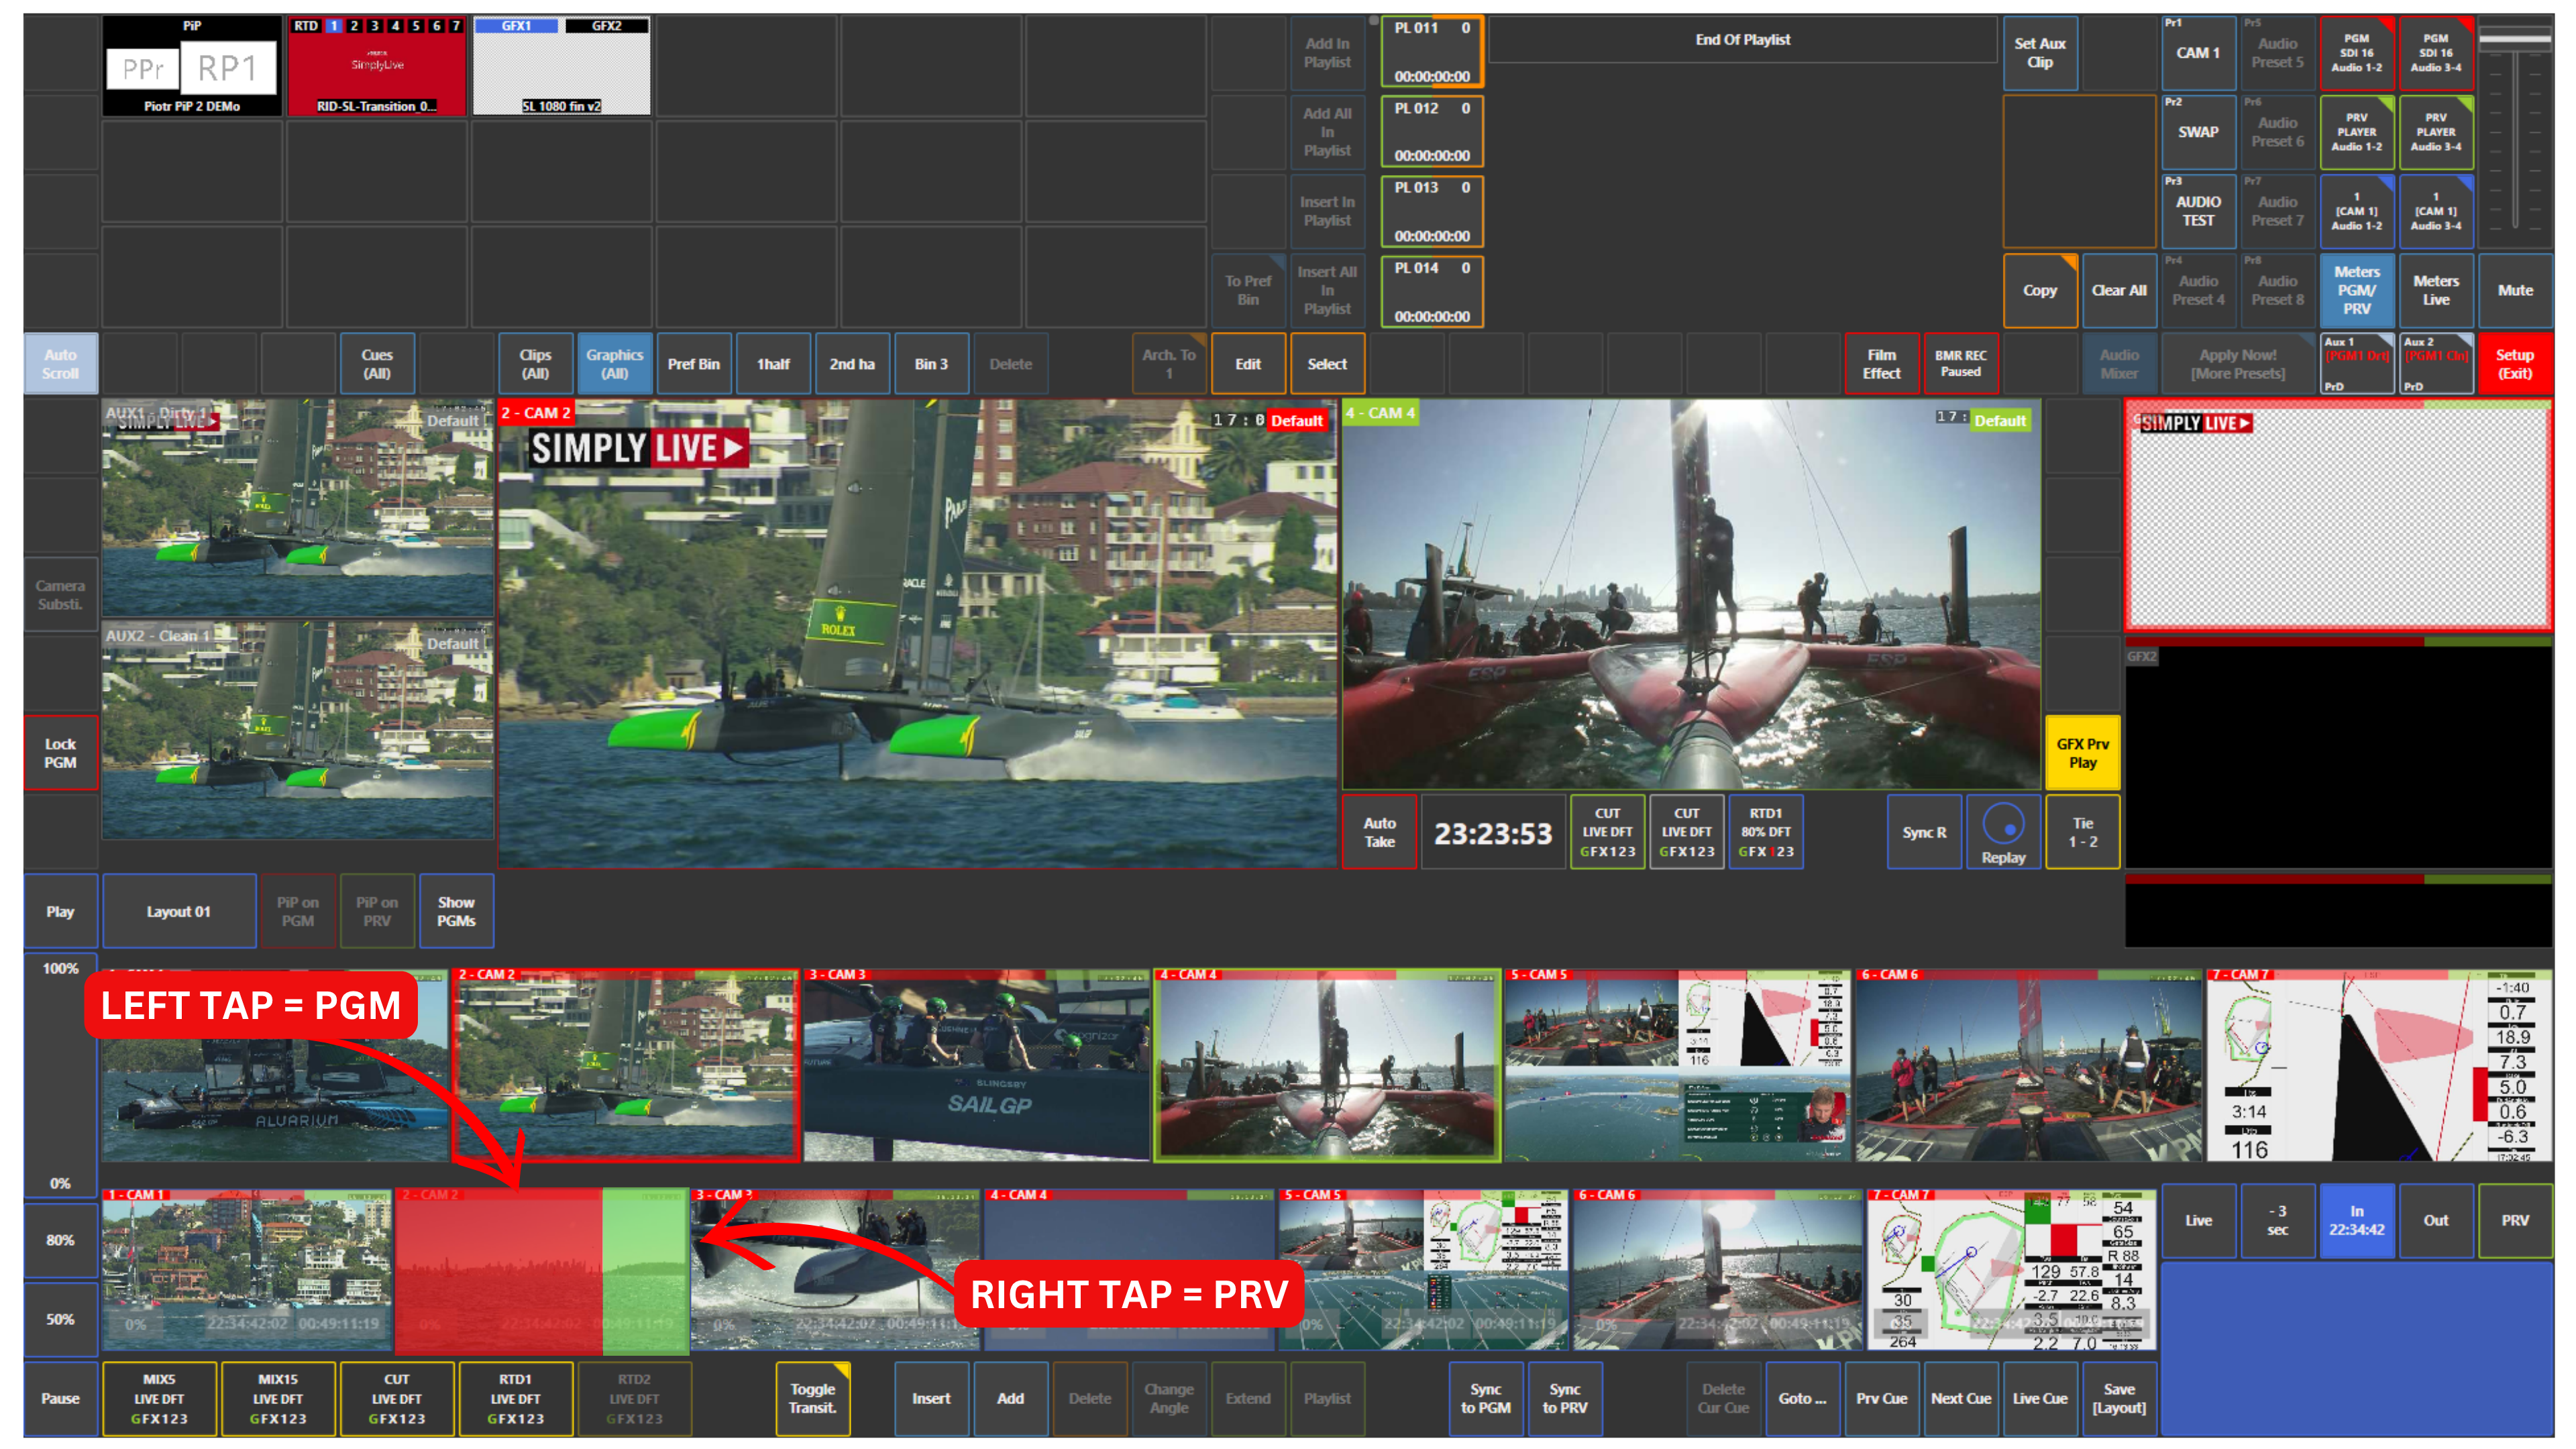
Switching replay cameras in Production works in the same way as switching input cameras.
To do this, use the replay camera layer, which is the bottom row of replay thumbnails.
To access the options for the replays, use the blue touchpad at the bottom right or you can also use the shuttle express controller.
The same rule applies:
-
Tap the left side, highlighted in red, to load the replay camera to Program (PGM)
-
Tap the right side, highlighted in green, to load the replay camera to Preview (PRV)
This allows you to prepare or take replay angles directly from the replay camera layer during production.
Auto Start Mode
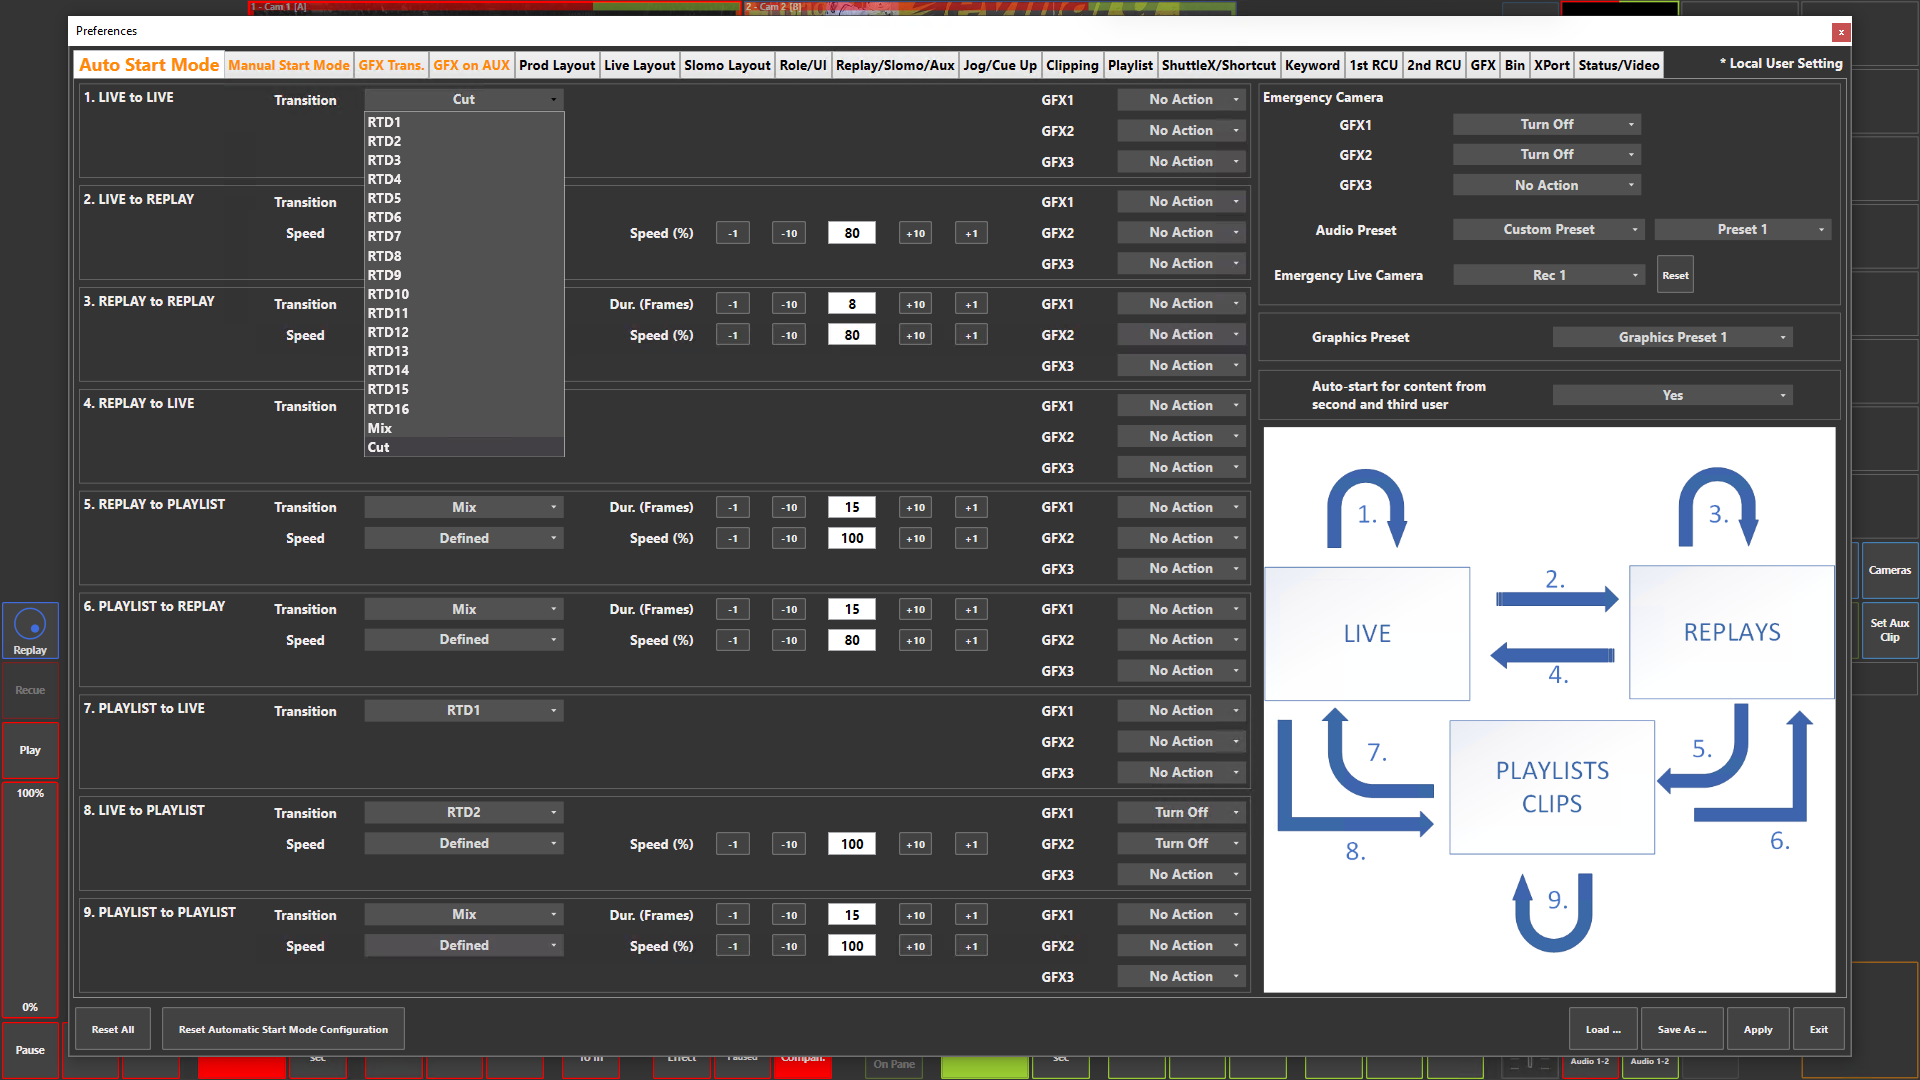
Auto Start Mode automates transitions and graphics changes when switching between Live, Replay and Playlist. Go to Setup > Prefs > Auto Start Mode and configure each switch separately, such as Live to Replay, Replay to Live, Replay to Replay, Replay to Playlist or Live to Playlist.
Choose Cut, Mix or a replay transition (RTD1–RTD16). For each graphics layer (GFX1, GFX2 and GFX3), select Turn On to activate it, Turn Off to remove it, or No Action to leave its current state unchanged.
Use Case – Live Production Scenario
When switching from Live to Replay, use RTD1 and turn off the graphics layers carrying the score and clock for a clean replay. For Replay to Live, choose the same transition or a different one, and turn the relevant layers back on to restore the score, clock and logos. These actions happen automatically whenever you make the corresponding switch.
Pro Tip — Different Wipes In and Out
You can use different wipes for different actions. For example, choose RTD1 for Live to Replay as your wipe in, and RTD2 for Replay to Live as your wipe out. For a simple transition, choose Mix or Cut instead.