The Shuttle Xpress features four programmable buttons, each of which can be assigned to different functions depending on your workflow.
This allows you to customise the controller to match your production style and speed.
Available Functions
Based on your system configuration, the following functions can be assigned to Shuttle Xpress buttons:
-
None
-
Toggle control
-
Jump backward
-
Pause
-
Play
-
Slomo speed 1
-
Slomo speed 2
-
Live
-
All Live
-
Mark In
-
Mark Out
-
Save
-
Mark (cue point)
-
Live Cue
-
Previous cue
-
Next cue
-
Add to Playlist
-
Insert to Playlist
-
Insert After to Playlist
How to configure
-
Go to: Setup → Prefs
-
Locate the Shuttle Xpress configuration section
-
Assign functions to:
-
Button 1
-
Button 2
-
Button 3
-
Button 4
-
Each button can have a different role depending on your needs.
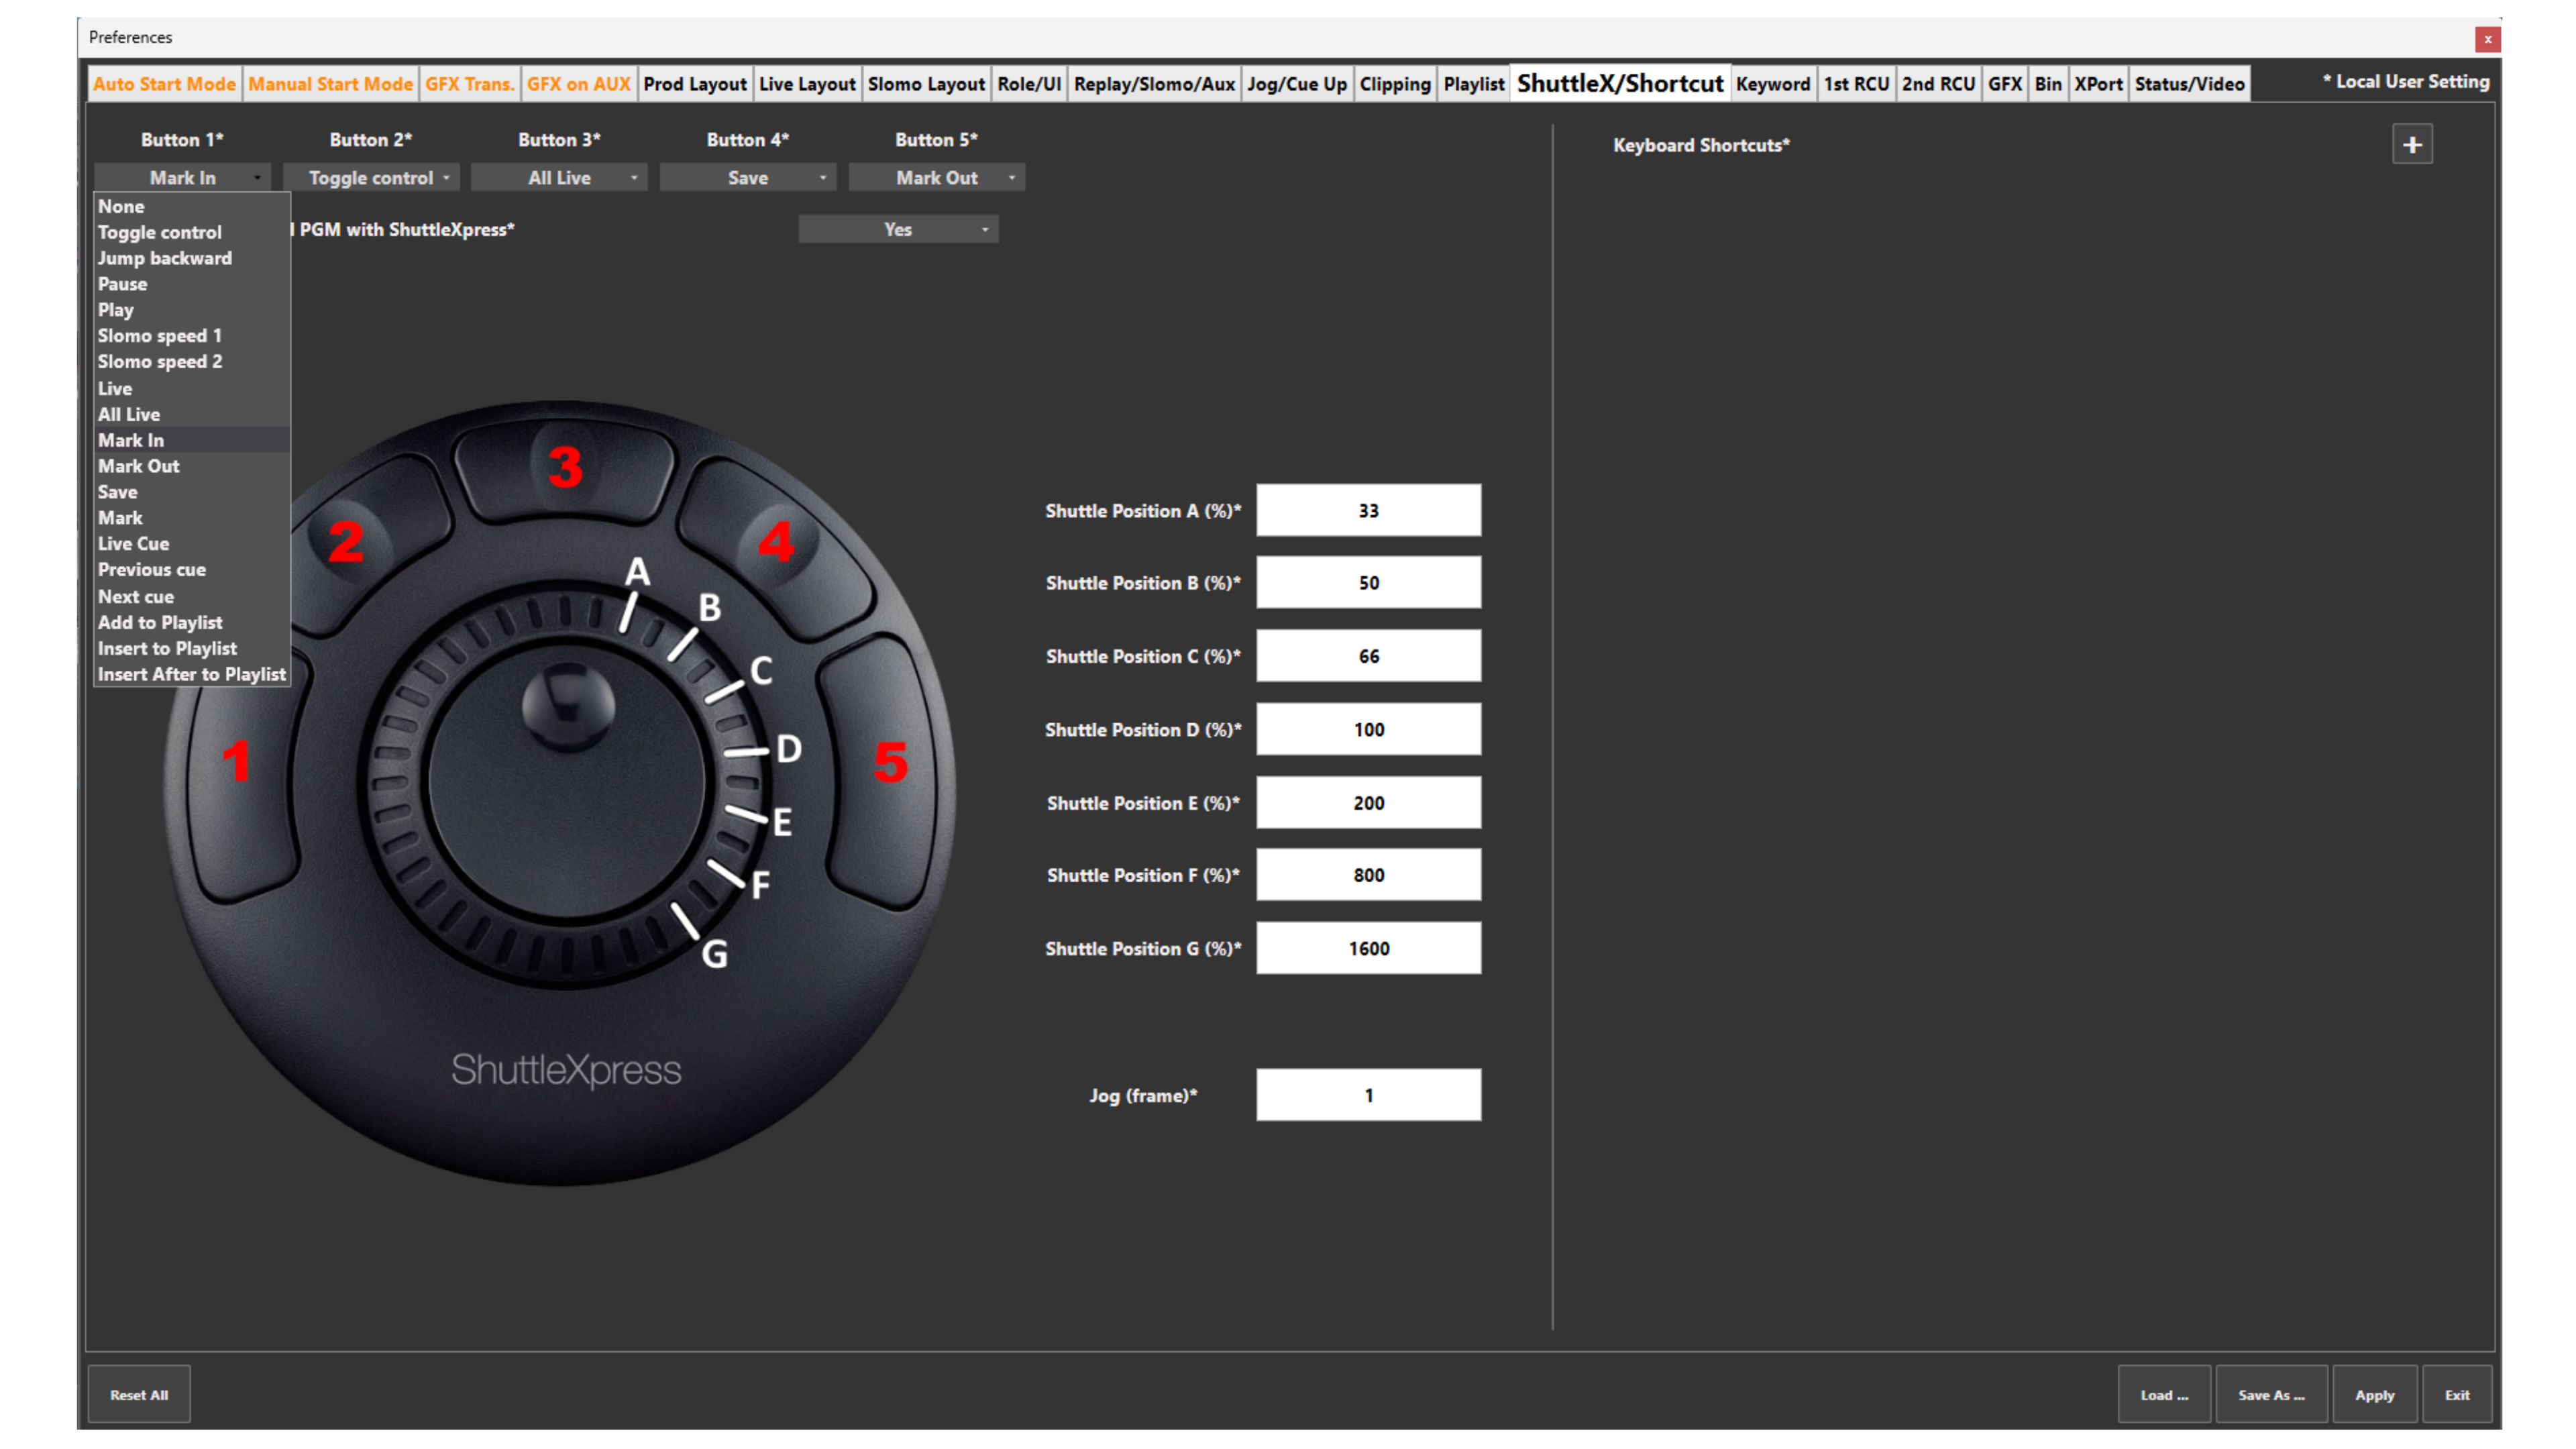
Jog / Shuttle Behaviour
You can also adjust how the Shuttle Xpress behaves when navigating:
-
Jog sensitivity (frame-by-frame control)
-
Shuttle speed (how fast you move through the record train)
This determines:
-
How quickly you move left/right
-
How aggressive or precise your navigation is
In practice:
-
Lower values = more precise control
-
Higher values = faster navigation
Use Case – Live Production Scenario
You are in a fast-paced live production.
-
Button 1 → Mark In
-
Button 2 → Mark Out
-
Button 3 → Save
-
Button 4 → Toggle control
You:
-
Scroll through inputs using Shuttle
-
Mark the action instantly
-
Save without touching the main controller
At the same time:
-
PGM1 is playing out
-
PGM2 is being prepared on touchscreen
You are effectively working with:
👉 Three control layers at once
Pro Tip
Shuttle Xpress can become your extra hand.
With the right button mapping, you can:
-
Mark
-
Save
-
Navigate
-
Trigger actions
…without leaving your main workflow.
This is where it becomes extremely powerful in live production.