
Interface Orientation
Overview
This tutorial introduces the main regions of the hi web interface.
After this tutorial, you can identify the navigation drawer, current page, system status, and active workspace.
Before You Begin
-
Obtain the approved hi server address and a valid sign-in method.
-
Confirm that the client meets the System Requirements.
-
Confirm that the client can reach the supplied hi server address through the approved network path.
-
Confirm with the administrator that the required access and session capacity are available.
-
Use an account with access to at least one standard page in the hi web interface.
Sign In
-
Open the server address supplied for the installation in a supported browser.
-
Complete the configured local or Microsoft Entra ID sign-in flow.
-
If sign-in fails, use the symptom-based guidance in Troubleshooting.
See Login for authentication modes, messages, and session behavior.
Identify the Main Regions
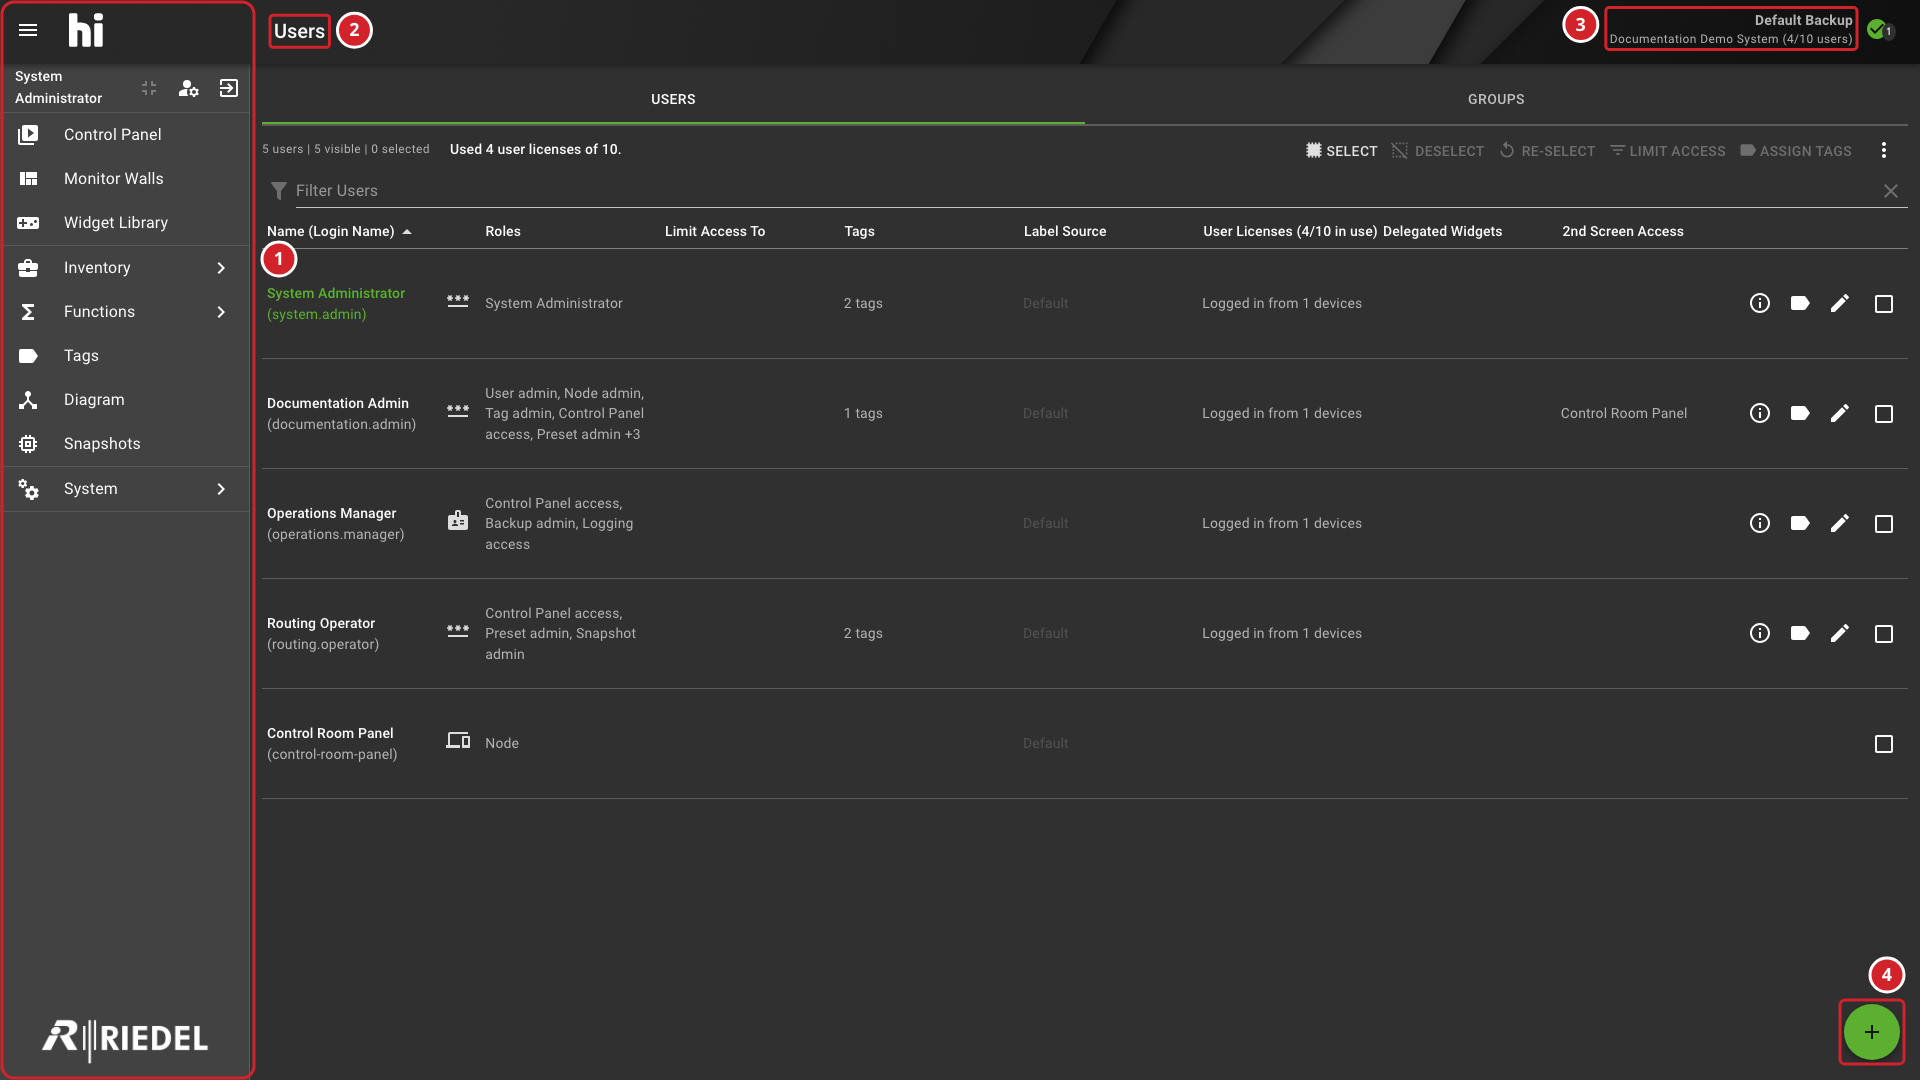
The following image identifies the main navigation, current page, installation status, and the workspace action used in this example.
-
The navigation drawer lists the pages available to the signed-in user.
-
The page heading identifies the open Users workspace.
-
The application bar shows the installation name and active Backup.
-
The + button opens the form for adding a user.
Open a Page
-
Select the Menu Toggle. After selecting a page, the navigation drawer collapses automatically when the browser viewport is narrower than 1912 pixels.
-
Select a destination available to your role.
-
Confirm that the Current Page and Workspace change to the selected destination.
Menu membership depends on the active licenses and the current user's roles. See Interface: Menu Items for the full list of destinations.
Review System Status
Review the status area without interpreting an icon from color alone. Select an available indicator to display its details.
See Interface: Connection State Indicators for the state meanings.
Verify the Result
Confirm that you can:
-
Open and close the navigation drawer.
-
Open a page available to your role.
-
Identify the Current Page, System Status, Main Menu, and Workspace.
Next Steps
-
If the installation does not contain a configured Node, continue to Add Your First Device.
-
If compatible Sources and Destinations already exist, continue to Make Your First Route.