
Prepare a Control Panel Preset
Overview
This tutorial creates one Control Panel Preset for a first routing exercise. The Preset uses Take mode and shows the required Source and Destination through Tag filtering.
After this tutorial, the Control Panel contains a saved Preset that is ready for a controlled route.
Before You Begin
-
Complete Add Your First Device, or use an installation with commissioned Nodes.
-
Confirm that the Topology contains one compatible Source and Destination.
-
Confirm that the Tags you plan to use are defined. See Manage Tags to create or manage Tags.
-
Use an account with the Node admin role to assign Tags to Ports and permission to create a Preset.
-
Confirm that changing the selected Destination is safe in the current operating context.
Tag the Sources and Destinations
Assign at least one Tag to every Source and Destination Port that you want to filter into the Preset. The Control Panel filters Ports by their assigned Tags.
-
Select Inventory > Nodes.
-
Select a Node that contains a required Source or Destination, then open its Tagging tab.
-
Select the required Ports and select Assign Tags.
-
Assign the Tags before filtering the Source and Destination lists.
-
Repeat for each Node that contains a required Port.
See Node List: Port Tagging for the full Tag assignment procedure.
Open the Control Panel
-
Select Control Panel from the main menu.
-
Confirm that the required Source and Destination Tag categories are visible.
Filter the Port Lists
-
Select the Tags that identify the required Source.
-
Select the Tags that identify the required Destination.
-
Confirm that both required Ports remain visible.
-
Adjust the AND, OR, Include, or Exclude relation when the filter hides a required Port.
See Control Panel: Filtering Sources and Destinations Using Tags for the complete filter behavior.
Create the Preset
-
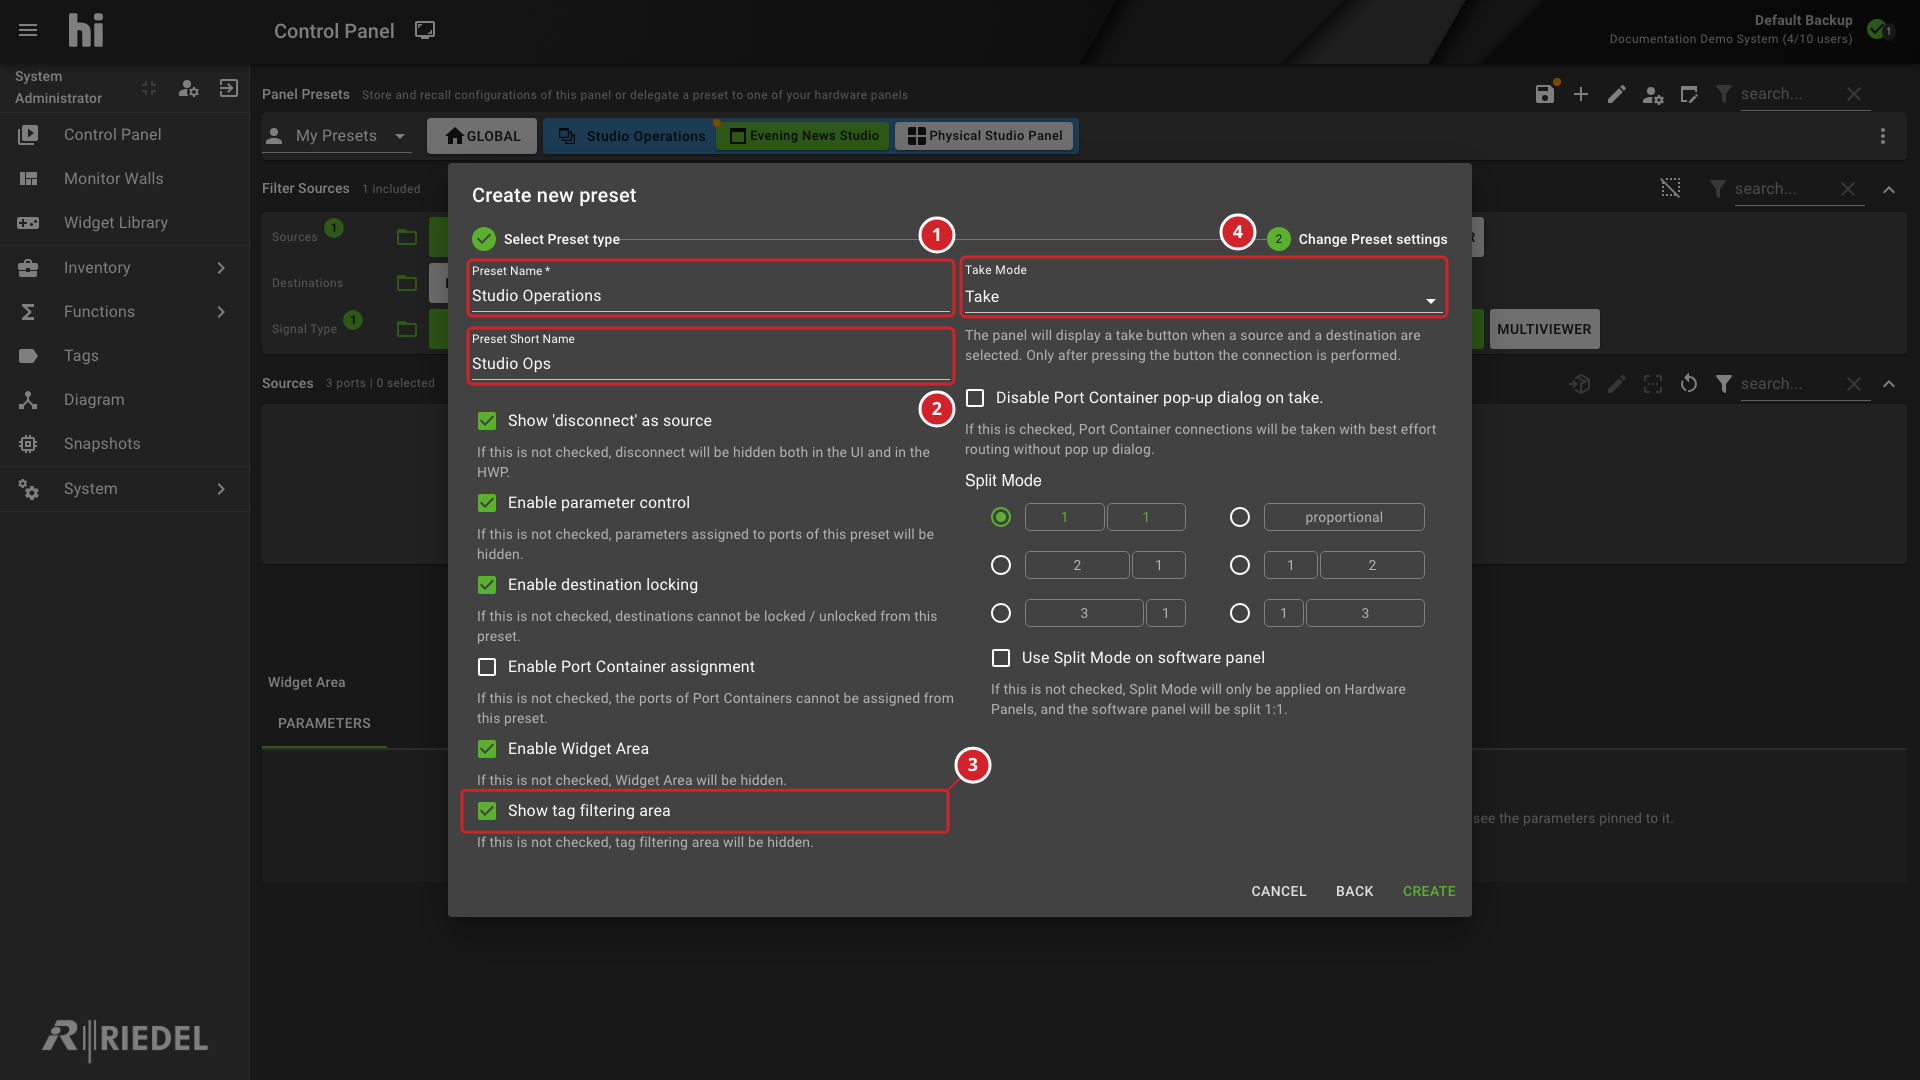
Select + to create a Dynamic Preset directly. Alternatively, open the three-dot Preset menu and select Create a new preset. If the Select Preset type step appears, select Dynamic, then select Next.
-
Open Change Preset settings.
-
Enter an operator-facing Preset Name.
-
Enter a Preset Short Name for use from a Hardware Panel.
-
Enable Show tag filtering area. It appears only for a Dynamic Preset.
-
Set Take Mode to Take.
-
Select Create.
-
Enter the operator-facing Preset Name.
-
Enter the Preset Short Name used from a Hardware Panel.
-
Enable Show tag filtering area.
-
Select Take as the Preset mode. The screenshot shows the unsaved dialog.
Verify the Result
Confirm that the Preset appears in the Preset bar. Reopen it and verify that the required Source, Destination, Tag filters, and Take action remain available.
Next Steps
Continue to Make Your First Route. Use Control Panel for advanced Preset configuration and delegation.