
Add Your First Device
Overview
This tutorial adds one supported device to an already-deployed hi installation. It ends after the Node is visible in the Node List.
After this tutorial, the installation contains a configured Node that is ready for topology work and, when compatible Ports exist, routing.
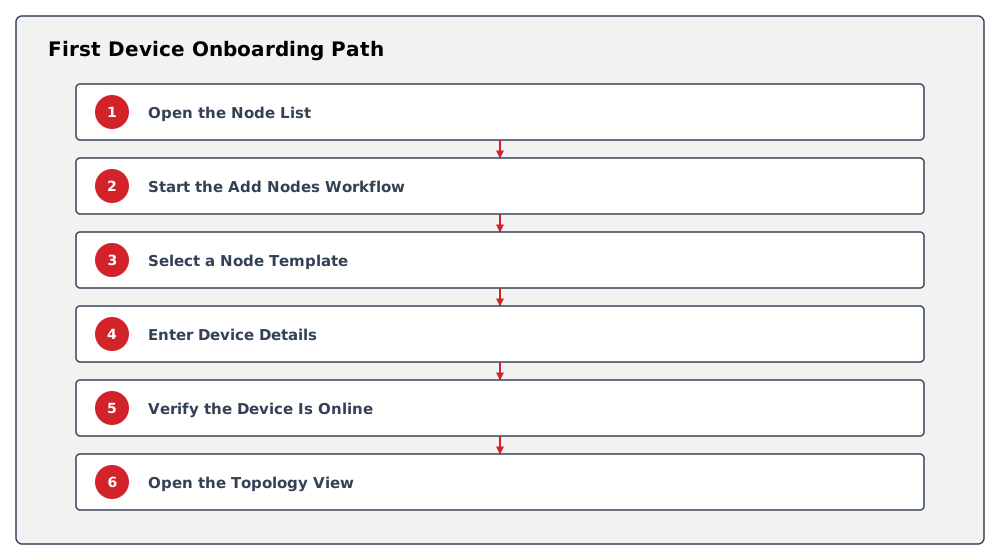
Before You Begin
-
Complete Interface Orientation.
-
Use an account with permission to add and configure Nodes.
-
Confirm that the device is listed in Integrations.
-
Obtain the device-side address, credentials, and configuration required by its integration page.
-
Confirm the required license with the administrator. See Licensing for entitlement details.
Open the Node List
-
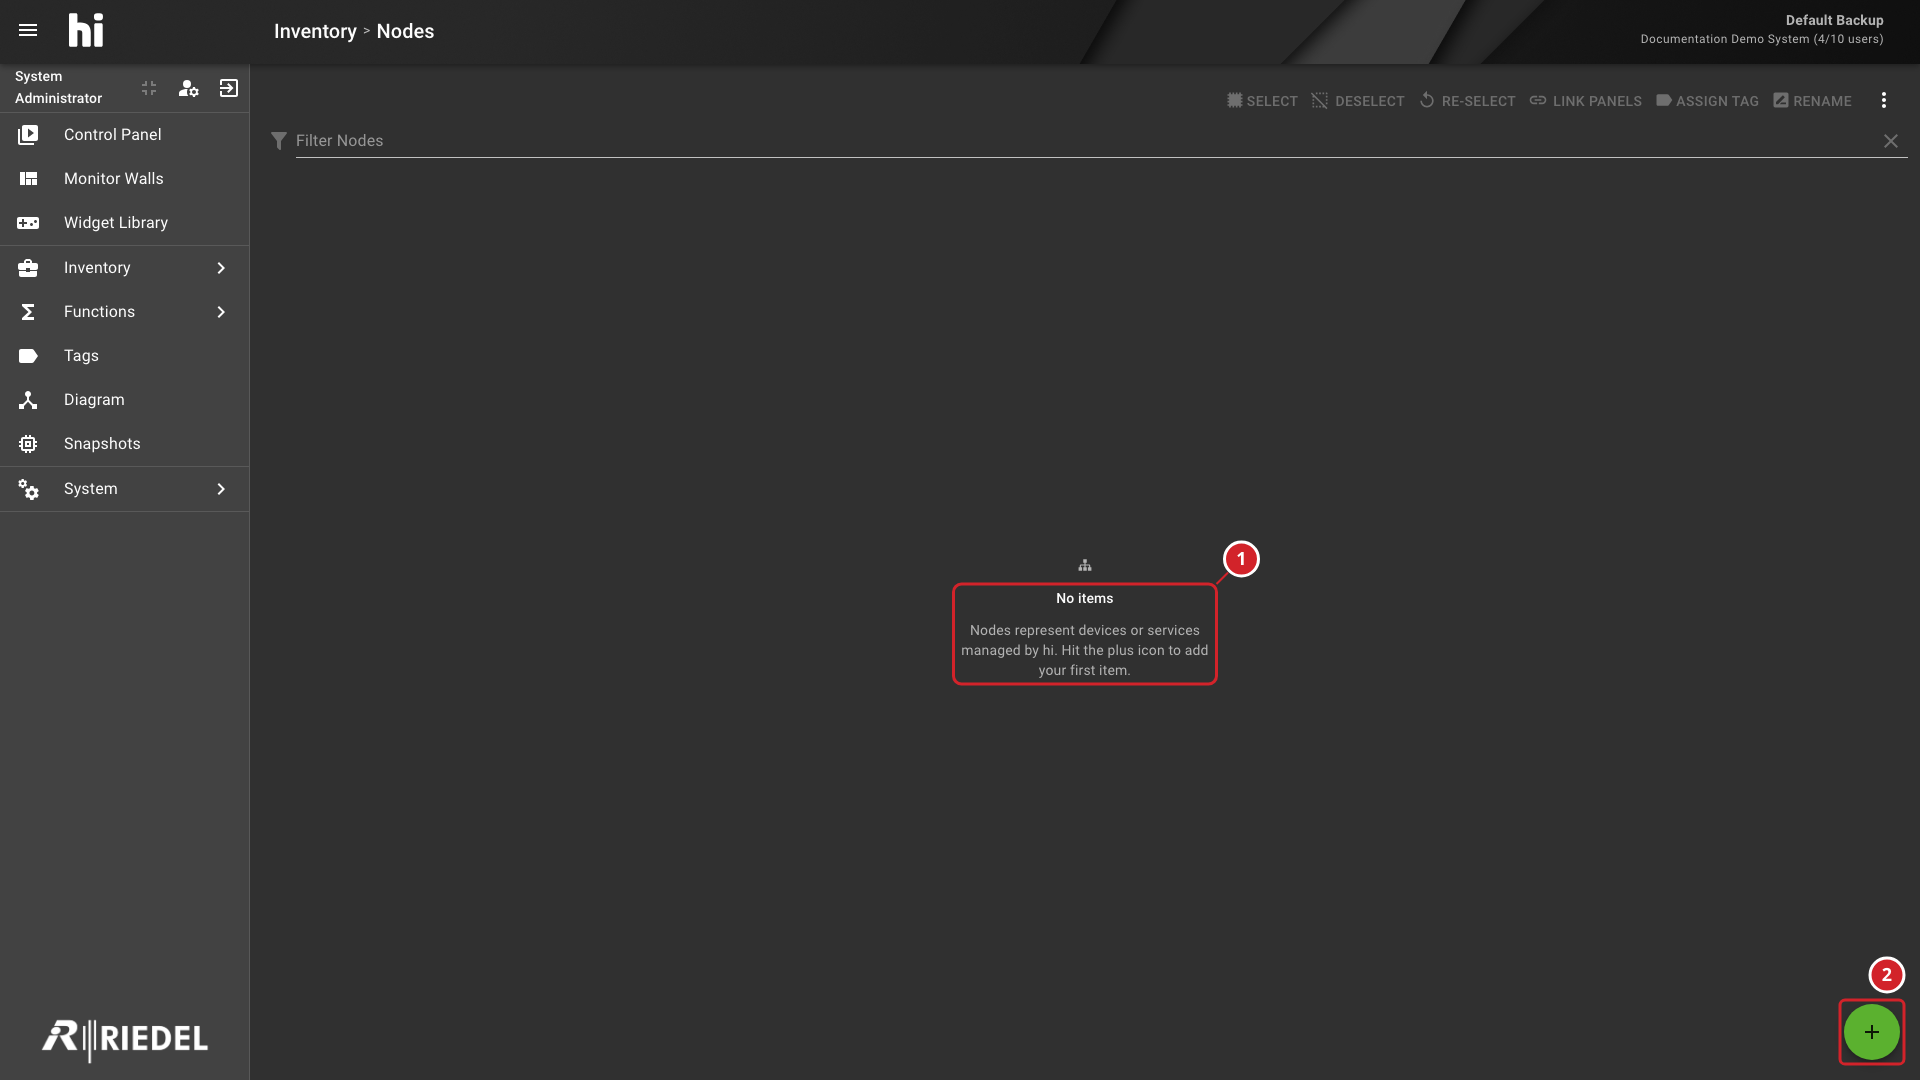
Select Inventory > Nodes.
-
Select +.
-
The empty Node List explains what Nodes represent.
-
Select the plus button to begin adding a Node.
Start the Add Nodes Workflow
-
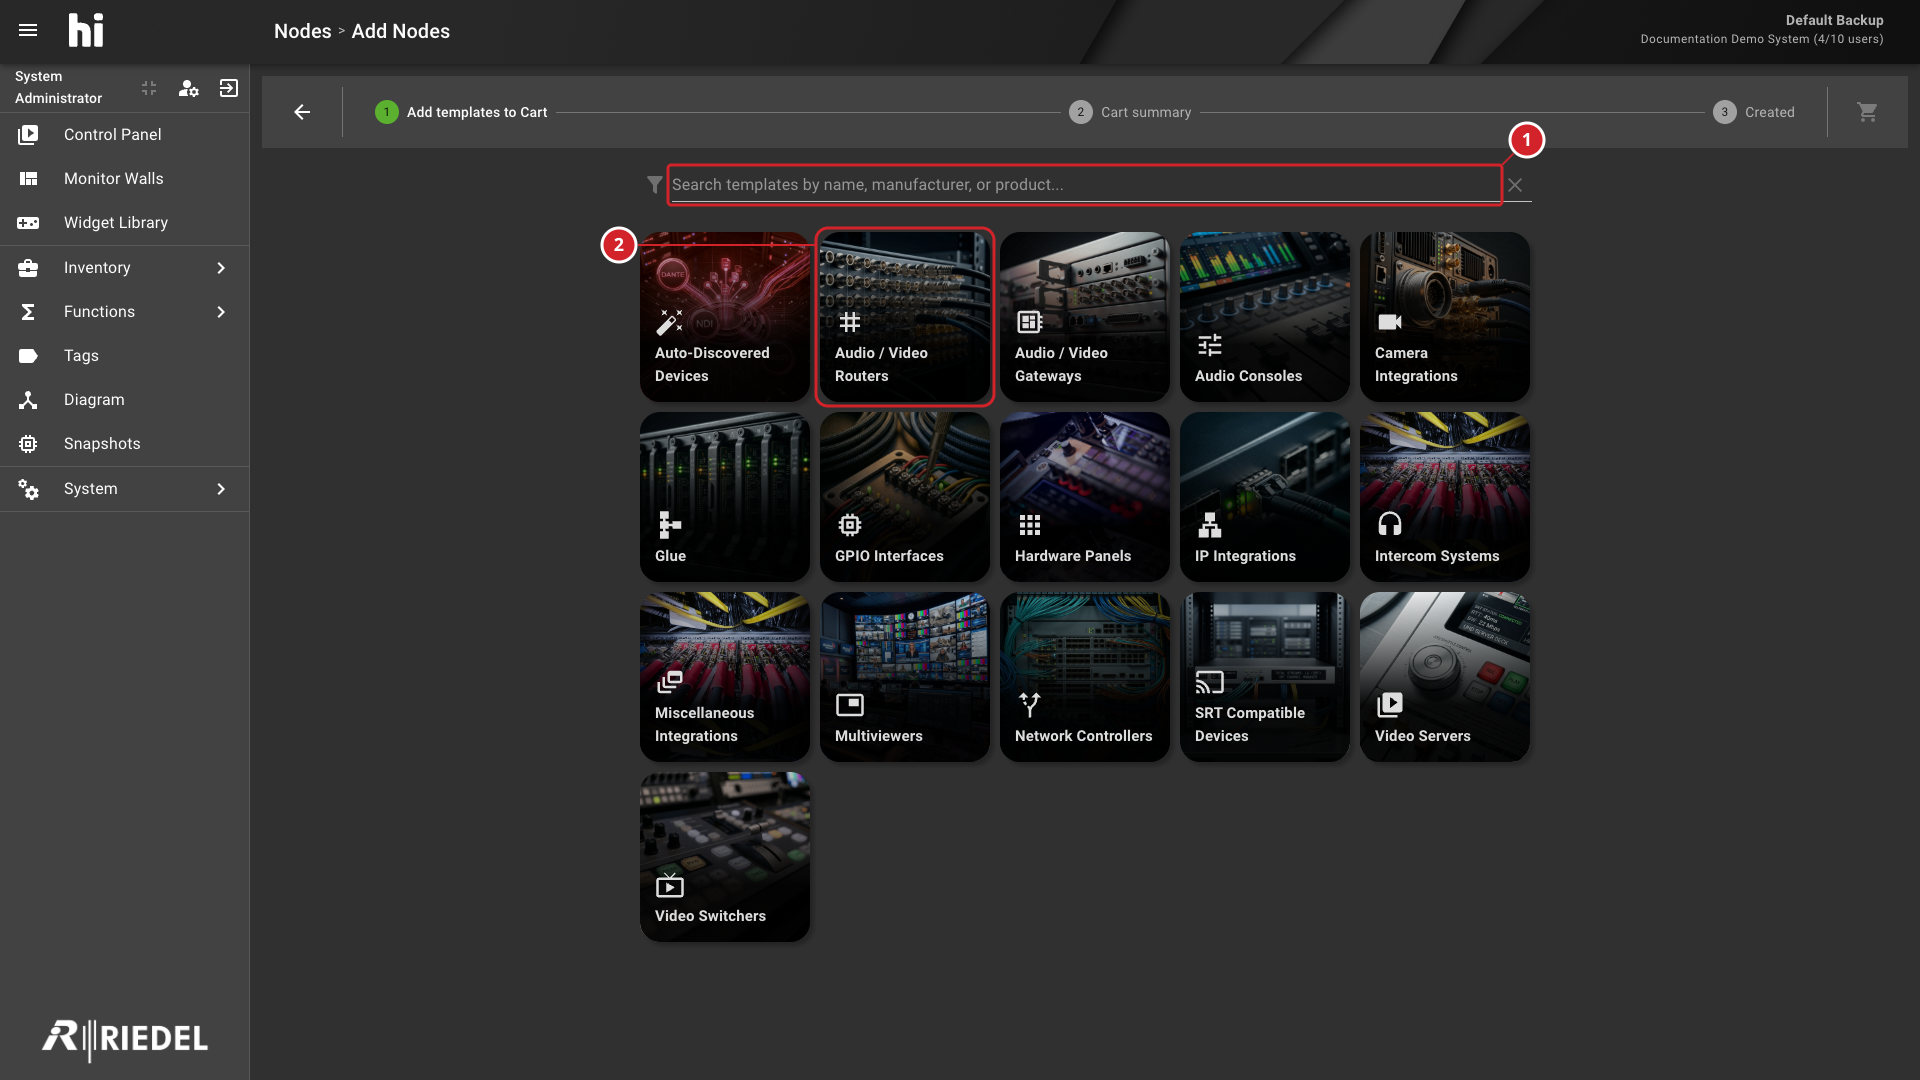
Search for a device or manufacturer, or select a device category.
-
Search the available device templates by name, manufacturer, or product.
-
Select a device category to browse its templates.
Some integrations provide discovery workflows. Use the device's Integrations page and Nodes for discovery behavior.
Select a Node Template
-
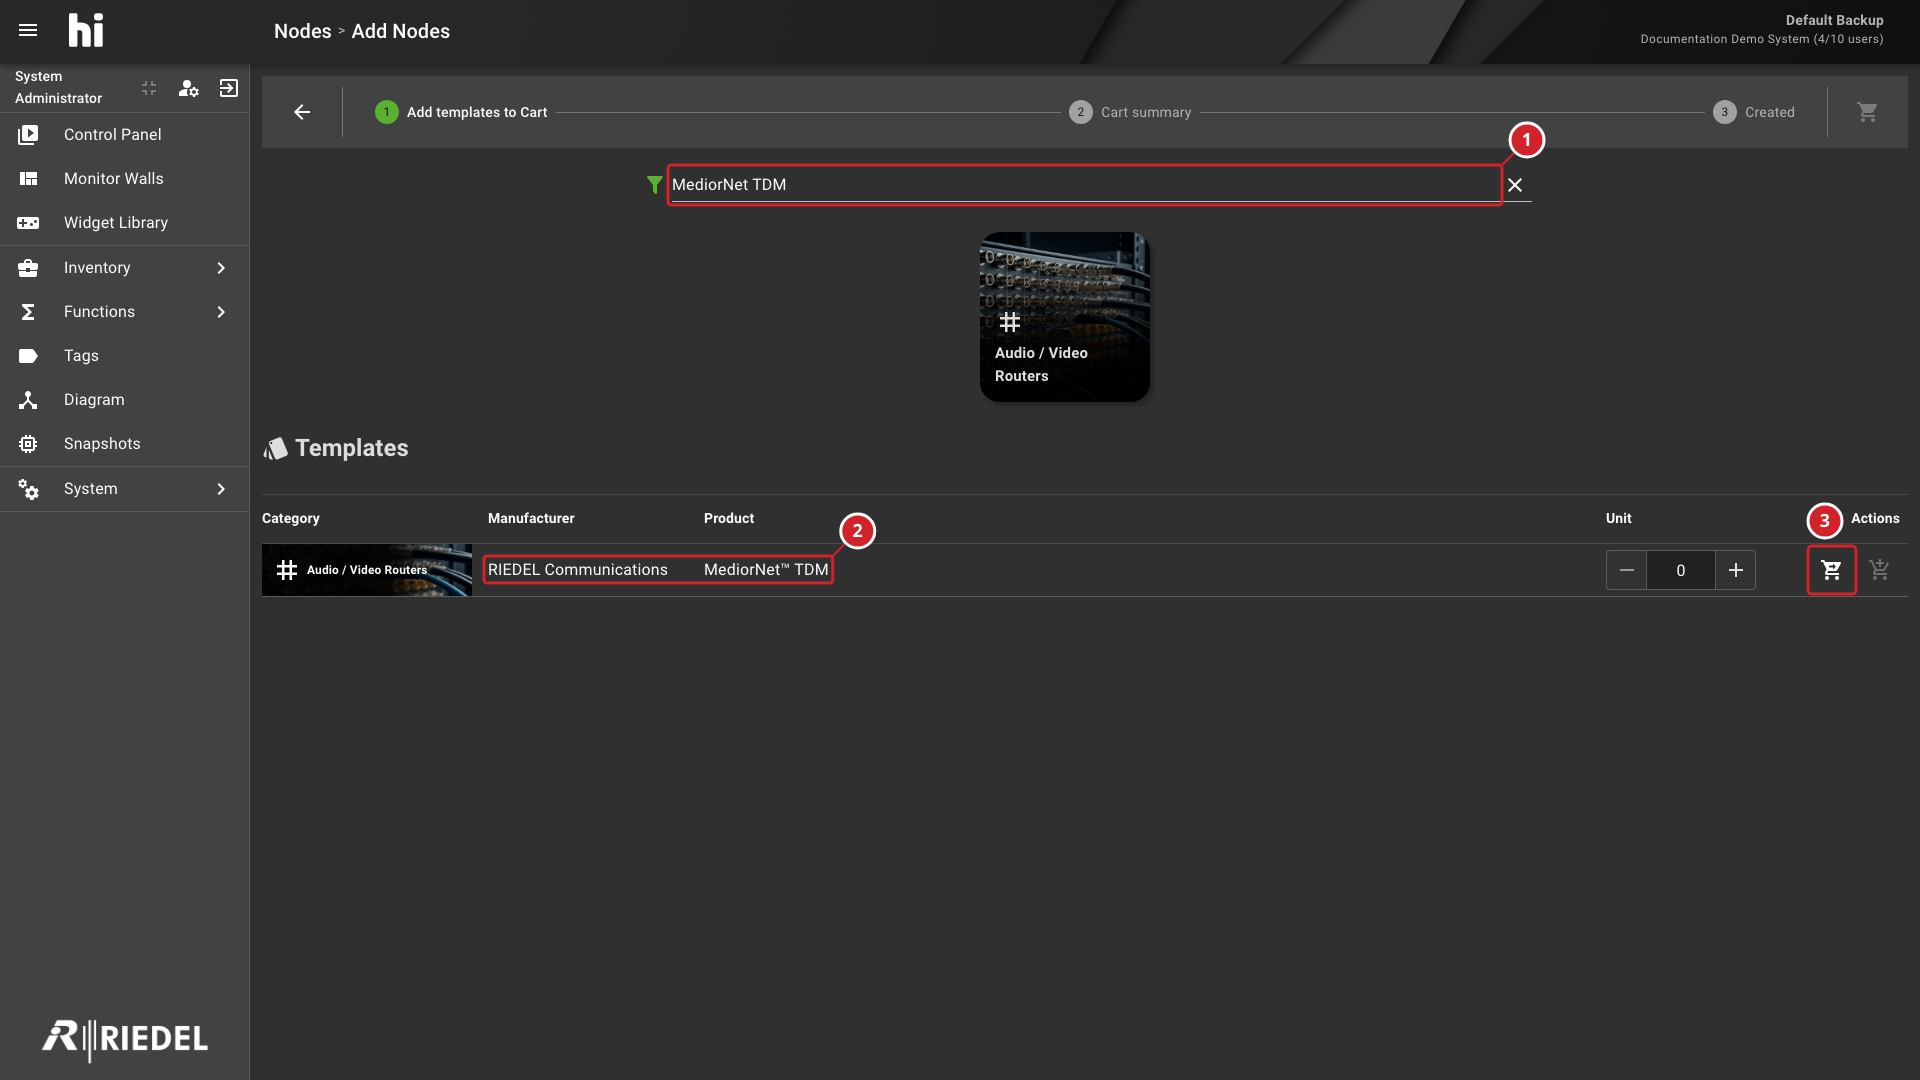
Search for the required device. This example uses a Riedel MediorNet™ TDM frame.
-
Find a Node Template that matches the supported device and active license.
-
Use the direct-create action to open the device configuration, or add the template to the cart and proceed to Cart summary. This example uses the direct-create workflow.
-
Search narrows the available device templates.
-
This result is the MediorNet TDM template.
-
Create a Node directly from the selected template.
Templates requiring an unavailable license can appear disabled.
Enter Device Details
Enter only the fields presented by the selected Node Template. These fields can include a display name, management address, credentials, and integration-specific options.
-
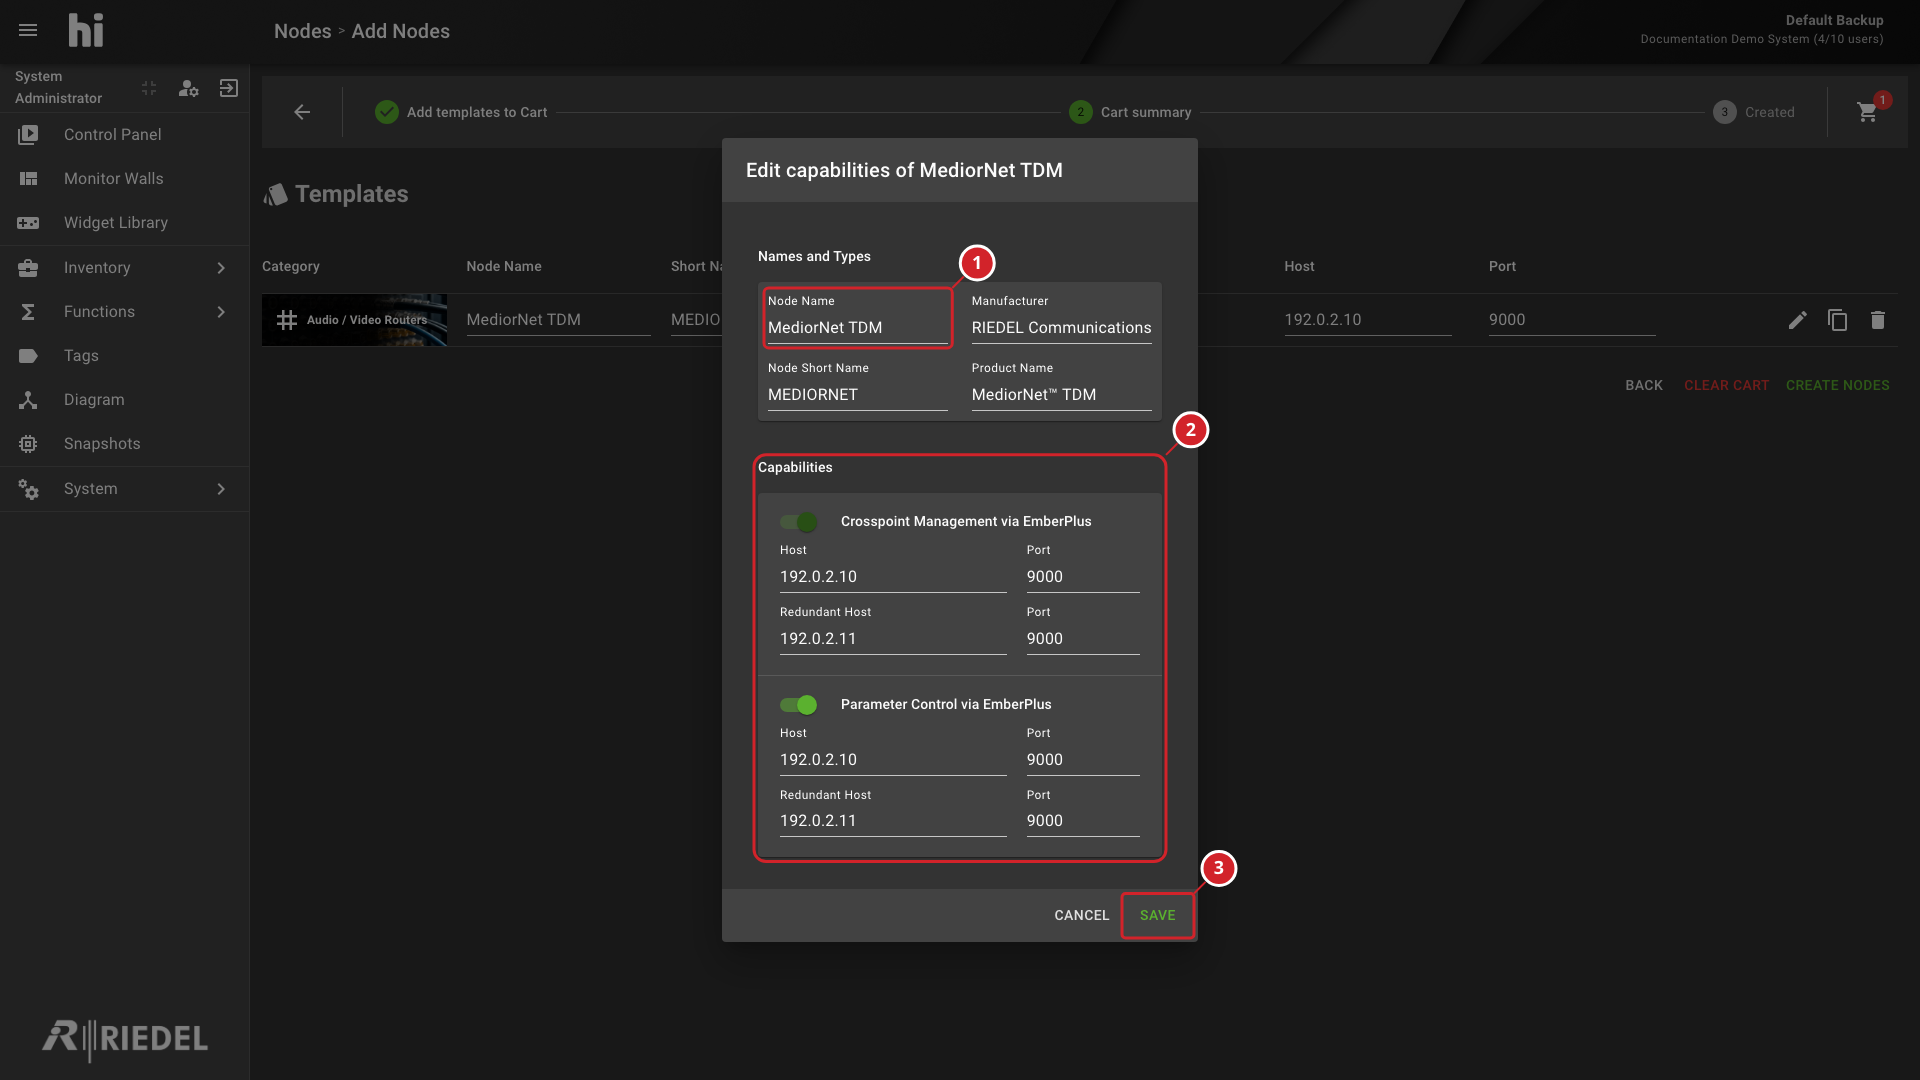
Enter a concise operator-facing Node Name. This example uses MediorNet TDM.
-
Enter the connection values required by the integration page and approved project design. For MediorNet TDM, use the connection values and redundancy requirements in MediorNet TDM: Required Configuration.
-
Select Save in the capability editor.
-
Enter the name used to identify this Node in the hi system.
-
Review and select the capabilities to configure for the Node.
-
Save the Node configuration.
Review the Cart Summary
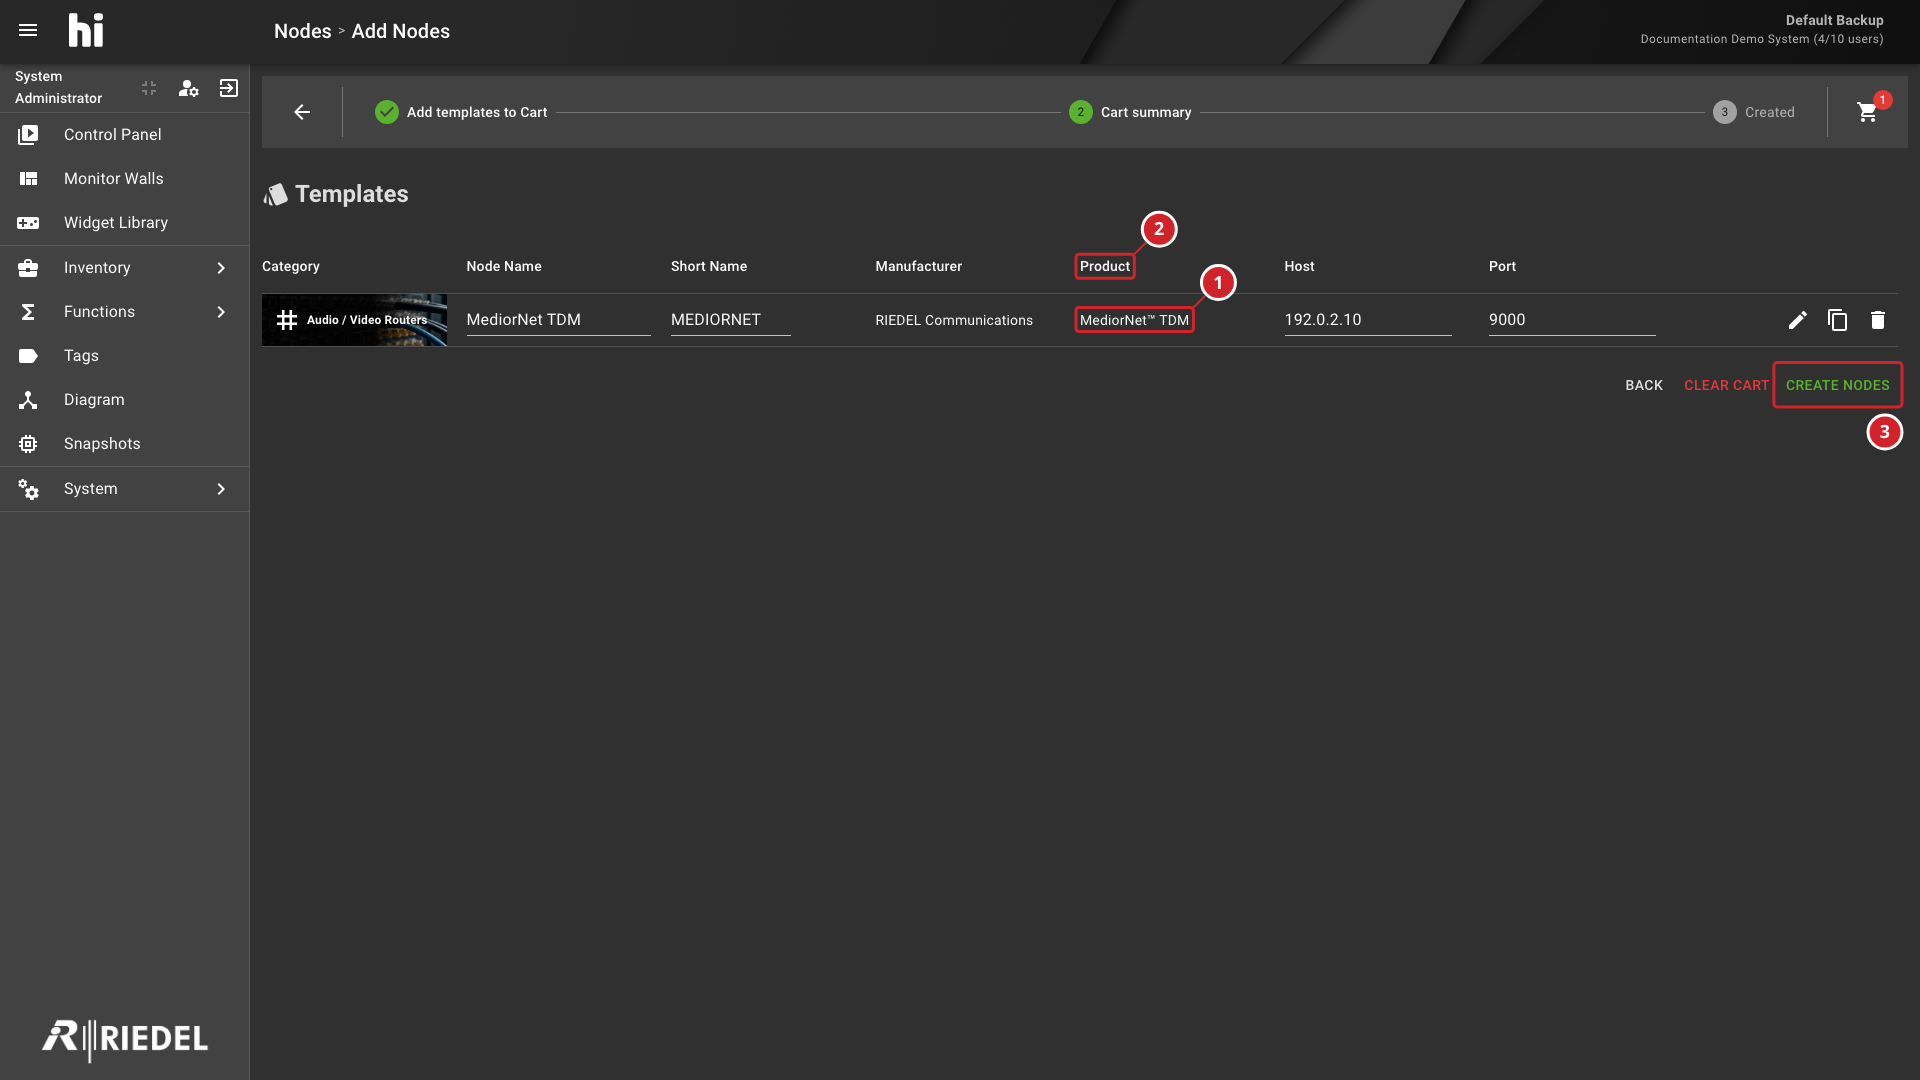
Review the Nodes to create, then select Create Nodes.
-
The selected MediorNet TDM template is queued for creation.
-
Review the selected product before creating Nodes.
-
Create the configured Node.
Device-specific ports, authentication requirements, and defaults are described on the relevant Integrations page.
Review the Creation Summary
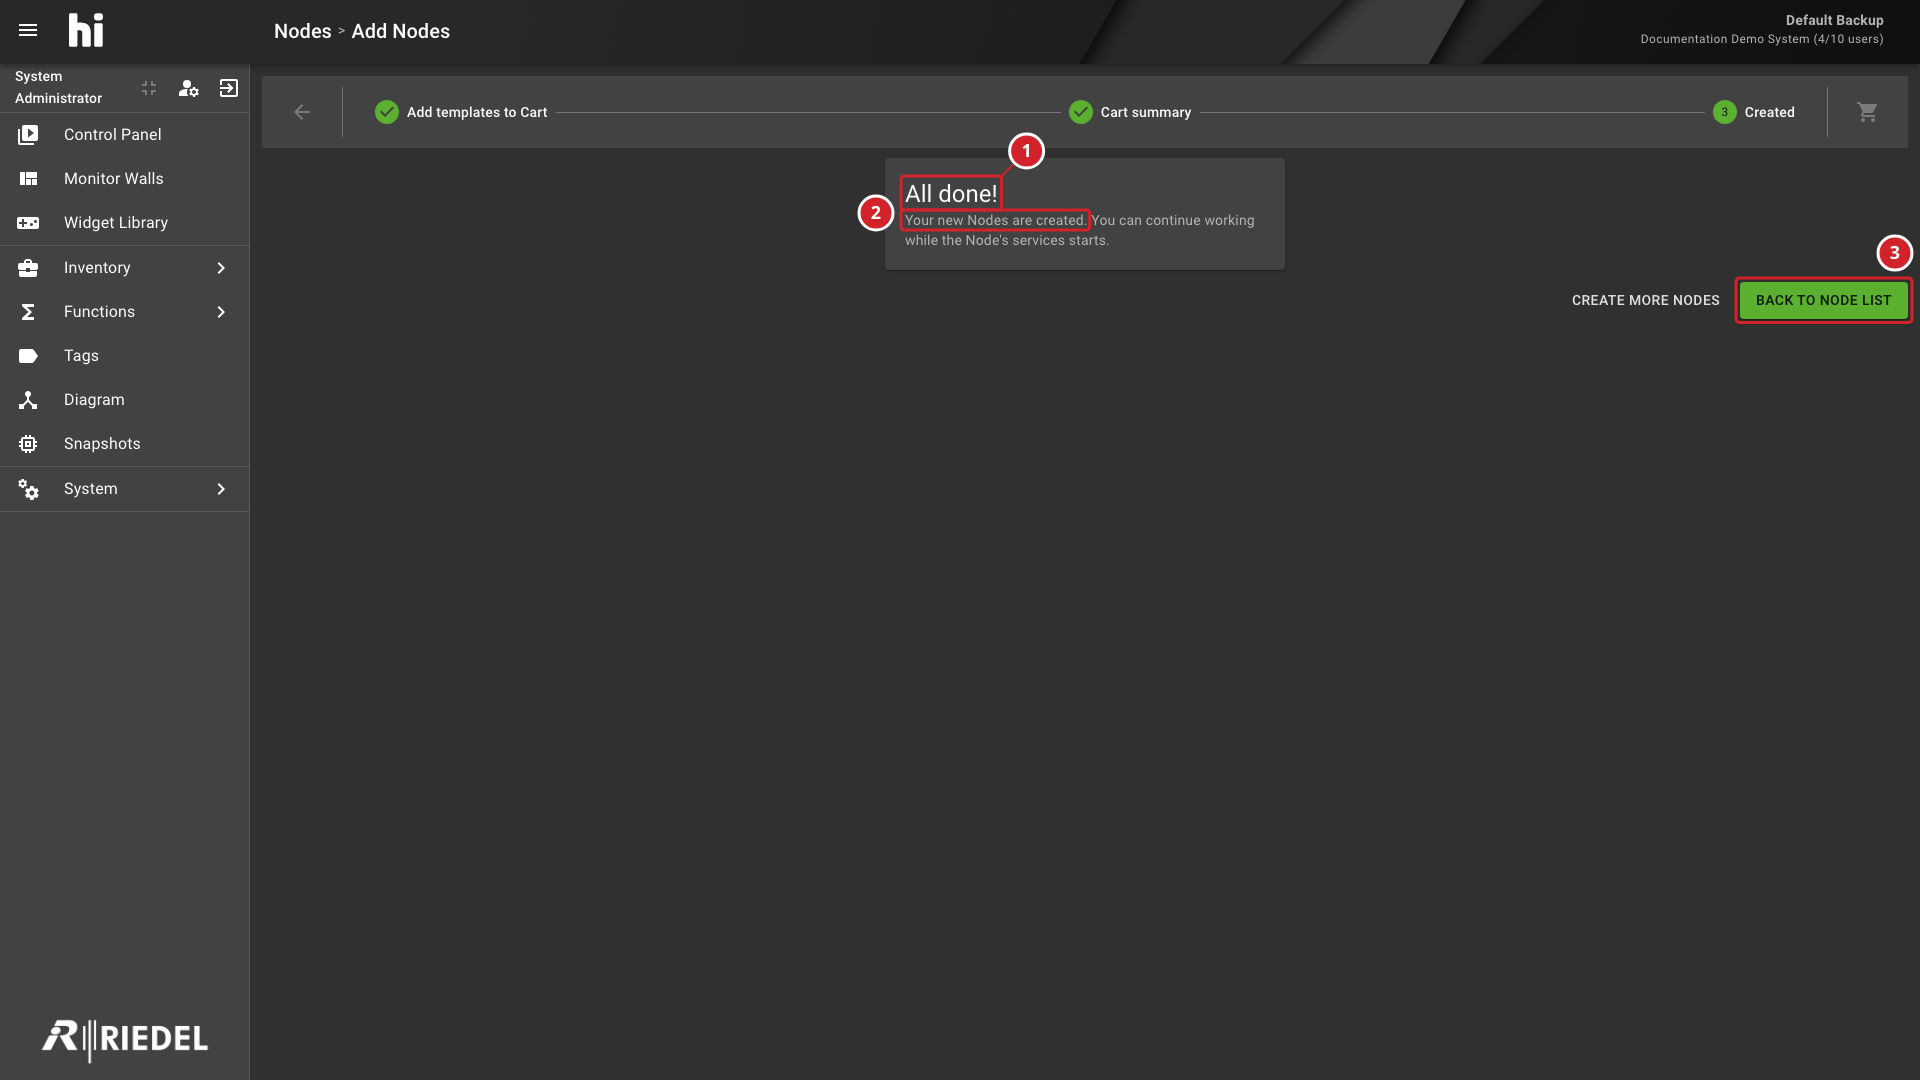
Confirm that the Created step reports All done!, then select Back to Node List.
-
The Node creation process has completed.
-
The summary confirms that the new Node was created.
-
Return to the Node List.
Verify the Node
Locate the new Node in the Node List.
-
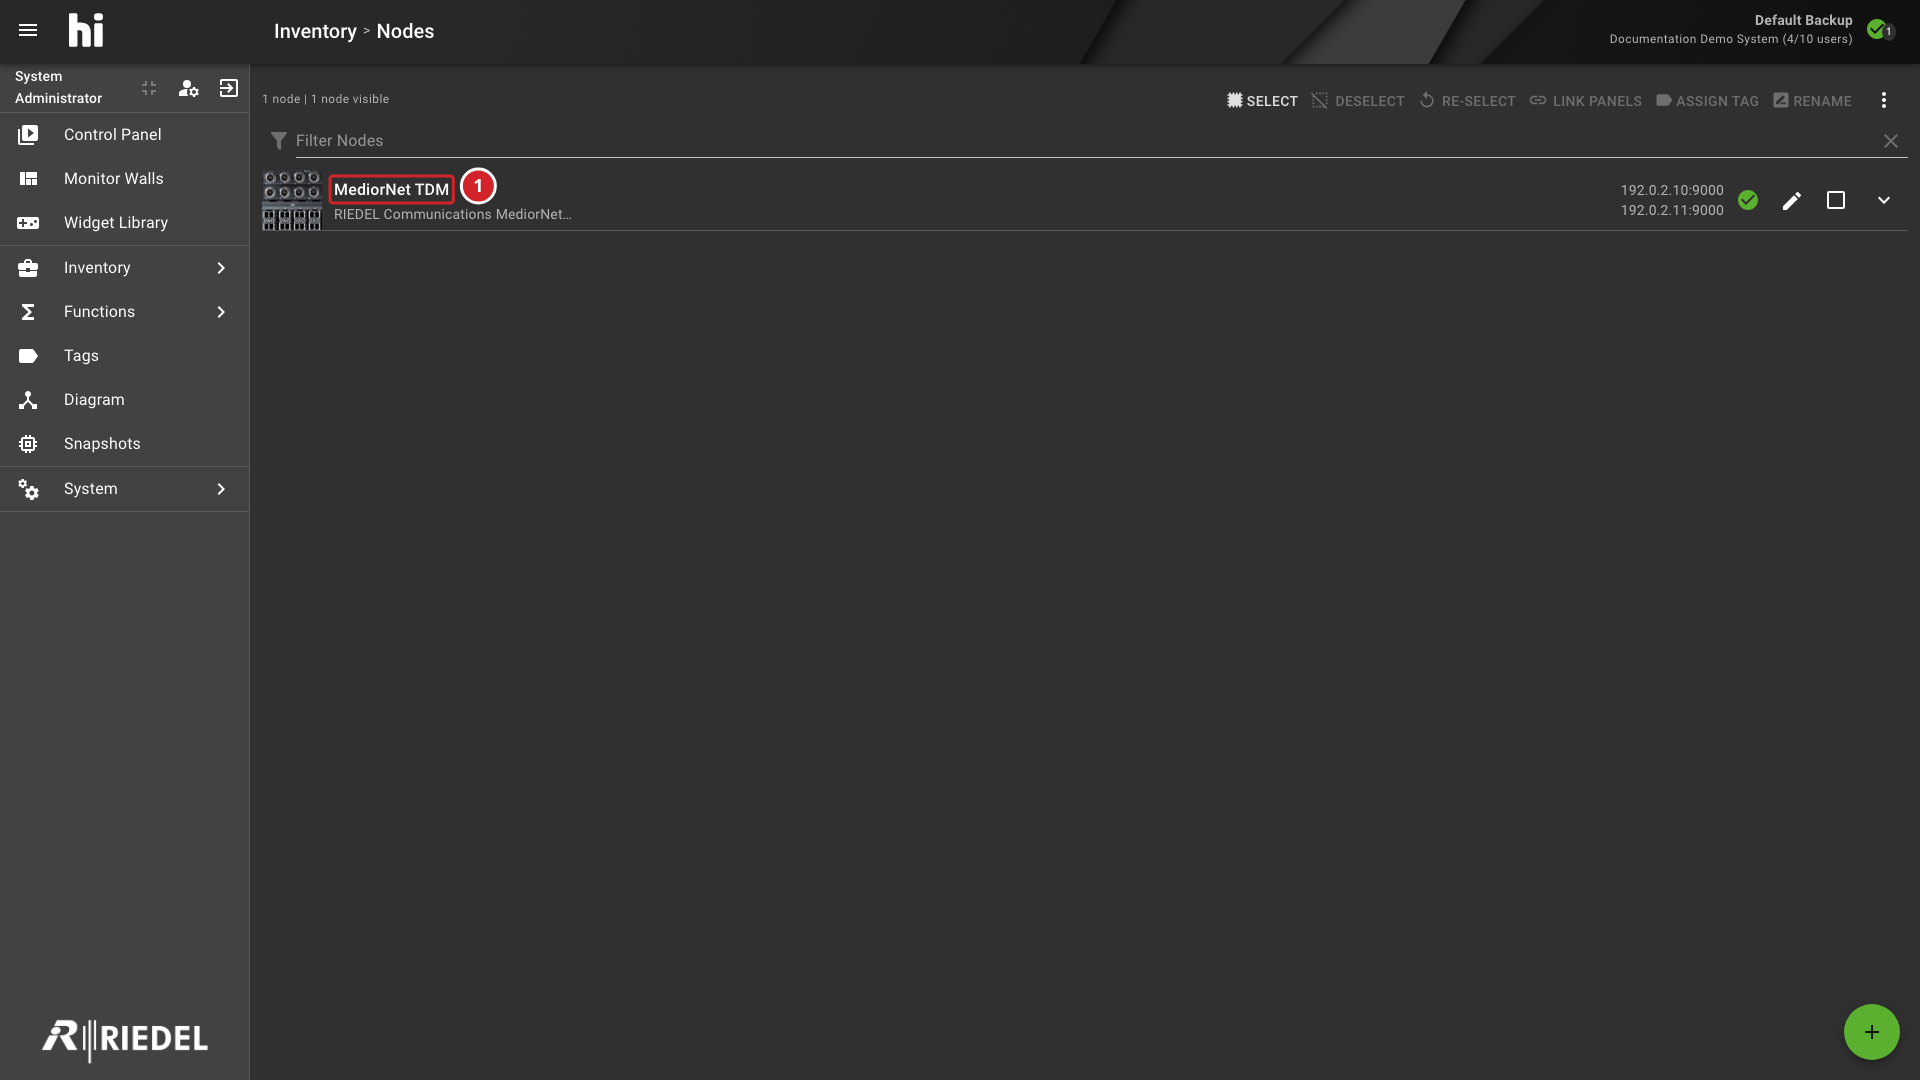
Locate the new Node. Confirm that its name is MediorNet TDM and that the device family identifies Riedel MediorNet TDM.
-
Confirm that the displayed address matches the host and Ember+ port entered in the capability editor.
-
Review the connection-state icon at the right of the row. The Node becomes operational when hi reaches the system controller at the configured address.
-
The Node List identifies the commissioned MediorNet TDM node.
If the state does not become operational, use Troubleshooting: A Node Remains Offline or Unreachable.
Connection-state meanings are described in Interface: Connection State Indicators.
Verify the Topology
-
Select Diagram.
-
Turn off Connected only if the new Node does not yet have wiring.
-
Locate the new Node.
-
Confirm that the expected Ports are present for the selected Node Template.
-
Compare unexpected or missing Ports with the relevant integration page before changing the Node configuration.
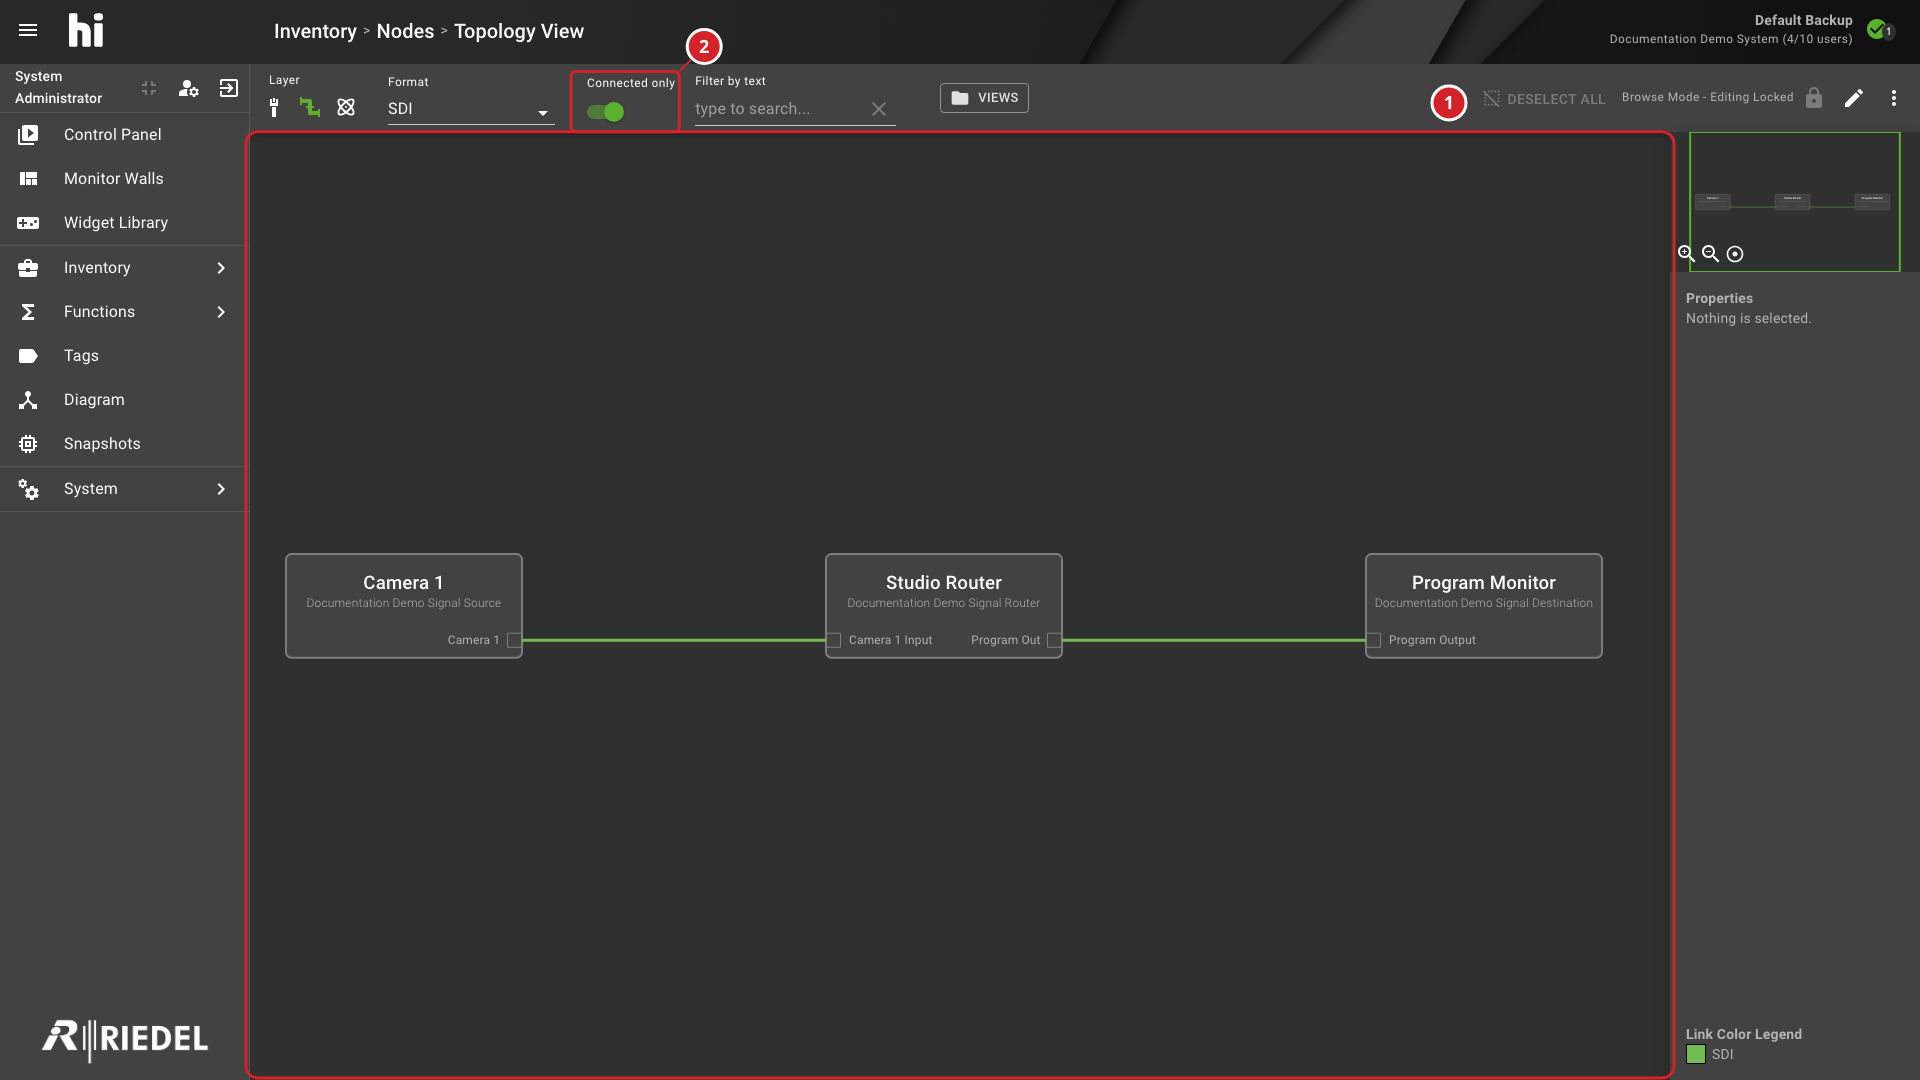
The following image illustrates the Topology View controls using a separate camera-to-monitor example. In your installation, locate the MediorNet TDM Node that you just created.
-
Use the topology canvas to locate your Node and its connections.
-
Enable Connected only to focus on connected topology elements.
Verify the Result
The tutorial is complete when the new Node appears in the Node List and Topology View with the expected identity and Ports.
Next Steps
Continue to Prepare a Control Panel Preset when the Topology contains a compatible Source and Destination. For complete Node administration, see Nodes.