
Make Your First Route
Overview
This tutorial performs one Source-to-Destination connection from the Control Panel. It uses a Preset configured for Take mode so that the connection requires explicit confirmation.
After this tutorial, the selected Destination displays the Source connected by the Take.
Before You Begin
-
Complete Interface Orientation.
-
Confirm that the installation contains online Nodes with a compatible Source and Destination.
-
Use an account authorized to view and route the selected Ports.
-
Complete Prepare a Control Panel Preset, or use an equivalent Preset configured for Take mode.
-
Confirm that changing the selected Destination is safe in the current operating context.
If you added a Node in the previous tutorial, verify that the commissioned Topology provides a valid routing path. One newly added device does not necessarily provide a safe or supported self-route.
Open the Control Panel
-
Select Control Panel from the main menu.
-
Select a Preset configured for Take mode.
-
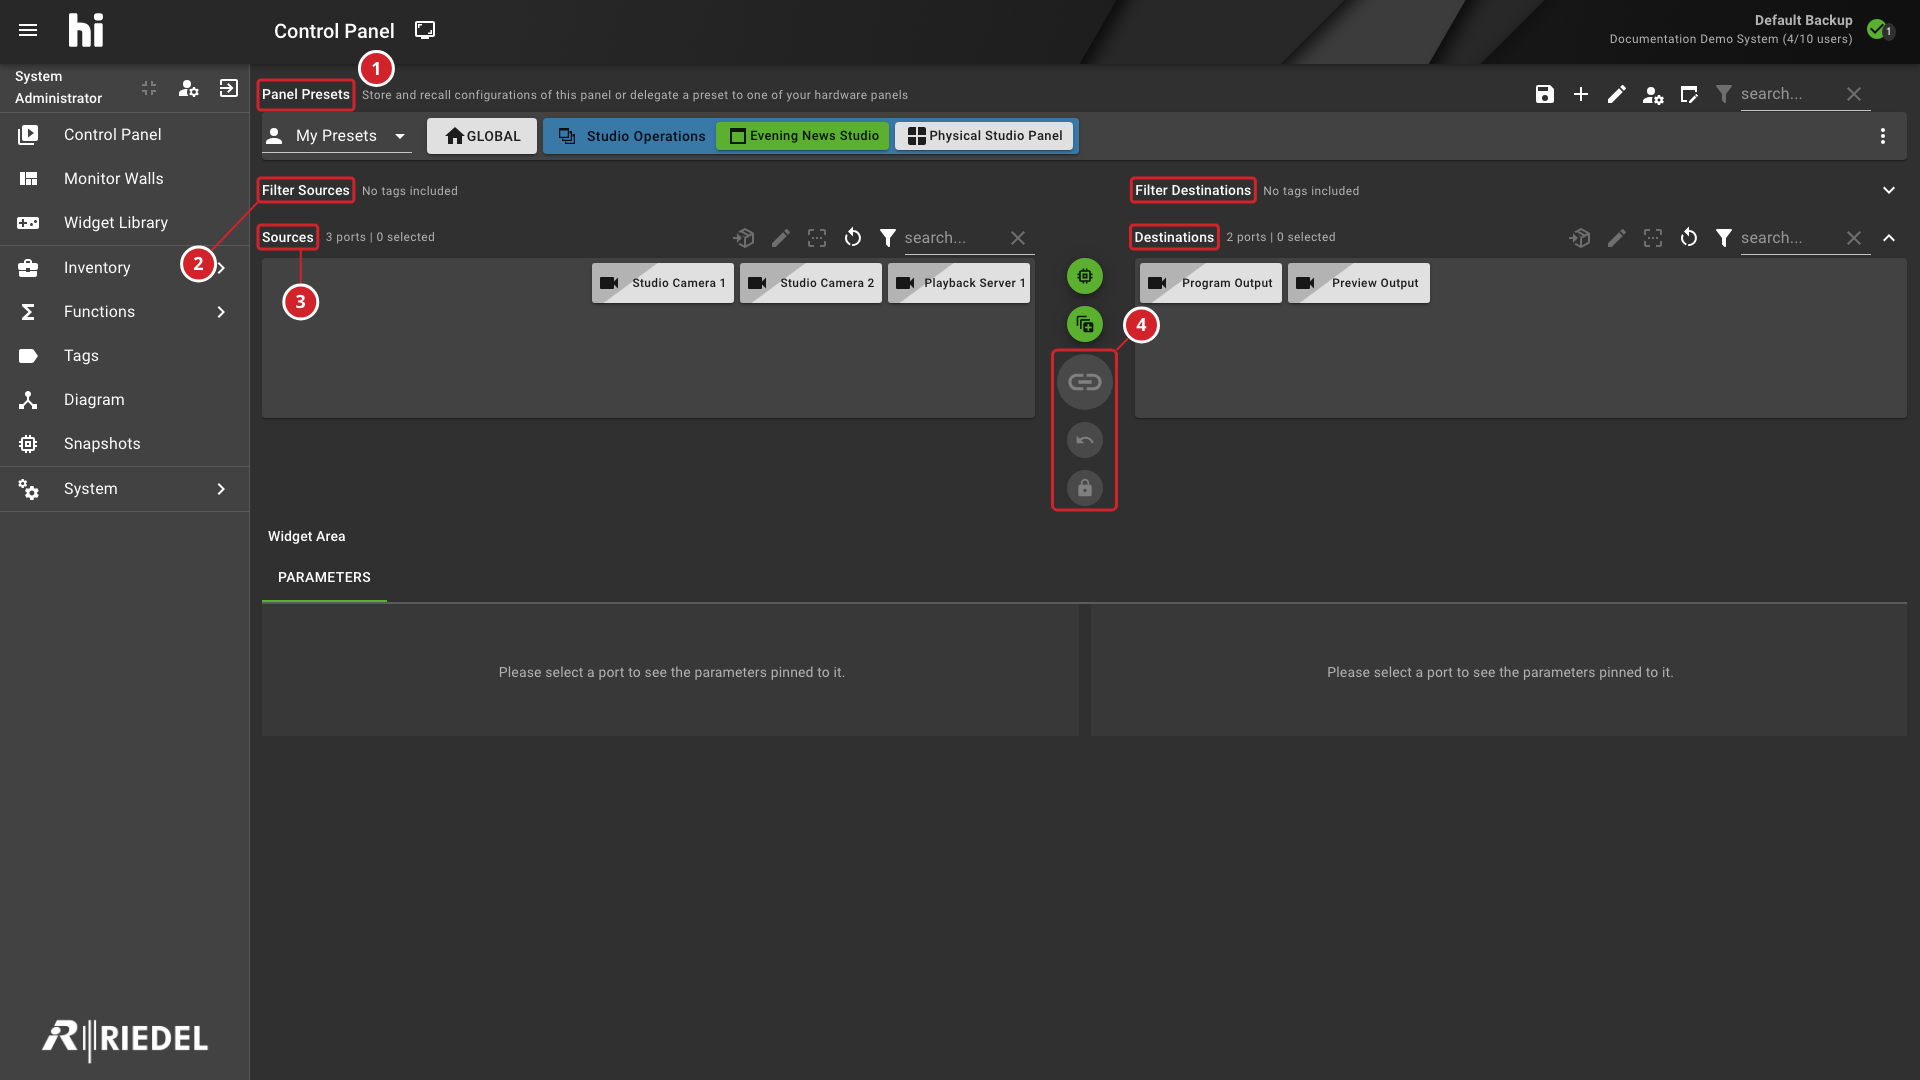
Confirm that the Preset displays the required Source and Destination areas.
-
Select a Preset from Panel Presets.
-
Use the Source and Destination Tag filters to find the required Ports.
-
The Source and Destination areas show the available Ports.
-
The connection toolbar includes the Take and lock controls.
Find the Ports
-
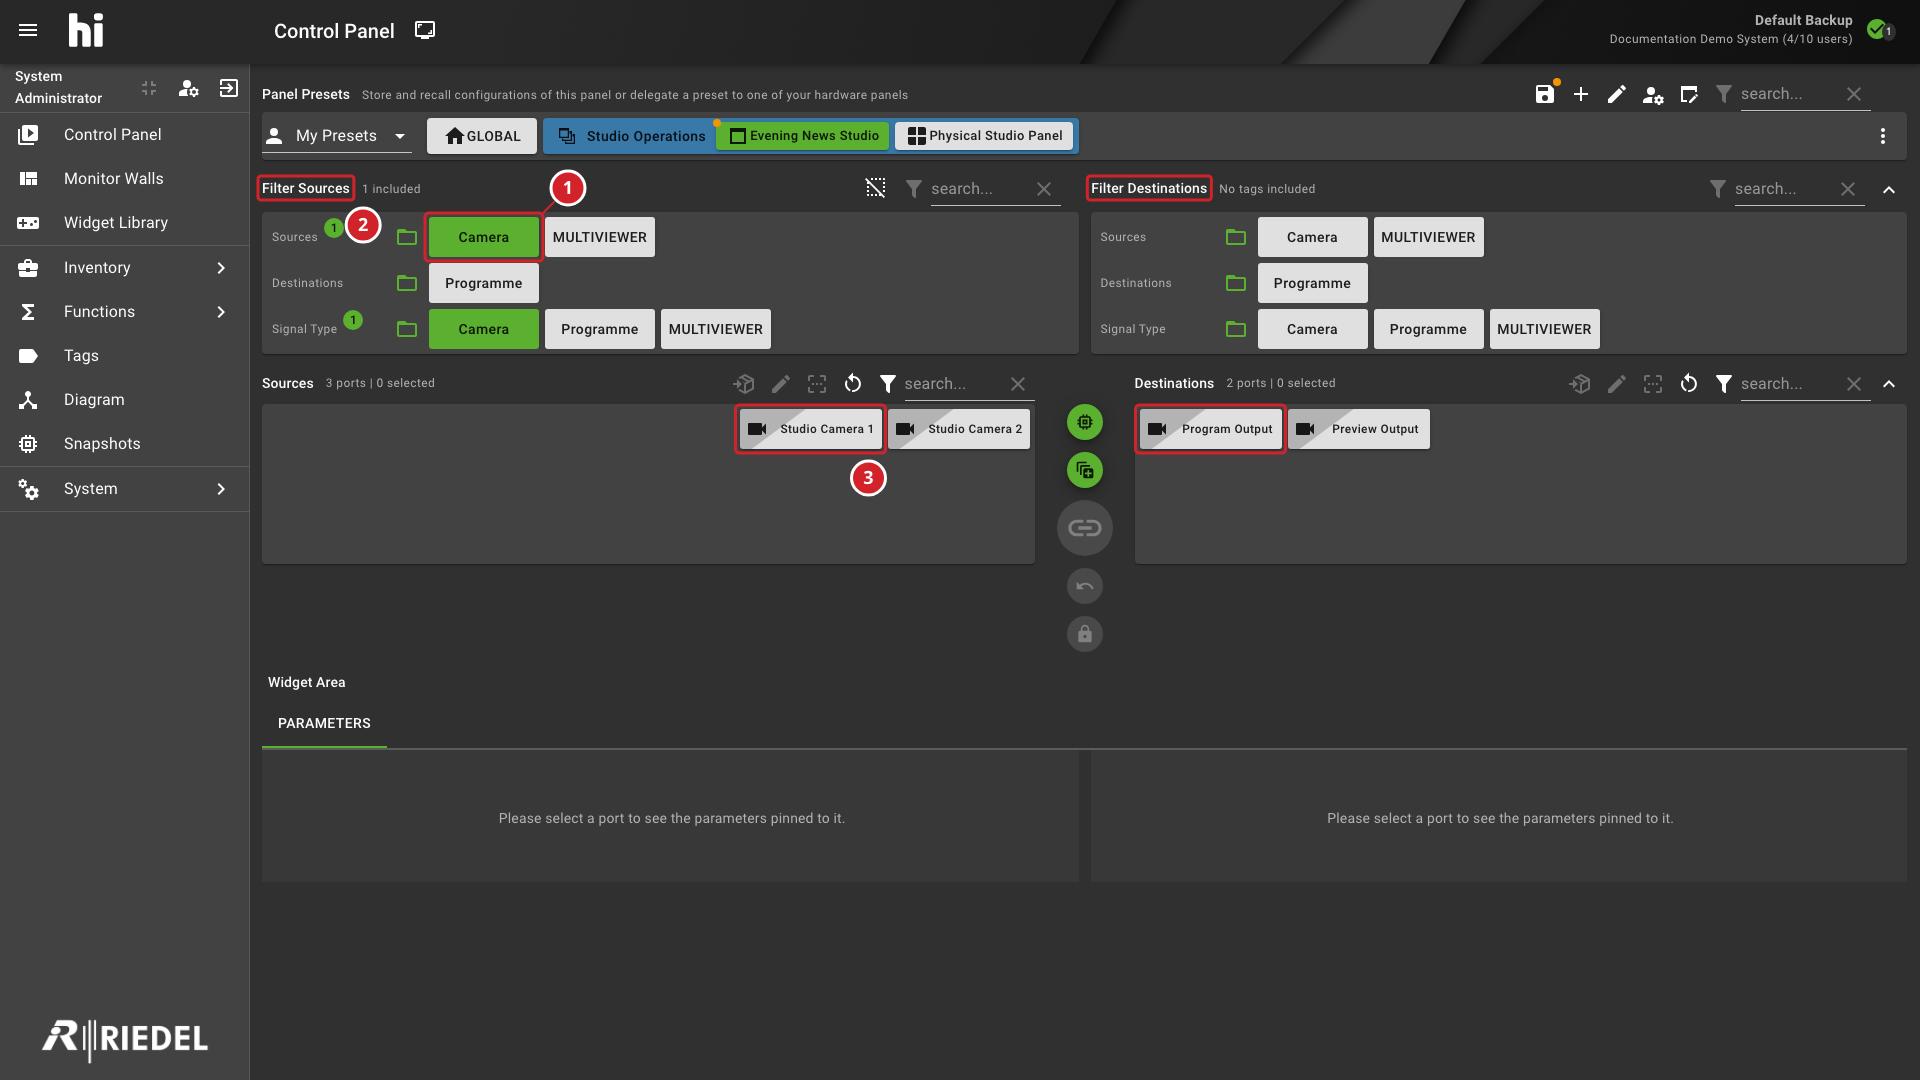
Use the Tag filters to narrow the Source list.
-
Use the Tag filters to narrow the Destination list.
-
Confirm that the required Ports remain visible.
-
The Camera Tag filters the Source list.
-
The Source and Destination filters narrow the available Ports.
-
The required Studio Camera 1 Source and Program Output Destination remain visible.
Available Tags and Ports depend on the active Preset and current user's access. See Control Panel for filter and Preset behavior.
Preview the Route
-
Select the Destination.
-
Select the compatible Source.
-
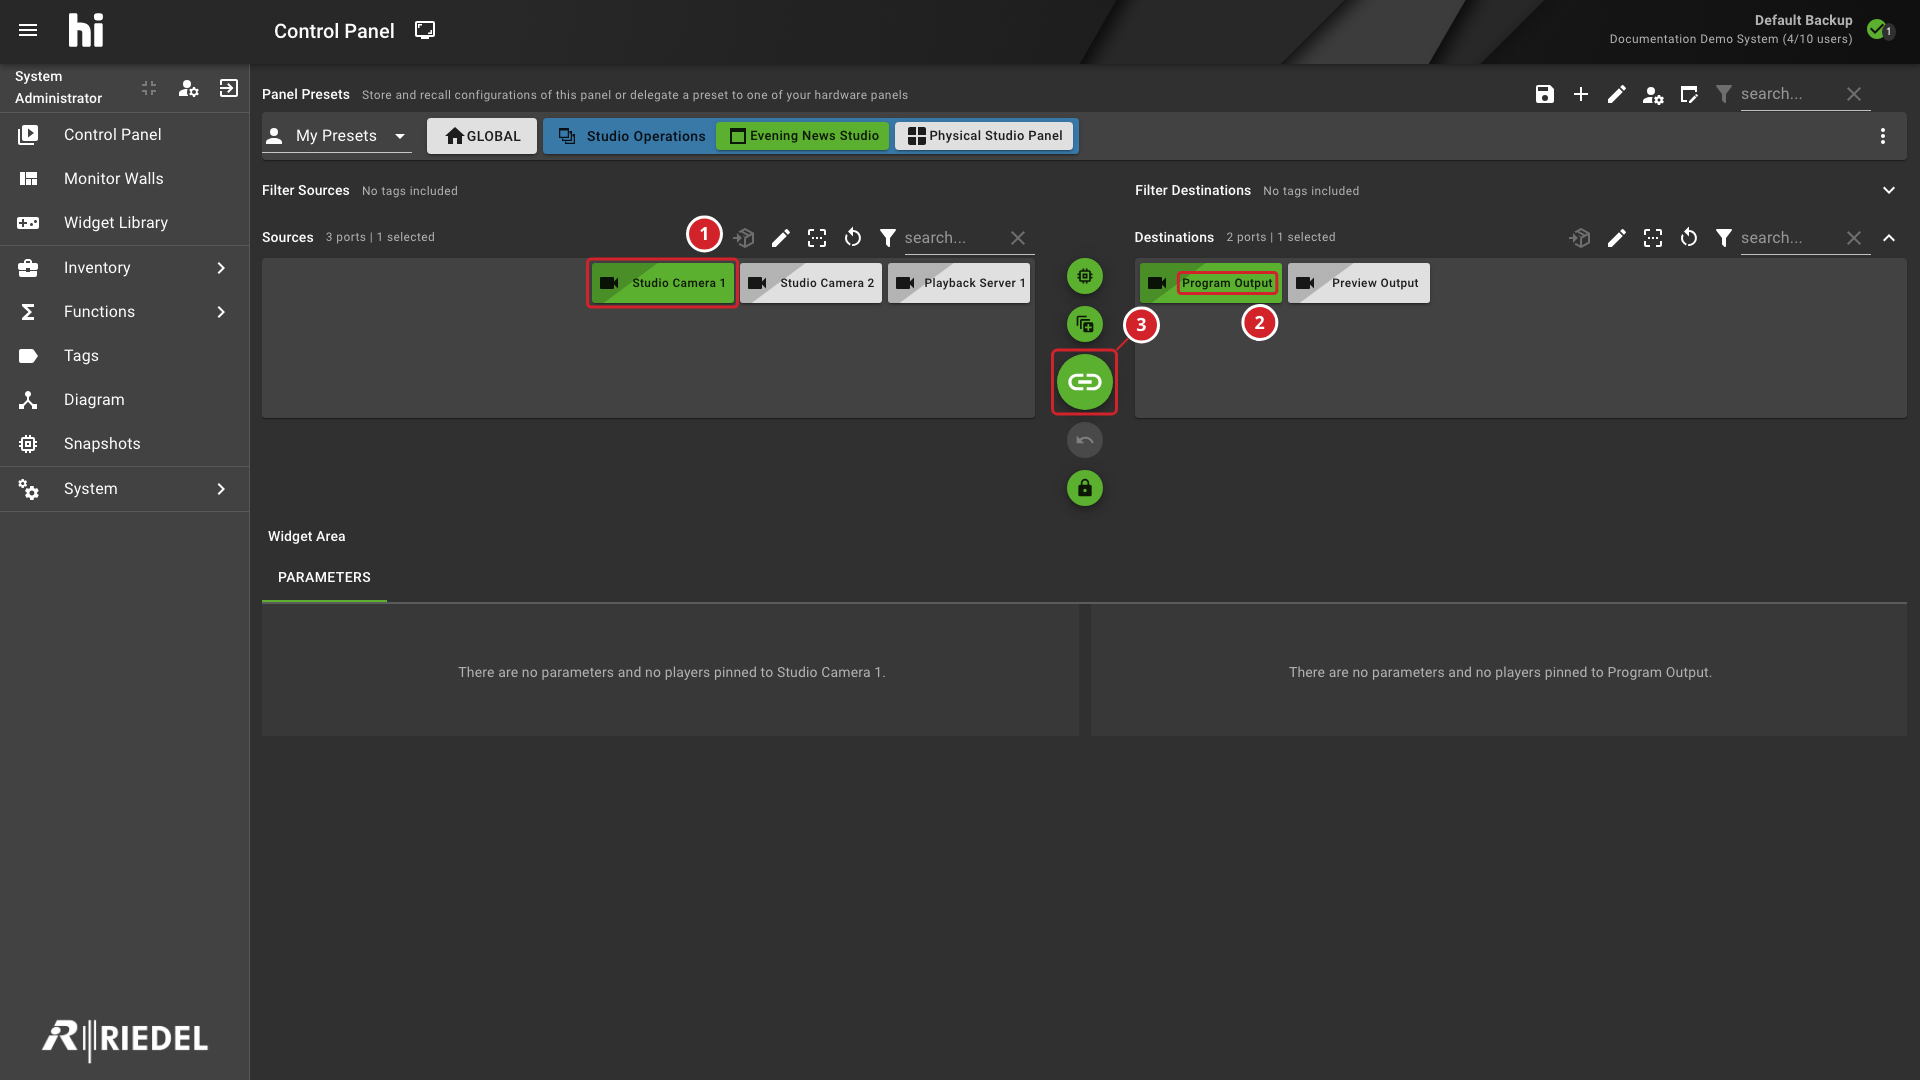
Review the selected Ports before applying the route.
-
Studio Camera 1 is the selected Source.
-
Program Output is the selected Destination.
-
Select Take after confirming the selected Ports.
Caution
Do not continue if the Destination is locked, the selected Ports are unexpected, or the action would interrupt an active signal.
Apply the Route
Select Take.
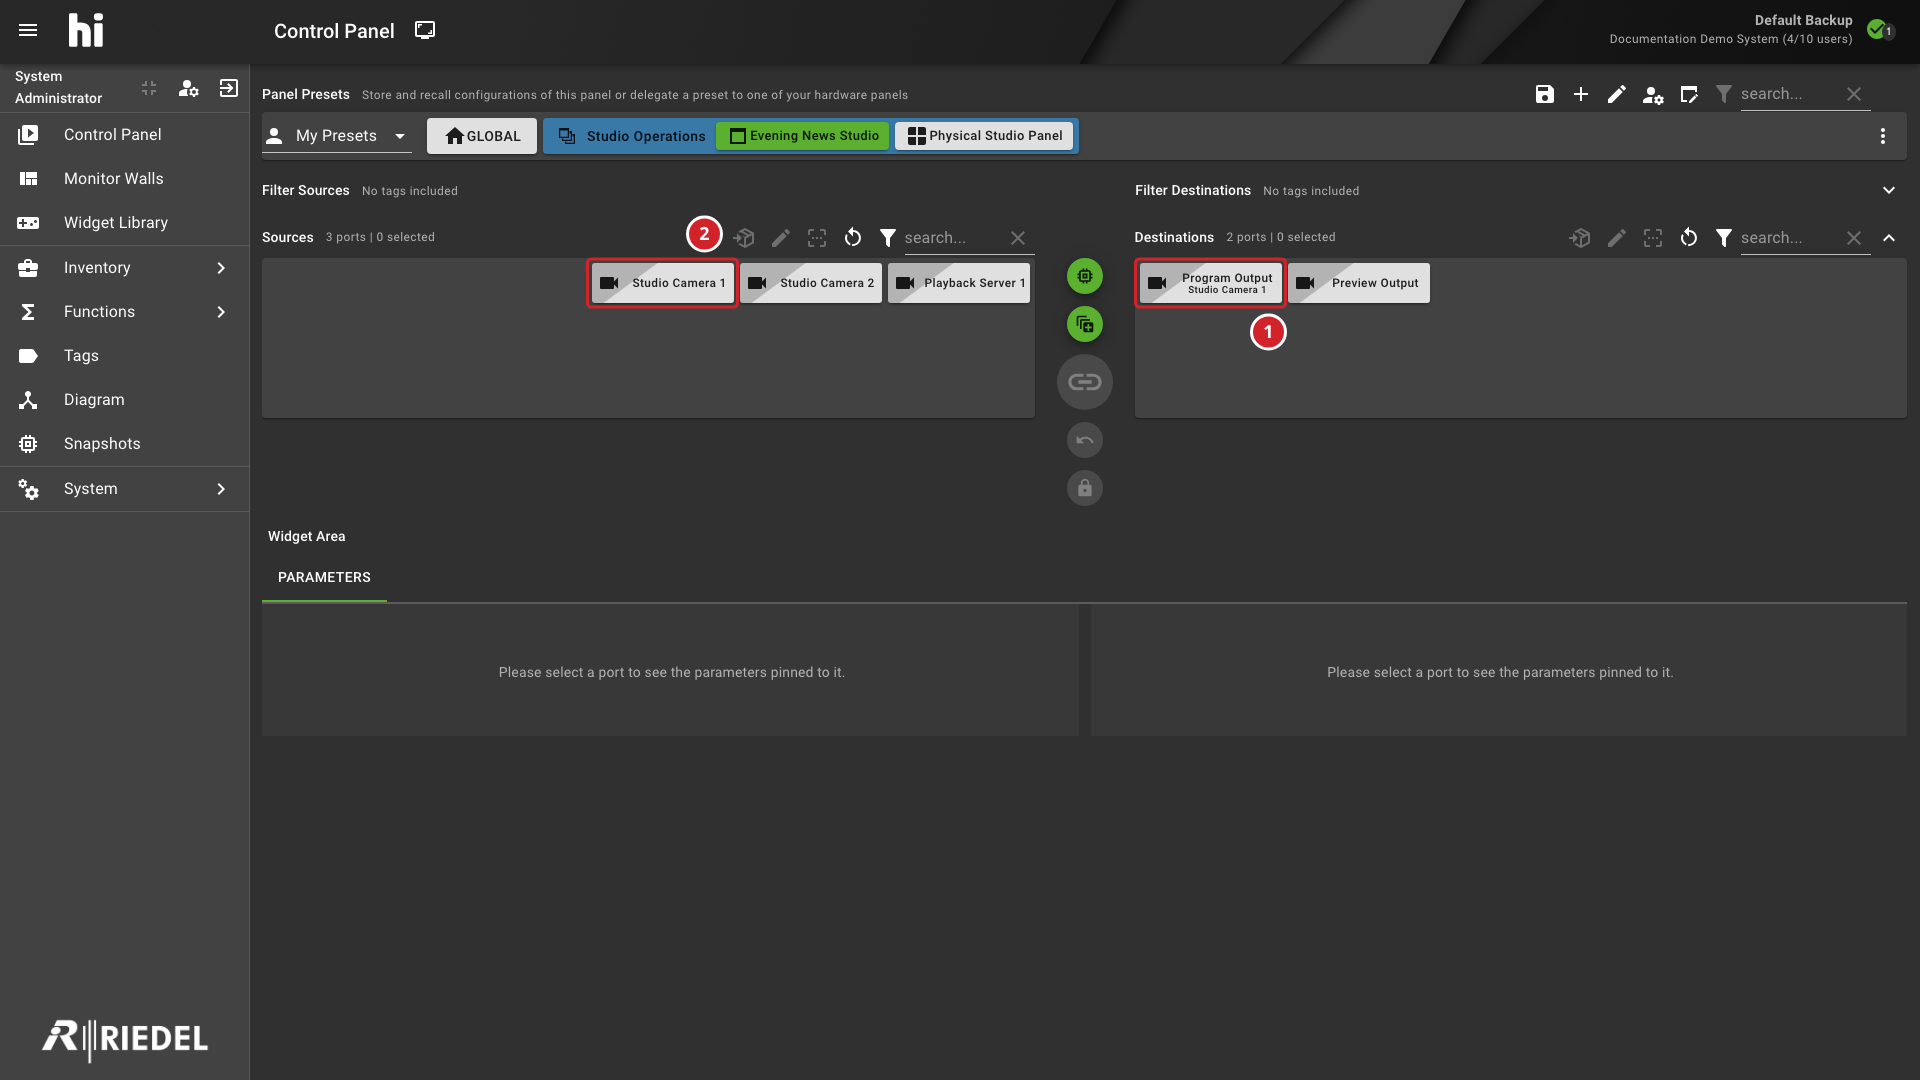
The hi system sends the routing request through the configured integration. The displayed state can update after the integration reports the resulting connection.
-
Program Output displays its connected Source below the Destination name.
-
Match that connected Source to Studio Camera 1 in the Source list.
Verify the Result
Confirm all of the following:
-
The Destination displays the expected connected Source.
-
The Control Panel does not show a routing error for the action.
-
The observed downstream result matches the intended Signal Path when operational monitoring is available.
If the displayed route does not update, use Troubleshooting: A Route Does Not Appear on the Destination.
Next Steps
-
Use Control Panel for Take Modes, Presets, locks, multi-select routing, and detailed routing behavior.
-
Use Manage Port Containers to route grouped signals and reorder slot pairings.
-
Use Topology to review the configured path between Nodes.
-
Use Tagging to organize Sources and Destinations for operator workflows.