
Manage Joystick Override
Use Joystick Override to map camera control unit (CCU) source Ports and GPI trigger Ports to a router destination.
Prerequisites
The user needs the Joystick Override admin role and the Joystick Override feature. Open Functions > Joystick Override. Confirm the Destination, CCU Source, and GPI Ports on a GPIO-capable Node, such as hiContact, before creating a Shader Group.
About Joystick Override
Each Shader Group has one router destination and one or more assignments. An assignment pairs a CCU source Port with a GPI trigger Port. The selected override mode controls what happens when the trigger is pressed and released.
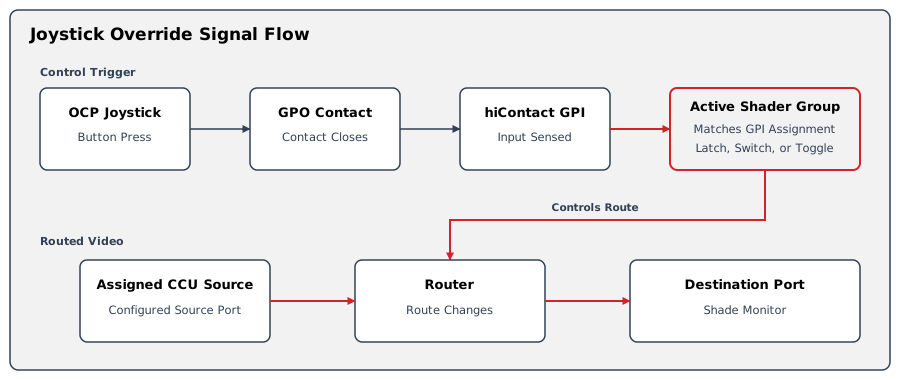
Information
See also: GPIO hiContact documentation for GPI wiring details.
Overview
The Joystick Override page lists configured Shader Groups. Each row shows:
-
The group name and whether it is enabled
-
The Destination Port and device
-
A warning icon when its configuration or an assignment needs attention
-
Its CCU source and GPI trigger assignments
When there are no groups, the page shows No Shader Groups yet. Select + at the bottom right to create the first one.
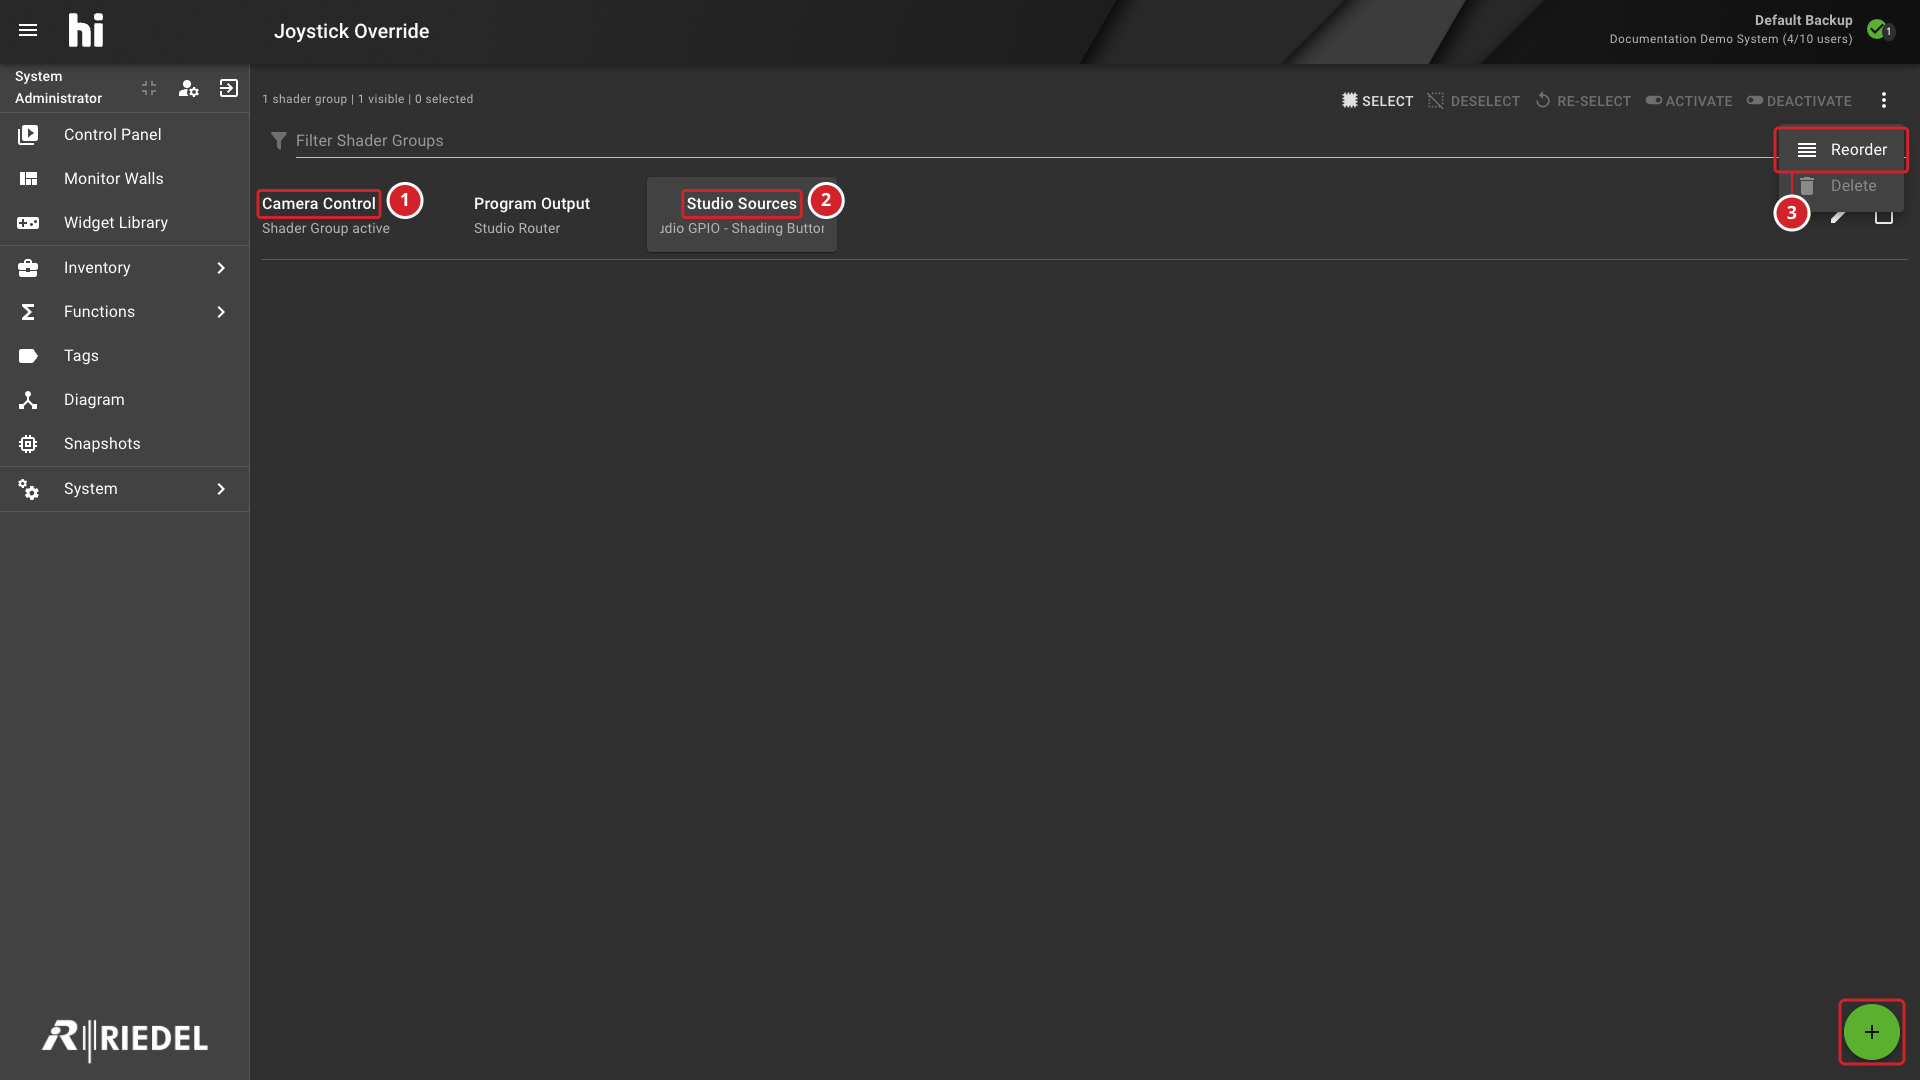
-
The Camera Control Shader Group.
-
The Studio Sources Node in the group's CCU assignment.
-
Reorder groups or add a Shader Group.
Create a Shader Group
-
Select + at the bottom right. The Add Shader Group dialog opens.
-
Enter the group name, select an override mode, and select a Destination Port.
-
Add at least one CCU and GPI assignment.
-
Select Save to save the group.
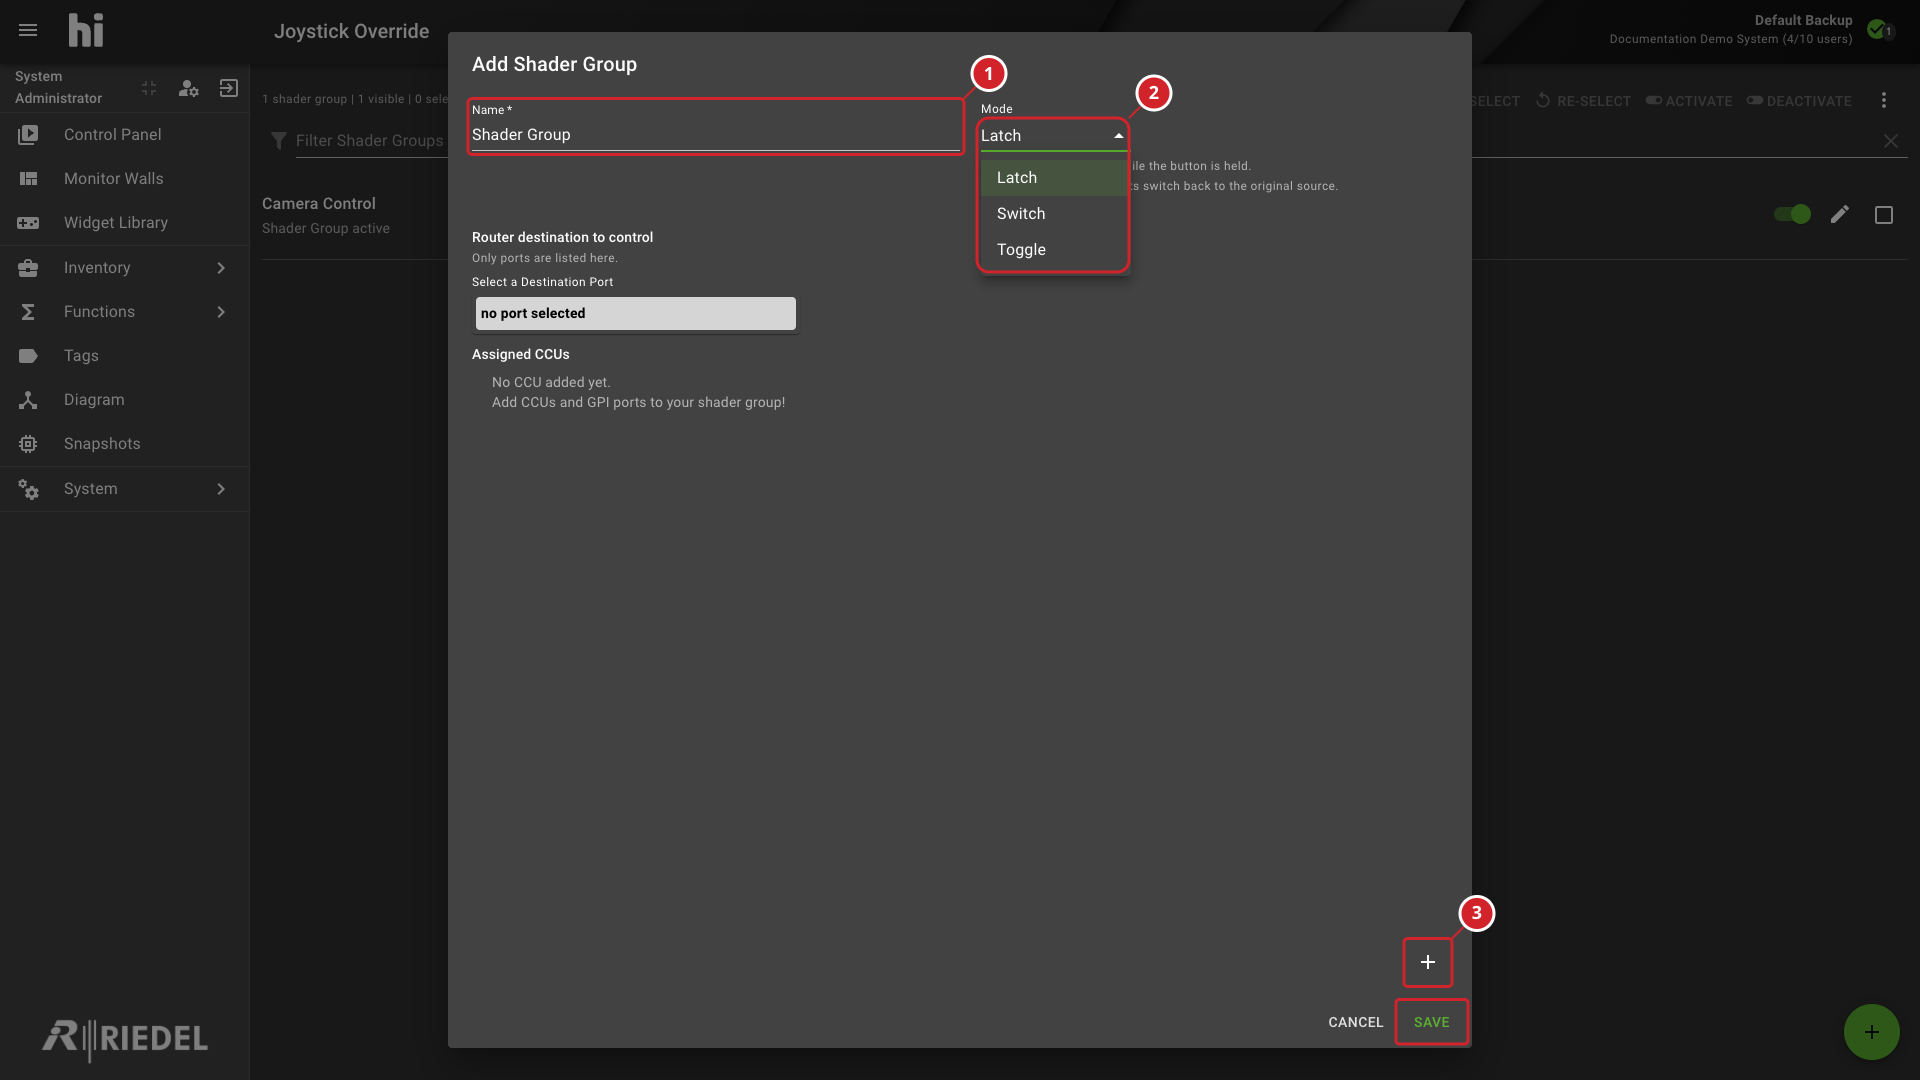
-
Shader Group name.
-
The available override modes: Latch, Switch, and Toggle.
-
Add a CCU assignment or save the Shader Group.
Group settings
|
Field |
Description |
|---|---|
|
Name |
Name shown for this group. |
|
Mode |
Select Latch, Switch, or Toggle. |
|
Select a Destination Port |
Select the router destination Port for this group. |
Override modes
|
Mode |
Behavior |
Example |
|---|---|---|
|
Latch |
Routes while the GPI trigger is held. Releasing it restores the original source. |
Hold the trigger to preview a camera; release it to restore the previous source. |
|
Switch |
Routes when the GPI trigger is pressed and remains latched. |
Press the trigger to leave that CCU source routed. |
|
Toggle |
Press once to route; press the same trigger again to restore the original source. |
Press once to select the camera and again to restore the previous source. |
The dialog displays a description for the selected mode below Mode.
Add CCU and GPI assignments
-
Select Add CCU.
-
Select the CCU source Port and GPI trigger Port.
|
Field |
Description |
|---|---|
|
Show All Nodes |
Turn this on to include devices outside the authorized CCU source list. |
|
Select a Source Port |
Select the CCU video source Port. |
|
Select a GPI Port |
Select the GPI input Port that triggers the assignment. |
-
Select OK to finish the assignment. Repeat to add more assignments.
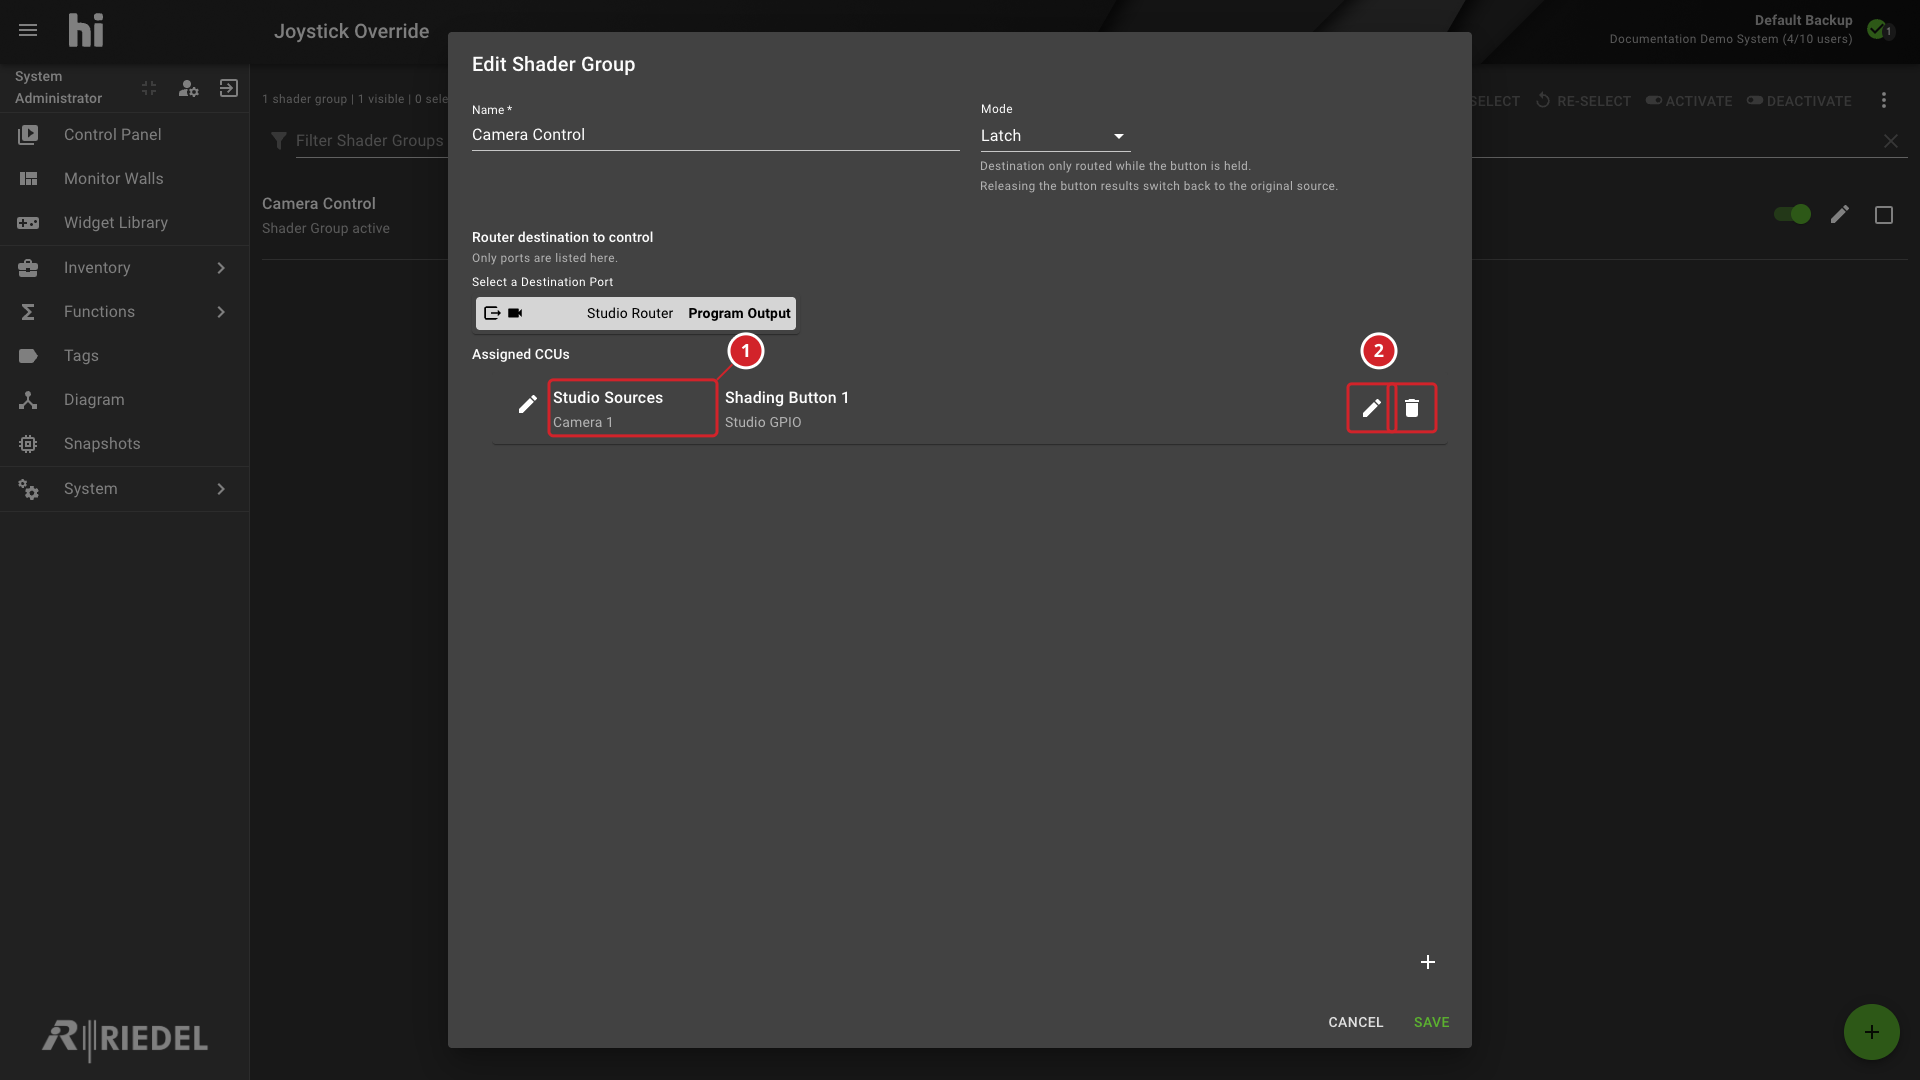
-
The Camera 1 Port on the Studio Sources Node in the assignment row.
-
Edit or delete the assignment.
Select an assignment's edit or delete control to change or remove it. Finish editing the current assignment before adding another or saving the group.
Edit a Shader Group
Select Edit on a group to open Edit Shader Group. Change the name, override mode, destination Port, or assignments, then select Save.
Reorder assignments
-
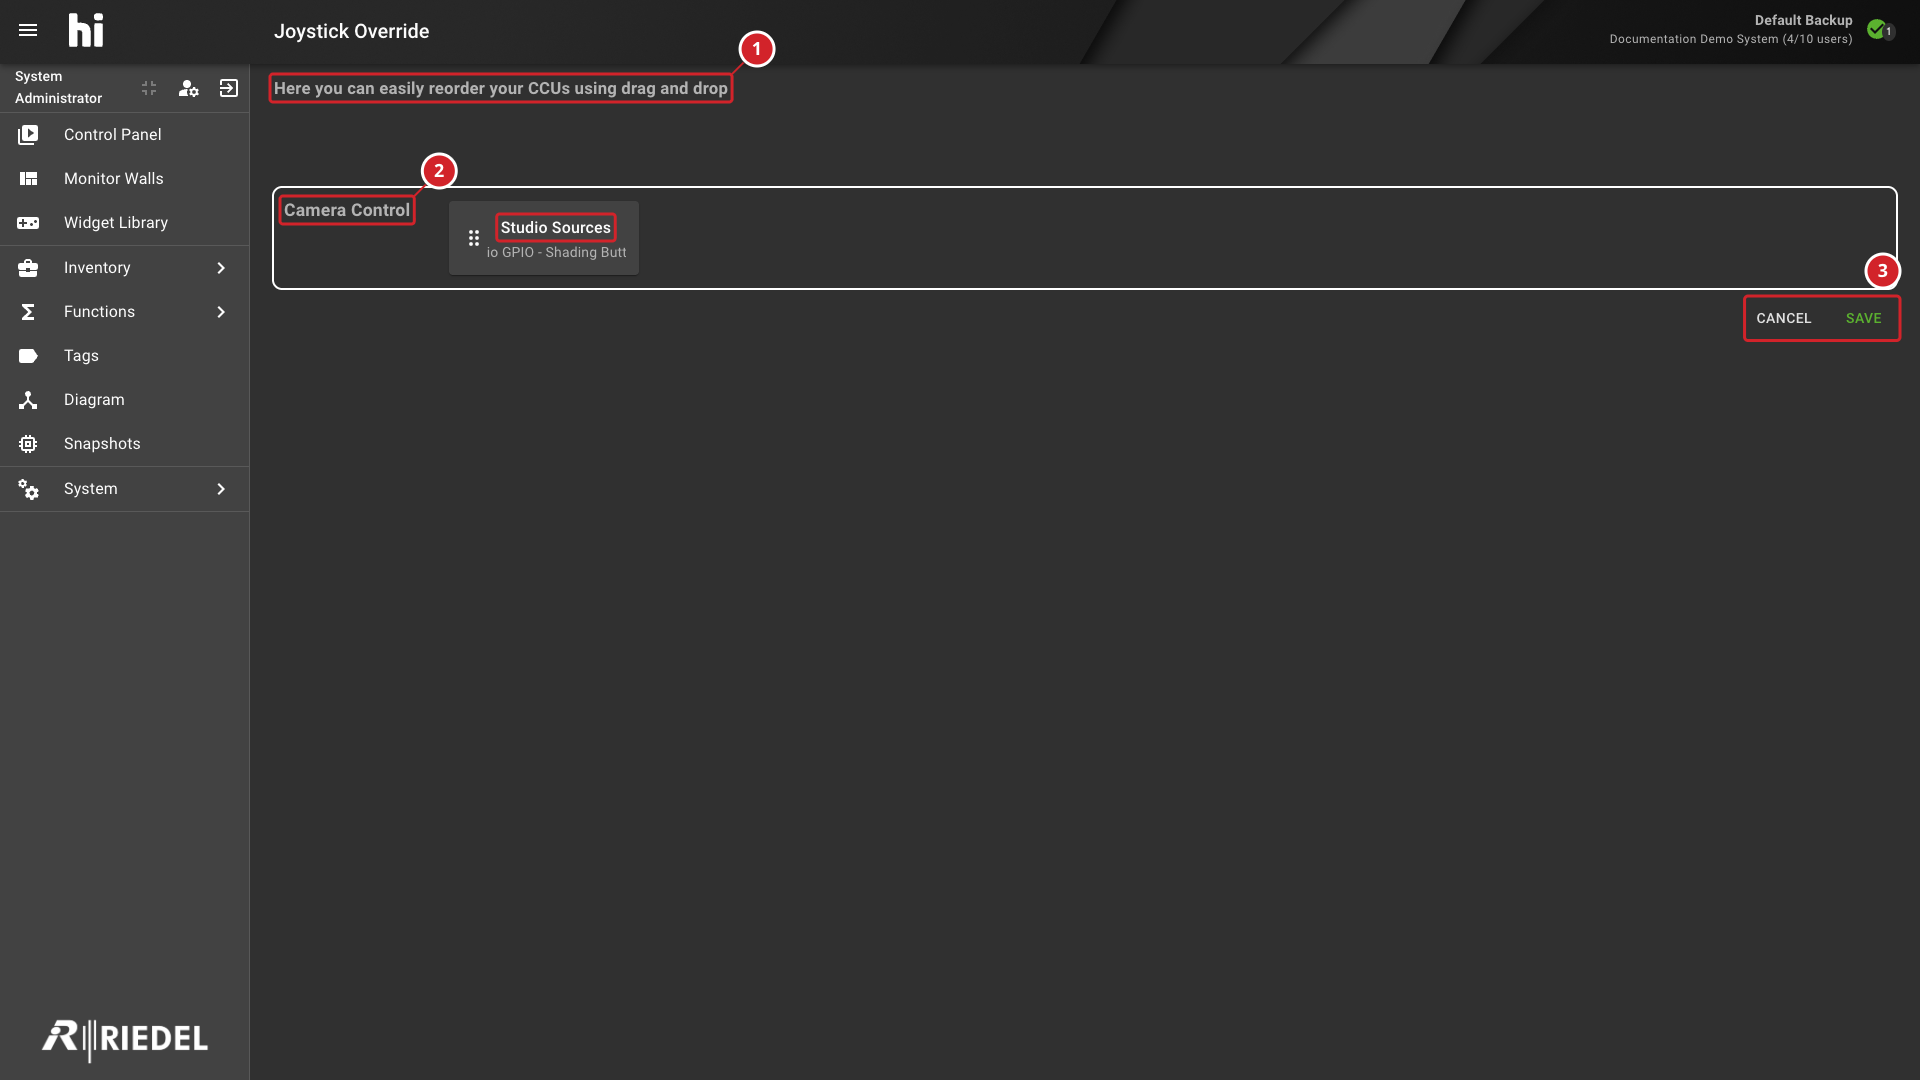
Select Reorder in the toolbar.
-
Drag assignments to change their order within or across Shader Groups.
-
Select Save to keep the arrangement or Cancel to discard it.
-
The instruction for reordering CCU assignments.
-
The current Camera Control group and its Studio Sources CCU assignment.
-
Save the new order or cancel the changes.
Activate / Deactivate a Shader Group
Use the group enable control to enable or disable it. Disabled groups do not respond to their GPI assignments.
Troubleshooting
|
Symptom |
Possible Cause |
Resolution |
|---|---|---|
|
Group shows a warning icon |
A required group or assignment value is missing or invalid. |
Edit the group and check its destination and each CCU/GPI assignment. |
|
Destination Port is unavailable |
The user cannot select an authorized destination Port. |
Check the user's Port access and confirm the Port is available. |
|
CCU Source is unavailable |
The Source is outside the default authorized CCU list. |
Turn on Show All Nodes when appropriate. |
|
GPI does not trigger the override |
The group is disabled, an assignment is incomplete, or the GPI path is unavailable. |
Enable the group and verify the selected GPI trigger Port and physical wiring. |
Verify the Result
Check that the group and its assignments show no warning icons, enable the group, then test an assigned GPI trigger under controlled conditions. Confirm the Destination follows the selected override mode.
Next Steps
-
Use View and Edit Topology to verify the router path between the CCU Source and Destination.
-
Use Manage Nodes to verify the hiContact GPI Port configuration.