
Manage Portals
Overview
Use Portals to provide virtual Sources and Destinations whose underlying connections can change. Read Portals for the model and loop constraints.
Prerequisites
Portal management requires Port Container admin and the licensing described in Portals: Access and Licensing.
Start Here
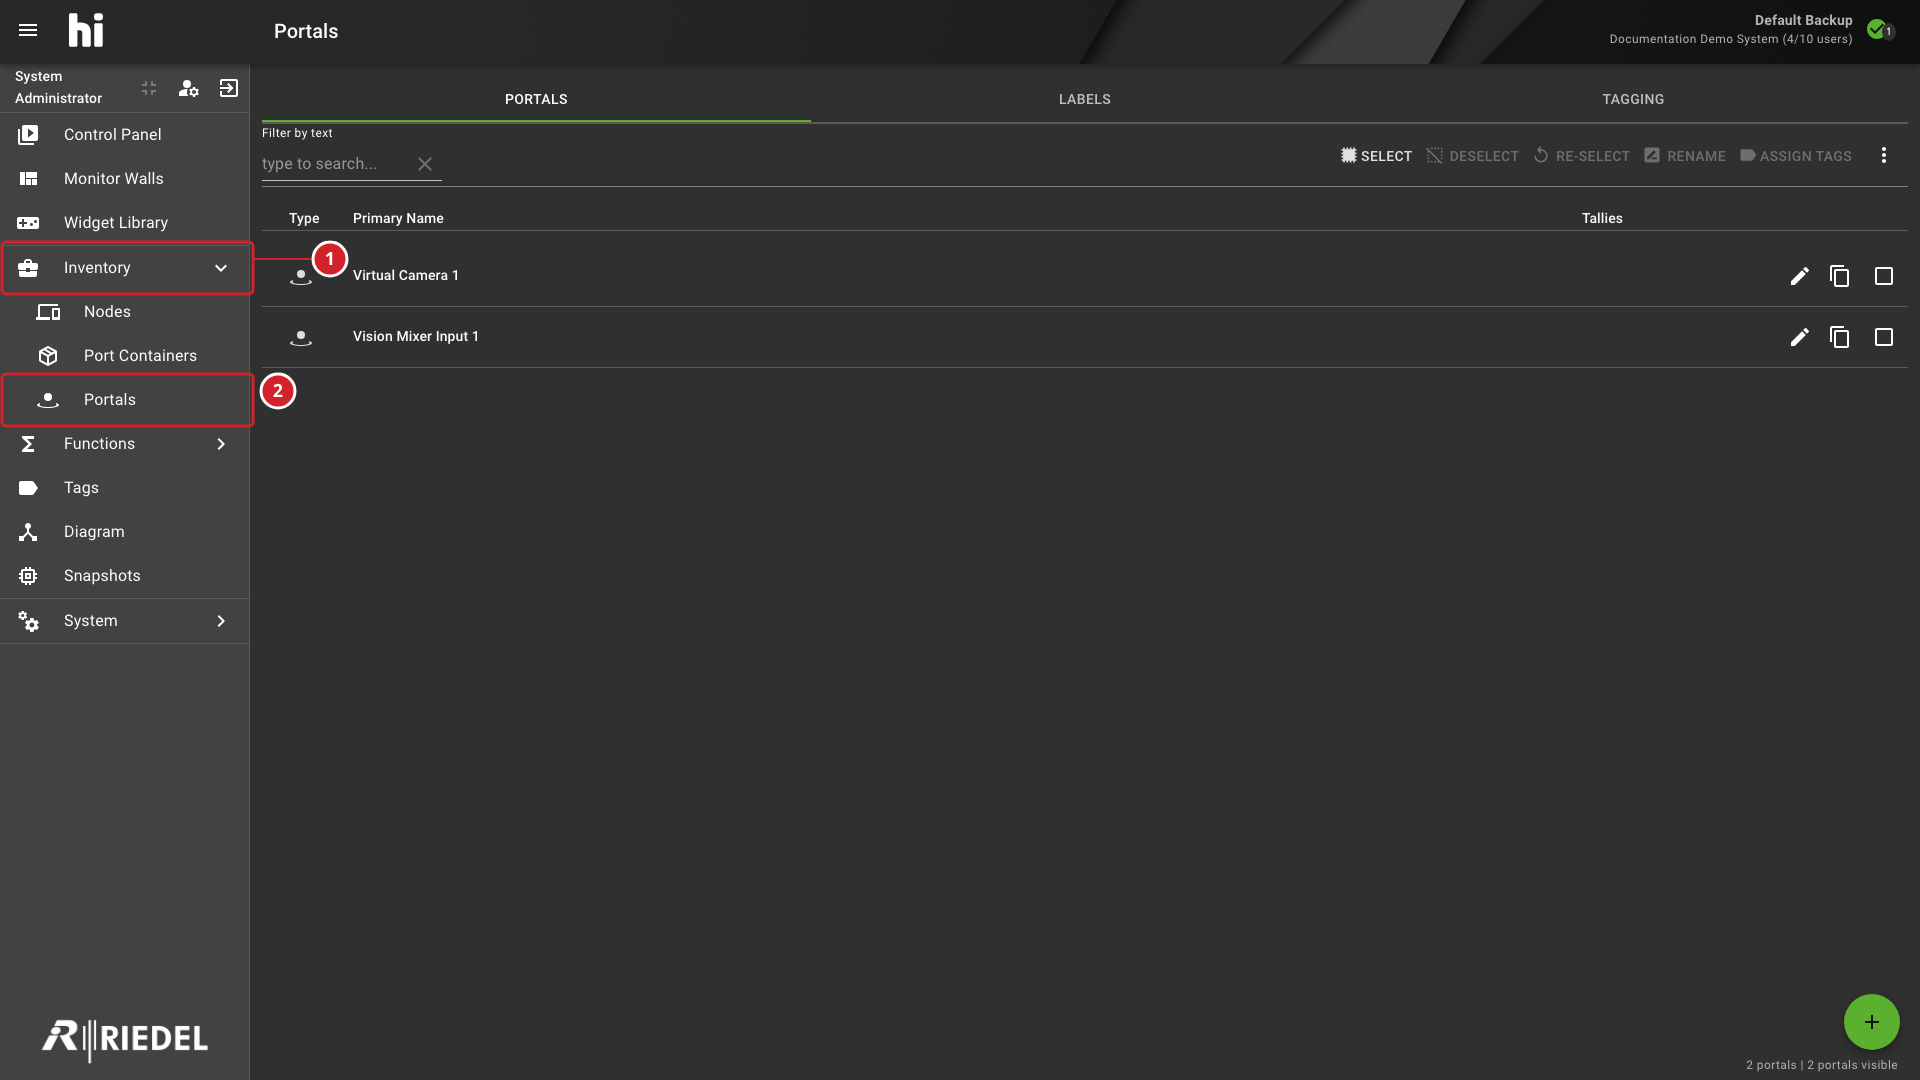
Open Inventory > Portals, then Create Portals to configure the required virtual objects.
-
Expand Inventory to show its destinations.
-
Select Portals to open Portal administration.
Explore
-
Create Portals for individual or numbered Portal creation.
-
Route Portals for Control Panel connections, disconnection, and Snapshot use.
-
Portal Properties Reference for naming fields, formats, and icons.
-
Rename Multiple Labels for Monitoring, Panel, and Mixer label changes.
Task Illustrations
-
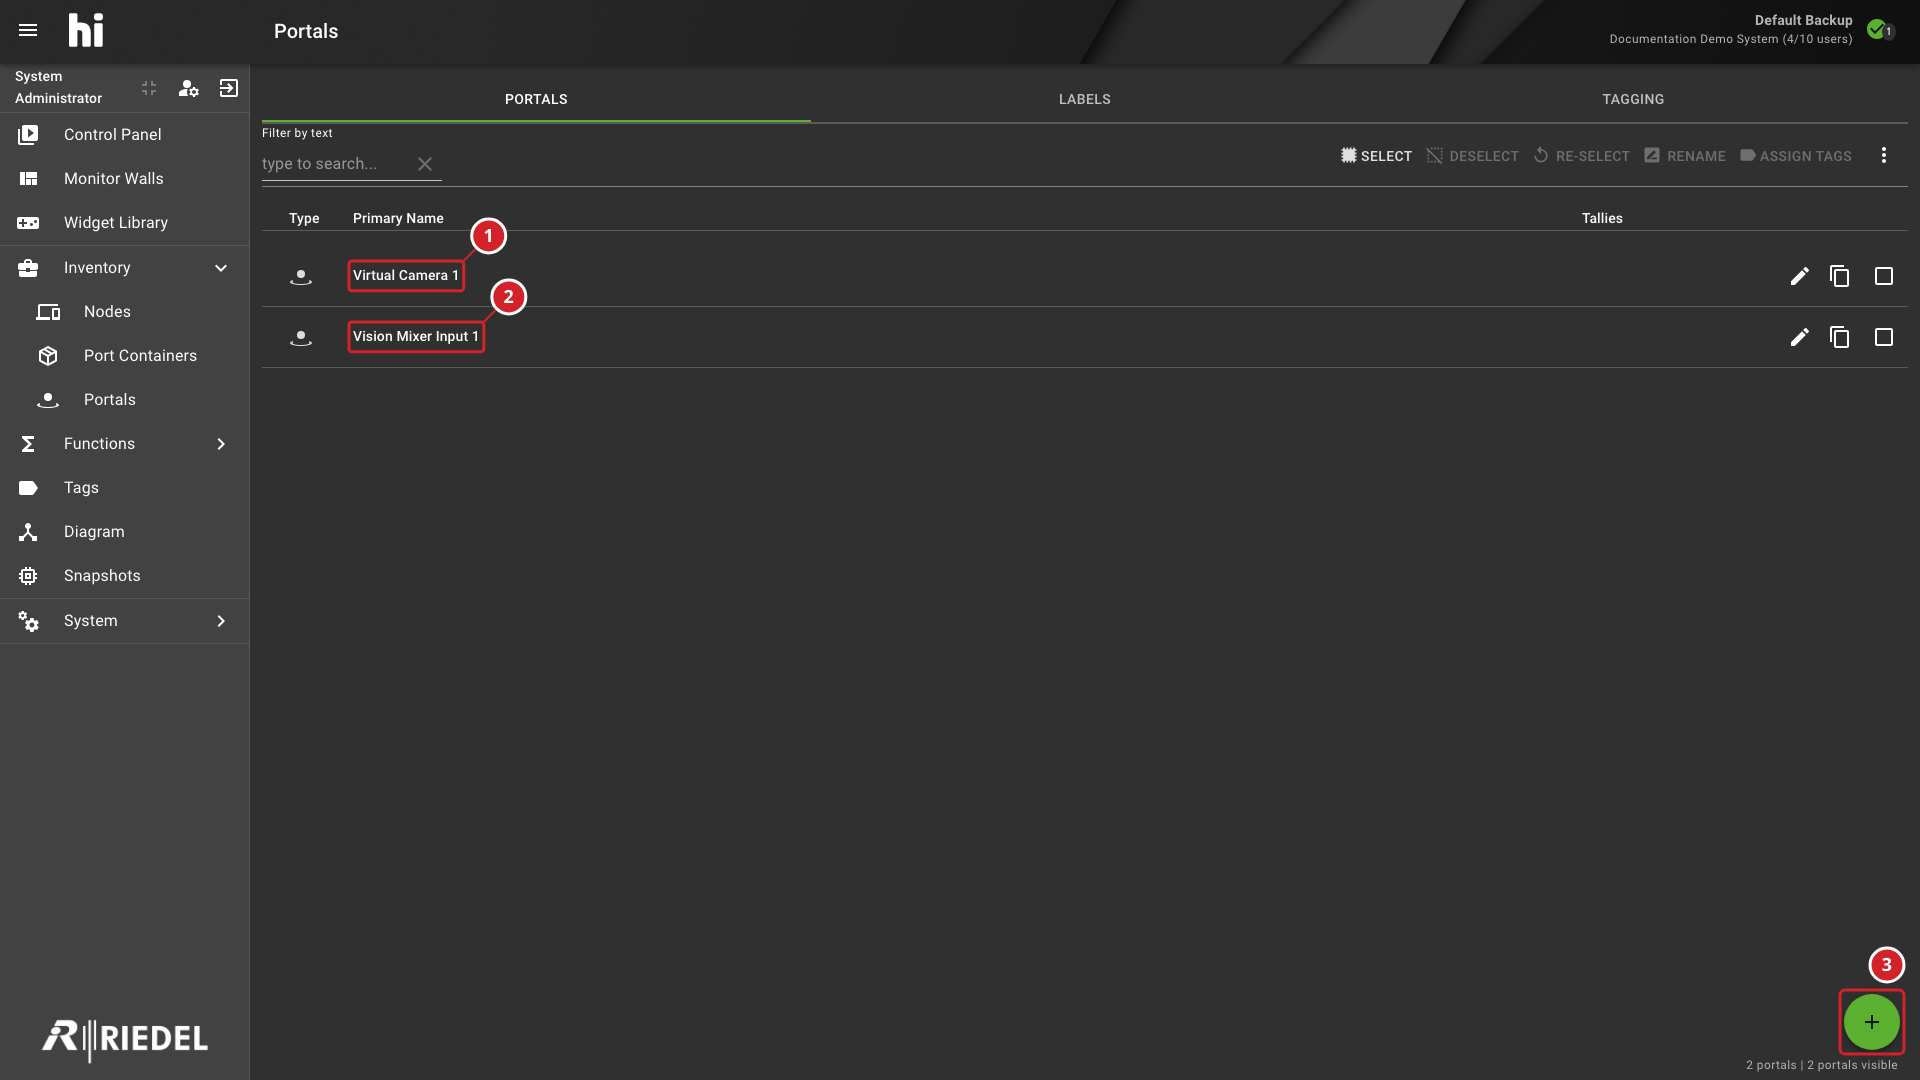
Virtual Camera 1 is the Source Portal for the camera workflow.
-
Vision Mixer Input 1 is the Destination Portal for the same SDI format.
-
Select + to create a Portal.
For the procedure, see Create Portals.
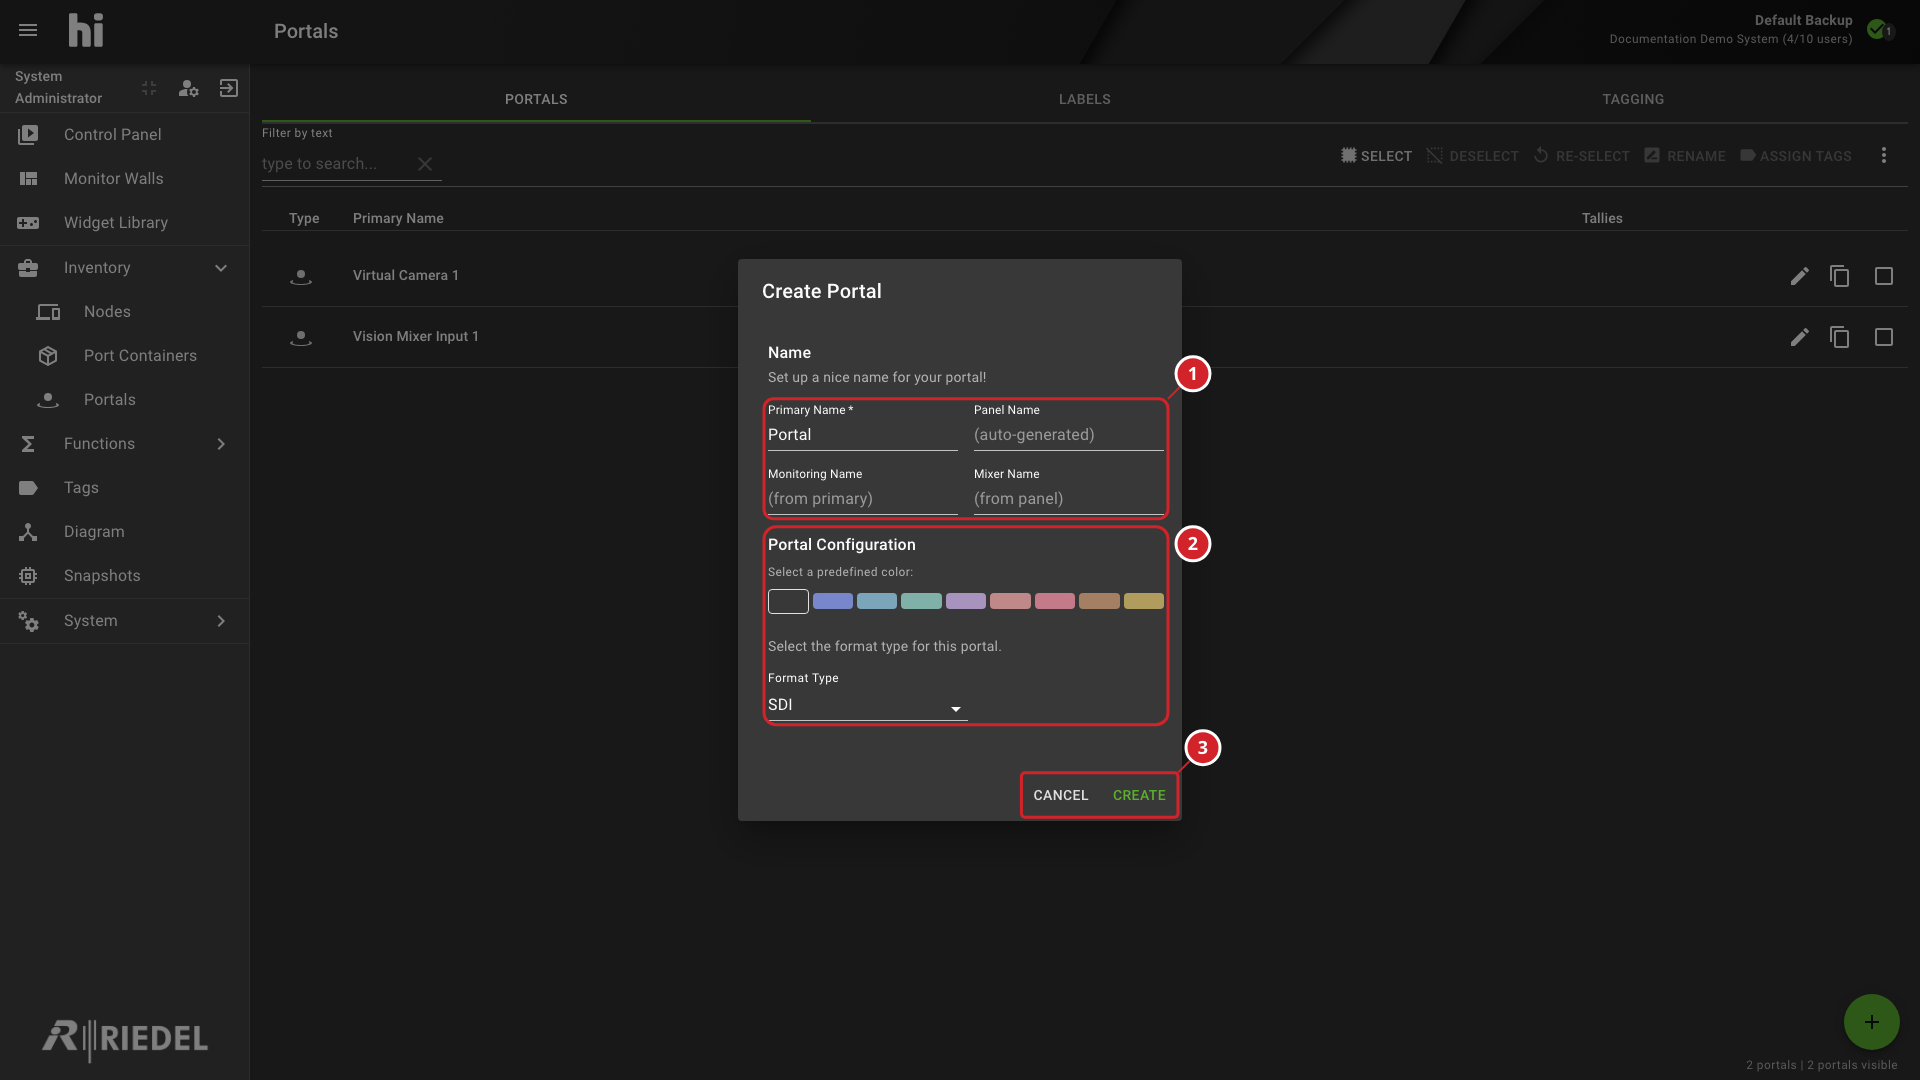
Portal Creation Dialog with Naming, Color, and Signal-Format Controls Annotated
-
Enter the Portal's names for the user-facing surfaces that use it.
-
Set the Portal's signal format and Portal properties.
-
Select Create to add the Portal or Cancel to close without saving.
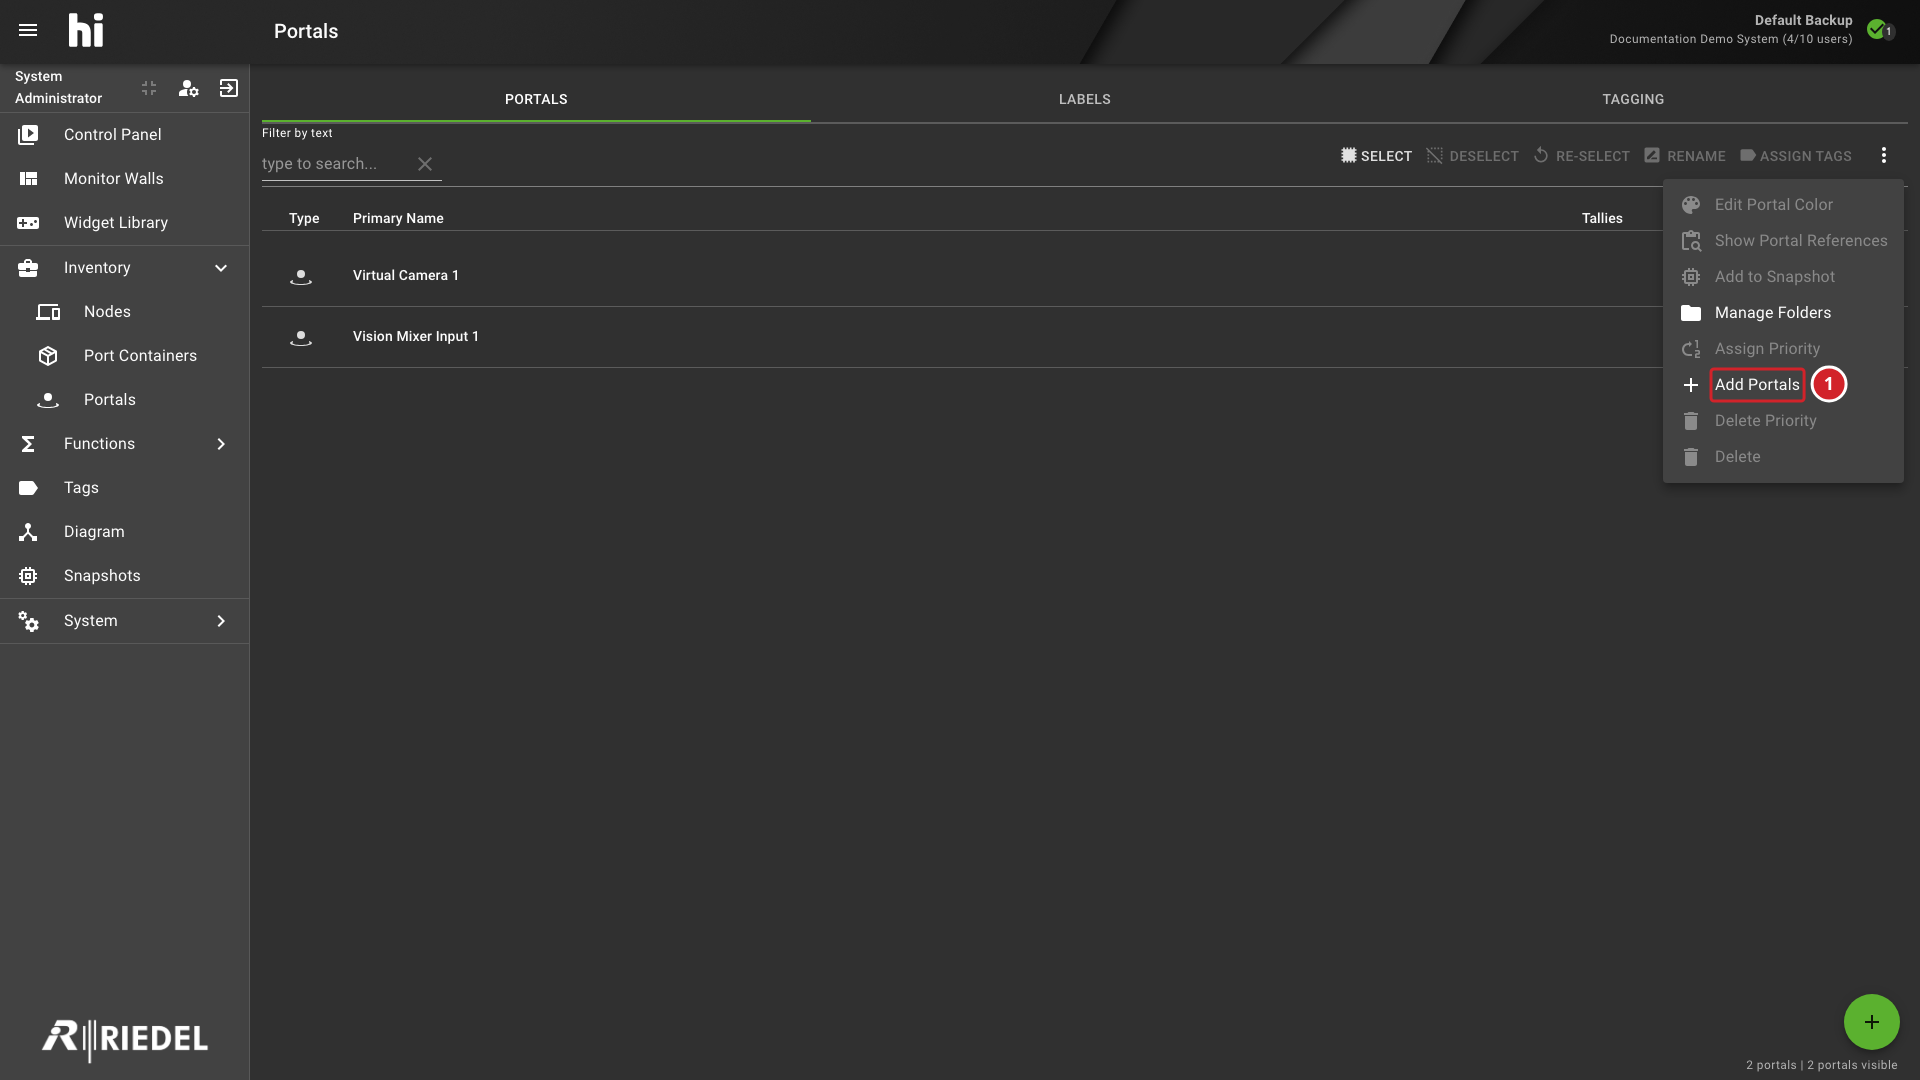
Portals Three-Dot Menu with Add Portals Highlighted
-
Select Add Portals from the three-dot menu to open the bulk-creation form.
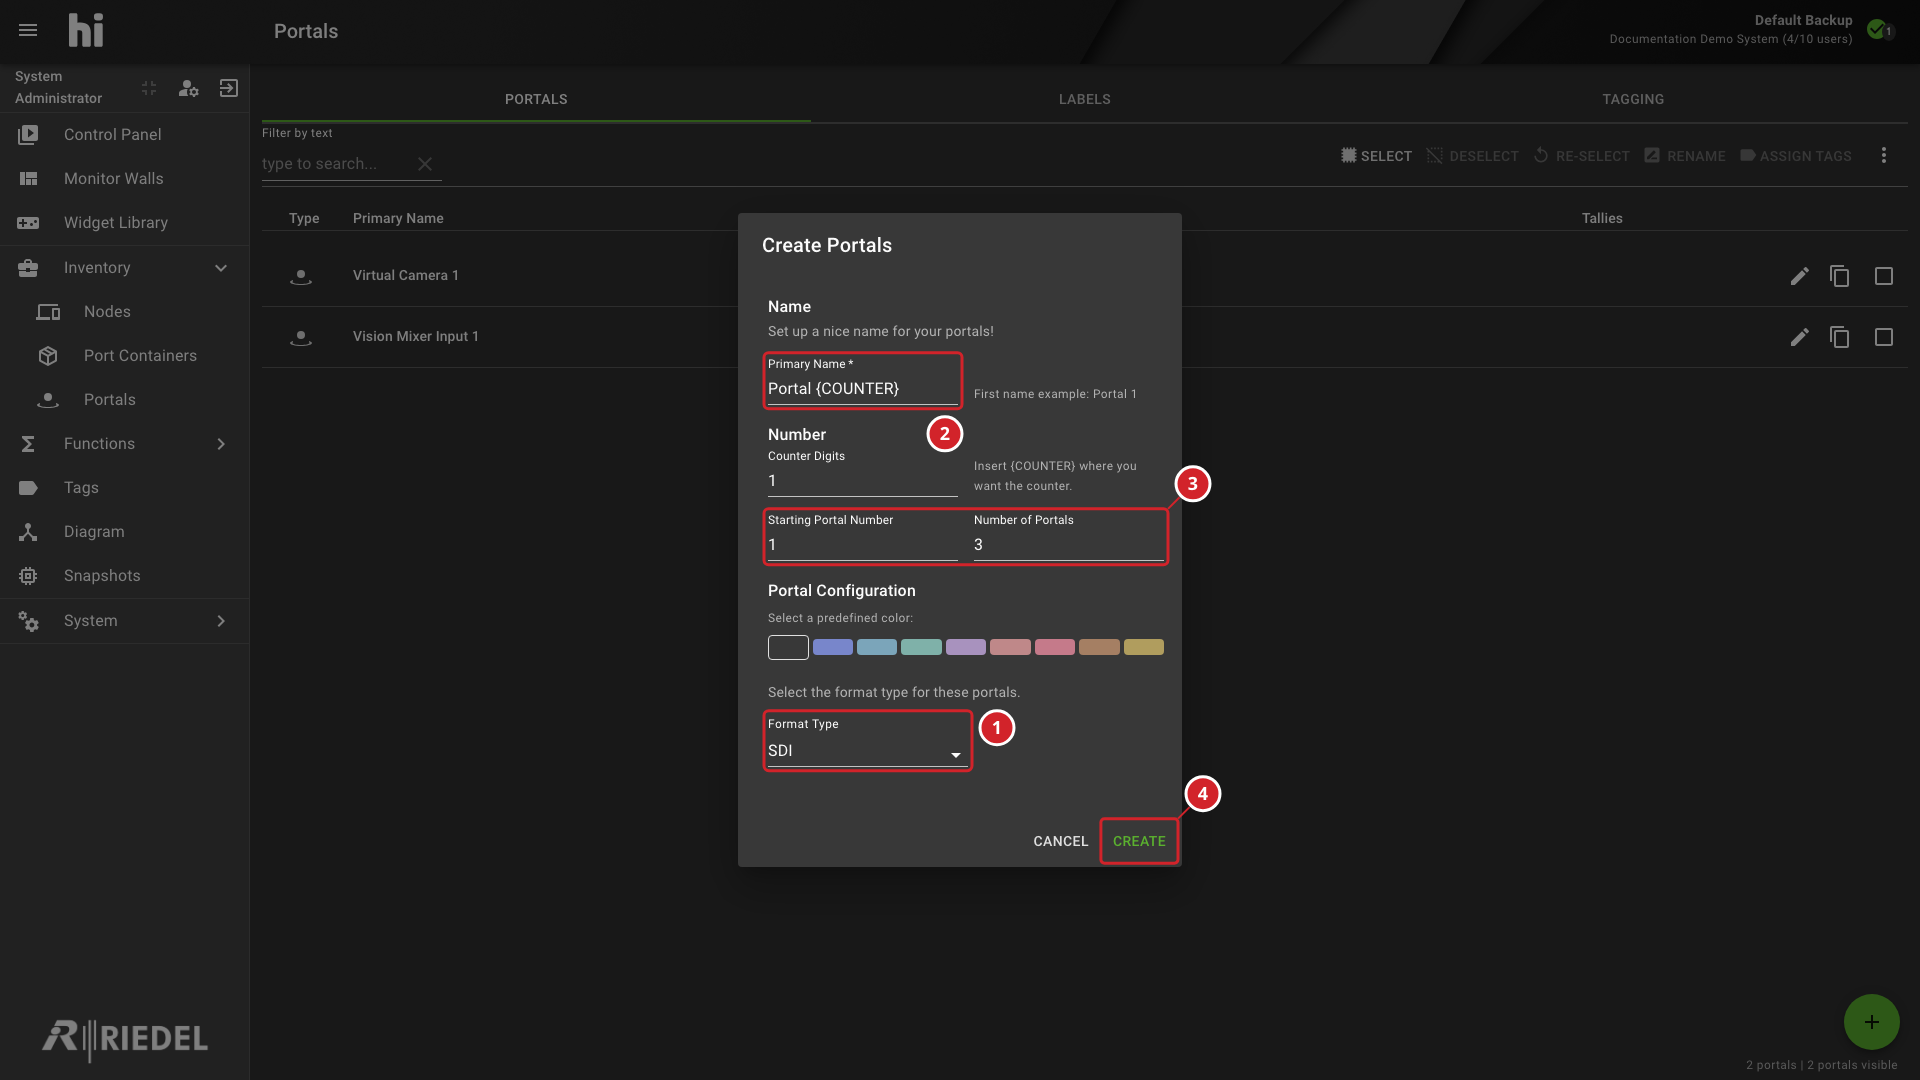
Bulk Portal Creation Fields for a Virtual Camera Workflow
-
Select the common Format Type for the new Portals.
-
Enter the shared name pattern, including
{COUNTER}where each name should vary. -
Set the starting number and number of Portals to create.
-
Review the preview, then select Create to add the Portals.
For the procedure, see Route Portals.
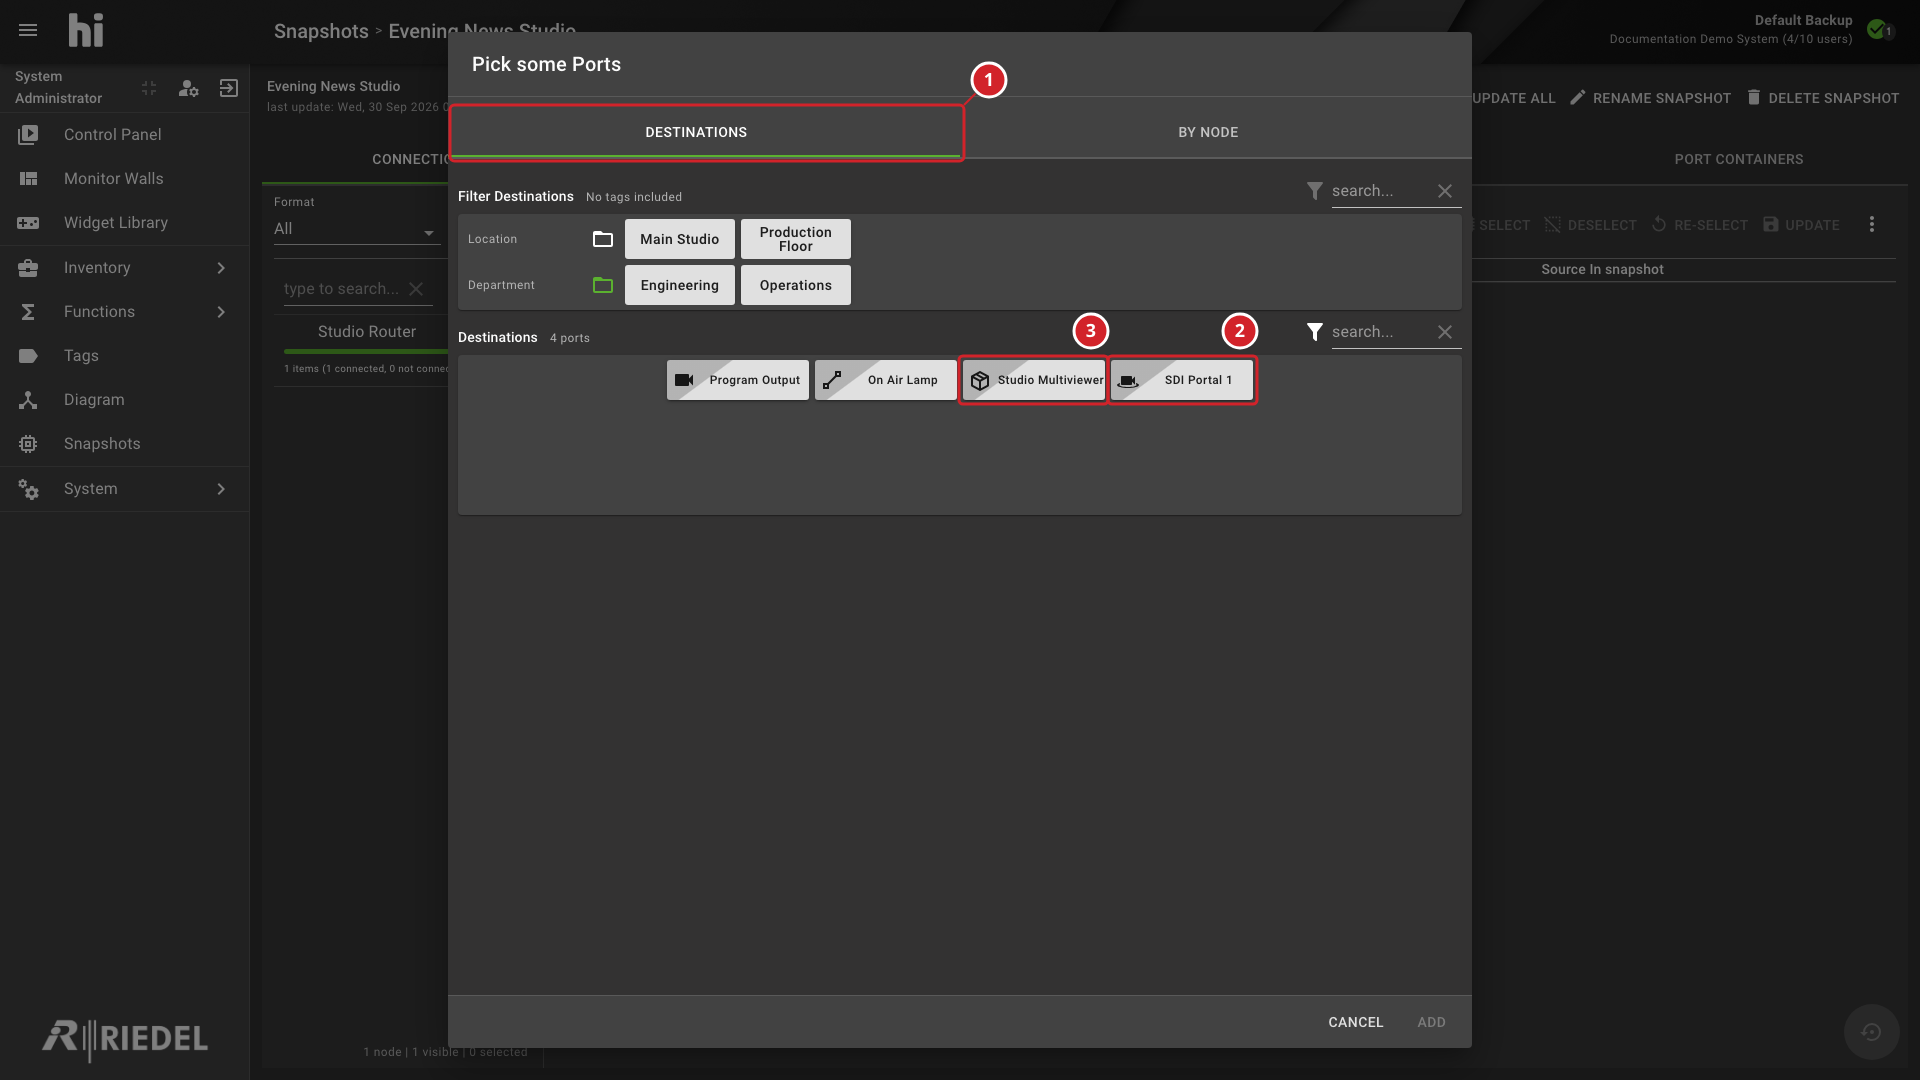
Port Picker Showing Portal and Port Container Signal Types Together
-
Destinations lists the Destination Ports available for selection.
-
SDI Portal 1 is a Portal available as a Destination.
-
Studio Multiviewer is a Port Container available as a Destination.