
Manage Widgets
Overview
Use the Widget Library to create reusable Widgets, review where they are used, and manage their delegation. Each supported type has its own setup and operator procedures.
See Widgets for how Widgets, Widget Groups, Presets, and assigned parameter controls relate, and Parameter Control for pinning and Port assignments.
Prerequisites
The Widget admin role is required, and the installation license must enable Widgets, which shows Widget Library in the menu. The selected widget type may also require a configured device, parameter, or Snapshot.
Browse Widget Types
Open Widget Library from the main menu. The Widgets tab lists configured Widgets; the Pinned Parameters tab lists parameters already pinned in Node configuration.
Select the plus button on the Widgets tab to open the widget-type selection dialog. Select a type to see its example preview, then select Select to continue.
See Widget Types Reference for the purpose and requirements of each type.
The next dialog depends on the selected type. For example, Video Server lets you select a configured player.
Add and Manage Widgets
-
Open Widget Library and select Widgets.
-
Select the plus button.
-
Select a widget type, then select Select.
-
Follow the type's setup procedure in Widget Types Reference.
Parameter, Video Server, and Snapshot Widgets bind to an existing parameter, player, or Snapshot. Their bindings cannot be changed through the Library's Edit action.
Other supported types provide their own configuration dialogs. Select an editable Widget and use Edit, then follow its configuration procedure.
To manage existing Widgets, select them in the configured list, then select Delegate to user or Delete. Delegate to user assigns the Widgets to users with Simplified Power Widget access. Use the rename icon to rename a Widget. Counter Widget names are limited to 15 characters.
Before deleting a Widget, review its Preset / Widget Group and Delegated To columns to identify where it is used and which users have access to it. When a column summarizes multiple entries, its tooltip lists the individual entries. Select Delete, then check the Widget names in the confirmation dialog before confirming. Select Cancel if the selection is incorrect or you still need to review its use.
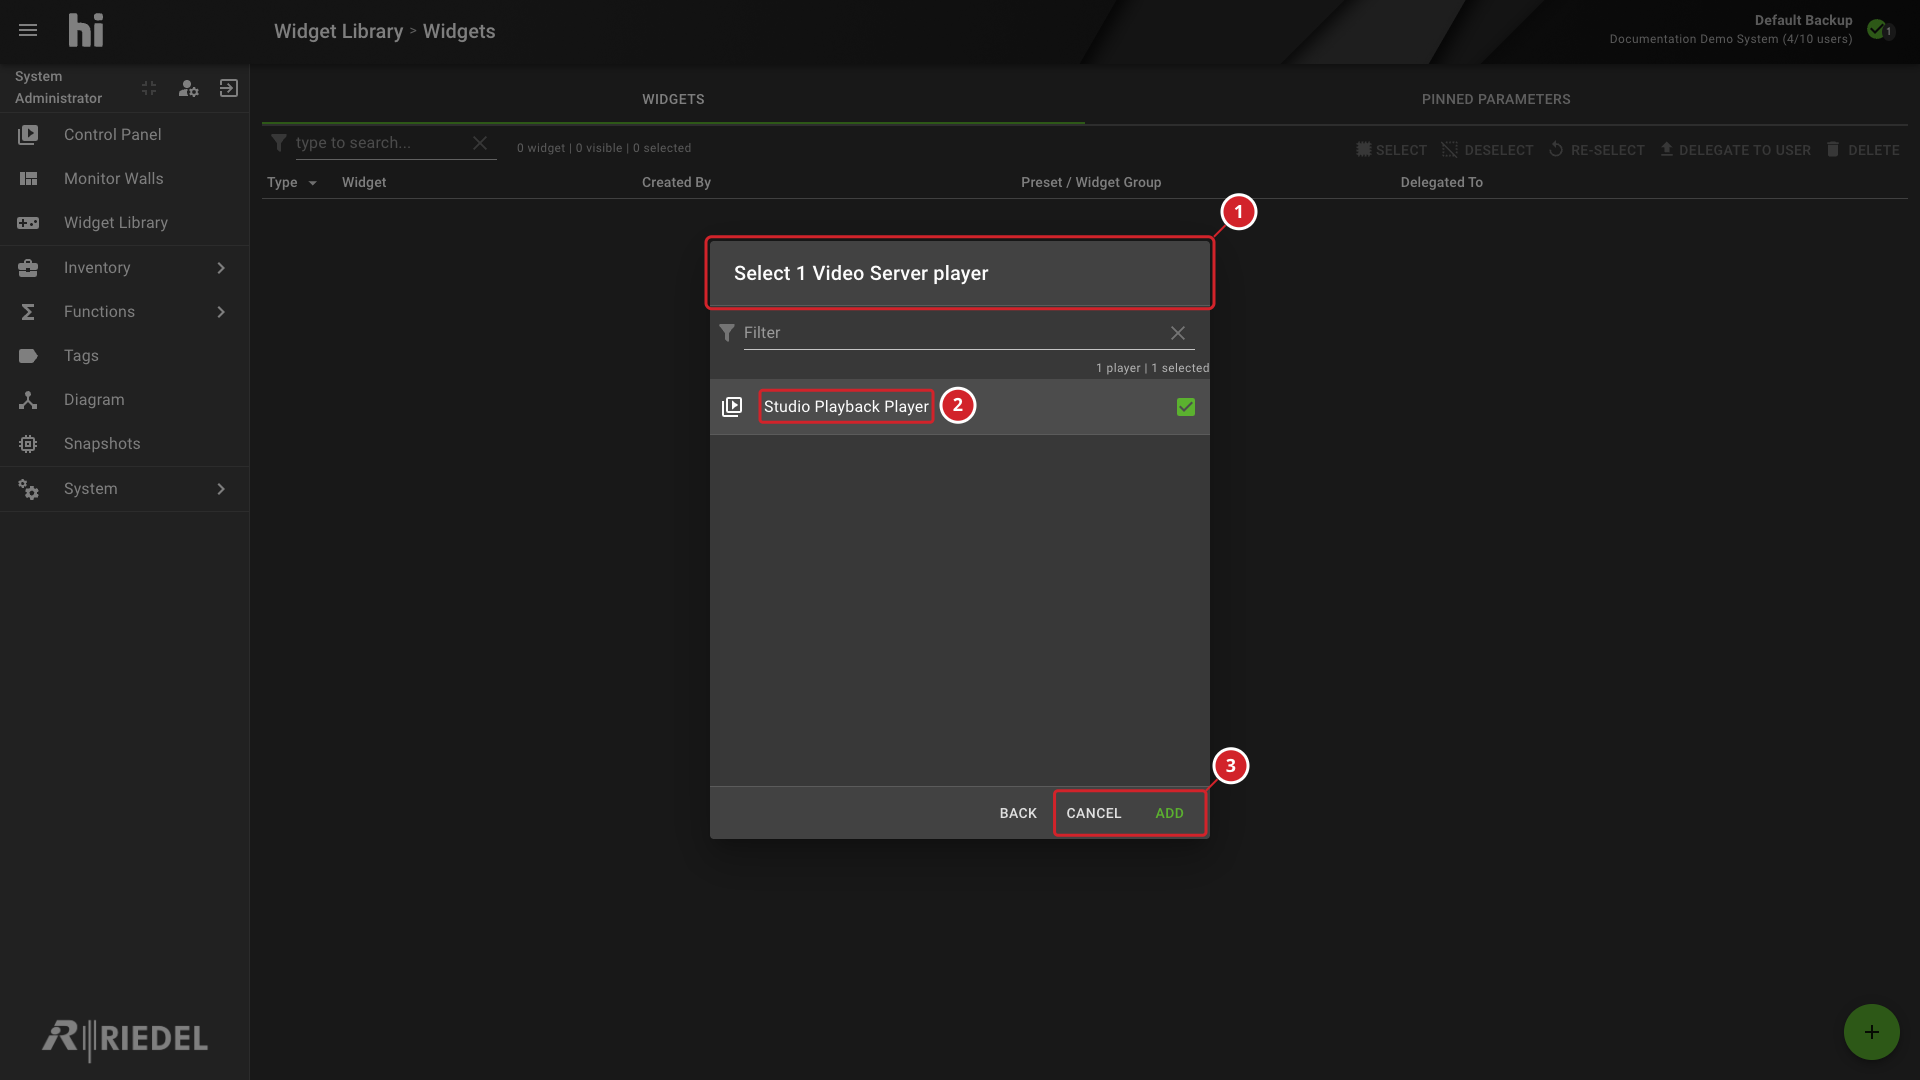
-
The Video Server Player selection dialog.
-
The Studio Playback Player selected for the widget.
-
Add the selected player to the Widget Library.
To show reusable Widgets on the Control Panel, follow Make Widgets Available in a Control Panel Preset. The Widget Area can also show the selected Port's assigned controls.
For playback controls, follow Use a Video Server Widget.
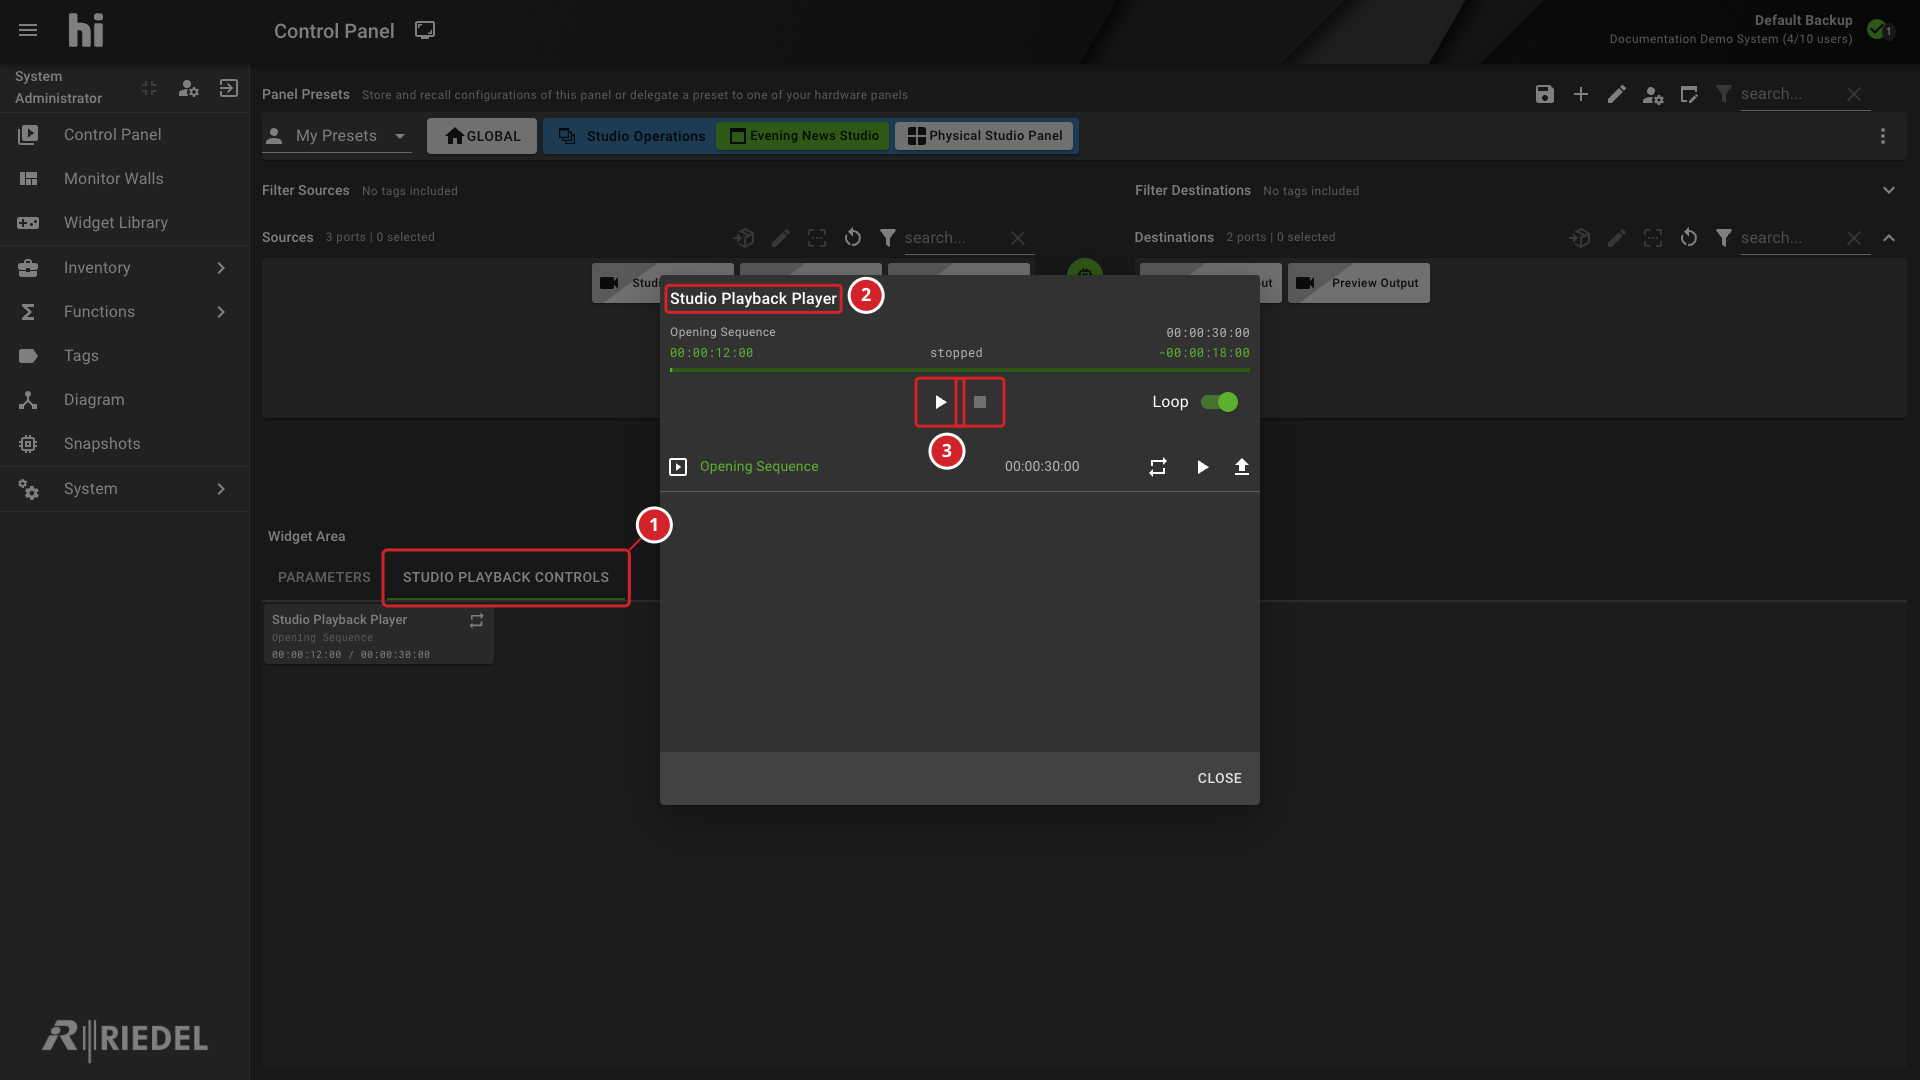
-
The Studio Playback Controls Widget Group.
-
The Studio Playback Player widget.
-
The Play and Stop controls for the selected player.
Parameter Controls
See Parameter Control for data-type controls, writability, and Parameter Container behavior.
Use Assign a Parameter Control to pin a parameter and make its control available on a Port or Port Container.
Use Create a Parameter Widget when the control should belong to a reusable Widget Group instead.
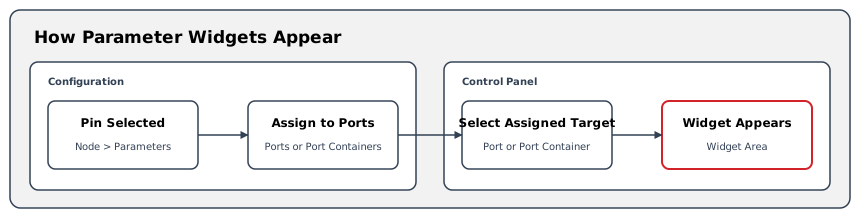
Pinned Parameters
The Pinned Parameters tab lets you select a Node, search pinned parameters, sort by Type or Parameter, and view where each parameter is assigned. A user with the Node admin role can rename a pinned parameter from this tab. Pinning and unpinning are done in the Node's Parameters tab; see Parameter Control.
Verify the Result
-
Confirm that the new Widget appears in the configured list.
-
Open the Control Panel with a Preset that enables Widget Area.
-
Select the intended Widget Group and confirm that its Widgets appear.
-
For assigned parameter controls, select the intended Port and confirm that its controls appear.
For other Widget Groups, confirm that the active Preset includes the required groups.
Next Steps
-
See Widget Types Reference for every supported Widget's setup and operating procedure.
-
See Make Widgets Available in a Control Panel Preset to include groups and add reusable Widgets.
-
See Parameter Control to pin, group, and assign parameters.
-
See Manage Nodes to configure Node parameters and video server players.