
Create and Edit Multiviewer Head Layouts
Overview
A layout describes the picture-in-picture areas of one Multiviewer Head and the Destination Port that feeds each area. Create or change a layout from the Control Panel that opens for the Multiviewer Head. To create the head itself, see Configure a Monitor Wall.
Prerequisites
-
Use an account with the Monitor Wall admin role and the enabled Monitor Wall feature.
-
Configure the room and the Multiviewer Head. A single monitor has no layouts.
-
Know which layout template matches the layout that the physical Multiviewer shows.
-
To recall layouts on the device, configure a layout recall parameter for the head in the room configuration. Without it, you can still save layouts and a default layout.
Create a Layout
-
Open Monitor Walls, select the location and room, then select the Multiviewer Head to open its Control Panel.
-
In Display Layouts, select Add a new Layout.
-
In Edit Multiviewer Head Layout, enter a Layout Name.
-
Select a Layout Template that matches your current Multiviewer layout. The dialog shows the template's areas. Selecting another template replaces the areas and clears their Port assignments.
-
If the head has a layout recall parameter, enter or select the parameter value that corresponds with this layout. For an enum parameter, select [ No Recall ] to leave the value empty. For other parameter types, leave the value field empty. If no parameter is configured, the dialog says so and shows no value field.
-
Select one or more areas in the dialog, then select Assign ports.
-
In the Port Picker, select exactly as many Destination Ports as you selected areas, then select Assign. hi assigns the Ports to the selected areas in order.
-
Repeat steps 6 and 7 until each area has a Port.
-
Select Create.
Create stays unavailable until the layout has a name and at least one area, which a template provides. An area without a Port is saved as unassigned.
Edit a Layout
-
In Display Layouts, select the layout.
-
Select Edit selected Layout. Alternatively, open the three-dot menu and select Edit current layout.
-
Change the name, template, parameter value, or Port assignments.
-
To remove Ports, select the assigned areas, then select Unassign. The button reads Unassign when every selected area has a Port.
-
Select Save.
-
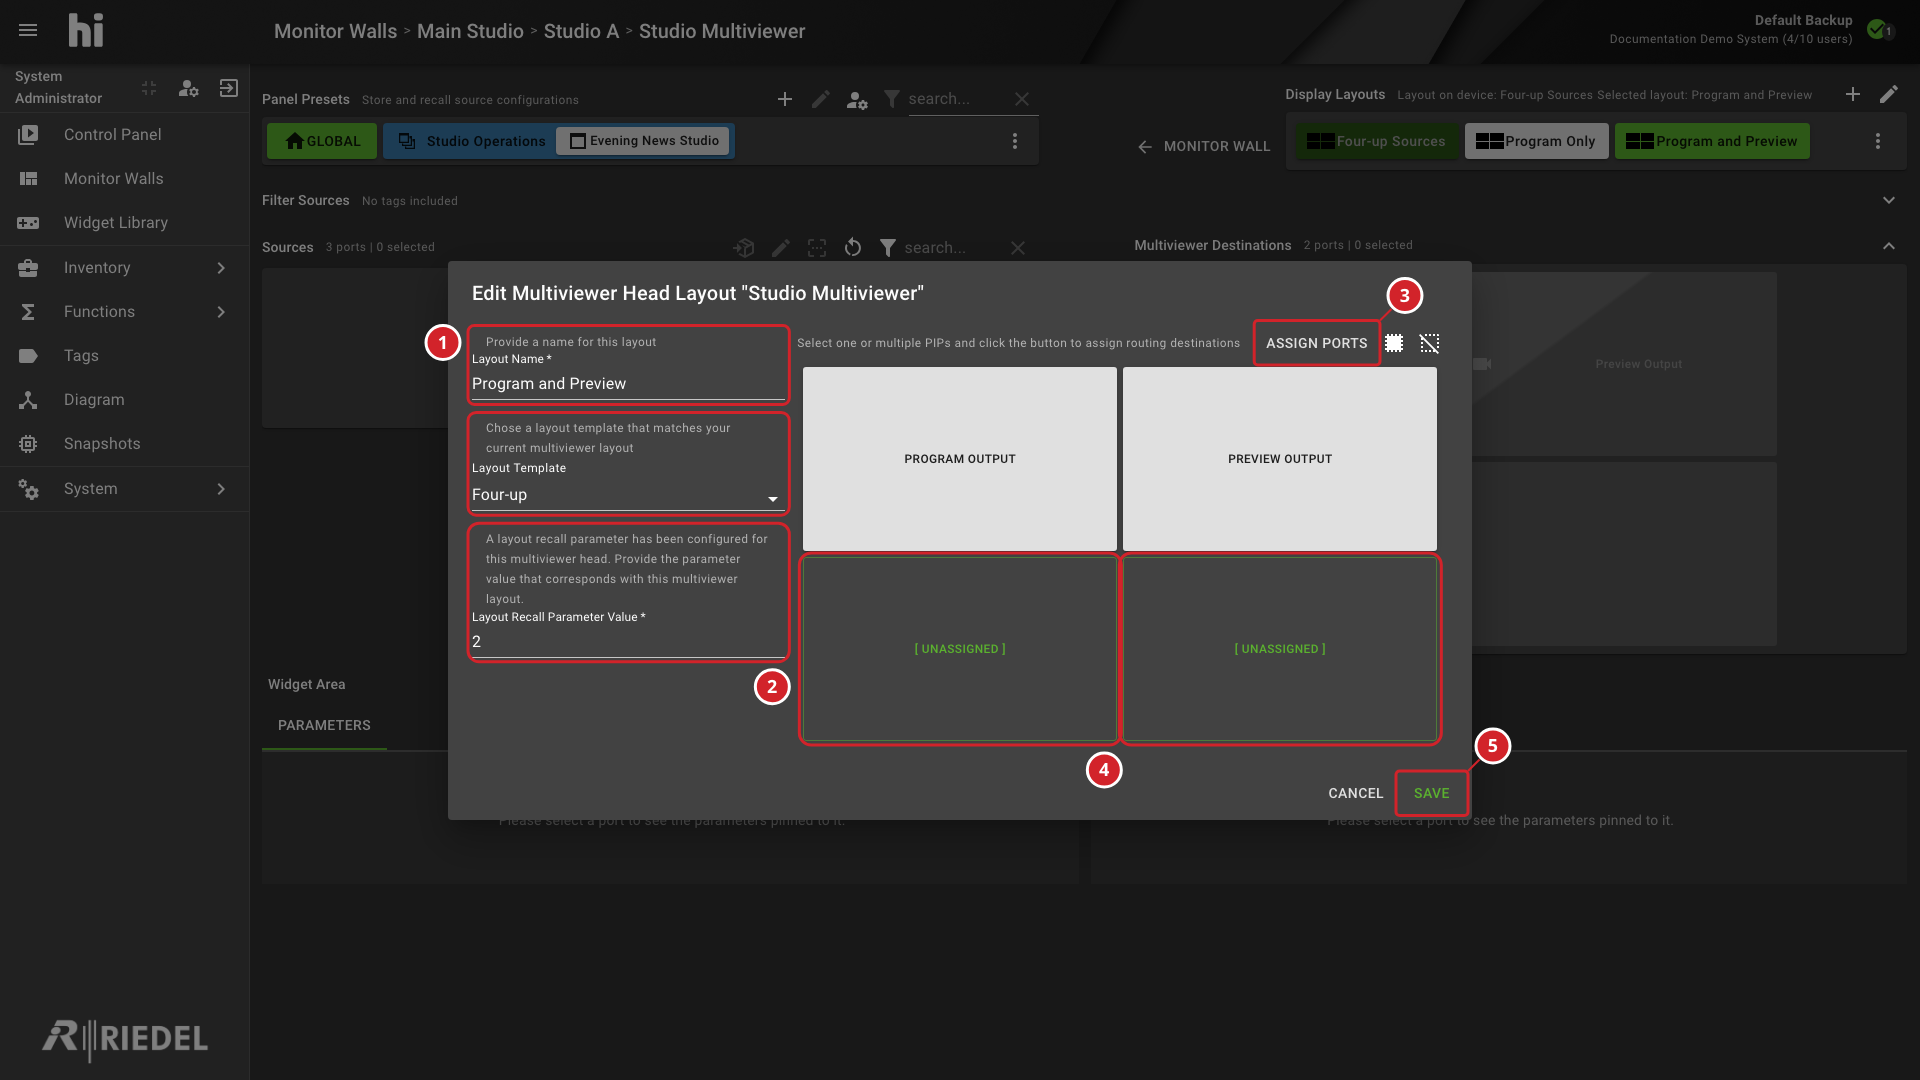
The Layout Name and Layout Template fields.
-
The layout recall parameter value for this layout.
-
Assign ports assigns Ports to the selected areas.
-
The selected areas that still show [ Unassigned ]. The two upper areas already have Ports.
-
Save saves the layout.
Use the Select all and Deselect all buttons above the area grid to change the selection of all areas. An unassigned area shows [ Unassigned ]. An assigned Port that hi cannot find shows [ Unknown ]. Port names of 20 or more characters are shortened in the area.
Delete a Layout
-
In Display Layouts, select the layout.
-
Open the three-dot menu and select Delete current layout.
-
In Delete the selected "<layout name>" Display Layout?, select Delete.
Apply a Layout
Open the three-dot menu in Display Layouts and select the entry for the layout state.
-
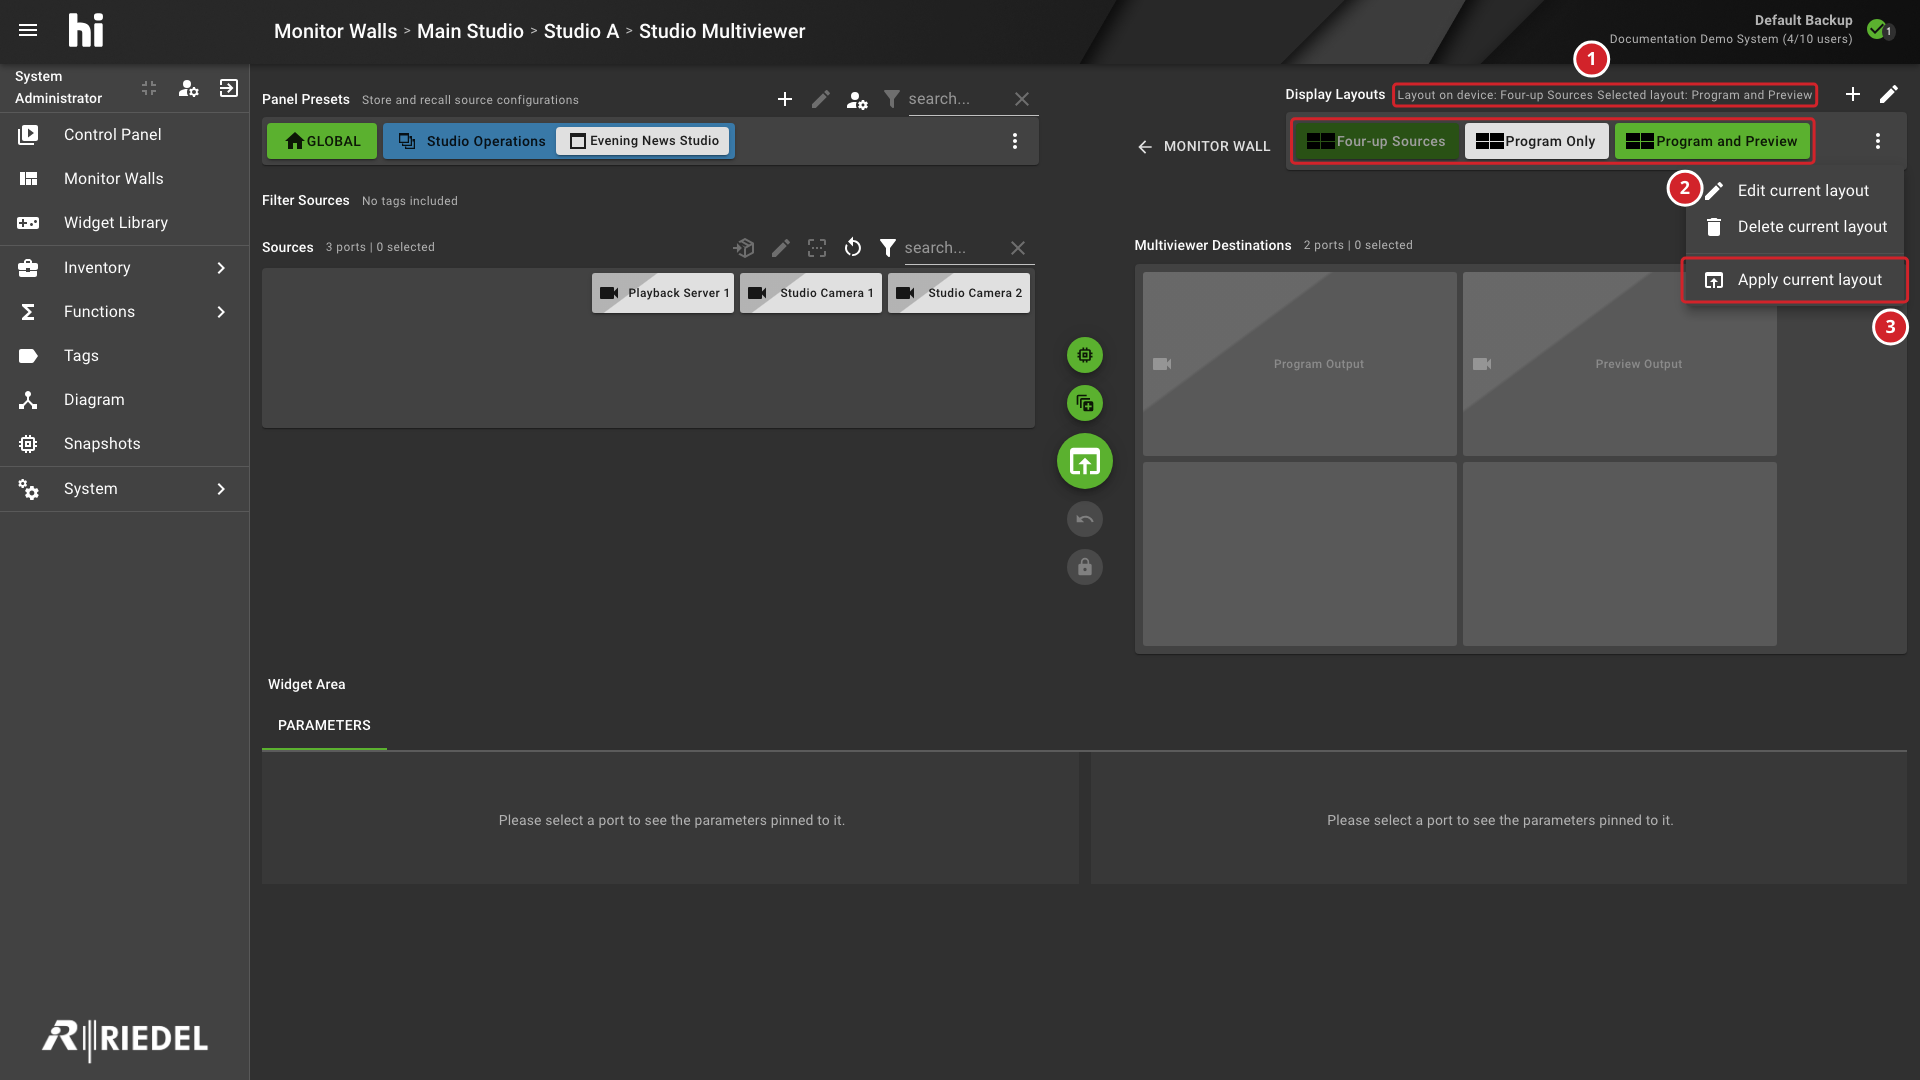
Layout on device shows the active layout and Selected layout shows the layout you selected.
-
The layout buttons select a layout. The selected layout is highlighted.
-
Apply current layout applies the selected layout to the device.
|
Menu entry |
When it appears |
|---|---|
|
Apply current layout |
The head has a layout recall parameter. It is unavailable when the selected layout has no parameter value. |
|
Save this as default layout |
The head has no layout recall parameter. The layout is saved as the default layout and nothing is sent to the device. |
Display Layouts shows Layout on device with the active layout and Selected layout with the layout you selected. If Apply reports Error recalling display layout., see Operate a Monitor Wall.
Verify the Result
Select the layout and confirm that the Destination areas show the assigned Ports. After you apply a layout, confirm that Layout on device shows its name and that the physical Multiviewer displays the layout.
Next Steps
Use Operate a Monitor Wall to route Sources to the layout areas.