
Configure Microsoft Entra ID Sign-In
Overview
Register an application in Microsoft Entra ID (formerly Azure Active Directory), then enter its identifiers in the hi system. Users can then sign in to the hi web interface with their Entra ID work accounts.
Part of this procedure is performed in the Microsoft Azure Portal by the organization's IT administrator. Microsoft can change Azure Portal labels. See the Microsoft Entra documentation for the current Azure Portal layout.
Information
The Azure Portal screenshots show the portal as of 2024. Host names, organization names, and application and directory IDs in the screenshots are examples.
Prerequisites
-
Use a local hi account that can change System > System Settings. See Manage System Settings.
-
Confirm that the installed license enables Entra ID authentication. See Entra ID Authentication.
-
Confirm that the hi web interface has a registered DNS name. Add the name to the company DNS server, or create a public DNS entry.
-
Confirm that users reach the hi web interface through HTTPS. Entra ID authentication requires HTTPS.
-
Install a certificate from a trusted Certificate Authority. The default self-signed certificate works, but browsers report the site as not secure.
-
Use an Entra ID account that can register applications and grant administrator consent for the tenant.
Register the Application
-
In the Azure Portal, open the Microsoft Entra ID instance.
-
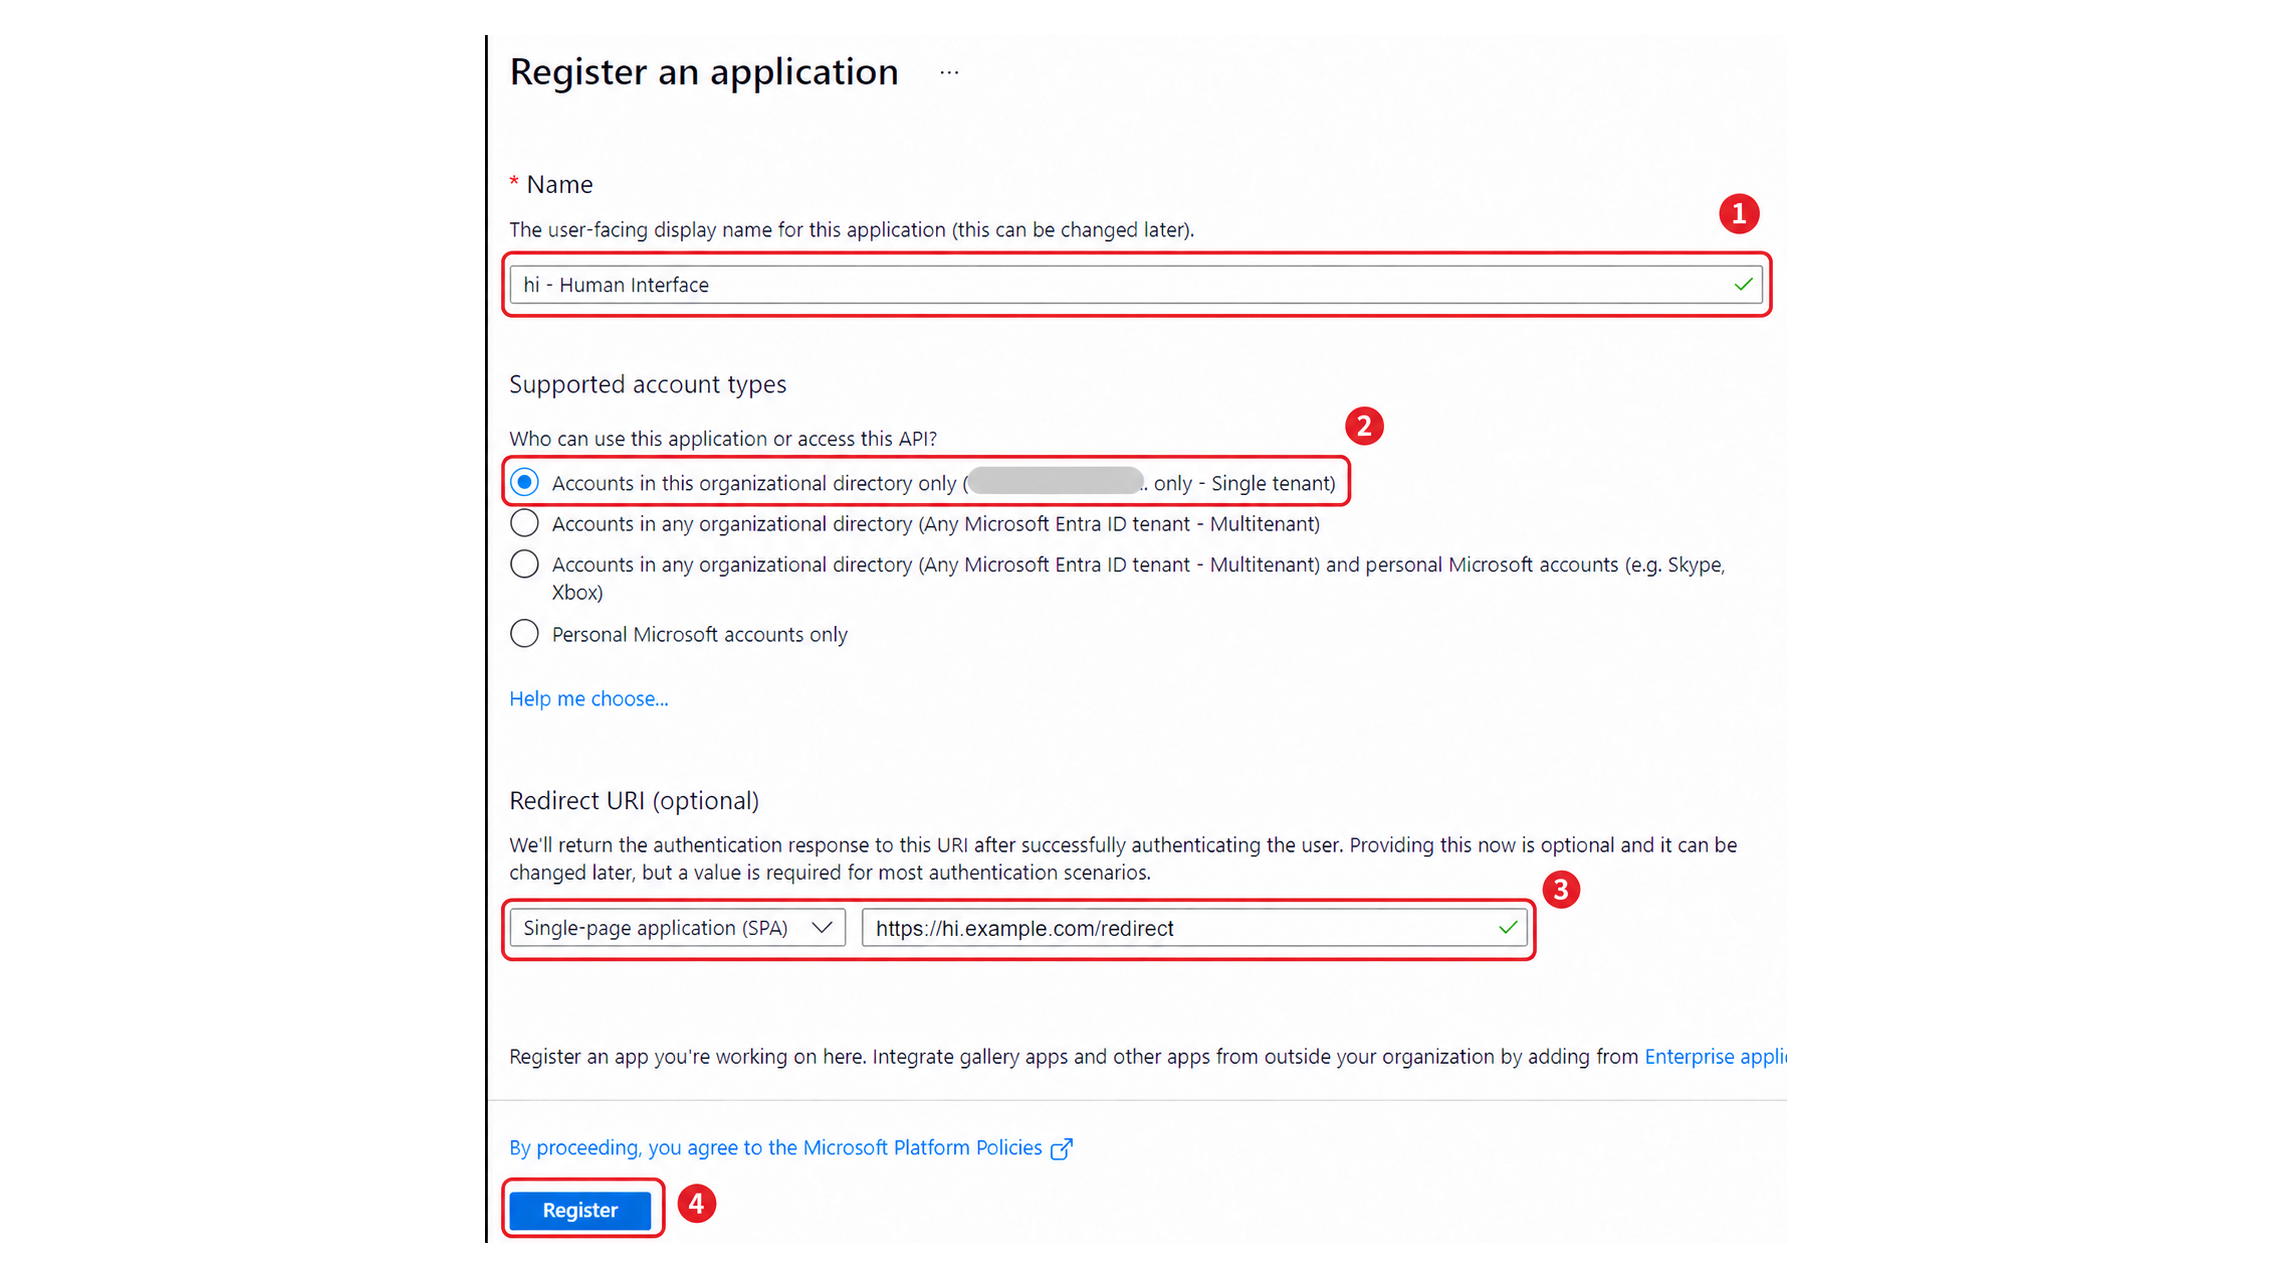
Select App registrations, then select New registration.
-
Enter a name for the application, for example
hi - Human Interface. -
Under Supported account types, select Accounts in this organizational directory only (Single tenant).
-
Build the redirect URI. Add
/redirectto the HTTPS address of the hi web interface, for examplehttps://hi.example.com/redirect. -
Under Redirect URI, select Single-page application (SPA) and enter the redirect URI.
-
Select Register.
-
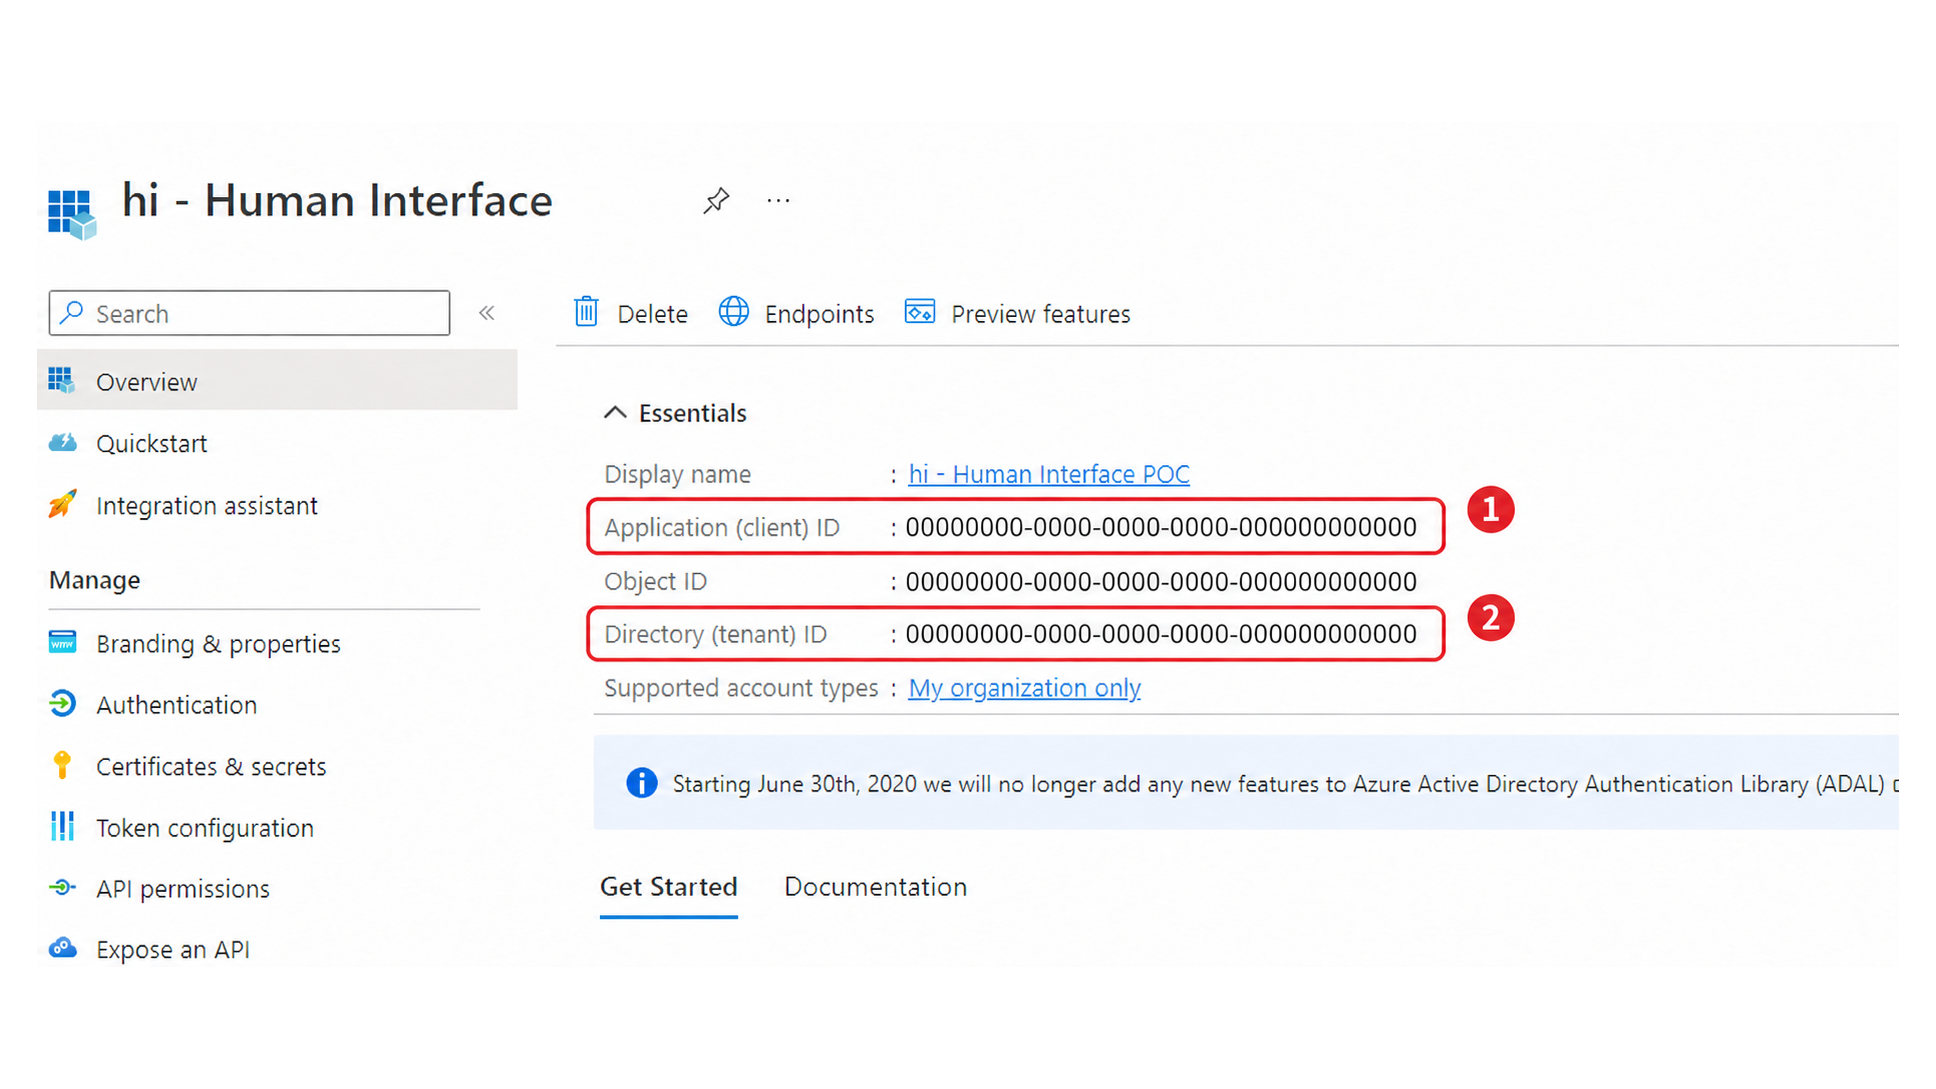
On the Overview page, record the Application (client) ID and the Directory (tenant) ID.
-
Enter a name for the hi application.
-
Select Accounts in this organizational directory only (Single tenant).
-
Select Single-page application (SPA) and enter the HTTPS redirect URI ending in
/redirect. -
Select Register.
-
Record the Application (client) ID.
-
Record the Directory (tenant) ID.
Configure Authentication
hi uses the authorization-code flow with PKCE. See Microsoft's guidance on implicit grant settings.
-
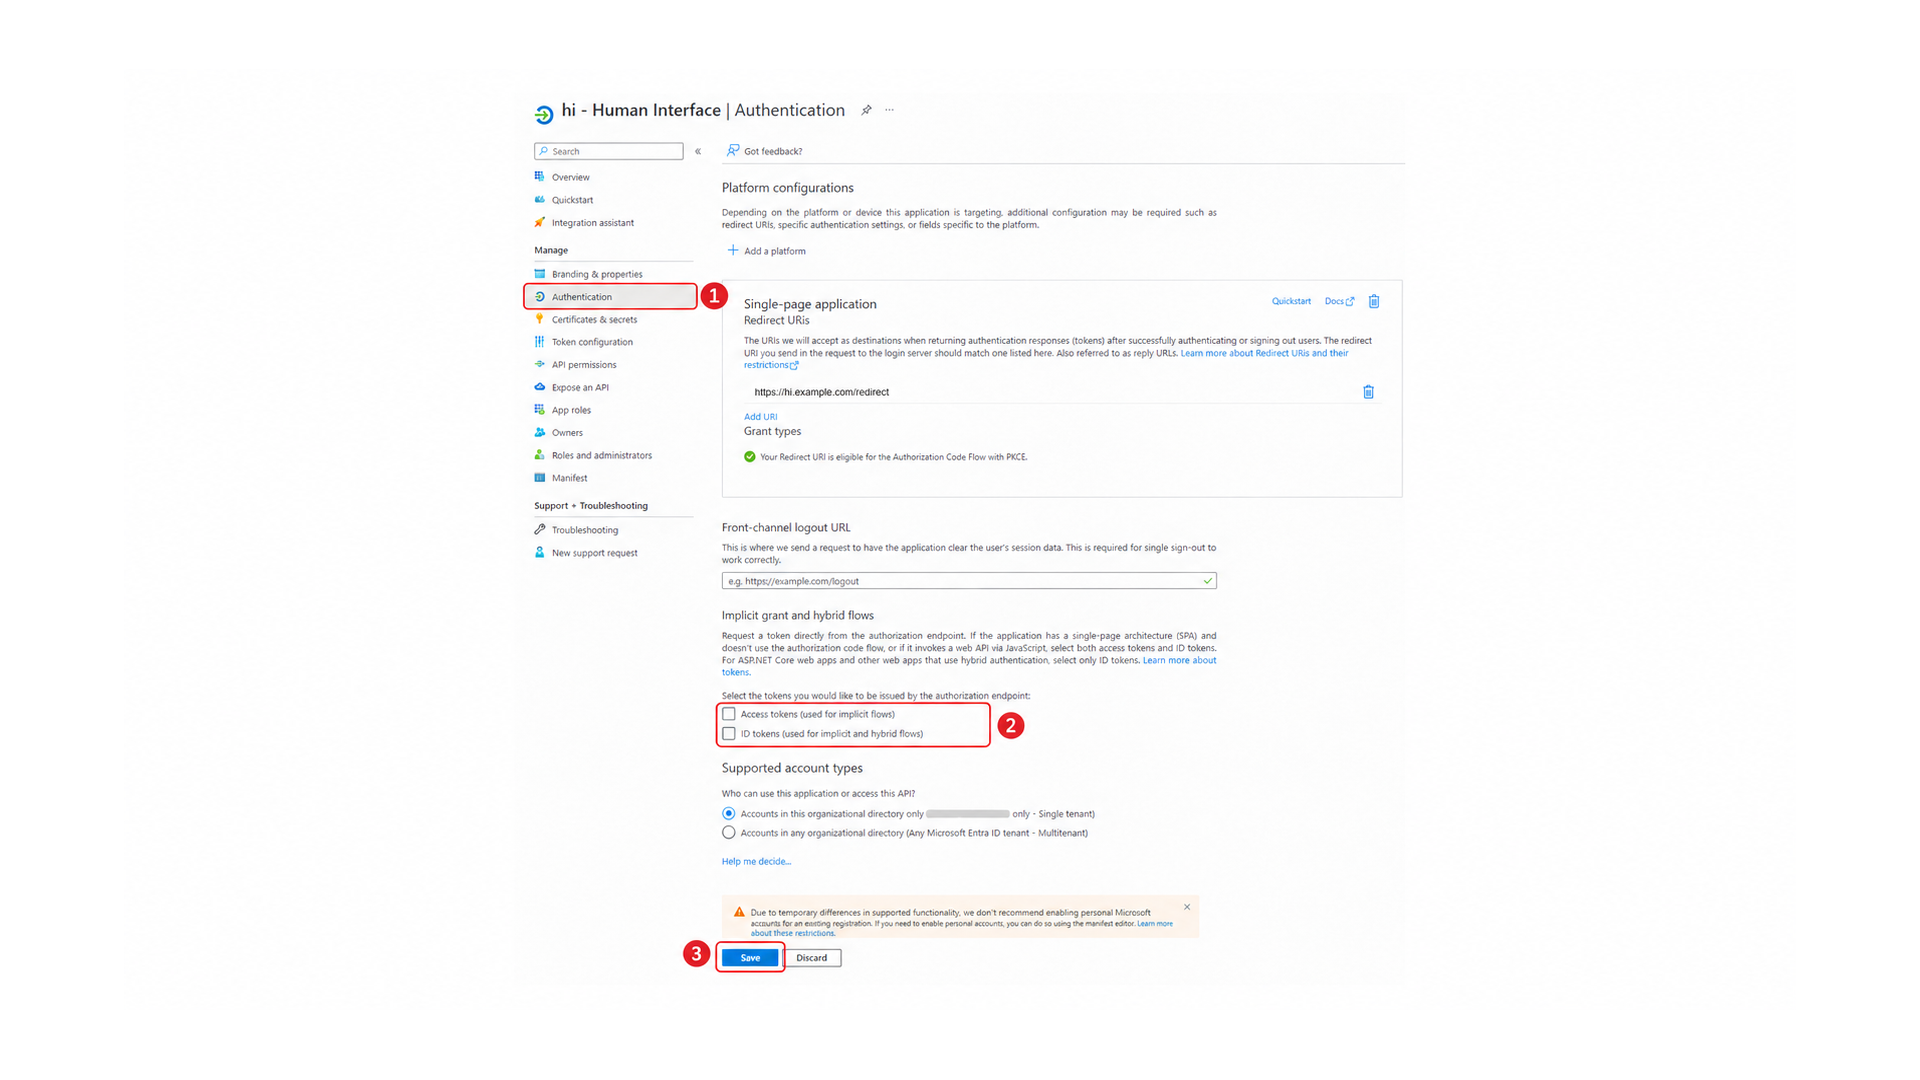
In the registered application, select Authentication.
-
For an application registration dedicated to hi, leave Access tokens (used for implicit flows) and ID tokens (used for implicit and hybrid flows) unselected.
-
Select Save.
Information
If the registration is shared with an older application, coordinate changes to its implicit grant settings with your IT administrator. Disabling these settings affects all applications that share the registration.
-
Select Authentication.
-
Leave Access tokens (used for implicit flows) and ID tokens (used for implicit and hybrid flows) unselected.
-
Select Save.
Grant API Permissions
The application must read the signed-in user and list the groups of the directory.
-
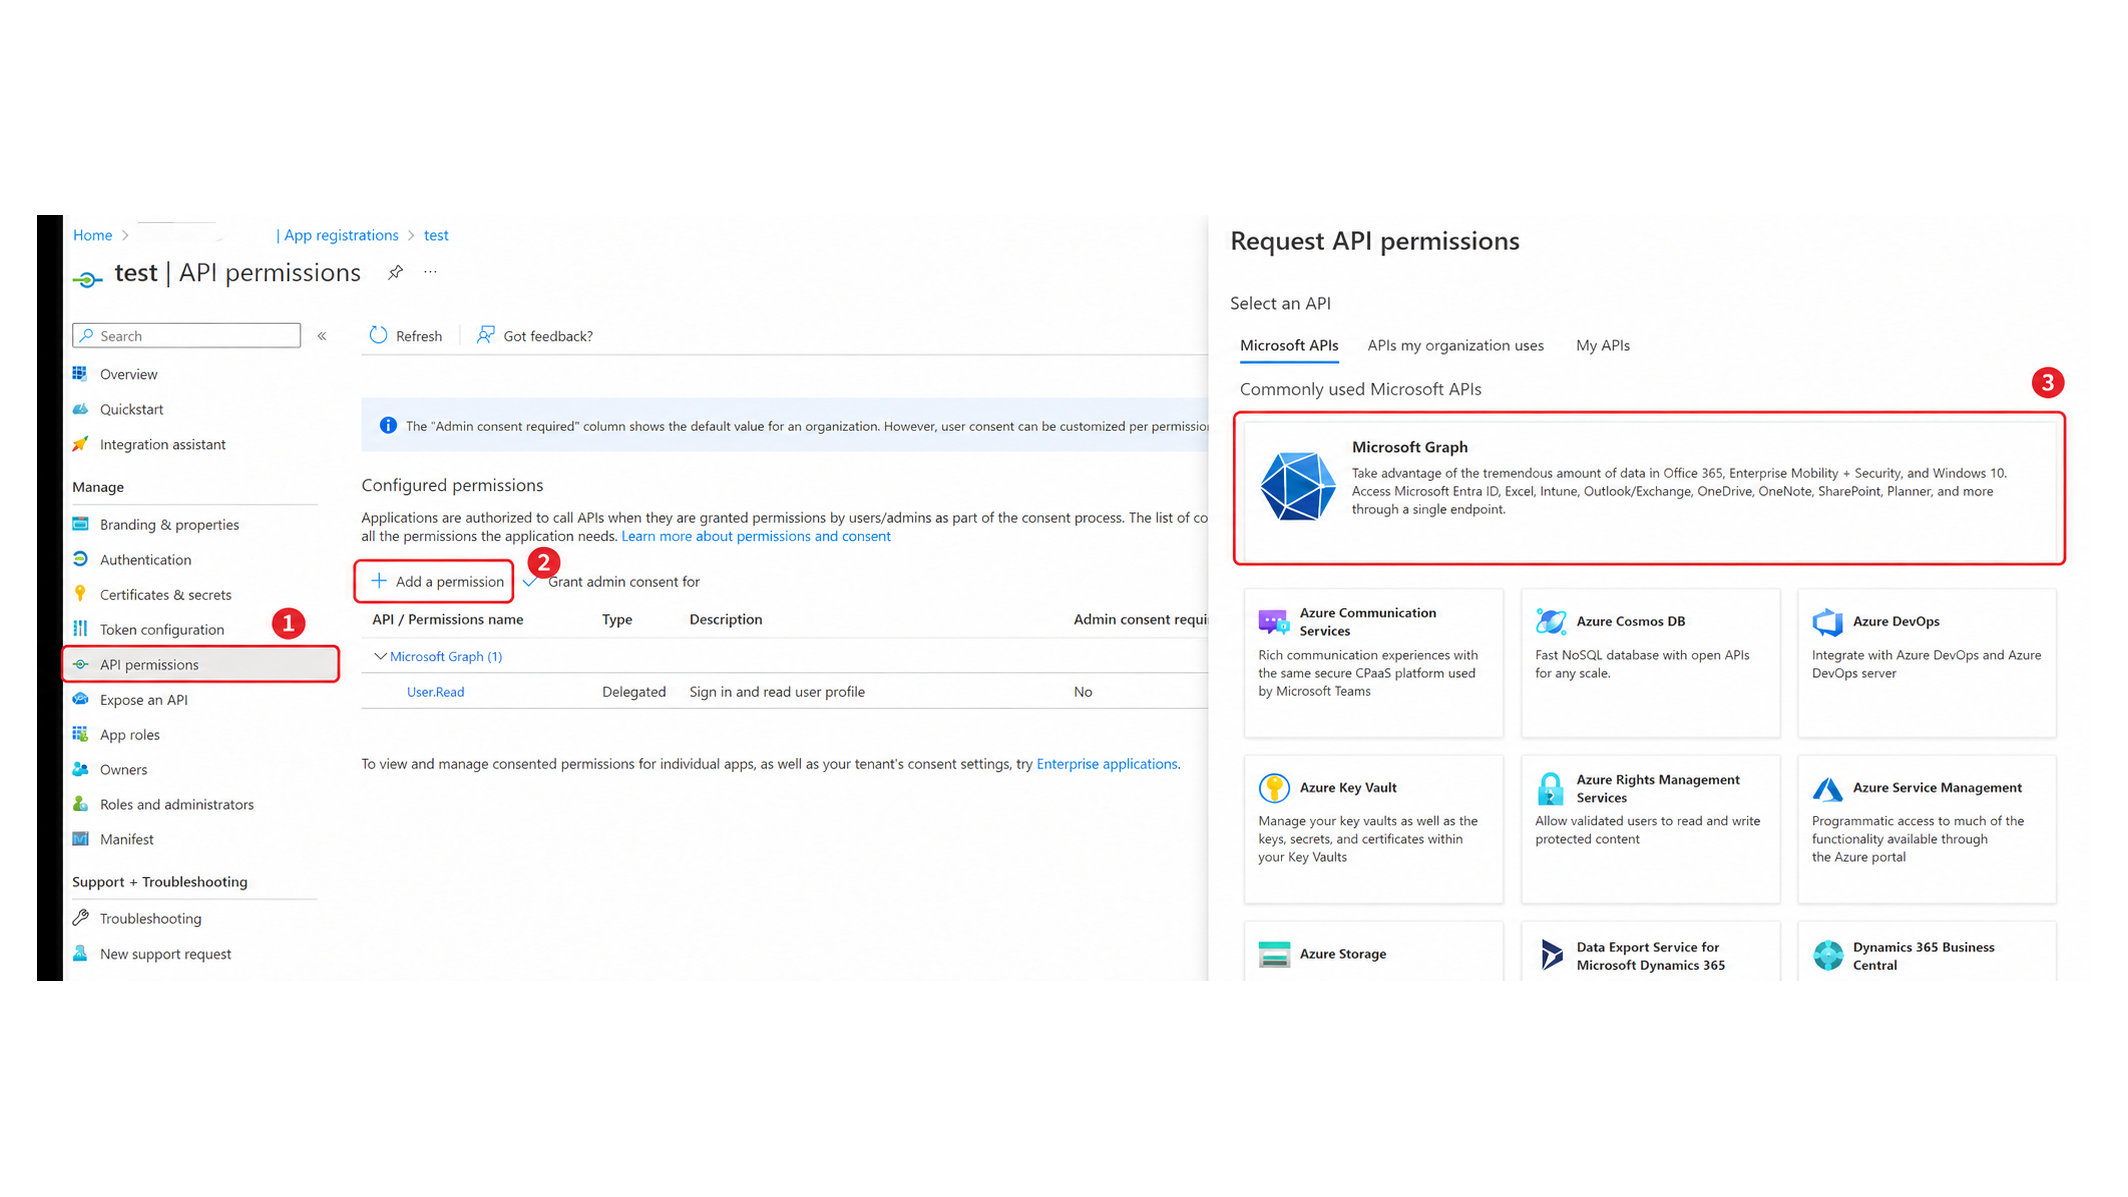
Select API permissions. The User.Read permission is already present.
-
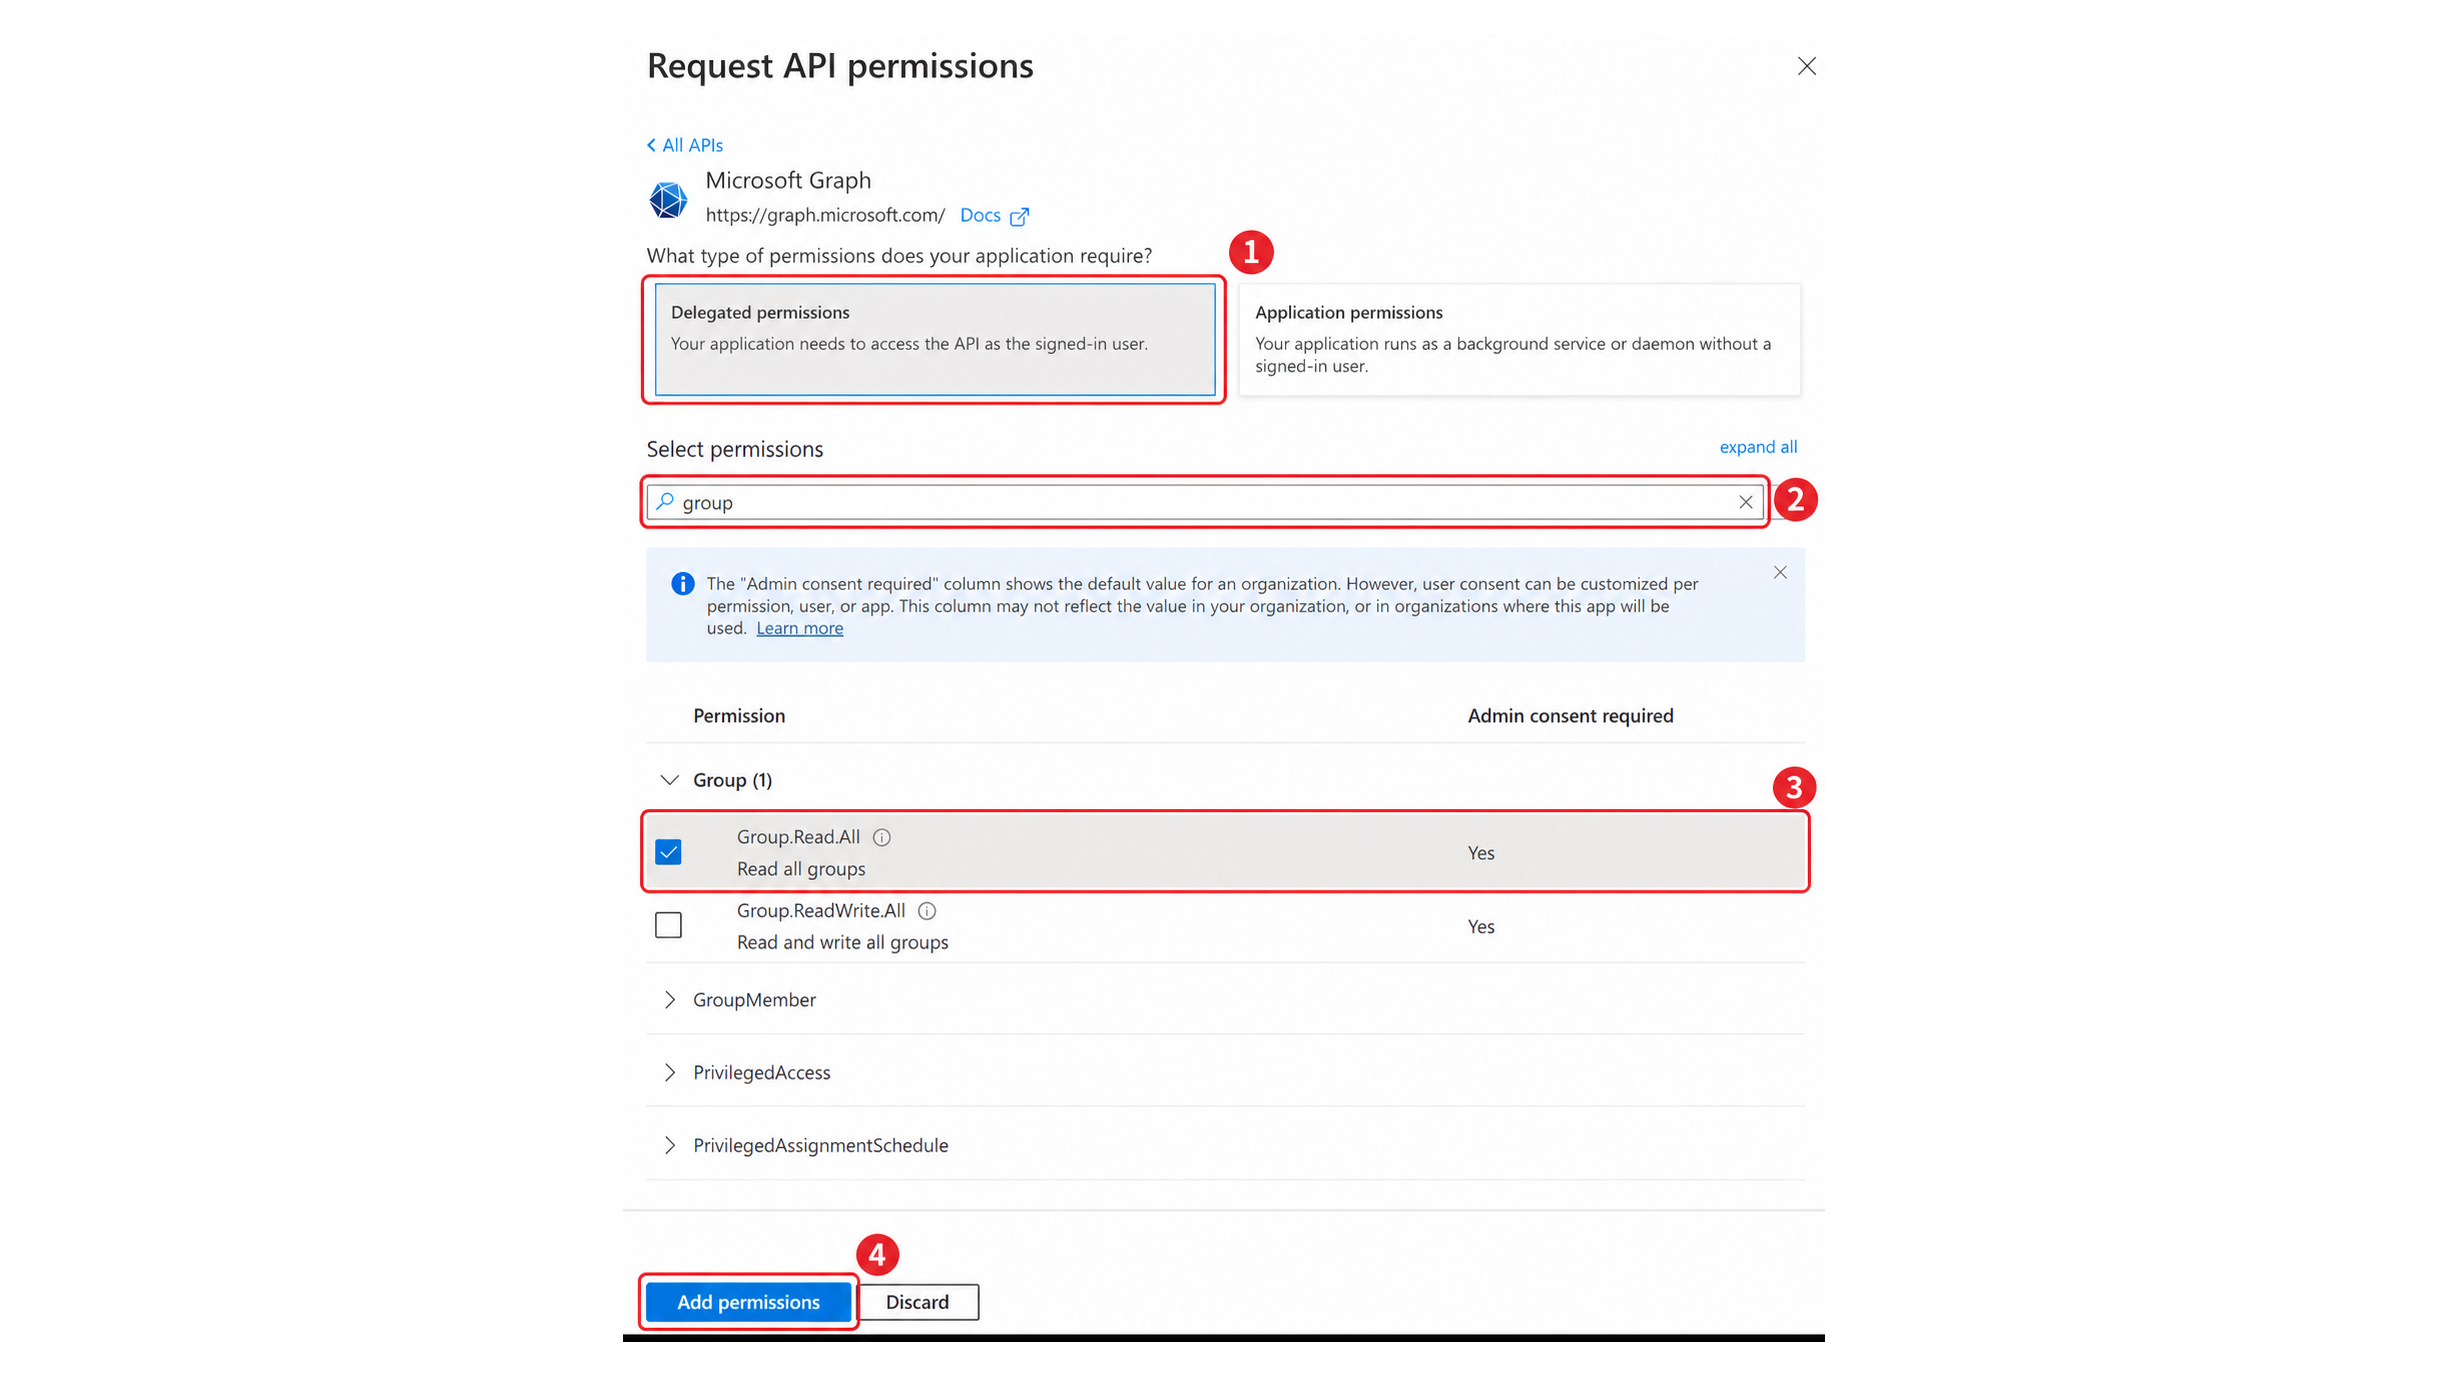
Select Add a permission, then select Microsoft Graph.
-
Select Delegated permissions.
-
Enter
groupin the permission filter and expand Group. -
Select Group.Read.All, then select Add permissions.
-
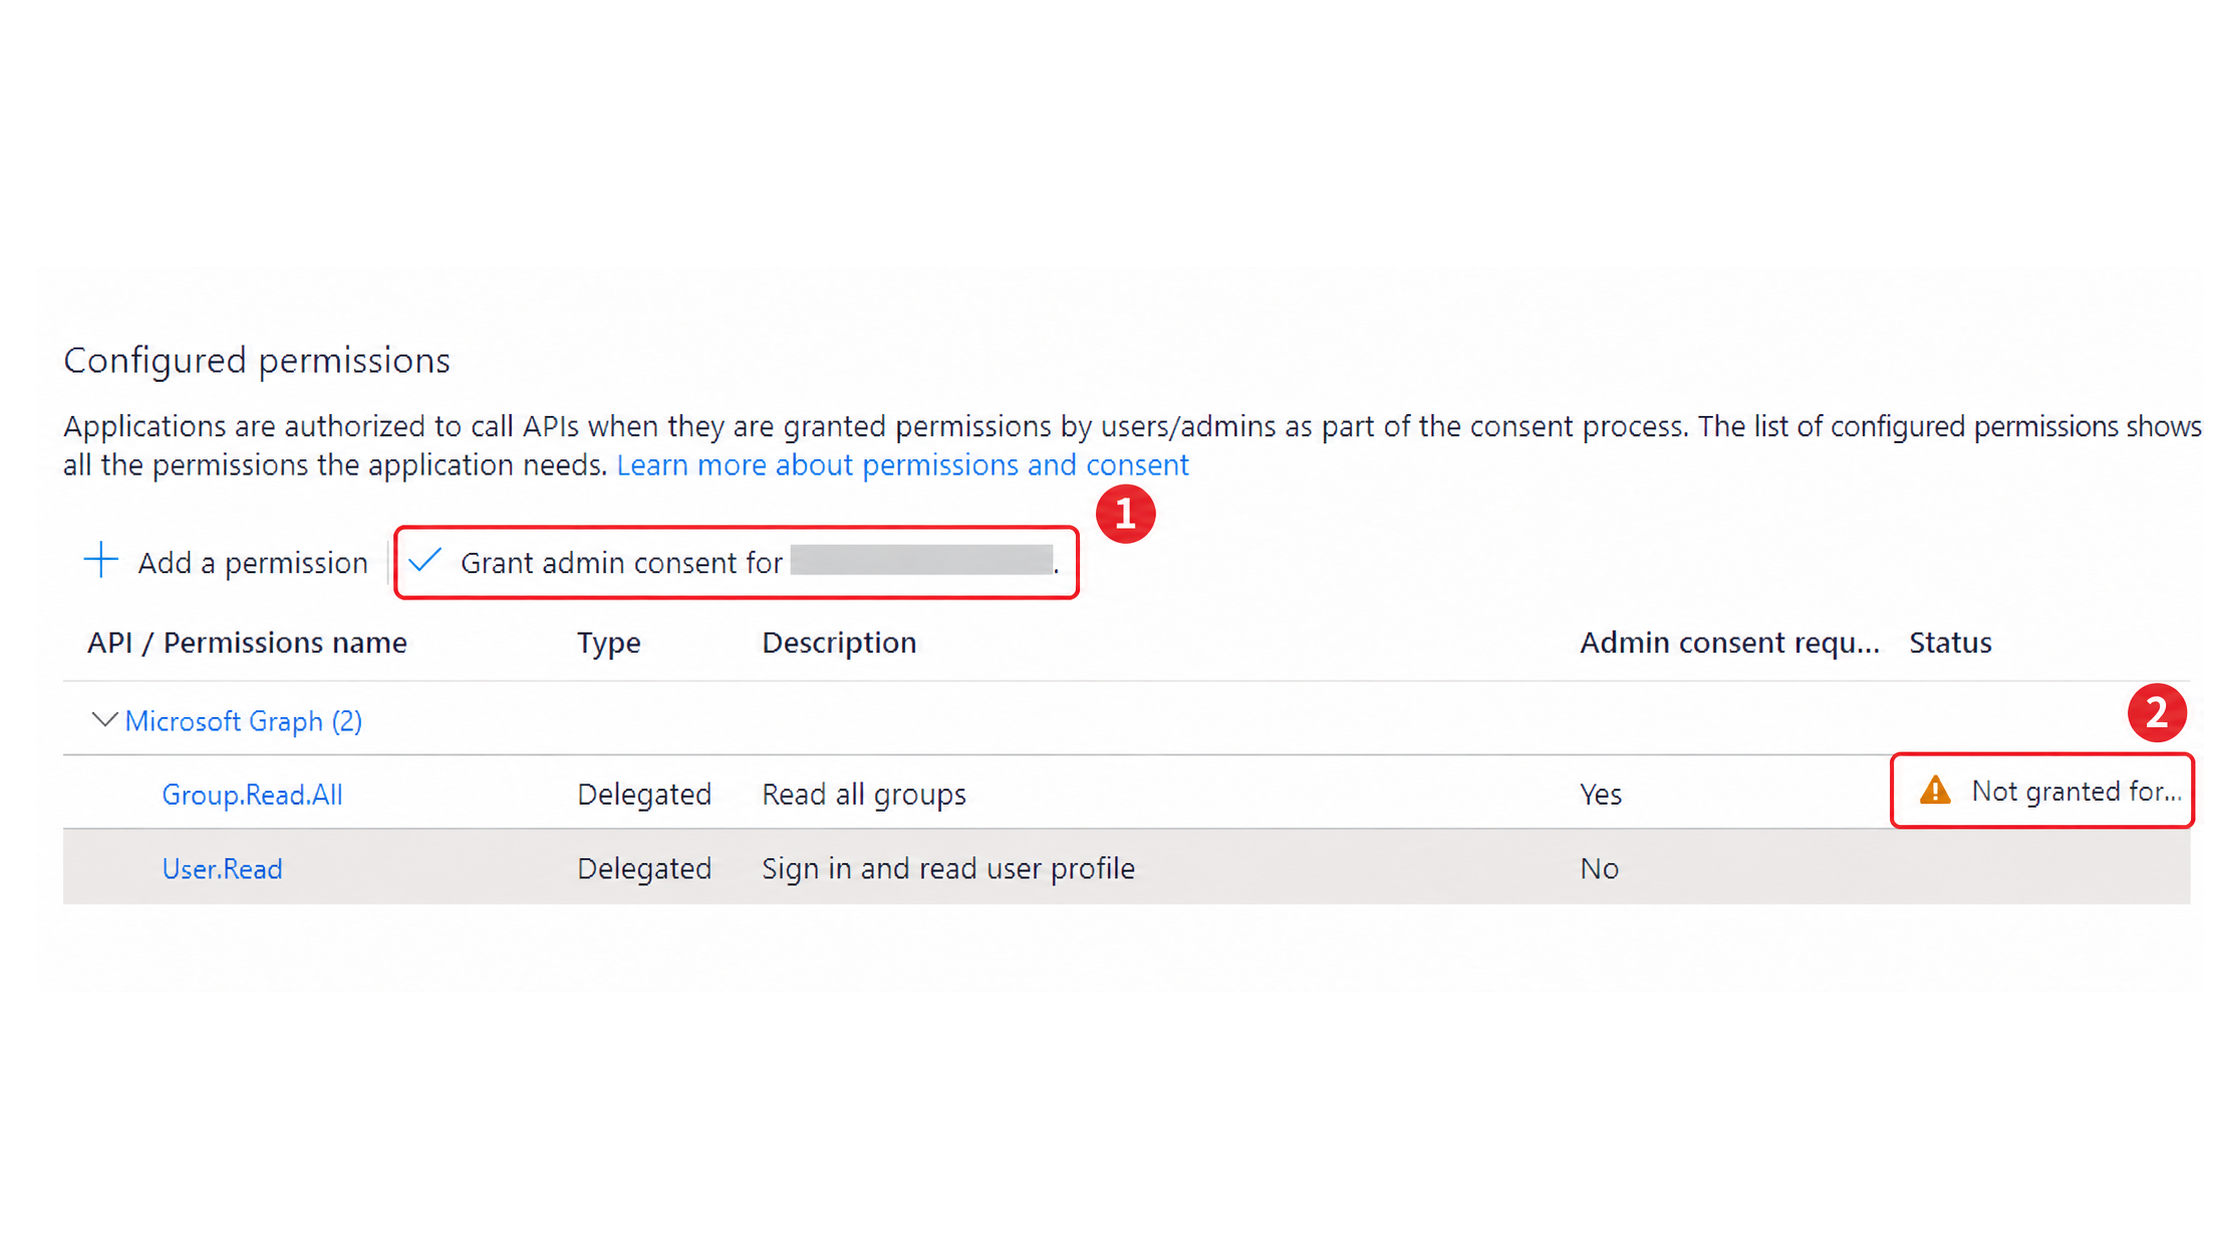
Select Grant admin consent for your organization, then select Yes.
-
Confirm that the status of both permissions is green.
-
Select API permissions.
-
Select Add a permission.
-
Select Microsoft Graph.
-
Select Delegated permissions.
-
Enter
groupin the permission filter. -
Select Group.Read.All.
-
Select Add permissions.
-
Select Grant admin consent for your organization.
-
The status column shows that consent has not yet been granted. After granting consent, confirm that both permissions show a green status.
Configure the Group Claim
-
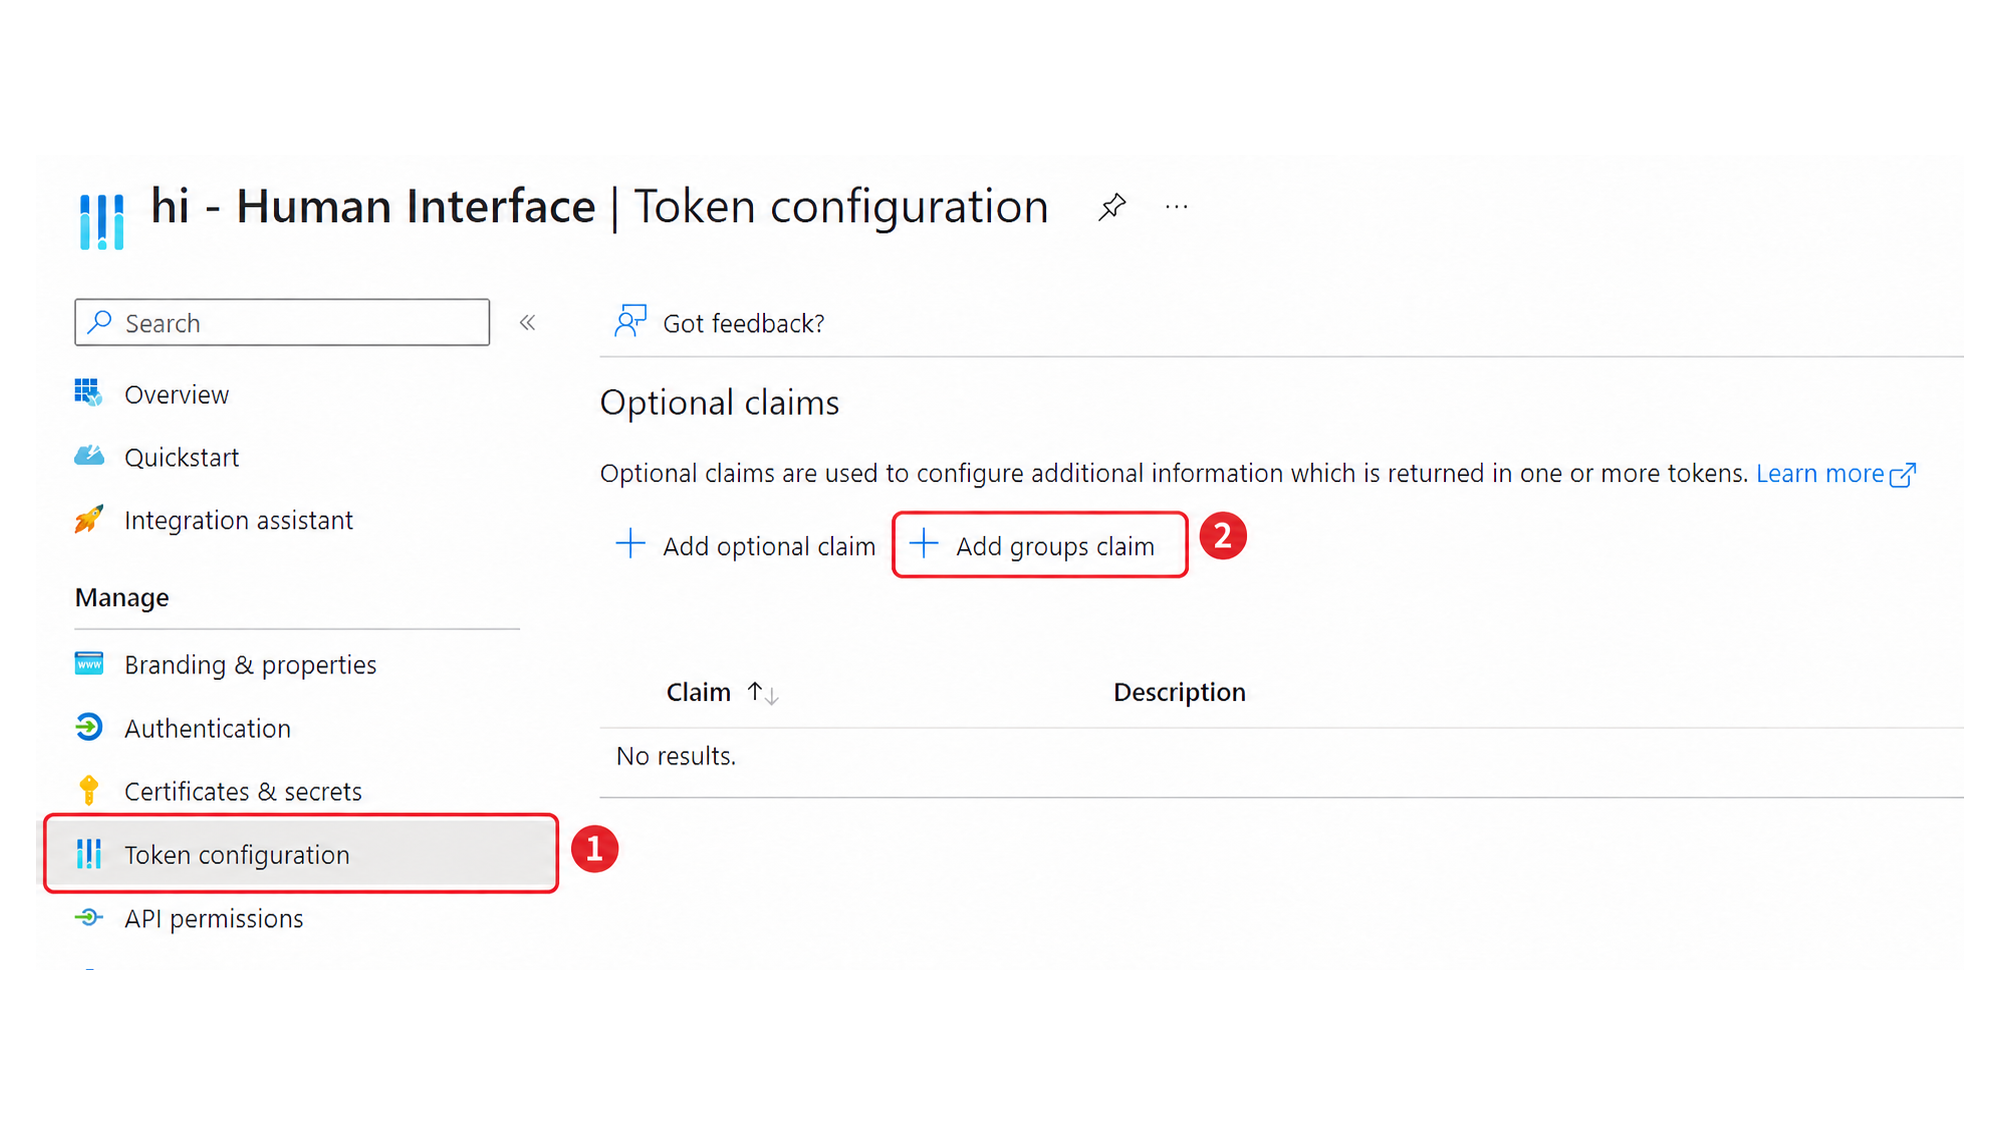
Select Token configuration.
-
Select Add groups claim.
-
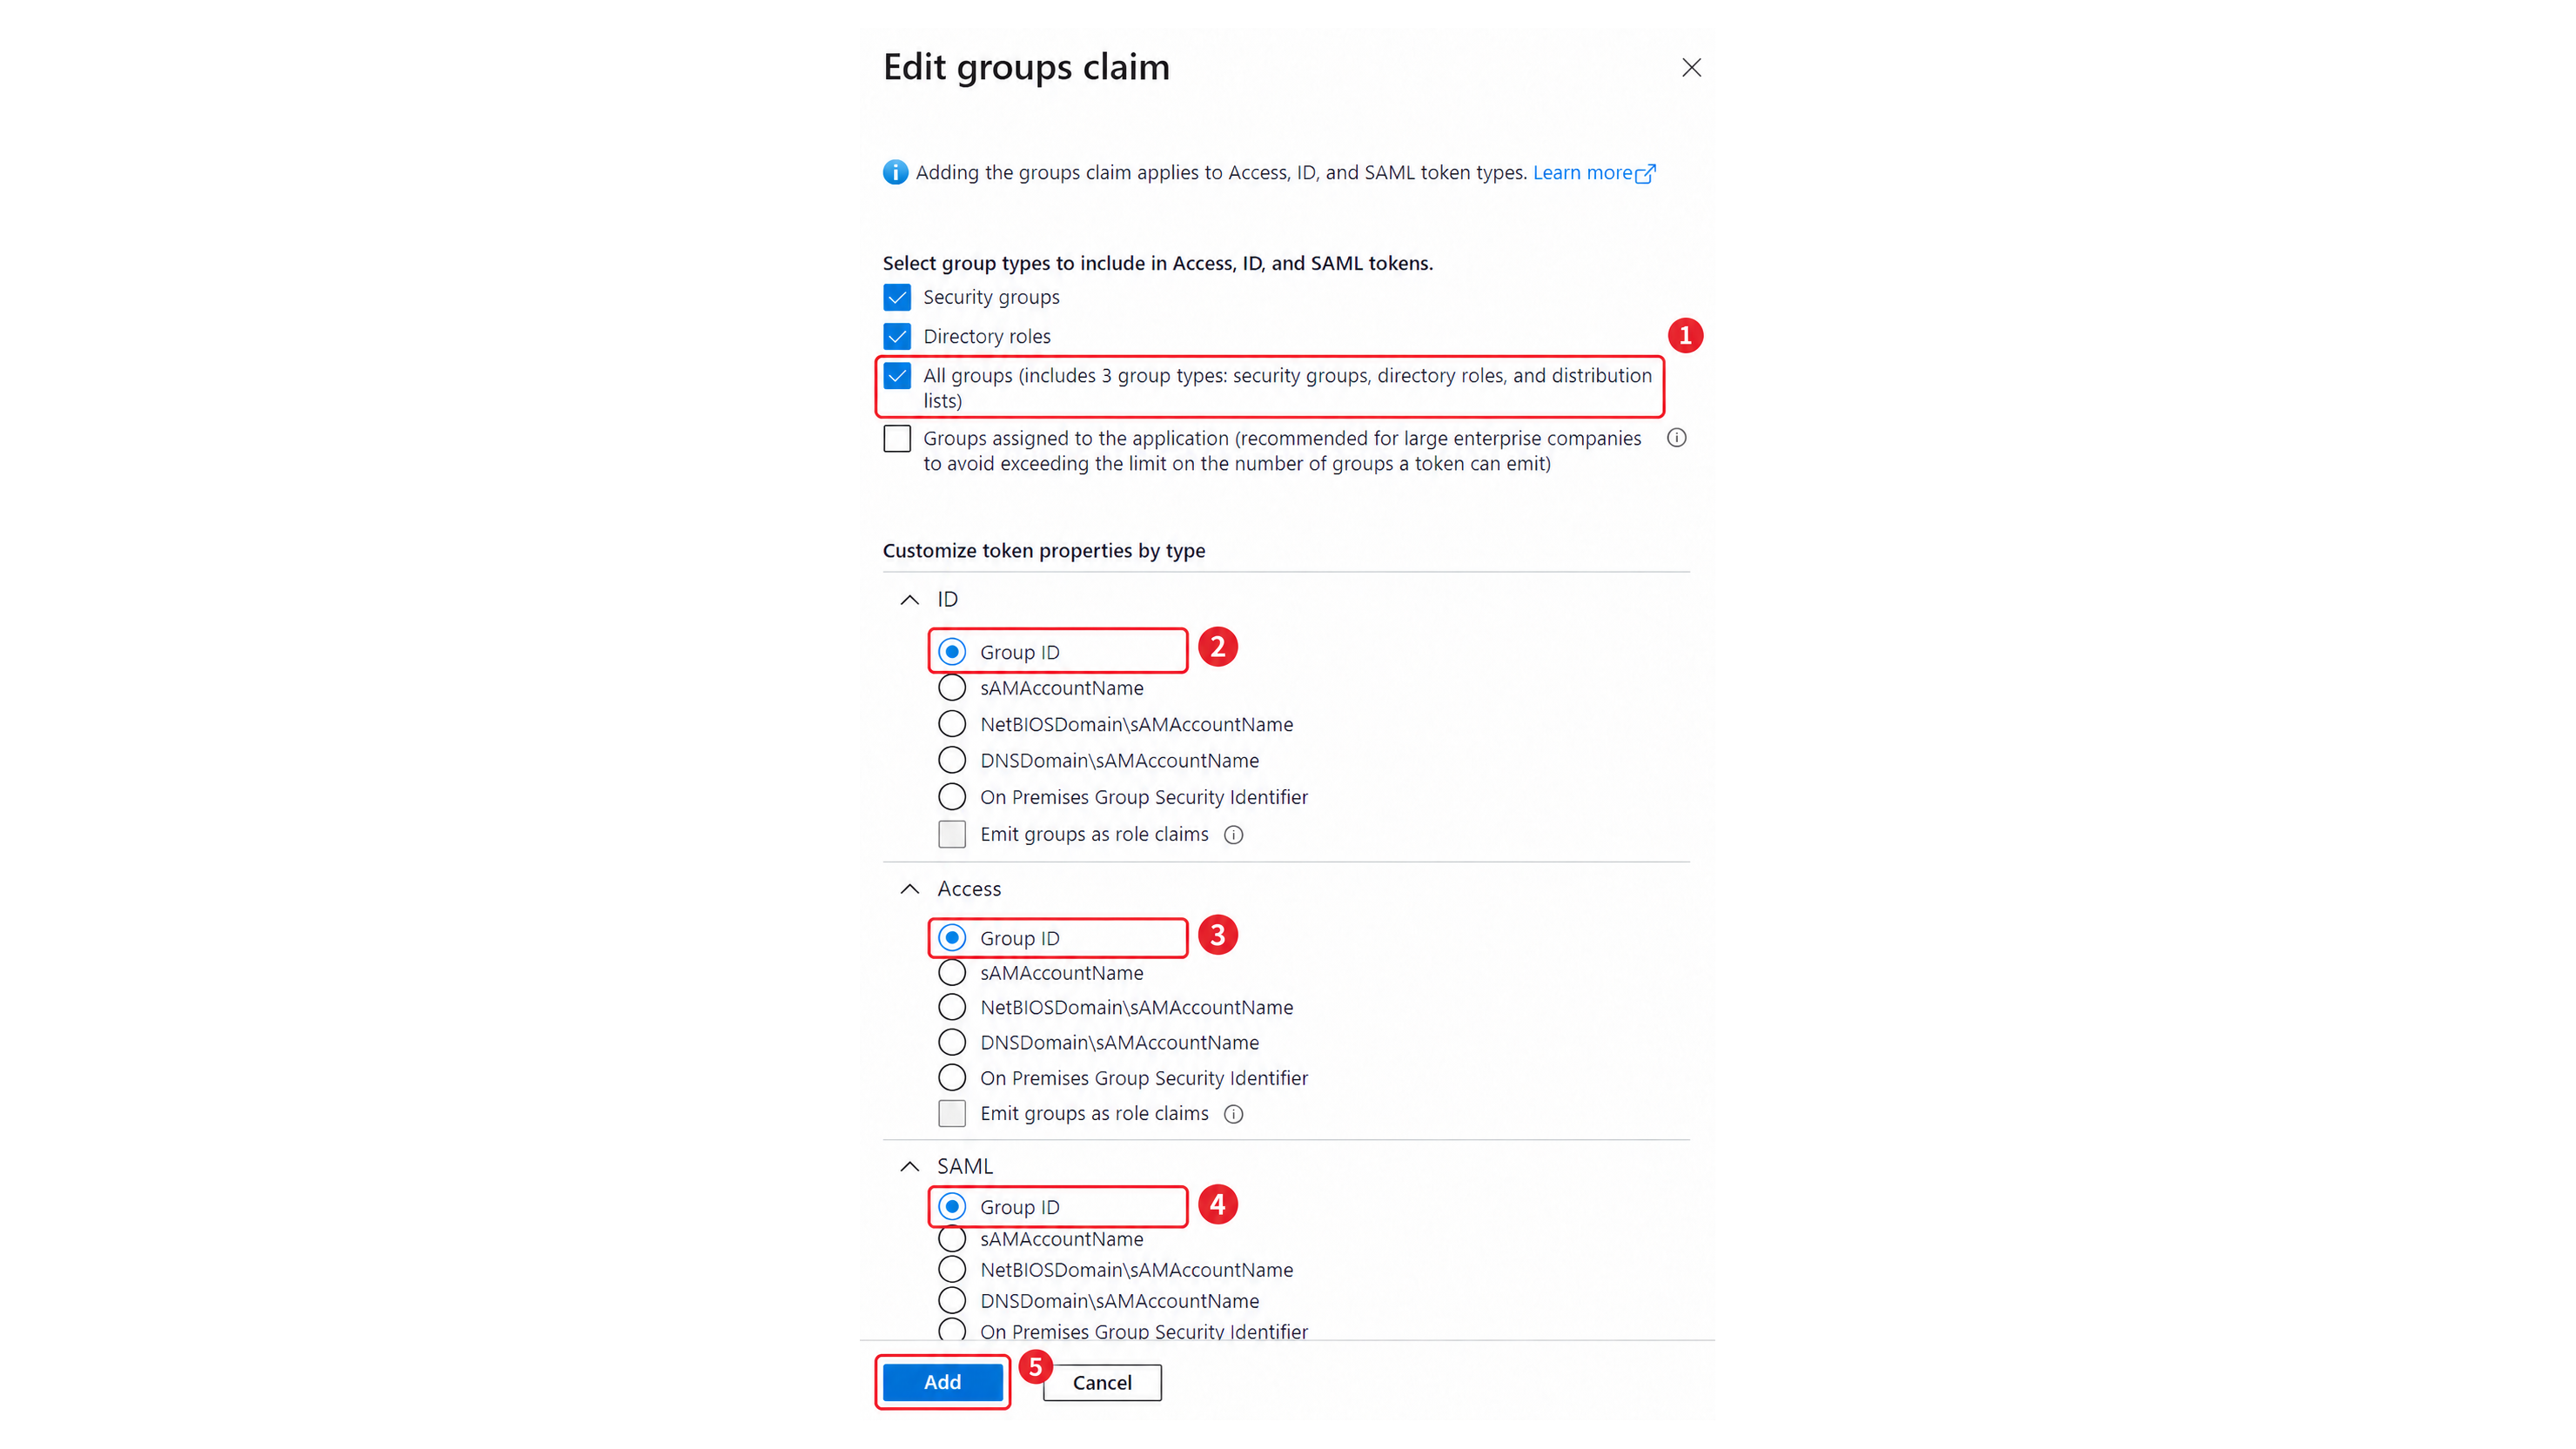
In the Edit groups claim dialog, select All groups.
-
Confirm that Group ID is selected for each token type.
-
Select Add.
-
Select Token configuration.
-
Select Add groups claim.
-
Select All groups.
-
Confirm that Group ID is selected for the ID token.
-
Confirm that Group ID is selected for the Access token.
-
Confirm that Group ID is selected for the SAML token.
-
Select Add.
Enable Entra ID in hi
-
Sign in to hi with a local administrator account.
-
Select System > System Settings.
-
In the Entra ID (Active Directory) Authentication section, turn on Enabled.
-
Enter the Tenant ID and the Application (client) ID that you recorded.
-
Select Save.
See Entra ID Authentication for all settings, including Hide local user login.
Import Groups and Assign Roles
Caution
An Entra ID user can sign in to hi only as a member of at least one Entra ID group that is imported into hi. Import at least one group and assign its roles before users sign in. Use a local administrator account for this task. Users without an imported group cannot sign in.
-
Sign in with the local administrator account, not an Entra ID account.
-
Import one or more groups. See Import Microsoft Entra ID User Groups. When prompted, select Confirm and sign in to Entra ID with an account that can read the groups of the tenant. You stay signed in to hi as the local administrator.
-
Assign roles and Tags to each imported group. See Assign Roles to a Microsoft Entra ID User Group.
Verify the Result
Sign out of hi. The login page shows an option to sign in with the Entra ID work account. Sign in with an account that belongs to an imported group. Confirm that the account receives the roles of that group.
Next Steps
Use Assign Tags to a Microsoft Entra ID User Group to control which Ports the imported groups can access.