Creating clips using only the touchscreen is fully possible and allows for a fast and intuitive workflow during live production.
To create a clip, simply navigate through the replay using touch gestures directly on the Program or Preview outputs.
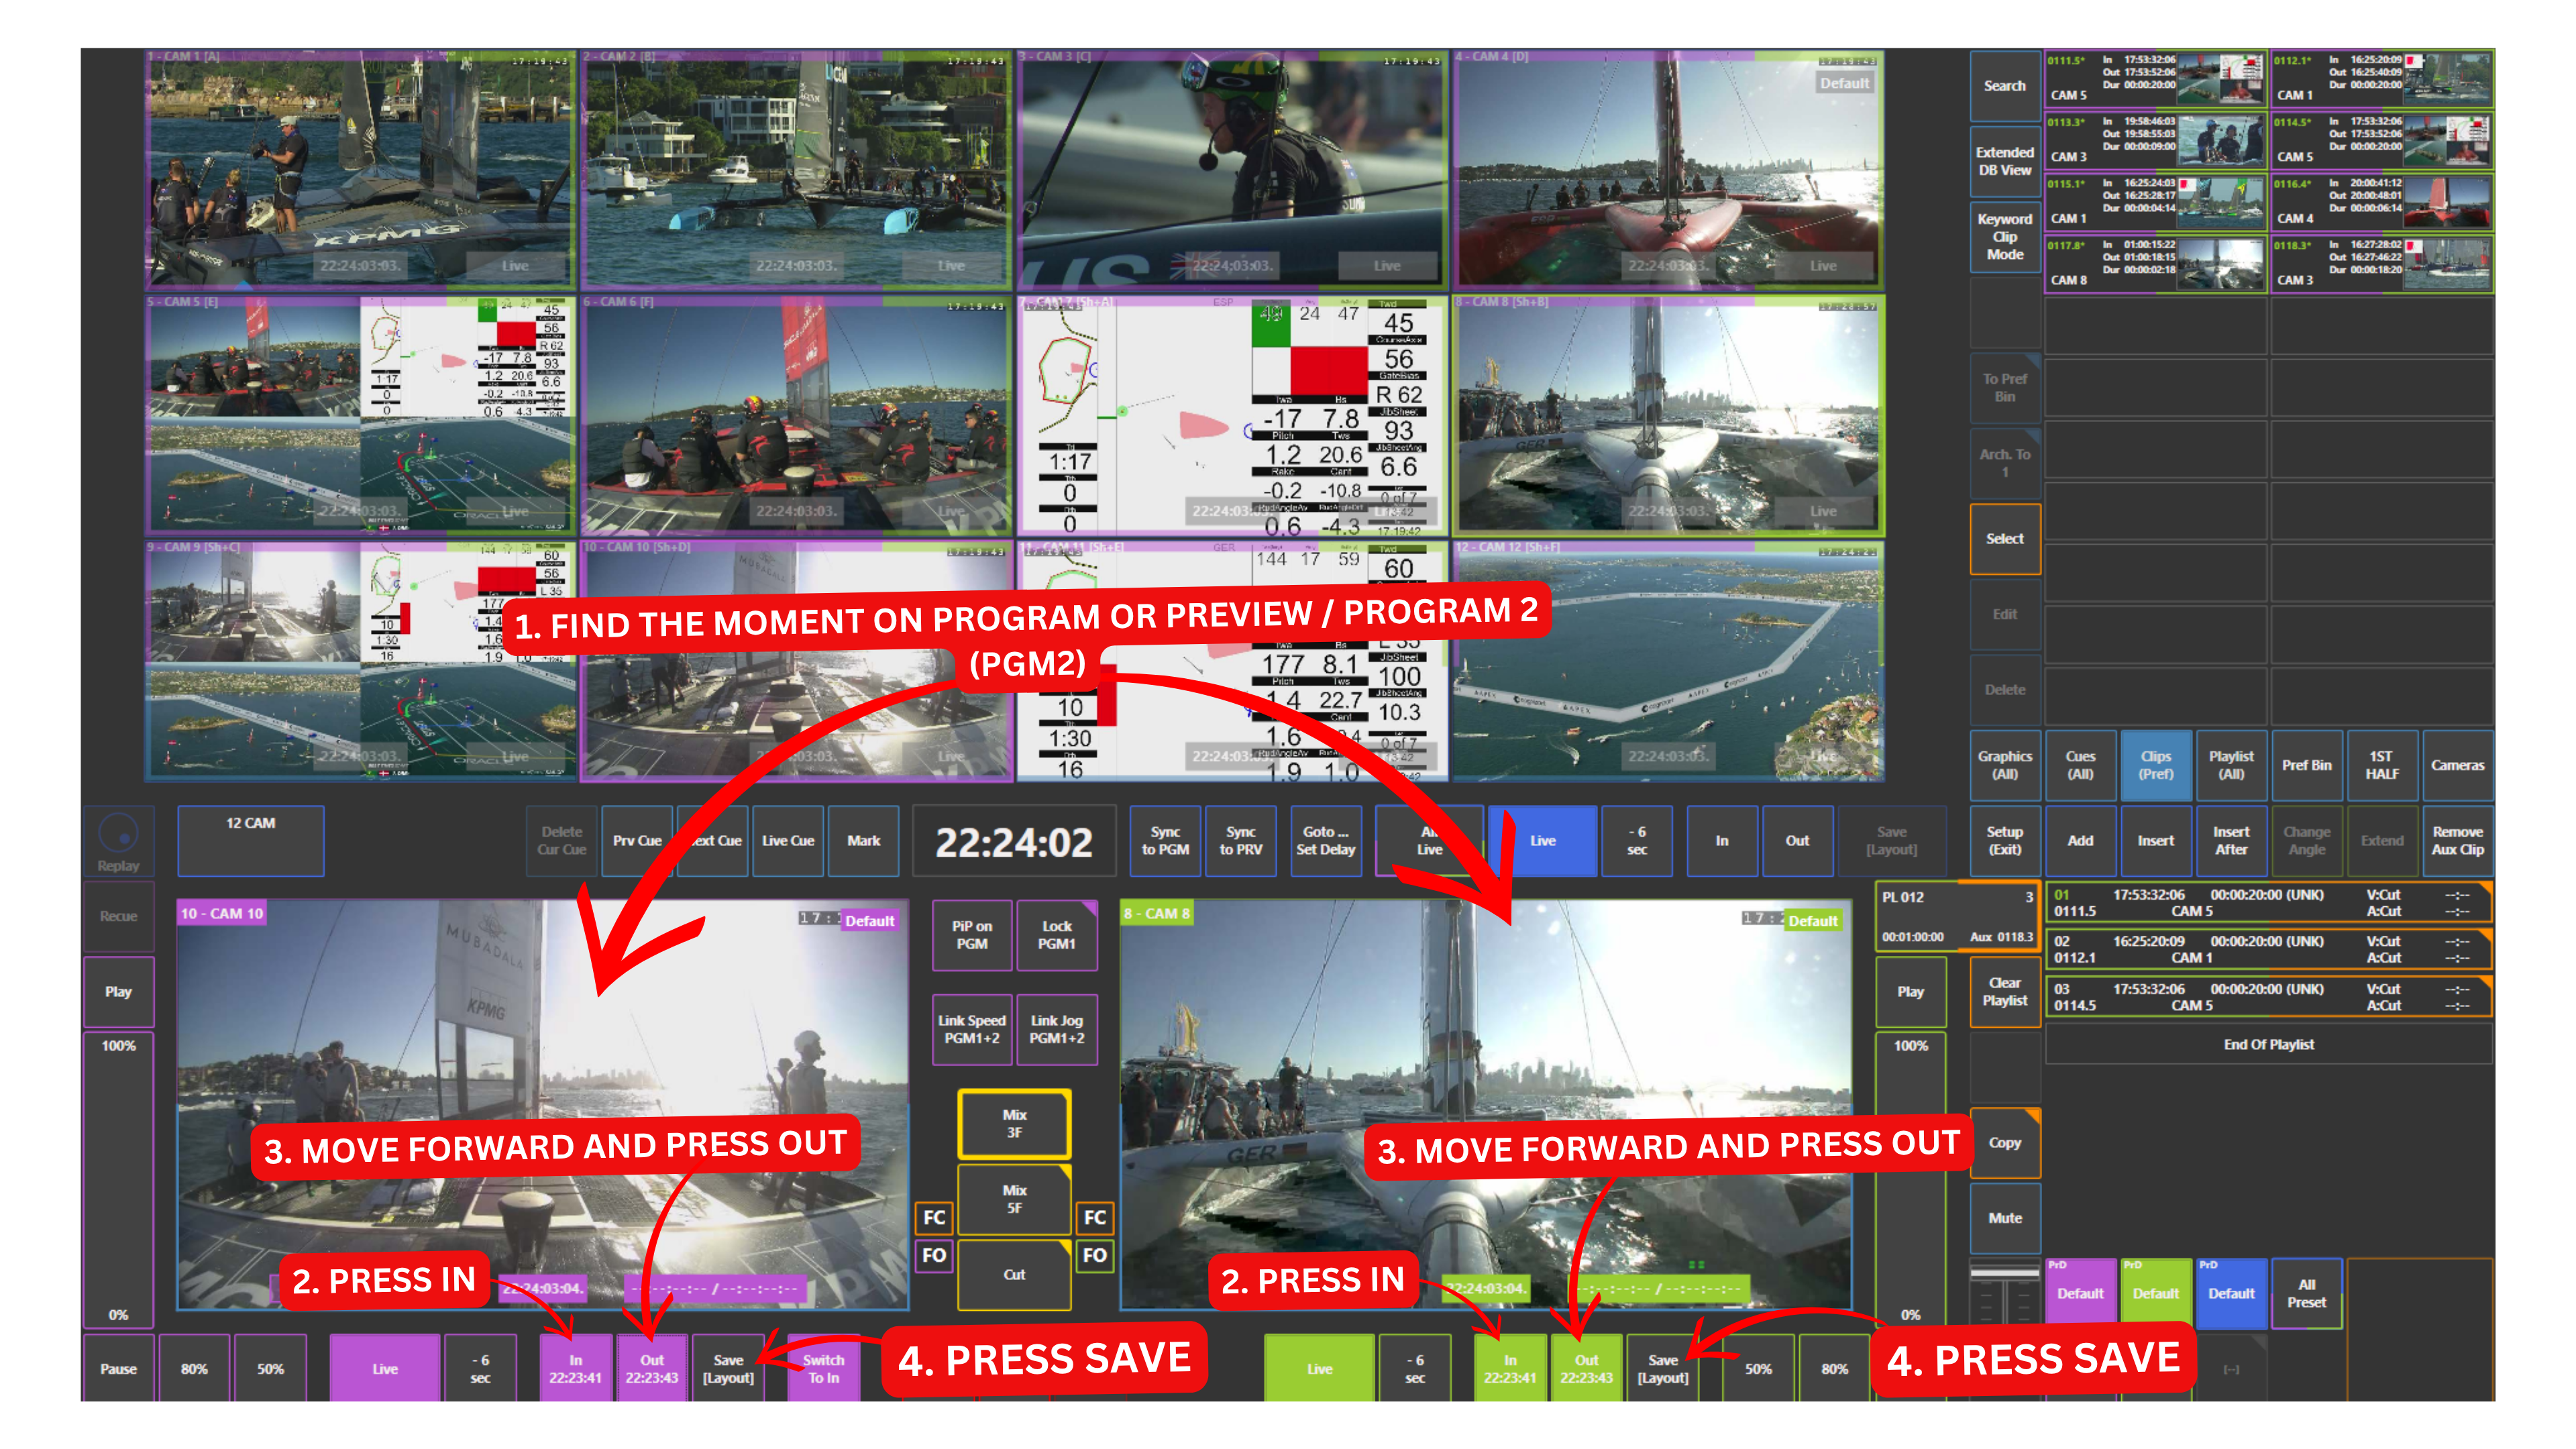
How to Create a Clip
-
Swipe left or right on the Program or Preview (PGM2) output to move backward or forward in time
-
Stop at the desired starting point
-
Touch the IN key to mark the beginning of the clip
-
Move forward in time by swiping again
-
Touch the OUT key to mark the end of the clip
-
Touch SAVE to create the clip
Once saved, the clip will immediately appear in the Clips panel, located in the upper right section of the interface.
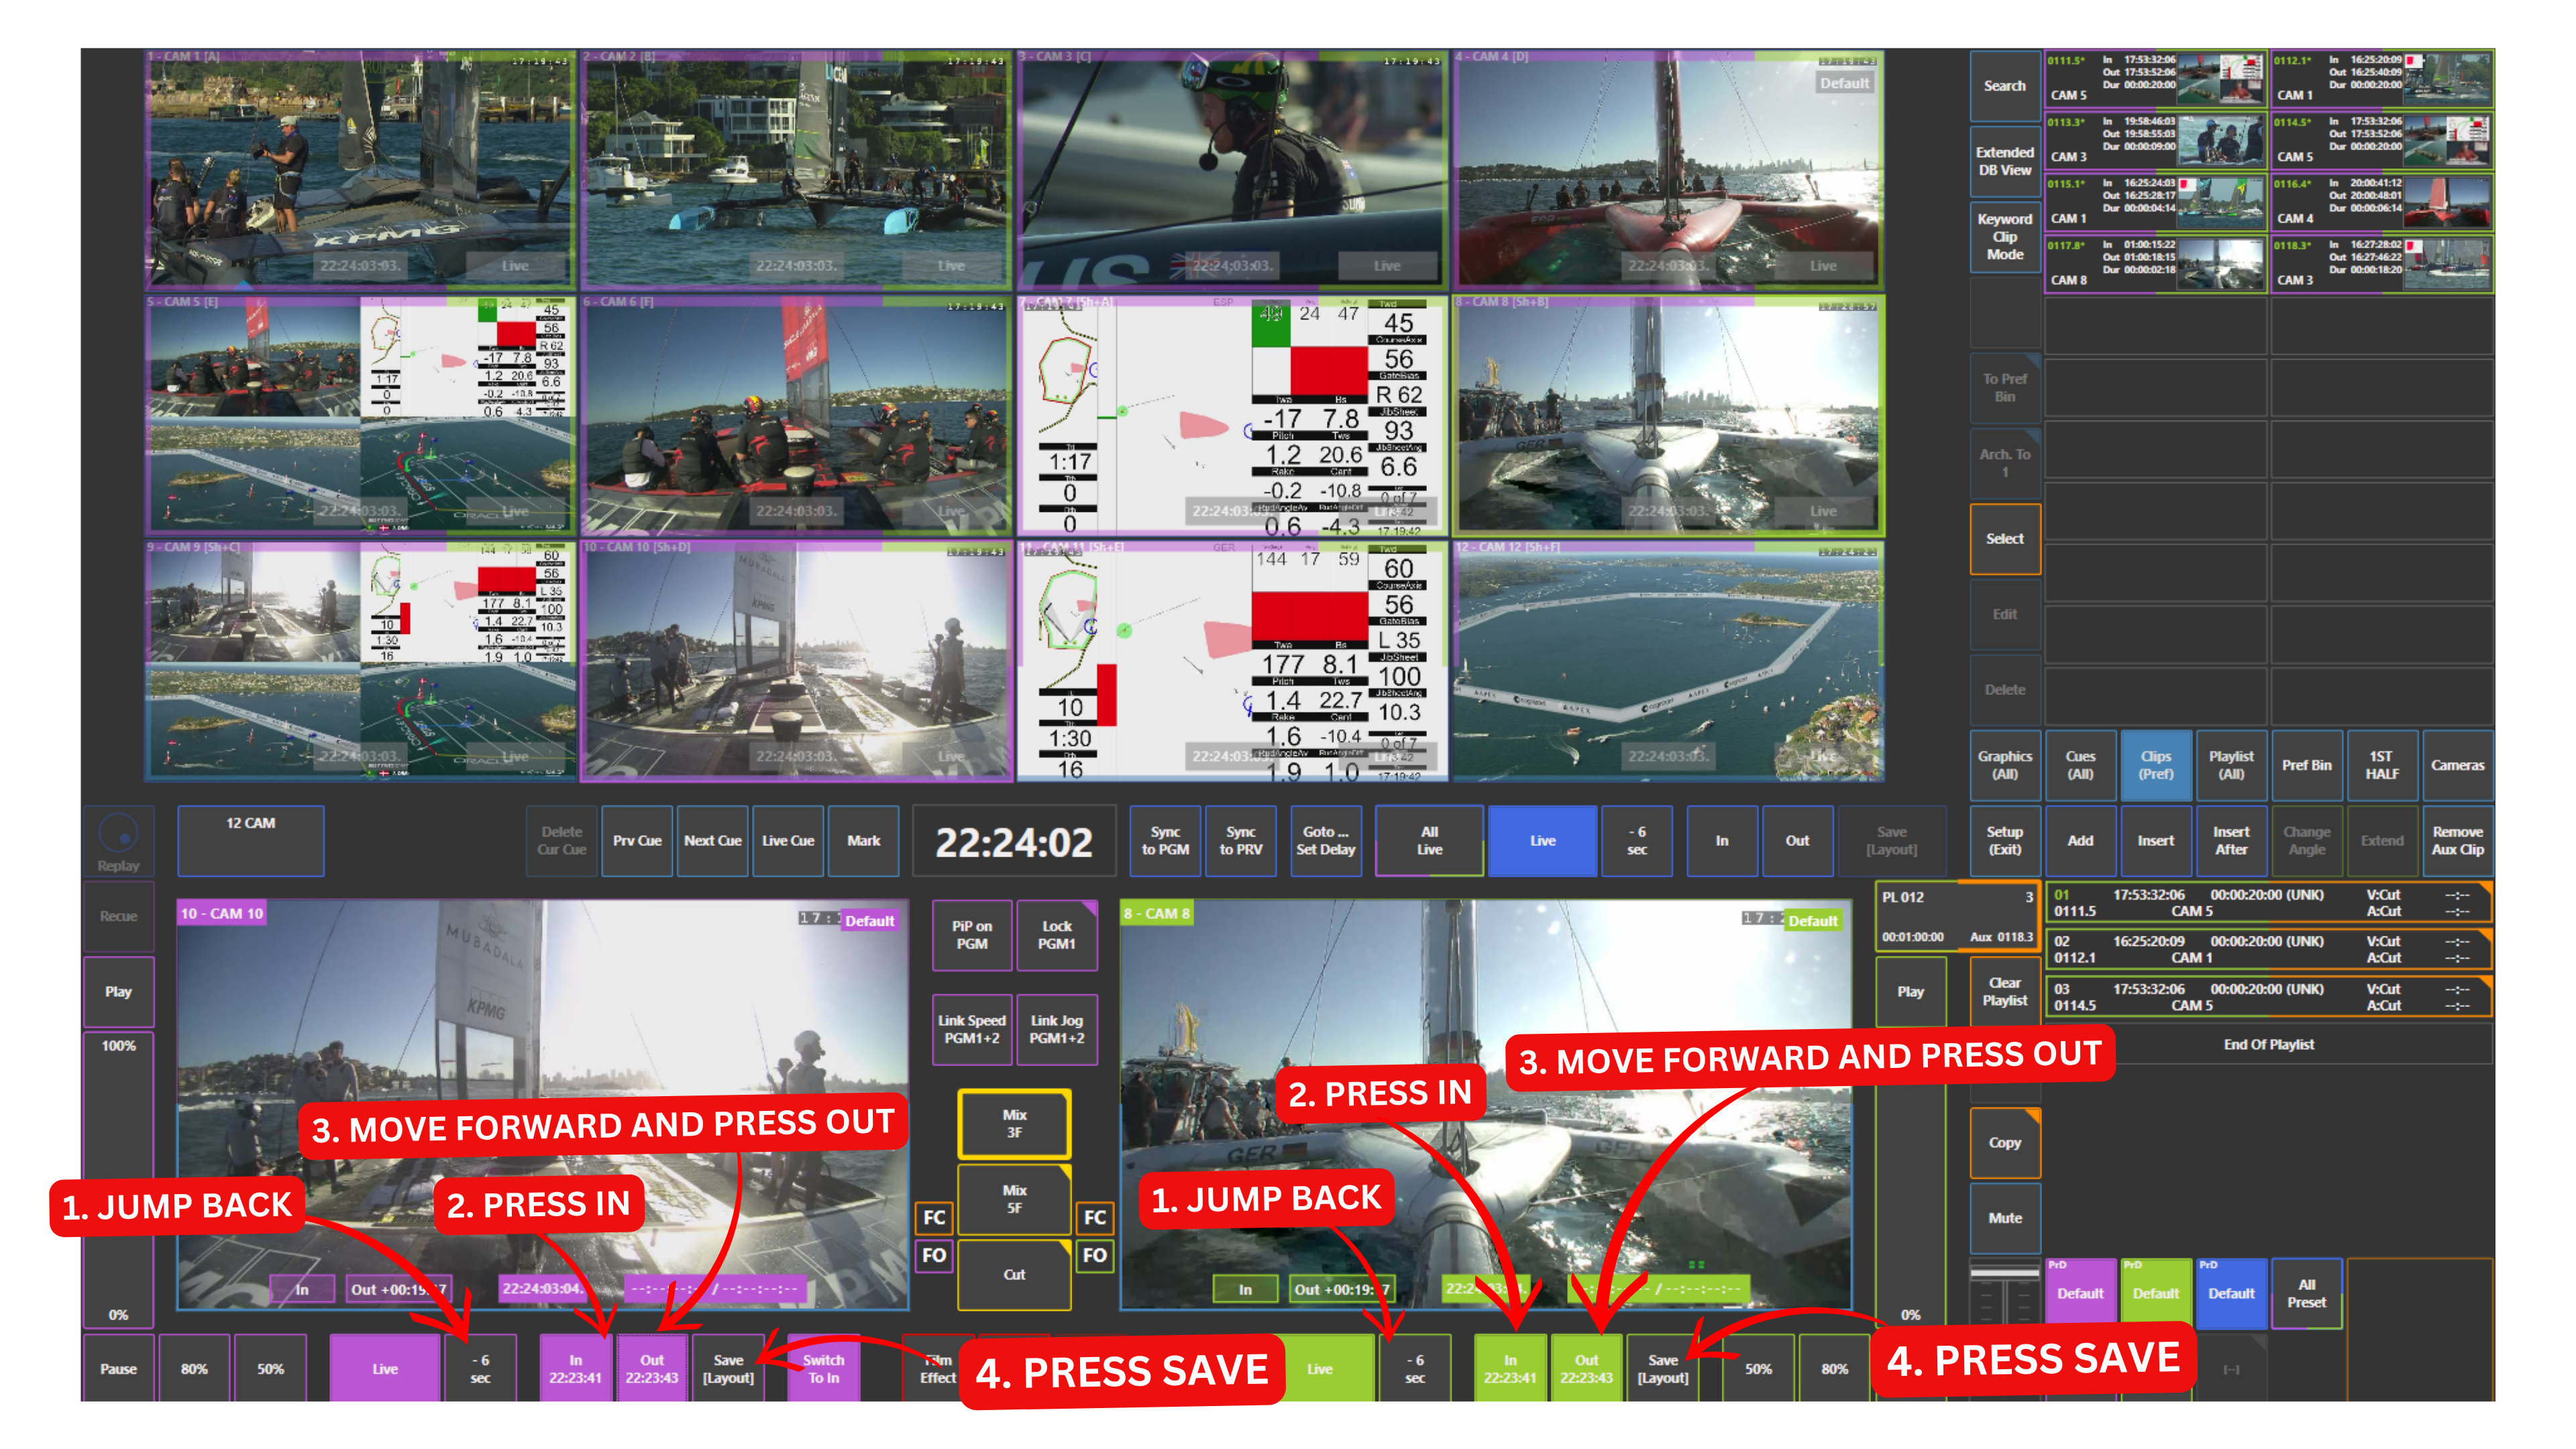
Alternative Fast Clipping Method
If there is no time to precisely define IN and OUT points, a faster workflow can be used.
The system allows predefined jump-back durations configured in settings. In this case:
-
Jump back by a predefined duration for example 6 seconds
-
Mark IN
-
Move slightly forward if needed
-
Mark OUT
-
Touch SAVE
This method is especially useful during fast-paced live events where speed is more important than frame-accurate precision.
Touchscreen Interaction Notes
-
Swiping on Program or Preview (PGM2) allows quick navigation through the replay timeline
-
IN, OUT, and SAVE controls are located in the lower part of the interface
-
The Clips panel is accessible in the upper right section
-
All actions are performed directly via touch, without requiring the replay controller
Pro Tip
Experiment with different clipping approaches to find what works best for your workflow.
Some operators prefer precise IN and OUT marking, while others rely on jump-back timing for speed.
Also practise quick access to your clips through the Clips panel to make your workflow more natural and efficient during live production.