Before you can play a clip, you first need to load it from your workspace. Clips are organized in pages and banks, allowing you to quickly locate important moments during live production.
Each clip position on the replay controller corresponds to an F key.
When a clip is saved in a specific PAGE and BANK location, the corresponding F key becomes illuminated, indicating that a clip is stored in that position.
The color of the key indicates the status of the clip. For example, a white key indicates that a clip is available in that bank location.
By navigating to the correct PAGE and BANK, you can quickly identify available clips and load them for playback.
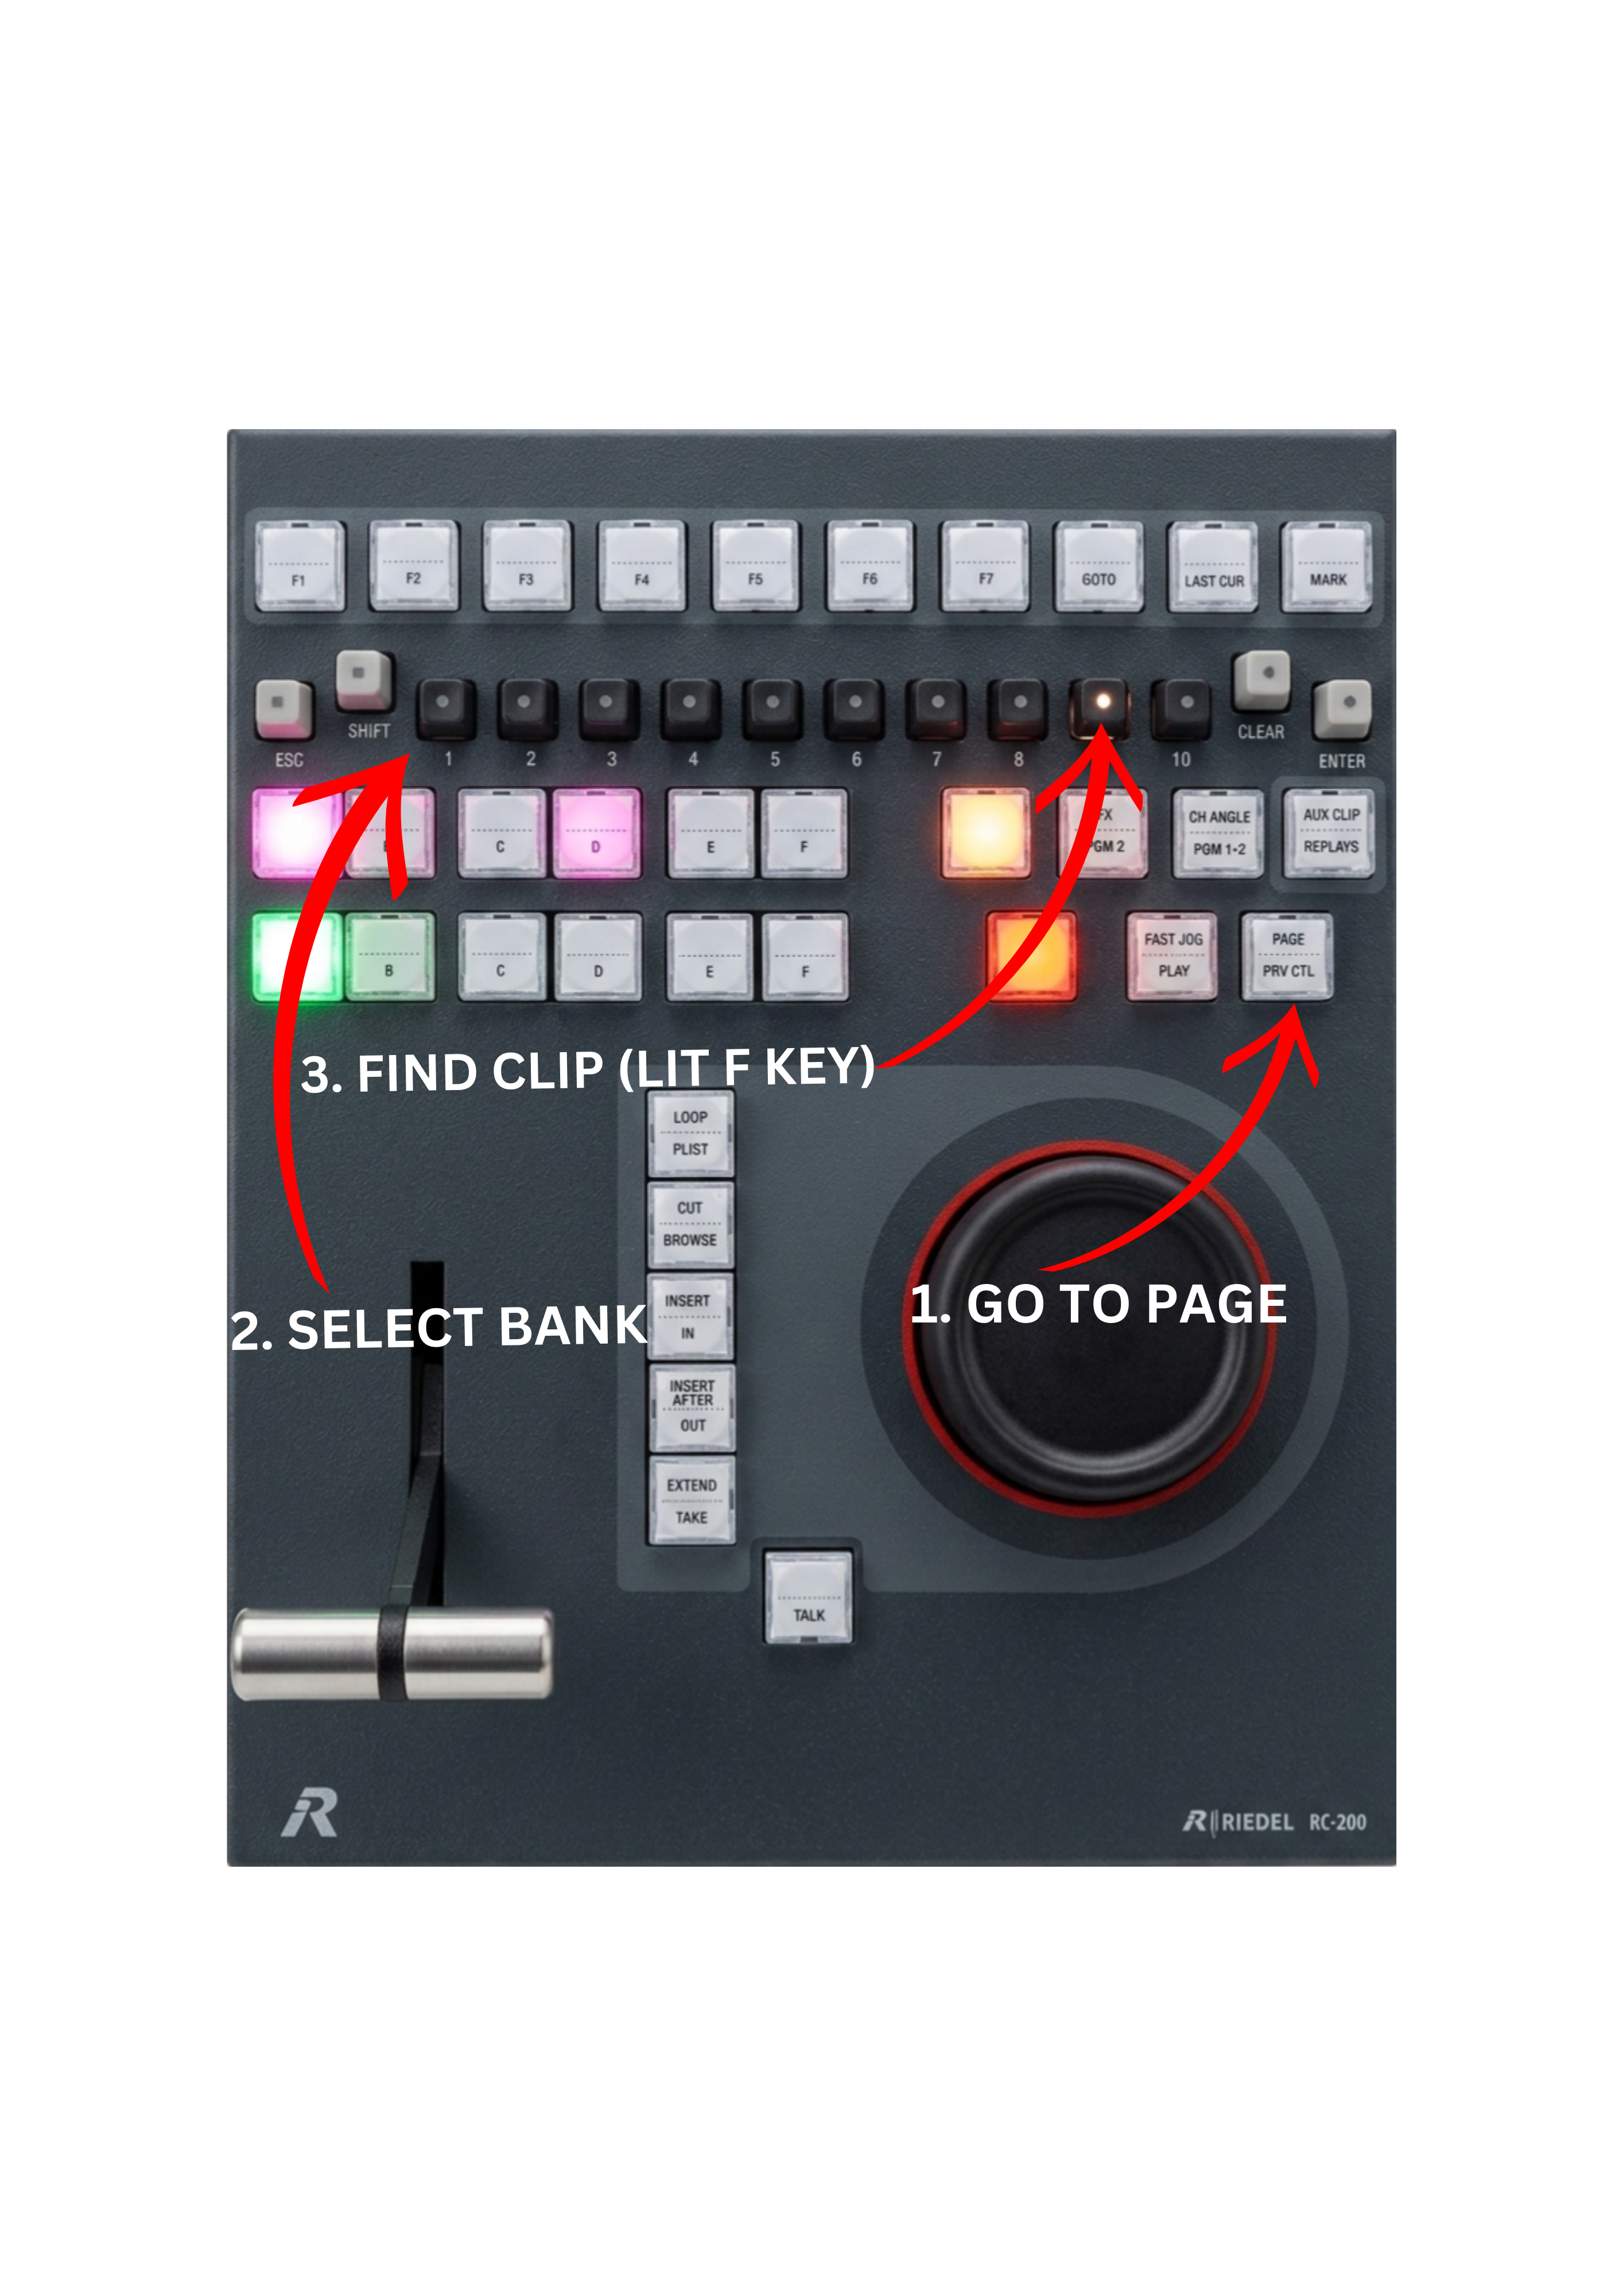
To Load a Clip
-
Navigate to the required PAGE where the clip is stored.
-
Select the appropriate BANK.
-
Locate the clip key that is illuminated.
-
Press the corresponding F key to load the clip into the replay channel.
Depending on the system configuration, the clip will load into either Program or Preview channel.
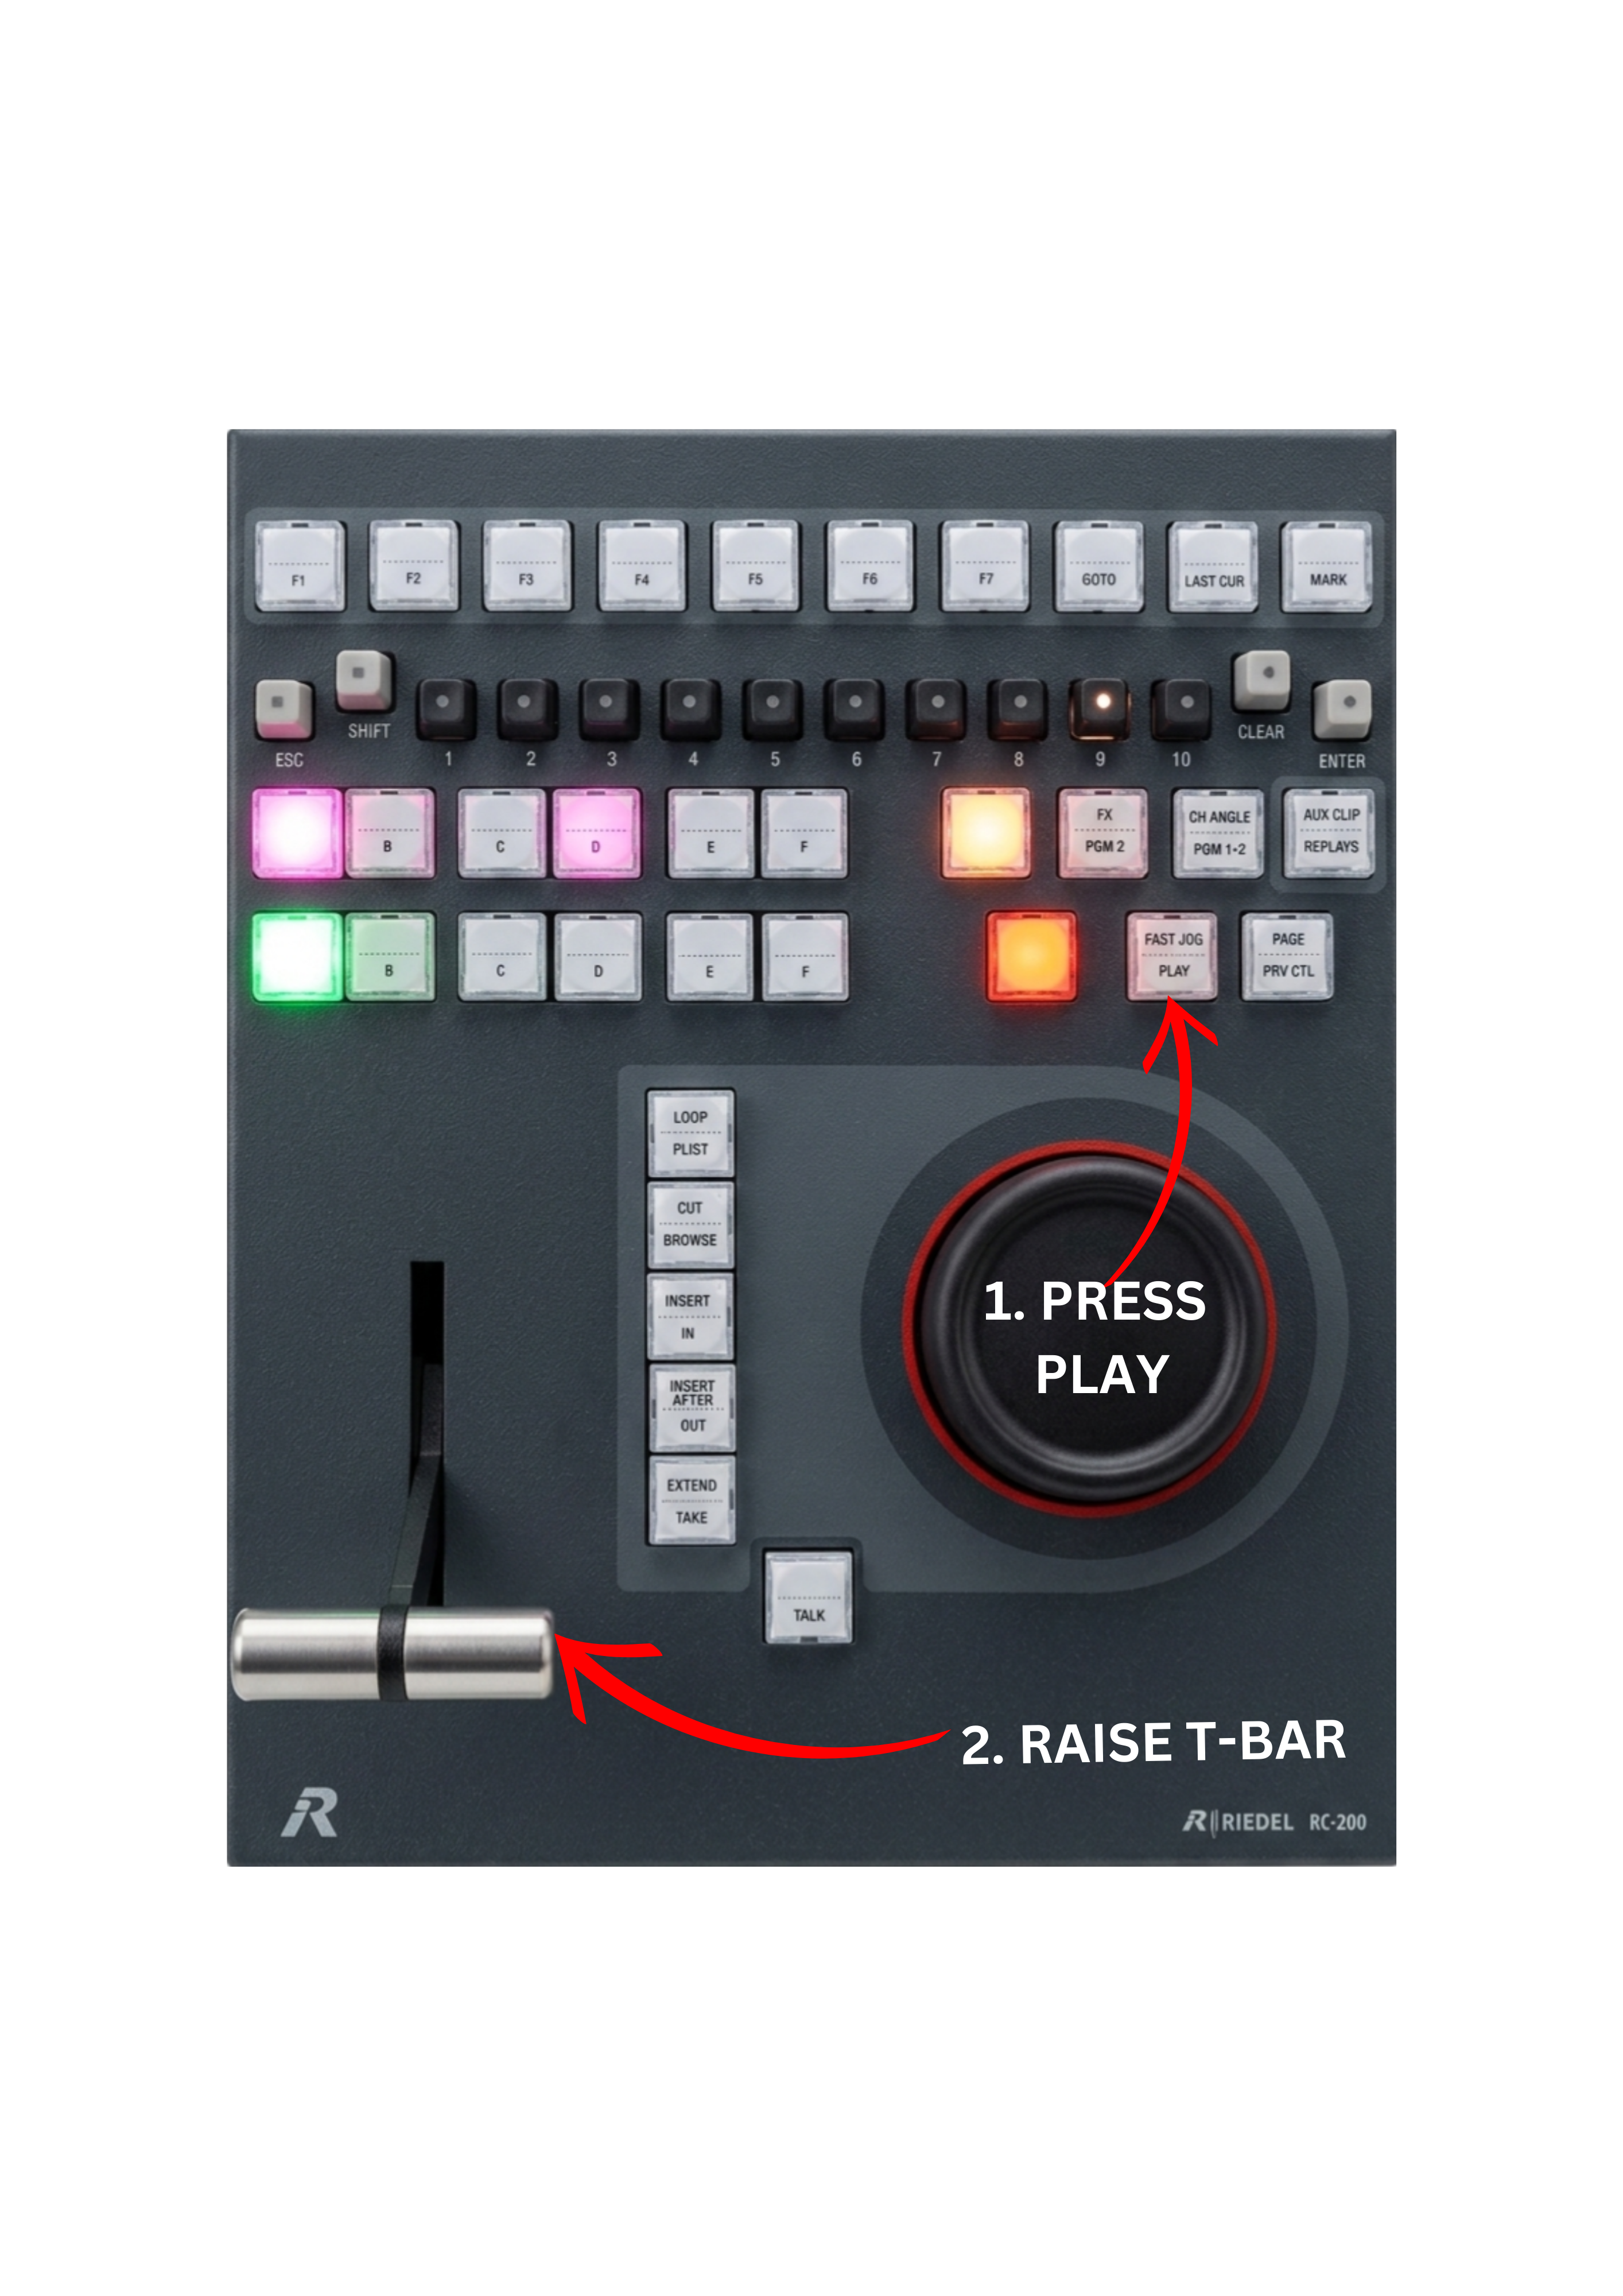
To Play the Clip
-
Press the PLAY key on the replay controller.
or
-
Raise the T-BAR to begin playback manually.
Raising the T-BAR allows you to control the replay speed dynamically, which is especially useful when performing slow motion during live broadcasts.
Pro Tip
If you want maximum control over replay speed, try starting playback by raising the T-BAR instead of pressing the PLAY key.
This allows you to smoothly accelerate the replay from slow motion to full speed while the replay is already on-air.
Pro Tip
If you start playback using the PLAY key, make sure the T-BAR is already positioned at its maximum forward position (100%).
If the T-BAR is slightly lowered, the replay may start slower than expected. Even a small accidental movement of the lever can affect the playback speed.
Keeping the T-BAR fully raised ensures the replay starts at full speed.
Pro Tip
You can adjust the resistance of the T-BAR using the adjustment screw located on the underside of the RC-200 controller.
By tightening or loosening this screw, you can customize how firm or loose the T-BAR movement feels, depending on your operating preference.
Pro Tip
The Lever Engage Mode can be configured in Setup → Prefs → RCU.
Direct means the T-BAR reacts immediately to its current physical position.
Conditional means the T-BAR only takes control once it reaches the current playout speed.
For example, if playback is running at 80%, you need to move the T-BAR to match 80% before it takes control and adjusts the speed.