
Configure Video Server Players and Storage
Overview
On a Video Server Node, the Storage tab lists the clips available on the server and the Players tab configures each player. Configure a player so that its Widget shows the intended clips when an operator selects an assigned Port. For the Node type, see Internal Video Server.
Prerequisites
-
Use Node admin and open Inventory > Nodes.
-
The Node has the Video Server capability, which makes the Storage and Players tabs available.
-
Clips exist on the Video Server.
Review Stored Clips
-
Open the Video Server Node and select Storage.
-
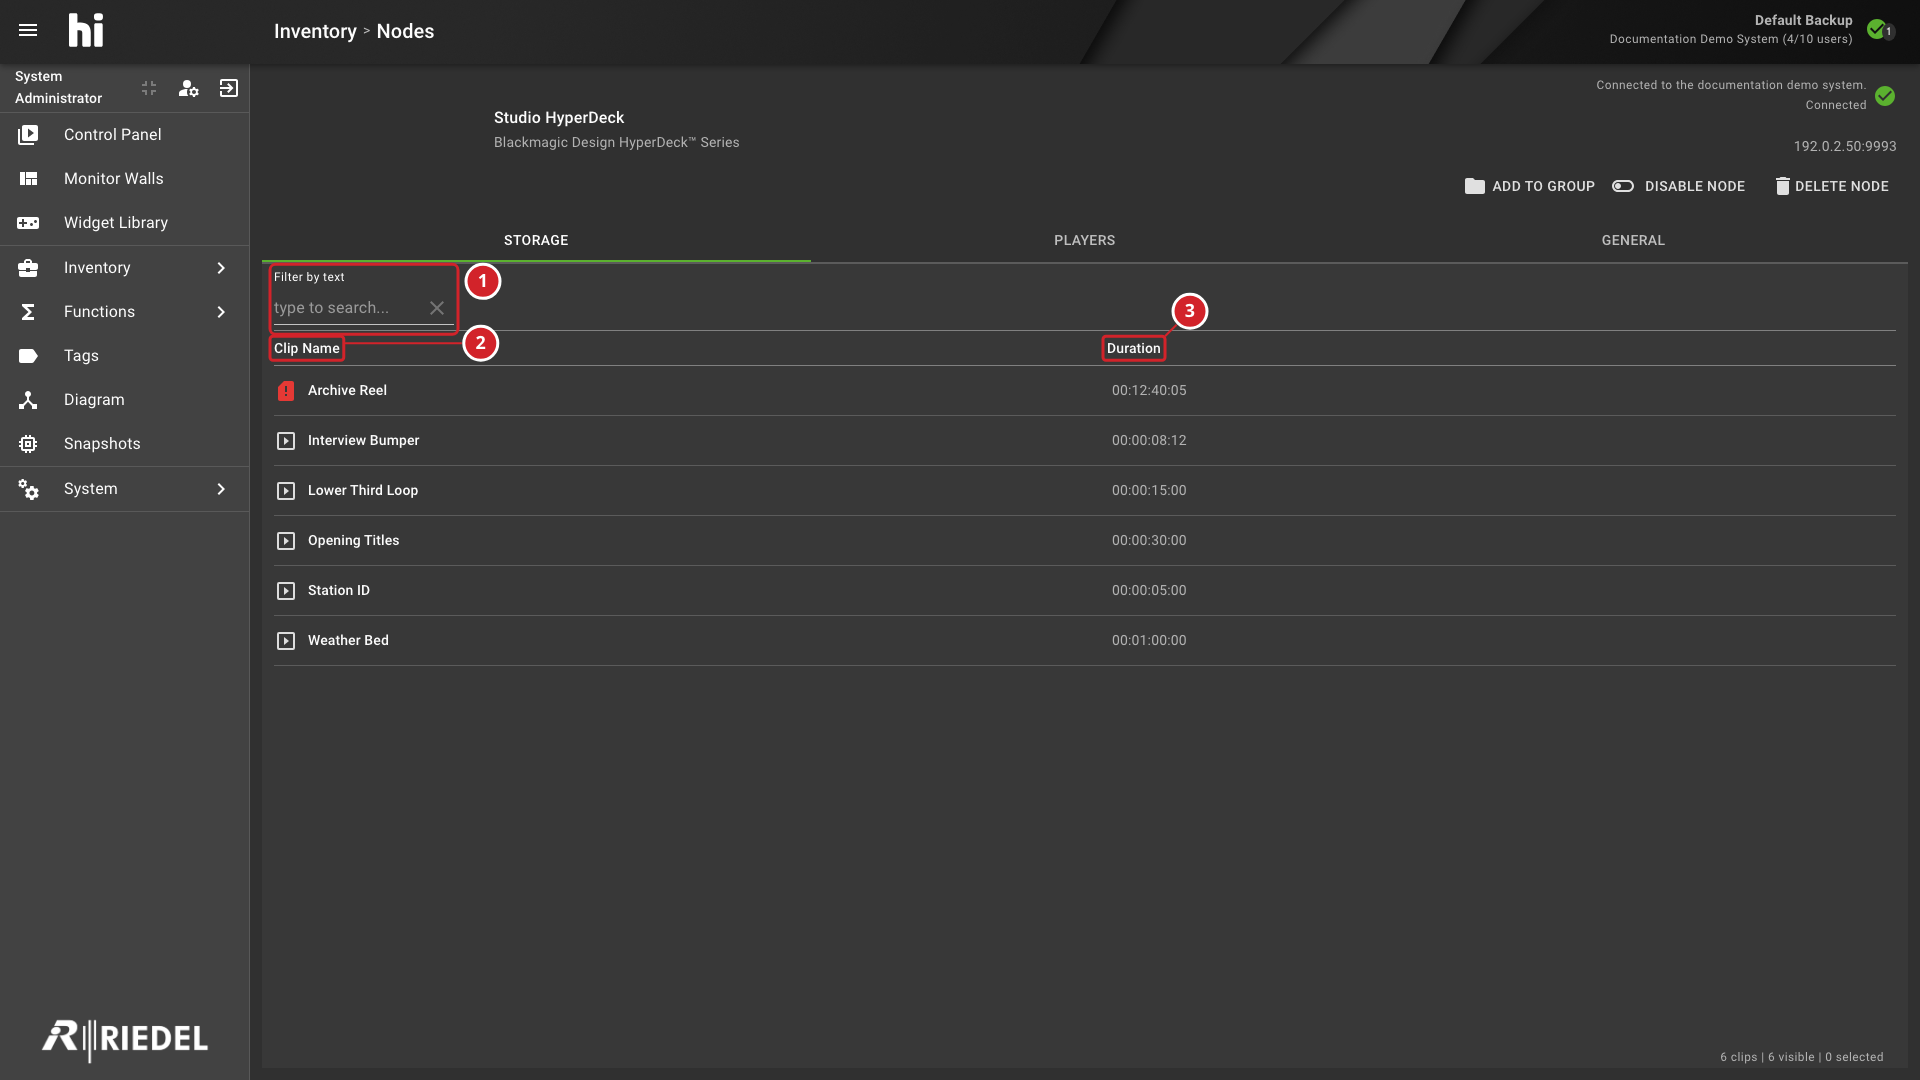
Use Filter by text to find a clip by name.
-
Review Clip Name and Duration. An offline clip uses an offline icon.
The footer shows the counts of clips, visible clips, and selected clips. Storage is read-only in this view; no edit actions are present.
-
Filter by text, which narrows the clip list.
-
The Clip Name column. An offline clip shows an offline icon.
-
The Duration column, which shows the clip length as timecode.
Select a Player
-
Select Players.
-
Use Filter Players to locate a player. Each row shows the number of clips and Port assignments.
-
Select one player. If you select several, the details pane asks you to select a single player.
-
To rename it, select the player, then Rename.
The details pane offers the Clips and Port Assignments tabs and shows the player's Widget.
Edit the Player Clip List
-
On the Clips tab, select Edit.
-
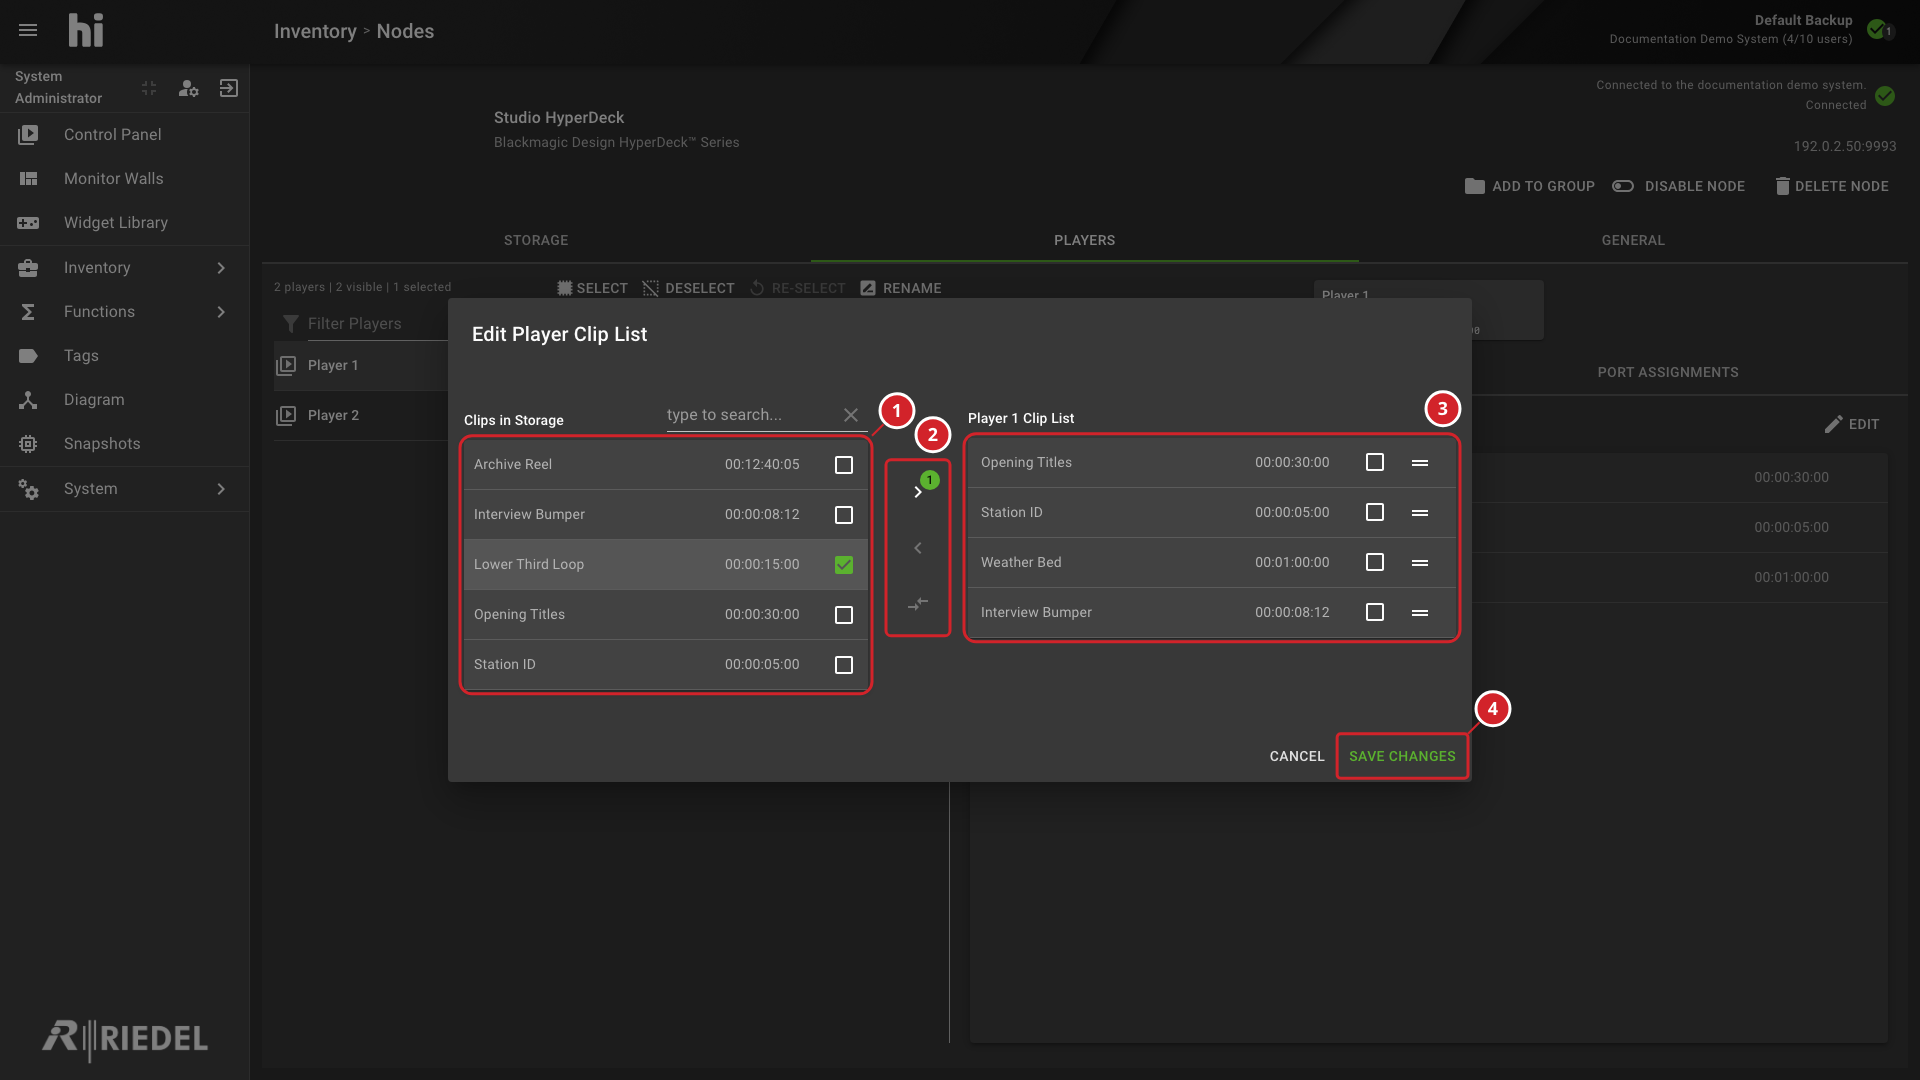
In Edit Player Clip List, select clips under Clips in Storage. Use the add control (Add clip to list) to move them to the player's list.
-
Use Remove Clip from Player to remove selected entries, and Switch entries to reorder them.
-
Select Save changes. The button is unavailable until the list changes. Select Cancel to discard.
-
Clips in Storage, with one stored clip selected.
-
The controls that add clips to the list, remove clips from the list, and switch entries.
-
The clip list of the player, Player 1 Clip List.
-
Save changes, which applies the list.
If the player has no clips, the tab shows "This players has no clips assigned".
Assign the Player to Ports
-
Select the Port Assignments tab.
-
Select Assign to.
-
In the Port Picker, select one or more Ports (Sources by default).
-
Confirm the selection.
The tab states that "The player control widget will appear on the control panel when the assigned port is selected."
To remove an assignment, select its delete button and confirm Delete Port Assignment. A player with no assignment shows "This player is not assigned to any port".
Verify the Result
Select the player and confirm the clip and Port counts in its row. The Widget preview in the details pane shows the player. On the Control Panel, select an assigned Port and confirm the player Widget appears. See Use a Video Server Widget.
Next Steps
Optionally, create a Video Server Widget, which requires Widget admin, to add the player controls to the Widget Library.