
Use a Video Server Widget
Overview
A Video Server Widget provides controls for one configured player. It shows the player's clip list, loaded clip, timecode, and playback state, allowing an operator to prepare and control playback from the Control Panel.
Typical workflows include:
-
Prepare a clip before a production cue: load it without starting playback, check its name, and start it when required. Follow Load and Play a Clip.
-
Pause or stop the configured player while checking its displayed state and output. Clip-row play starts that clip directly, so use the load action when a separate preparation step is needed.
-
Repeat a loaded clip through Repeat a Clip, checking the displayed loop state before playback.
An administrator creates the Widget for the intended player. The Widget controls that player; it does not itself confirm which production output carries the player's signal.
Prerequisites
-
Your account has Control Panel access.
-
The active Preset includes the Widget's Widget Group and enables the Widget Area.
-
An administrator has created the Video Server Widget.
-
The Video Server Node is connected and has an available clip list.
Leave customization mode before opening the Widget.
Load and Play a Clip
Caution
Playback controls operate the configured Video Server player. Confirm the player and its output before starting or stopping playback.
-
Open Control Panel and select the Widget's Widget Group.
-
Select the player Widget to open its controls.
-
Confirm the player name and identify the required clip in its list.
-
Select the clip row's load icon to load it without starting playback.
-
Confirm that the loaded clip name is correct, then select the play icon.
-
To pause playback, select the pause icon. To stop playback, select the stop icon.
The play icon on a clip row starts that clip directly. Use the load icon when you need to check the loaded clip first.
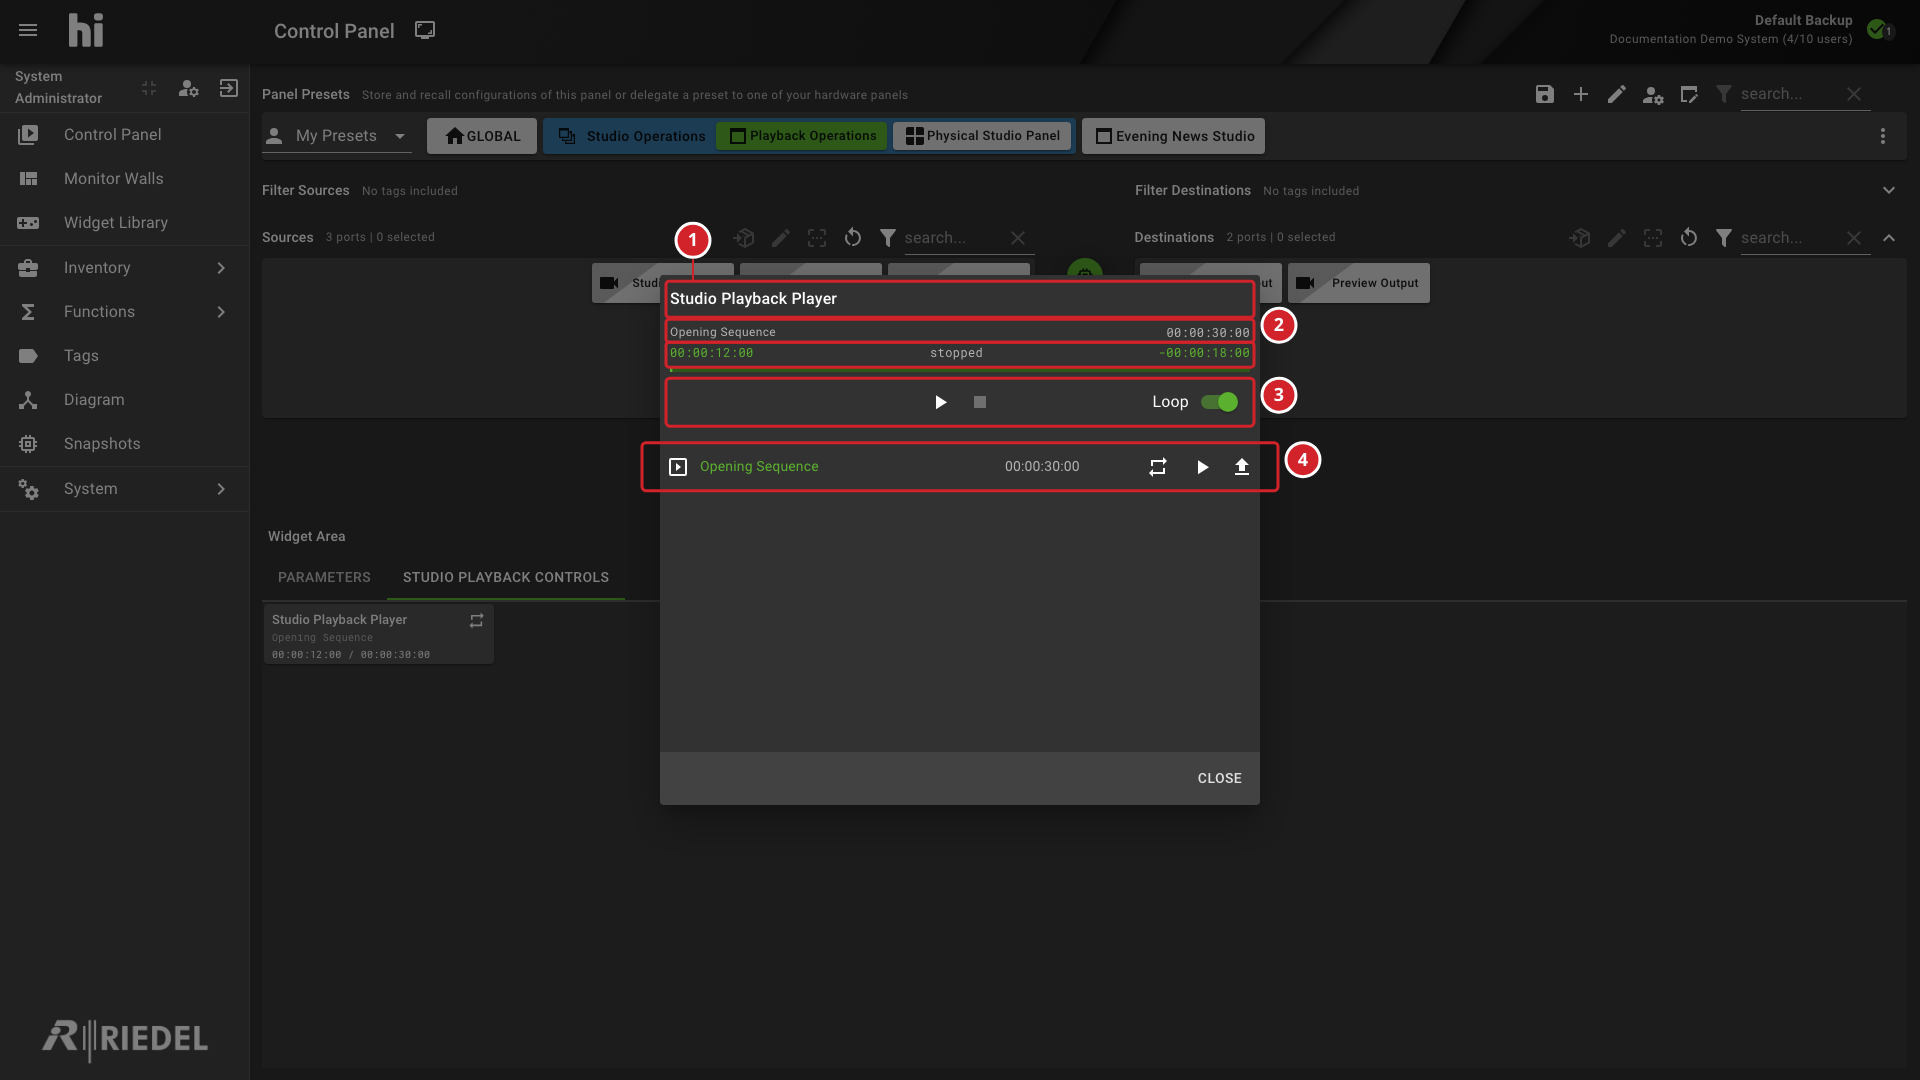
-
The player name identifies the player being controlled.
-
The loaded clip, timecode, and playback state identify its current state.
-
The main playback controls provide play, pause, and stop actions.
-
Clip rows provide individual play and load actions.
Repeat a Clip
When a clip-list item is loaded, use Loop to enable or disable its loop mode. Confirm the displayed loop state before playback.
Unavailable Controls
An offline clip cannot be loaded or played from its row. The main play and Loop controls require a loaded clip-list item.
The stop control is disabled when no clip is loaded or playback is already stopped. A disabled or disconnected Node can prevent opening the controls.
This node has no clips indicates an empty clip list. Unavailable Video Player indicates that the Widget's configured player cannot be found.
Verify the Result
Confirm the loaded clip, displayed playing, paused, or stopped state, and timecode. Verify the player's output separately when the result affects the production.
Next Steps
-
Create a Video Server Widget for another configured player.
-
Manage Nodes to review the player's Node configuration.
-
Manage Widgets to review where the Widget is used.