
Make Widgets Available in a Control Panel Preset
Overview
A Library Widget becomes available in a regular Control Panel through a Widget Group included in the selected Preset.
For example, add prepared playback and counter Widgets to a studio's Widget Group, then make that group available in the studio Preset.
Prerequisites
-
The installation license enables Widgets.
-
Your account has Control Panel access, and the intended Preset is editable.
-
The Preset enables Enable Widget Area; see Control Panel Preset Settings Reference.
-
For the reuse procedure, the required Widgets already exist in the Widget Library. For a new Line Transmit Widget, follow Configure a Line Transmit Widget.
-
To add Widgets to an existing group, you created that Widget Group or have Preset admin.
Widget admin manages the Library. It does not replace the permissions required to edit the selected Preset or Widget Group.
Include a Widget Group
-
Open Control Panel and select the intended Preset.
-
On the Preset toolbar, select Customize current preset.
-
In the Widget Area, select Add Widget Group.
-
In Edit Widget Groups of Preset, select the required existing group.
-
To create a group instead, enter its name in the row with the new placeholder.
-
Keep any existing groups that the Preset still requires selected.
-
Select Save, then select the intended Widget Group's tab.
-
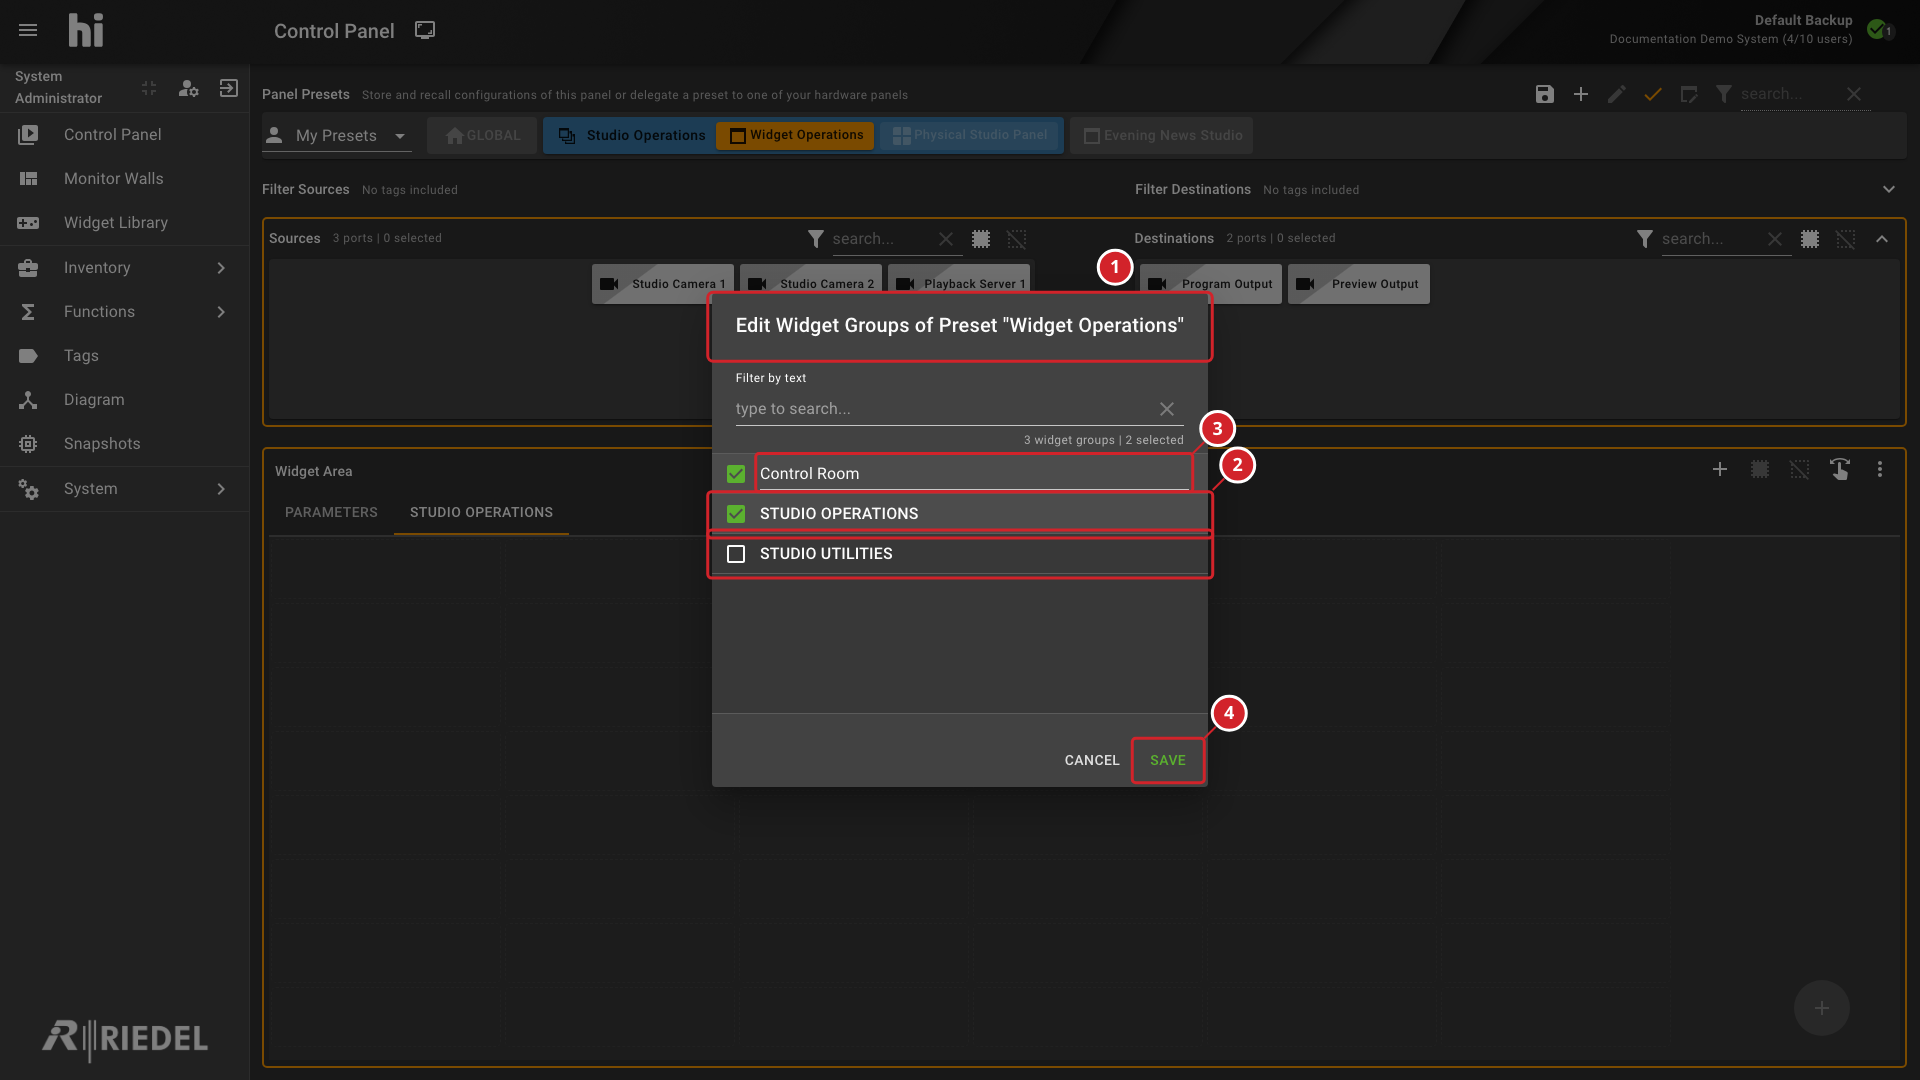
The dialog title identifies the Preset whose Widget Groups are being edited.
-
The checkboxes include the selected Widget Groups in the Preset.
-
The new row creates a named Widget Group.
-
Save submits the selected groups and any new group.
Clearing an existing group selection removes that group's inclusion in this Preset. Check the selection before saving.
Add Reusable Widgets
-
While in customization mode, select one empty position in the intended Widget Group.
-
Select the Widget Area's plus button.
-
In Select Widget Type, select Existing Widget, then select Select.
-
In Select 1 existing Widget, select the reusable Widget for that position.
-
Select Save.
-
Repeat for other required Widgets, then leave customization mode.
-
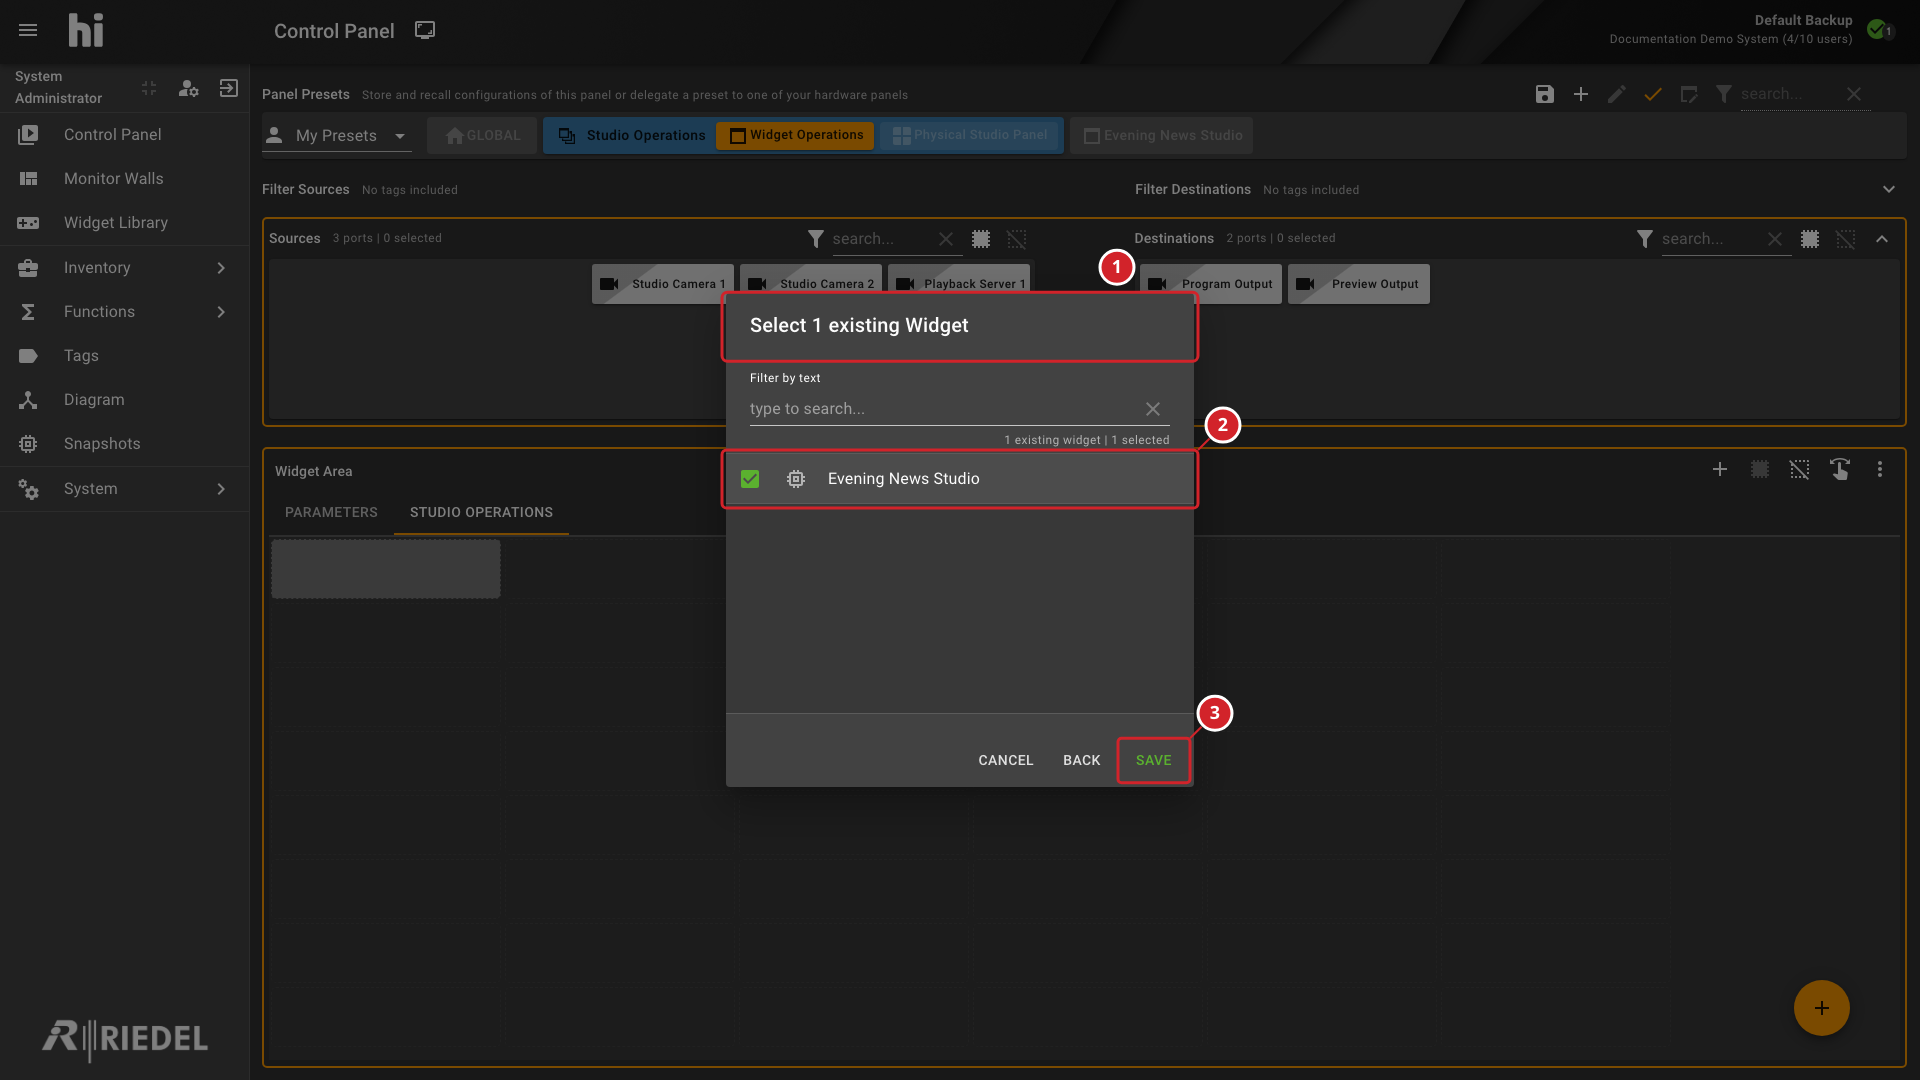
Select 1 existing Widget identifies the reuse-selection dialog.
-
The selected row identifies the reusable Widget for the selected position.
-
Save adds that Widget to the Widget Group.
The plus button requires an editable group and at least one selected empty position. Widgets already present in that group are excluded from the reuse selector.
The Parameters tab provides controls associated with selected Ports. Select a regular Widget Group when adding reusable Widgets.
Verify the Result
Select the Preset and Widget Group in normal operation mode. Confirm that the intended Widgets appear in their positions.
Verify with the intended operator's account. Your ability to edit a group does not mean that another user can access its Preset or controlled resources.
Next Steps
-
Widget Types Reference for each Widget's operating procedure.
-
Manage Widgets to review use and delegation.
-
Customize a Control Panel Preset for pinned Port layout changes.