
Customize a Control Panel Preset
Overview
Pin Ports and change their order in a Control Panel Preset.
Prerequisites
-
Use an account with Control Panel access and Tag access to the required Sources and Destinations.
-
Open Control Panel and select the required Preset.
-
Select an editable Preset. Read-only Presets can be activated but not modified.
Customize the Preset
-
On the Preset toolbar, select Customize current preset.
-
Select Ports, then select Toggle Pinned Buttons to keep them visible regardless of Tag filtering.
-
Select Reorder Pinned Buttons, drag pinned Ports into the required order, then select Finish Reordering Pinned Buttons.
-
Enable Display only pinned ports if a side must show only pinned Ports.
-
Select Exit customizing current preset, then open the Preset menu and select Update current preset to save the changes.
Before Pinning Ports
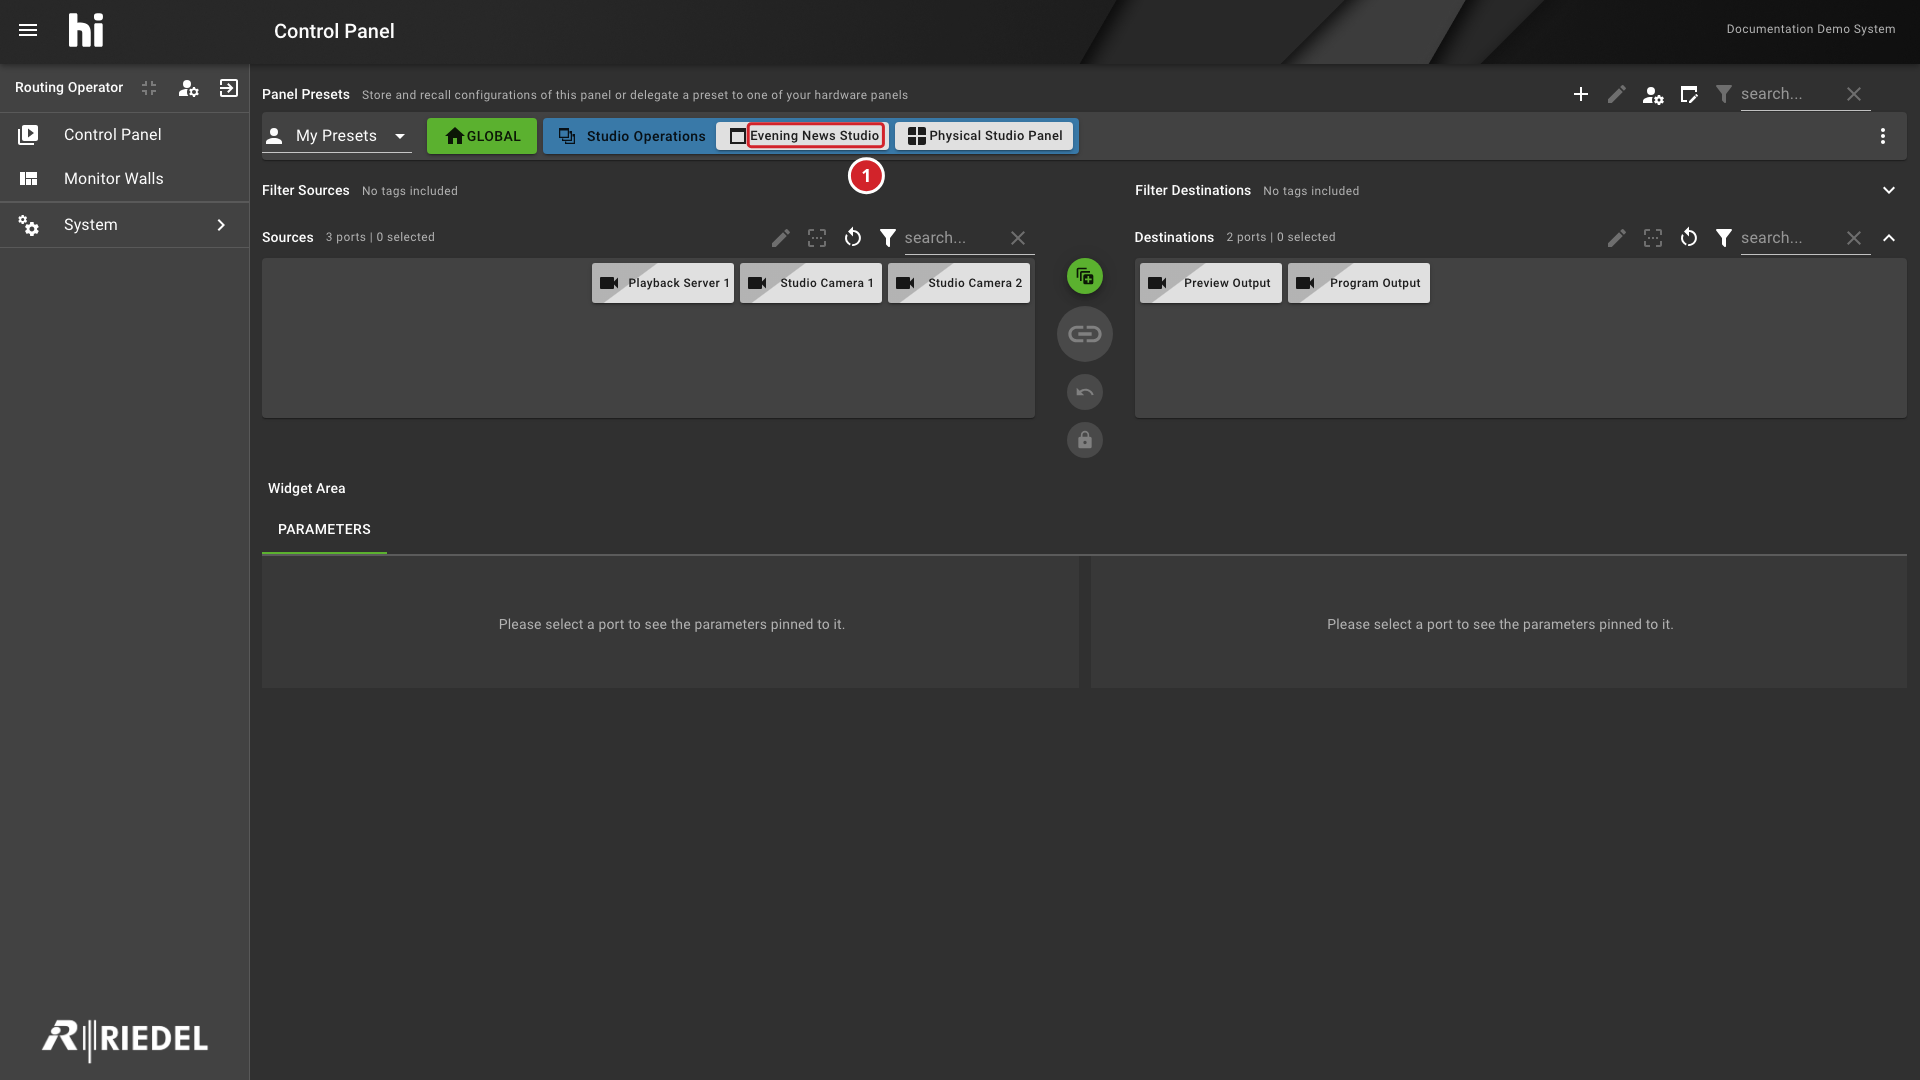
-
The Preset bar includes Evening News Studio.
Select Ports to Pin
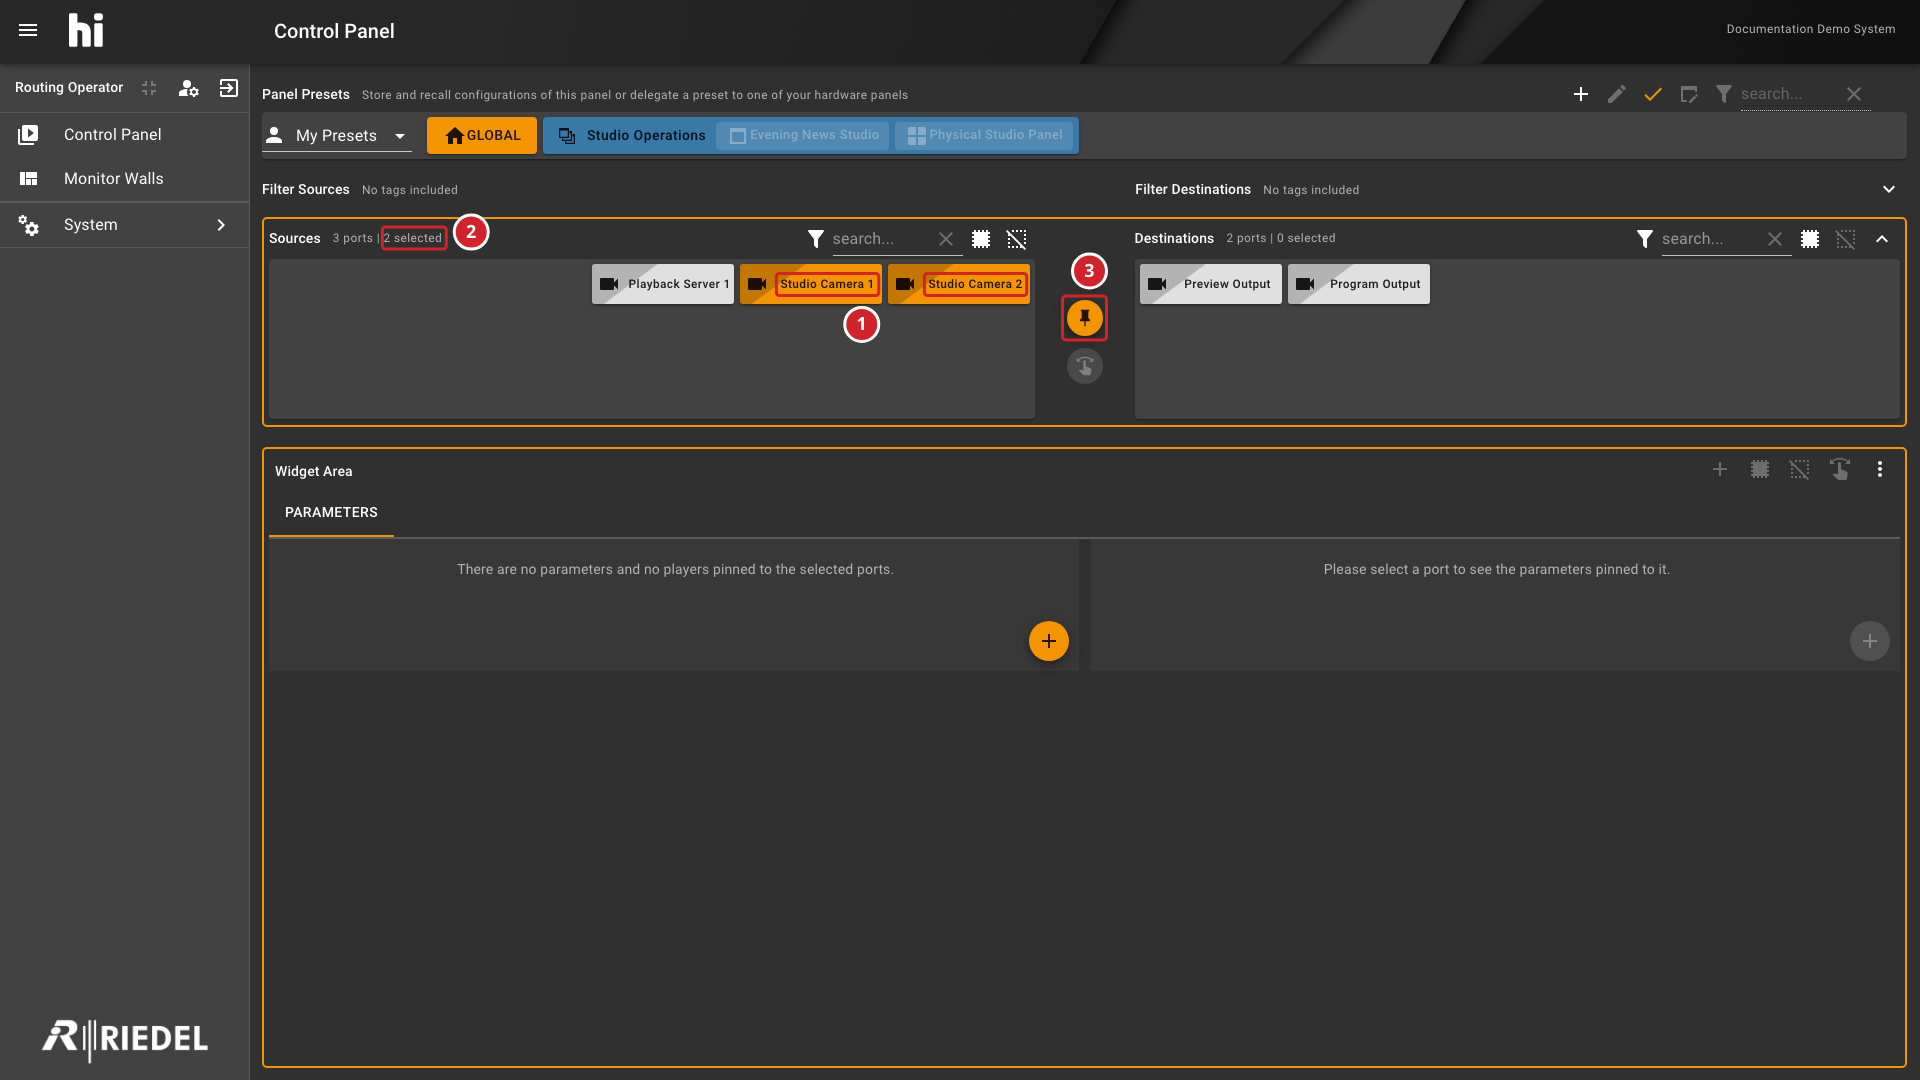
-
Studio Camera 1 and Studio Camera 2 are selected.
-
The selection count confirms 2 selected Sources.
-
Toggle Pinned Buttons pins or unpins the selected Ports.
Reorder Pinned Ports
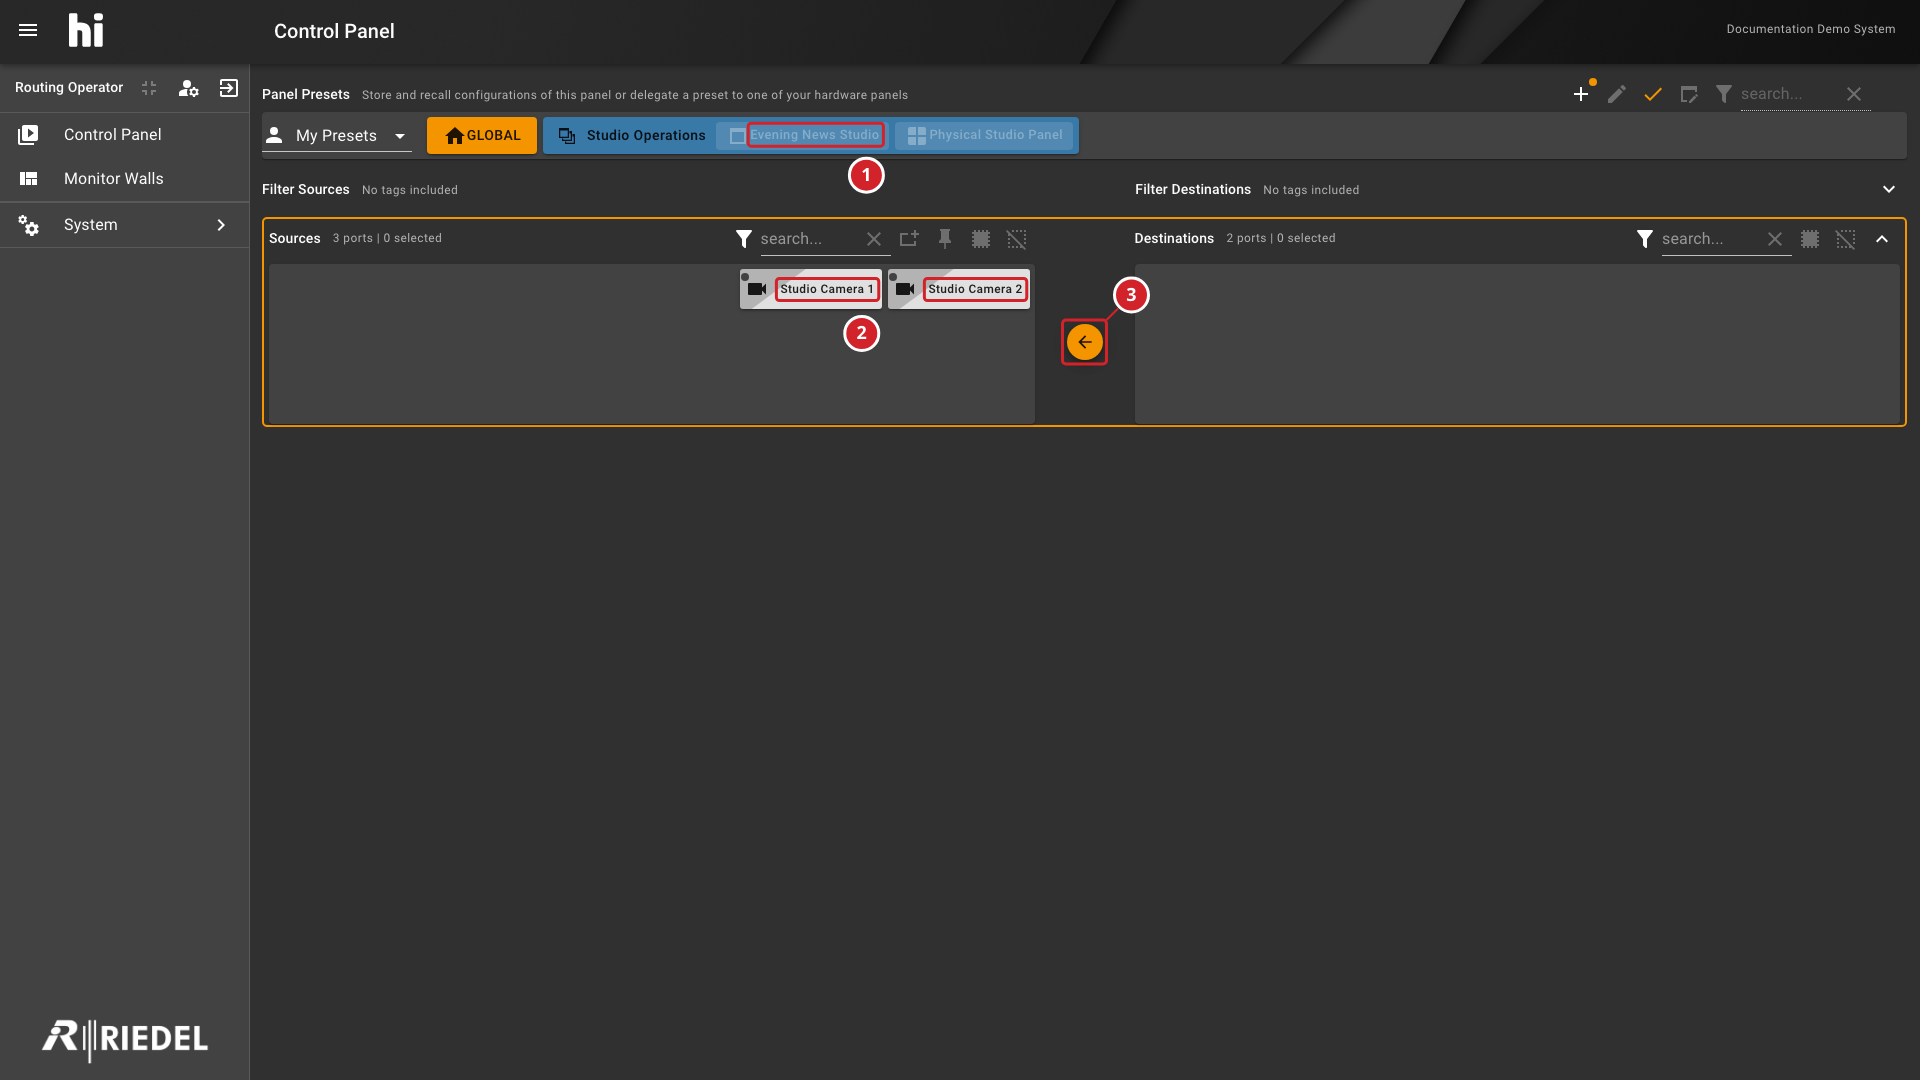
-
Evening News Studio remains visible on the Preset bar.
-
Reorder the pinned Studio Camera 1 and Studio Camera 2 Source buttons.
-
Finish Reordering Pinned Buttons returns to Customization Mode.
Display Only Pinned Ports
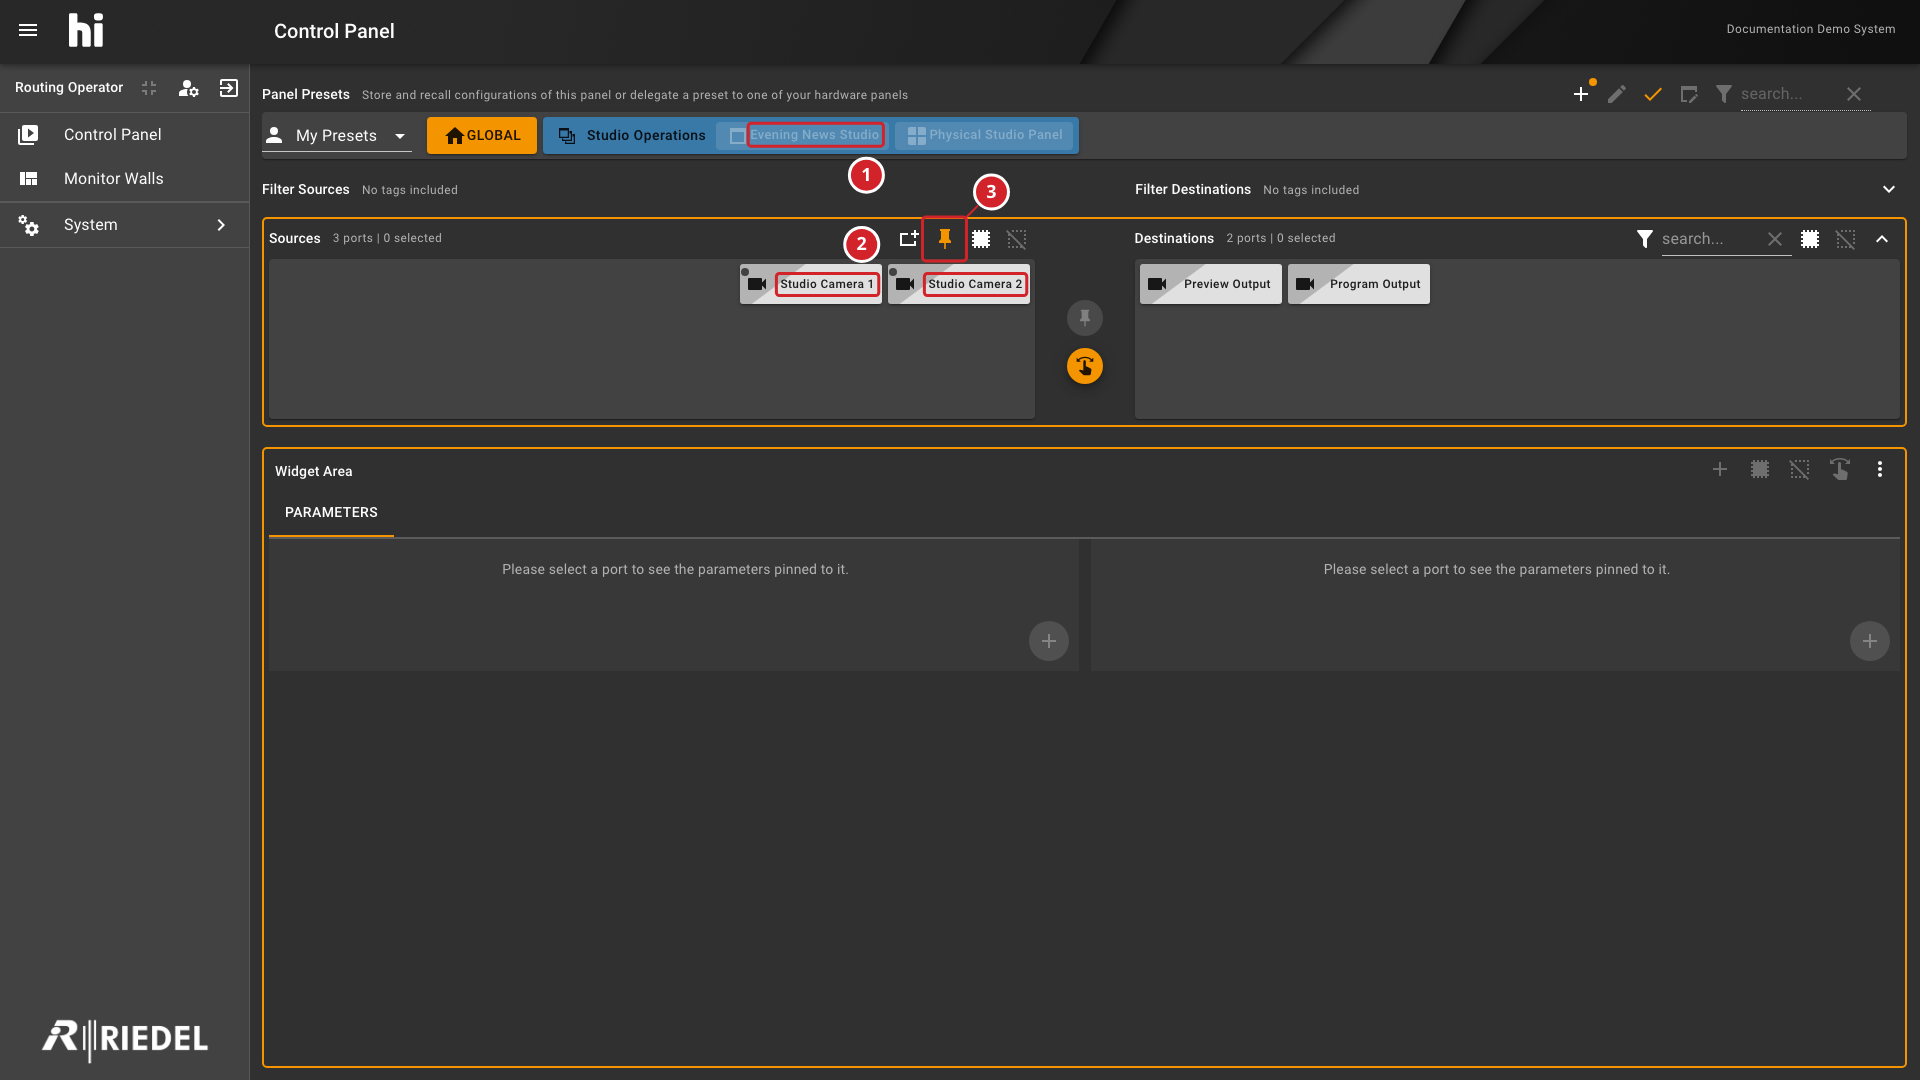
-
Evening News Studio remains visible on the Preset bar.
-
The Sources side shows the pinned Studio Camera 1 and Studio Camera 2 buttons.
-
Display only pinned ports is enabled for the Sources side.
Verify the Result
Select the saved Preset and confirm the pinned Ports and their order.
Next Steps
Use Delegate a Preset to Hardware Panels when physical panels need the saved configuration.