
Review and Connect Port Containers
Overview
When you route a Source Port Container to a Destination Port Container in the Control Panel, hi can open the Connect Port Containers dialog. Use it to review which Ports are paired, change the pairing, and apply the connection. For the routing steps that precede the dialog, see Route a Source to a Destination. To create or edit Port Containers, see Manage Port Containers.
Prerequisites
-
Use an account with Control Panel access and Tag access to the required Port Containers.
-
Open Control Panel and select a Preset that shows the Source and Destination Port Containers.
-
Select the Destination Port Container, then the Source Port Container, then select Take, or select the Source in Direct Take mode.
Information
The dialog does not open when the connection involves a Portal. It also does not open when the Preset enables the option Disable Port Container pop-up dialog on take. In both cases hi connects the Port Containers with best effort routing and shows no dialog. See Preset settings.
Review and Connect
-
In Connect Port Containers, check the names of the Source Port Container (left) and the Destination Port Container (right).
-
Review the rows of each signal format. Each row pairs a Source Port with a Destination Port by its row number.
-
Switch on show additional info to show the Node name below each Port name.
-
To change the pairing, drag a row on either side to a new position.
-
To use the same Source Port for several Destination rows, select the plus icon on the Source row. Select the minus icon on the copied row to remove it.
-
Check the direction control between each pair. Select it to exclude or include that pair in the connection.
-
Select the central Take control to apply the connection.
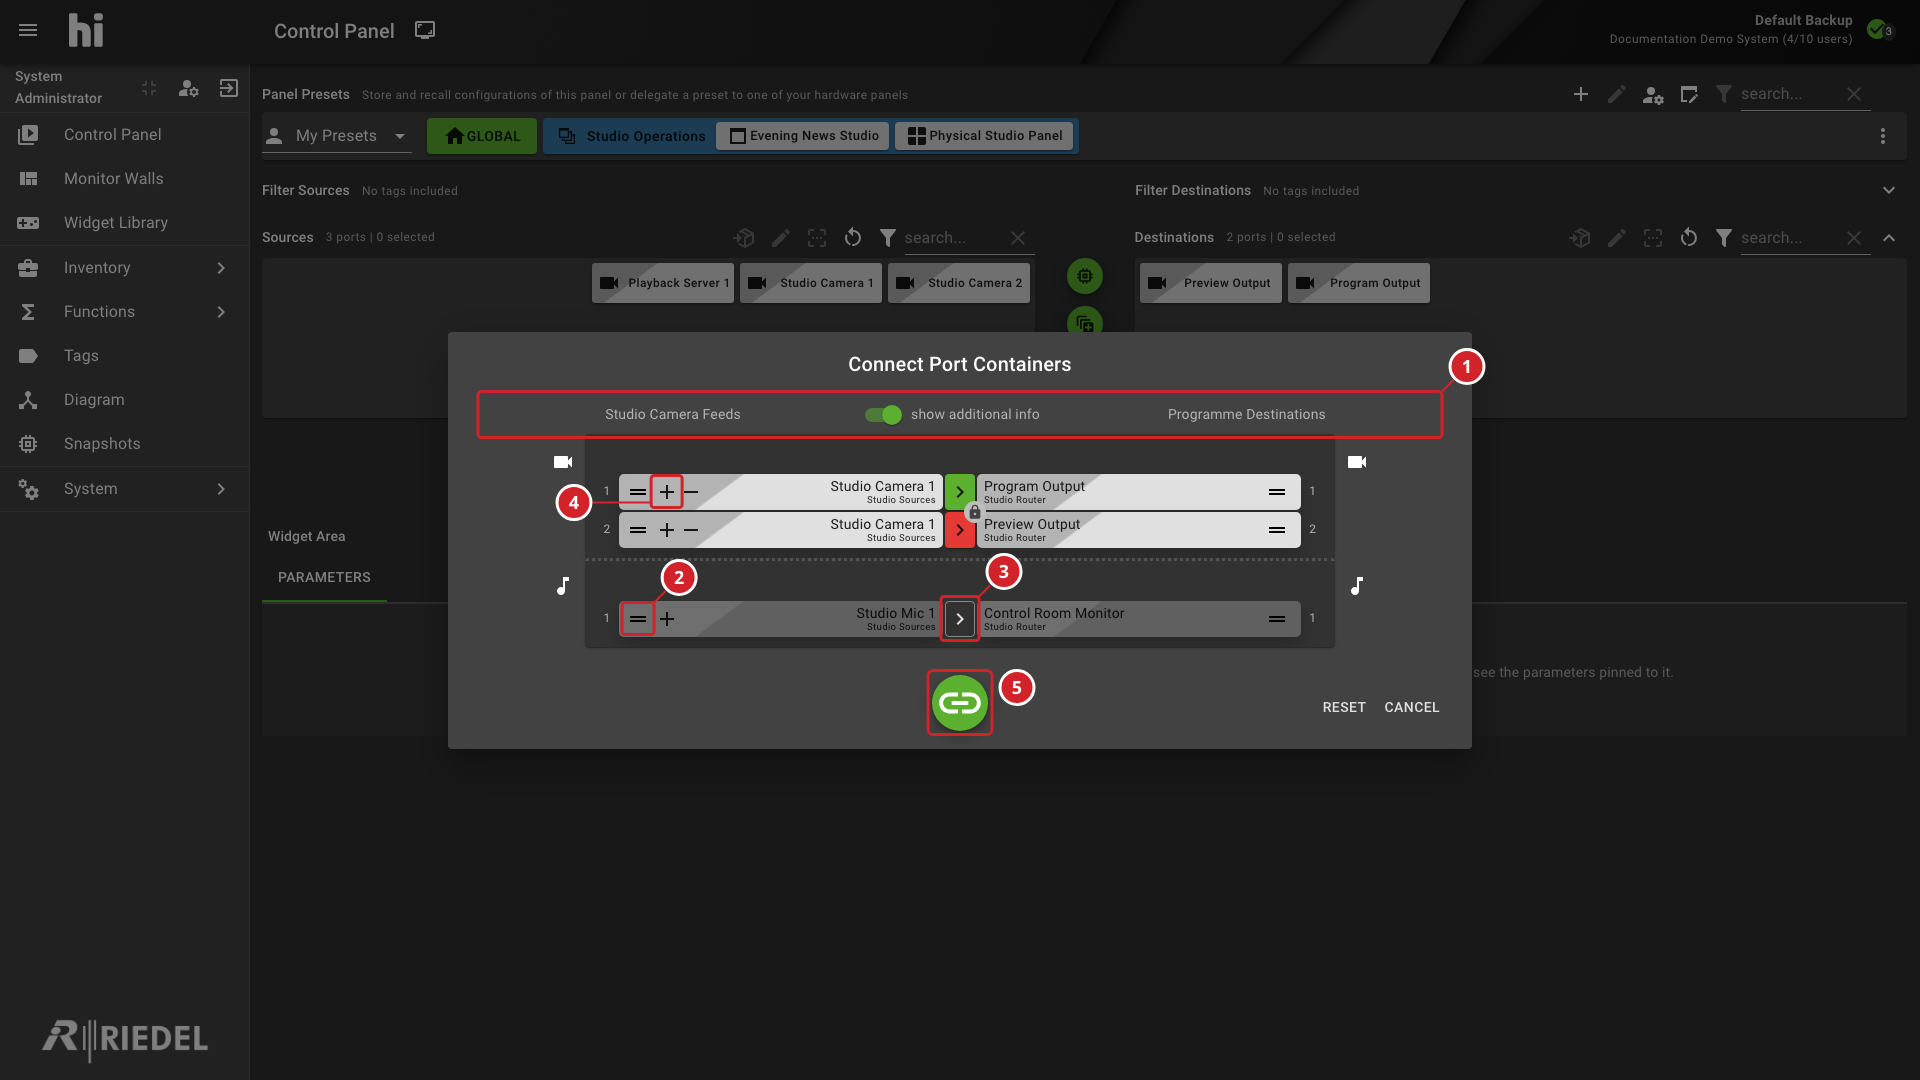
-
The container names and the show additional info switch. Switched on, each Port shows its Node name.
-
The drag handle on the Audio row reorders that Source Port.
-
The direction control on the Audio row. This pair is excluded from the connection.
-
The plus icon on the first SDI Source row duplicates that Source Port. The second row is such a copy.
-
The central Take control applies the connection.
Hold the pointer over a direction control to read its tooltip.
|
Tooltip |
Meaning |
|---|---|
|
Connect from left to right |
The Source Port on the left feeds the Destination Port on the right. |
|
Connect from right to left |
The pair is connected in the opposite direction. |
|
Connect not possible |
The pair cannot be connected. |
hi suggests a direction for each pair. Select Reset to discard your changes and reload the original pairing. Select Cancel to close the dialog without connecting.
The Take control stays unavailable while the dialog loads or when no row can be connected. A lock badge on a direction control identifies a pair whose Destination Port is locked.
Verify the Result
After you select the Take control, the dialog closes. Confirm on the Control Panel that the Destination Port Container shows the intended Source Port Container. Use Inspect a Signal Path when an individual Port is not connected as expected.
Next Steps
Use Destination Lock States Reference when a Destination Port is locked.