
Edit, Reorder, and Delete Preset Groups
Overview
Change an existing Preset Group in the Edit and reorder preset groups dialog. Rename or recolor a group, reorder groups and Presets, move Presets between groups, or delete groups. To create a group and assign the first Presets, use Organize Presets into Groups.
Prerequisites
-
Open Control Panel and show the Preset bar of the owner whose Presets you want to organize.
-
Use an account with the Preset admin role or the Simplified Control Panel access role.
-
Clear any text filter on the Preset bar. Edit Preset Groups is unavailable while a Preset filter is active.
-
Use the Control Panel in its normal mode or in Static Preset mode.
Open the Group Editor
-
Open the three-dot Preset menu.
-
Select Edit Preset Groups.
The Edit and reorder preset groups dialog lists Presets and Preset Groups. Select Save to apply every change made in the dialog. Select Cancel to discard them.
Rename or Recolor a Group
-
Select the edit icon at the end of the group row.
-
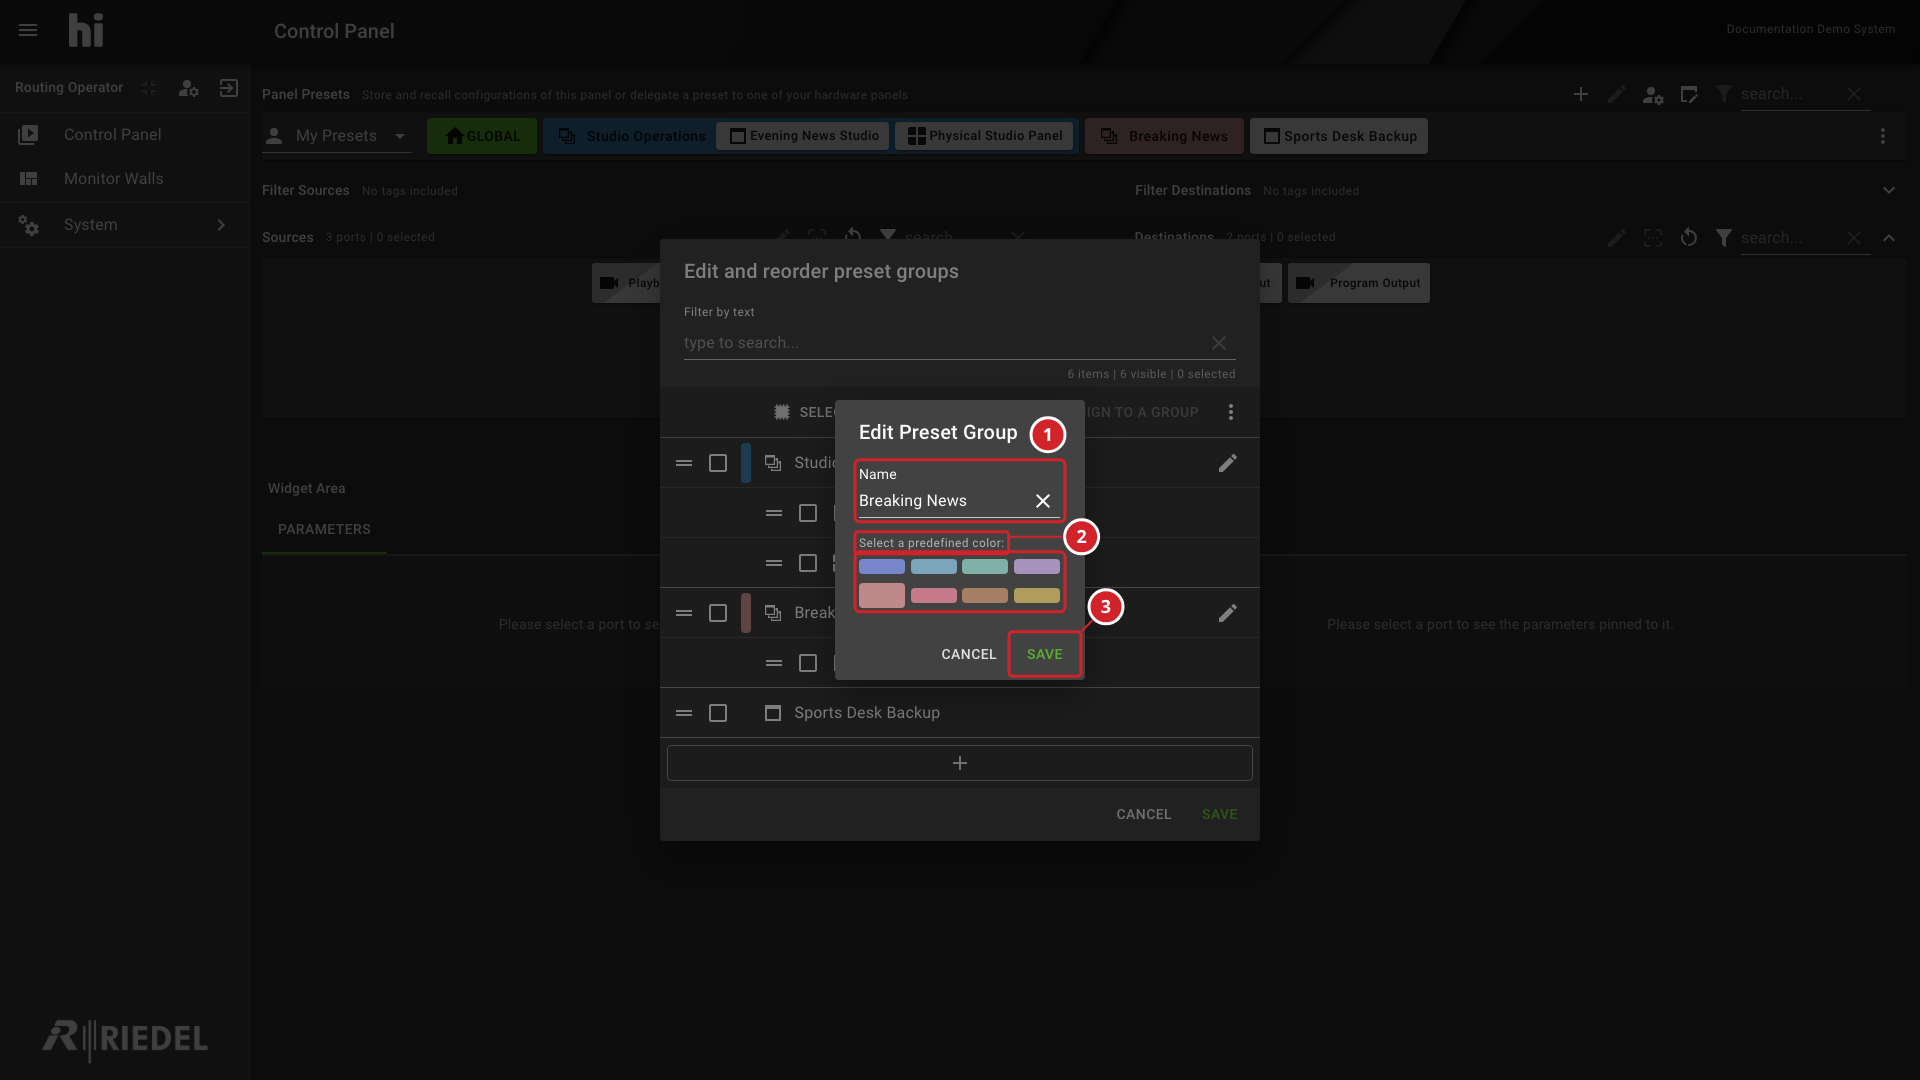
In Edit Preset Group, change the Name or select another of the eight predefined color swatches.
-
Select Save in Edit Preset Group.
-
Select Save in the group editor.
-
The Name field holds the group name.
-
The predefined color swatches select the group color. The larger swatch is the selected color.
-
Save applies the change to the group editor.
Reorder Groups and Presets
-
Drag the handle at the start of a row to move a group or a Preset.
-
Repeat until the order is correct.
-
Select Save in the group editor.
The saved order determines how groups and ungrouped Presets appear on the Preset bar.
Move Presets Between Groups
-
Select the checkbox of each Preset to move. Hold Shift while selecting a second row to select the range between them.
-
Select Assign to a Group.
-
In Assign Presets to a Group, select the target group. Select None to remove the Presets from their current group.
-
Select Save in Assign Presets to a Group.
-
Select Save in the group editor.
Use Select all and Deselect all to change the selection of all visible rows. Enter text in the filter field to narrow the list.
Delete Preset Groups
Caution
Deleting a Preset Group removes the group from the Preset bar. Review the group before confirming.
-
Select the checkbox of each group to delete.
-
Open the menu at the end of the editor toolbar and select Delete Groups. The action is unavailable until a group is selected.
-
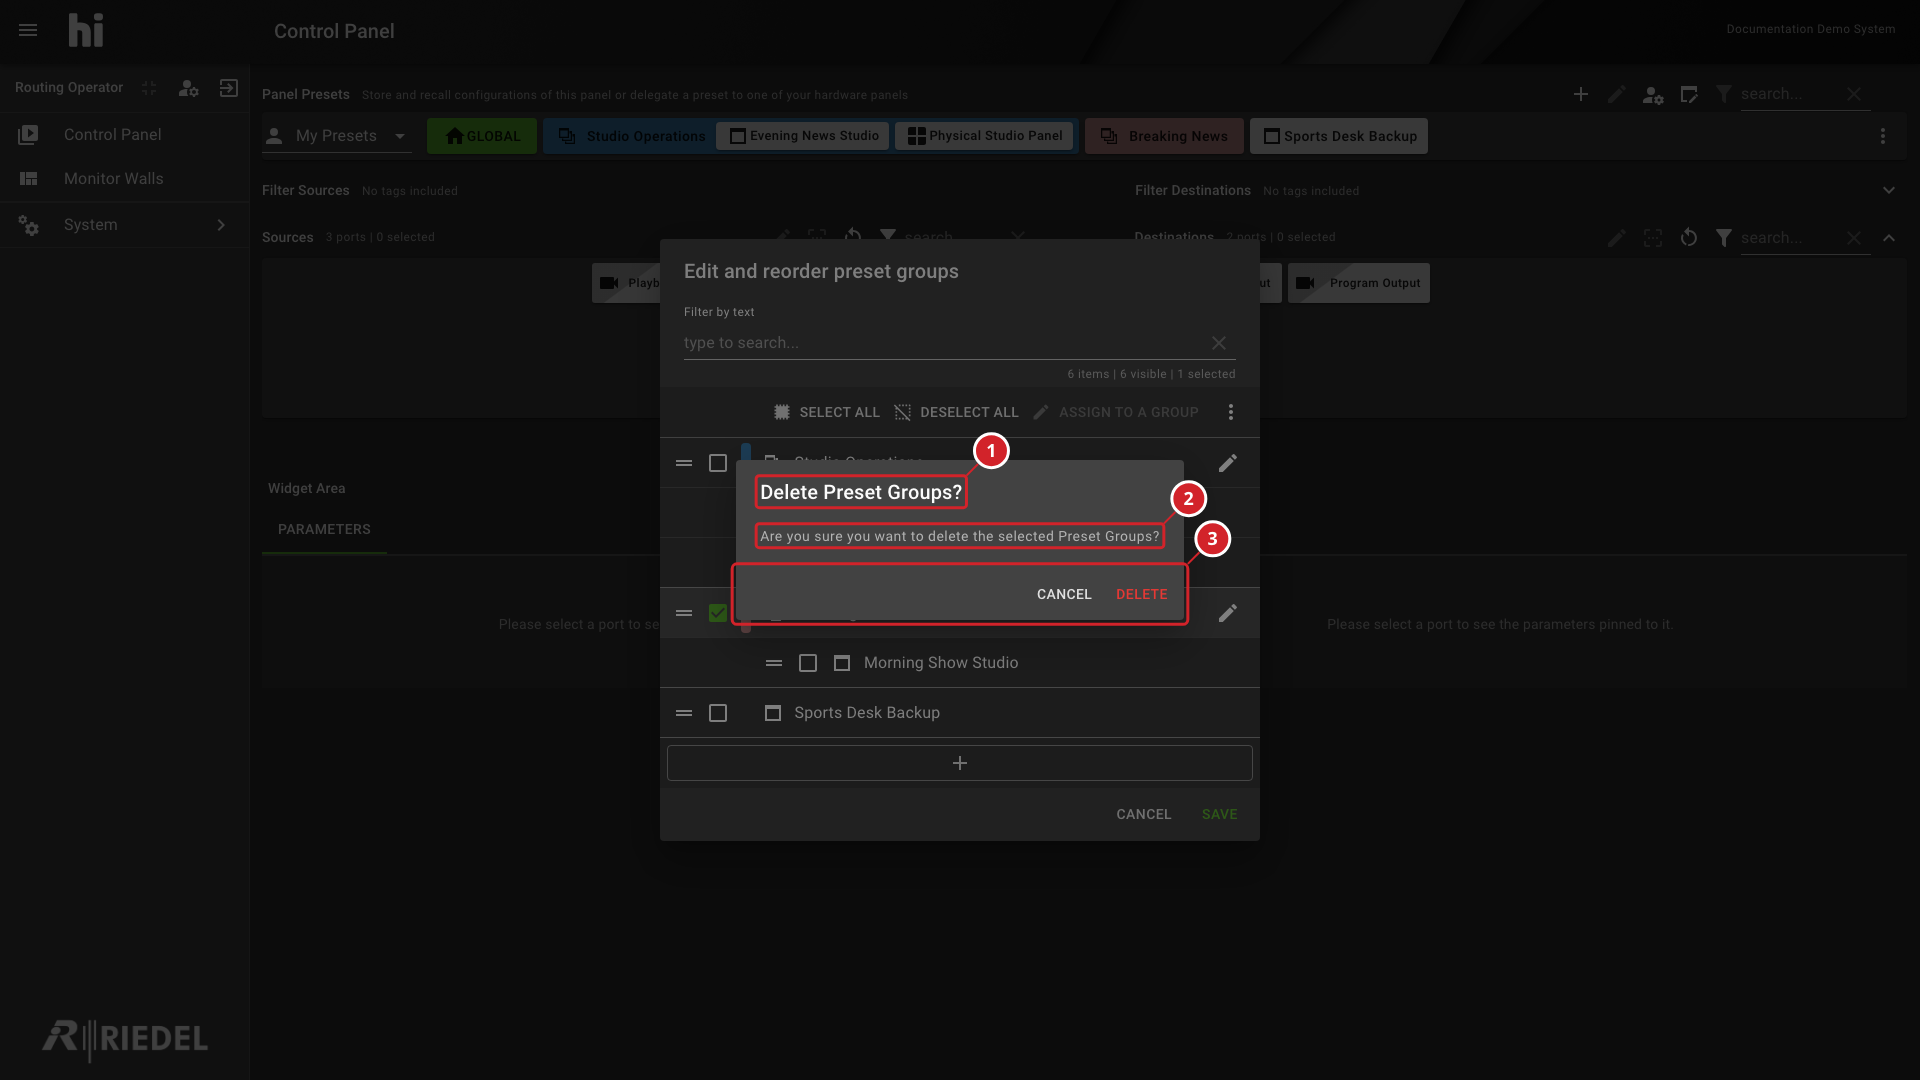
In Delete Preset Groups?, select Delete.
-
Select Save in the group editor.
-
The Delete Preset Groups? title.
-
The confirmation text asks about the selected Preset Groups. The checked group row stays visible behind the dialog.
-
Cancel keeps the groups. Delete removes the selected groups from the editor.
Verify the Result
Return to the Preset bar and confirm that the groups, colors, and order match the editor. Expand each group to confirm its Presets.
Next Steps
Use Delete Multiple Presets to remove Presets that you no longer need. See Preset settings for the other Preset menu actions.